Introduction
Welcome to the world of Discord! In today’s digital landscape, online communities thrive by bringing people from all corners of the globe together. Discord, a popular communication platform, has become a go-to hub for gamers, hobbyists, and communities with shared interests. Whether you’re coordinating raids in a multiplayer game or organizing a study group, Discord provides a seamless way to connect, chat, and collaborate.
However, managing a Discord server efficiently can be a challenge, especially when you have a large number of members with differing roles and responsibilities. That’s where the concept of role separation comes into play. By separating roles, you can establish clear hierarchies and assign specific permissions and access levels to different members.
In this article, we will explore the benefits of separating roles in Discord and provide a step-by-step guide on how to implement this feature effectively. By the end, you’ll have a solid understanding of how to streamline your Discord server’s administration and ensure that every member has the right level of access to perform their designated tasks.
What is Discord?
Discord, founded in 2015, is a popular communication platform that combines the functionalities of voice, video, and text chat into one seamless experience. Developed primarily for gamers, Discord has evolved into a versatile tool used by communities of all types.
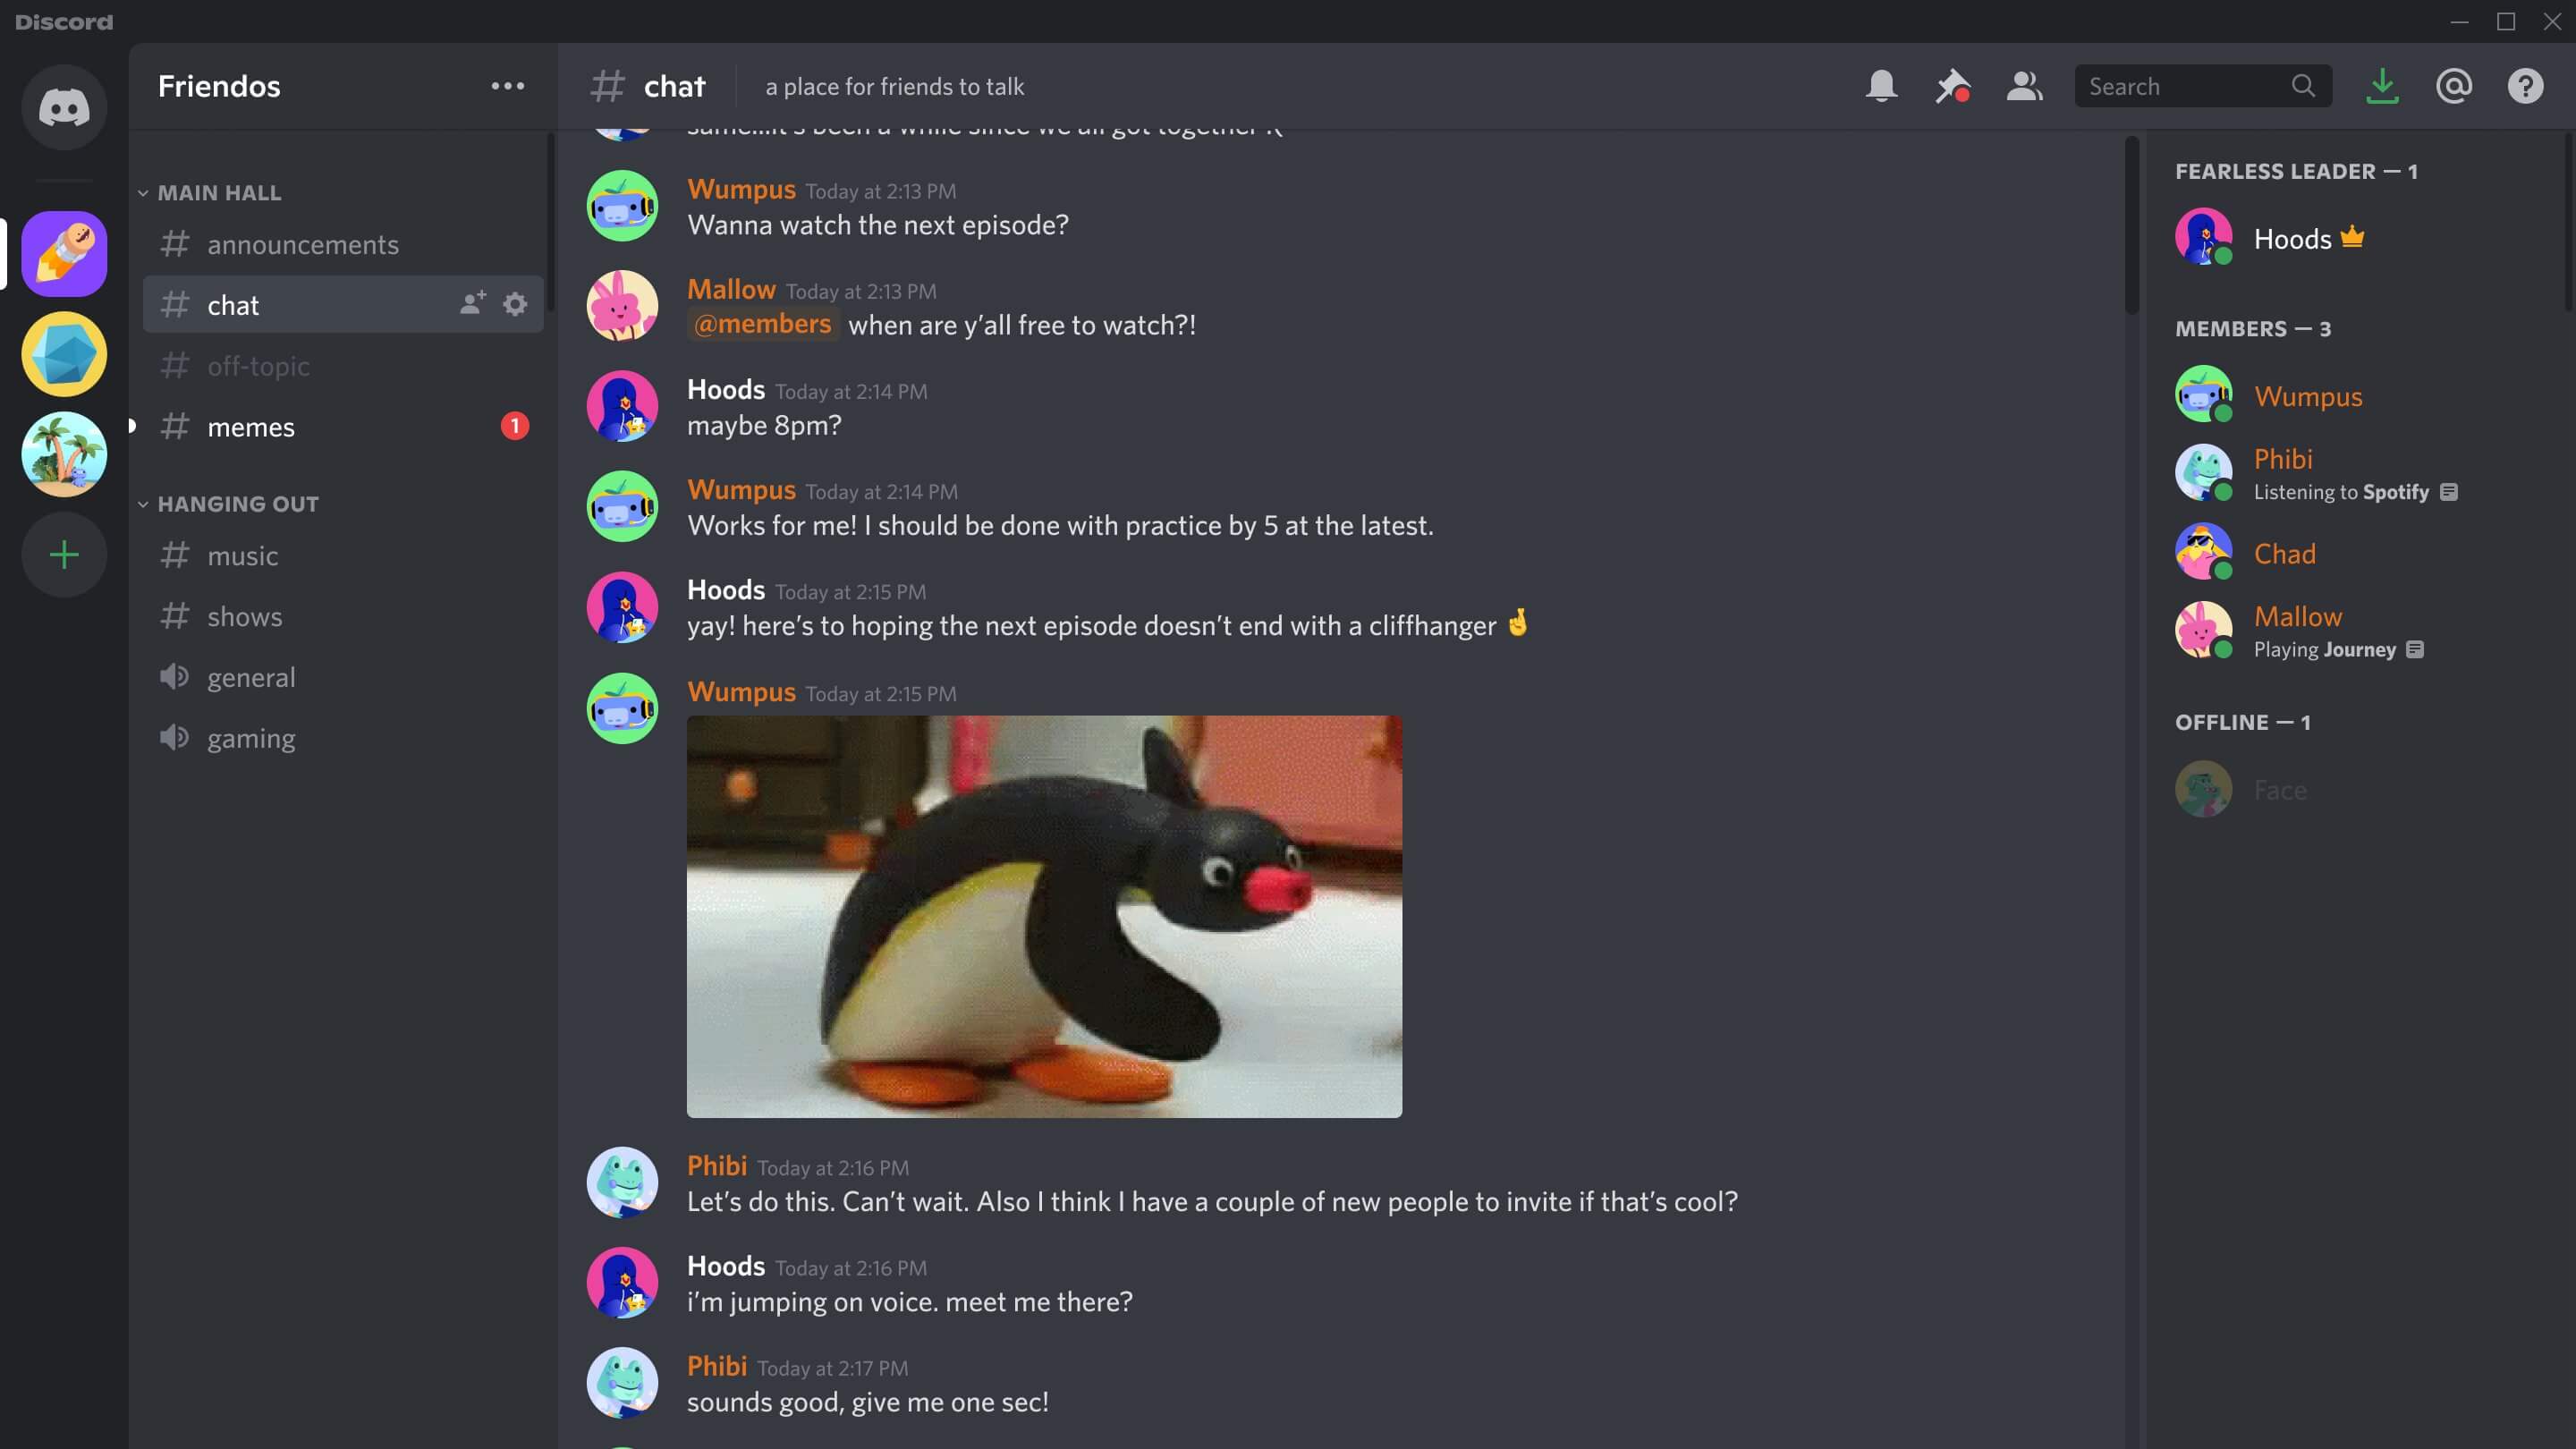
One of the core features that sets Discord apart is its server-based structure. Think of a server as a virtual space where people with shared interests can come together and collaborate. Servers can be customized to cater to specific needs, whether it’s creating a server for your gaming guild or setting up a server for your study group. Within these servers, members can join voice channels for real-time communication or engage in text-based discussions in dedicated chat rooms.
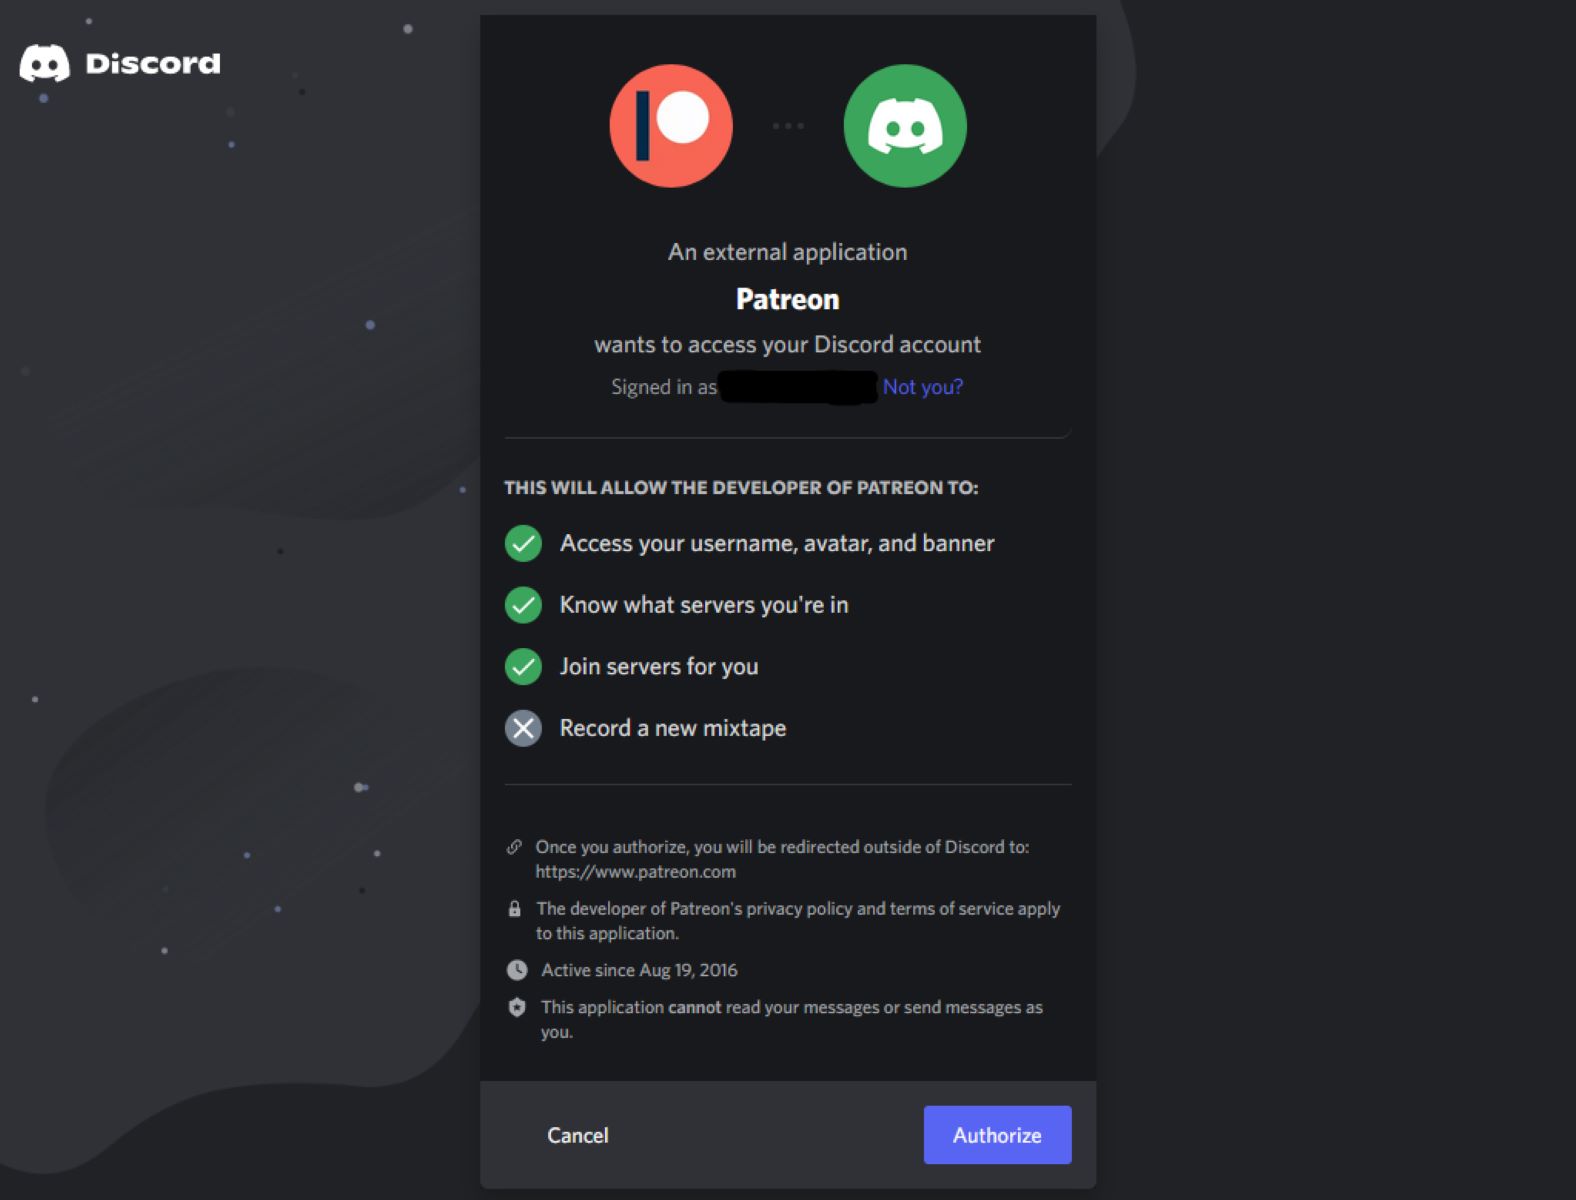
Discord also offers a wide range of features to enhance the user experience. For instance, you can create customized roles with different permissions, allowing you to assign specific responsibilities and access levels to different members. Additionally, Discord offers integration with other platforms and services, such as Twitch and Spotify, providing seamless connectivity and enhancing the overall functionality of the platform.
The platform’s user-friendly interface and intuitive controls make it accessible for users of all levels, including those who may not be gamers. Discord can be accessed through web browsers or downloaded as a desktop or mobile app, ensuring that users can stay connected no matter where they are.
Beyond its technical features, Discord has fostered a vibrant and inclusive community. With millions of active users, you can find servers dedicated to practically any topic or interest imaginable. From art and music to technology and sports, Discord brings together like-minded individuals, facilitating connections and fostering a sense of belonging.
Why Separate Roles?
Separating roles in Discord has numerous advantages and benefits for both server administrators and members. Here are a few key reasons why role separation is crucial:
1. Organizational Hierarchy: By separating roles, you can establish a clear organizational structure within your Discord server. This helps to define the different ranks, responsibilities, and permissions for each role, creating a sense of order and structure.
2. Access Control: Role separation allows you to control access to sensitive information and features within your server. You can assign specific permissions to each role, ensuring that members only have access to the features and channels that are relevant to them.
3. Streamlined Communication: With role separation, you can create dedicated channels for different roles. This helps to keep conversations and discussions focused and relevant to the specific group of members. Whether it’s a chat room for moderators to discuss server management or a channel for a specific gaming team, role separation ensures effective communication within the server.
4. Efficient Moderation: Separating roles allows for effective moderation and management of the server. By assigning moderation roles, you can empower trusted members to enforce rules, monitor conversations and channels, and take appropriate actions when necessary. This helps to maintain a safe and respectful environment for all members.
5. Role Recognition: Role separation creates a sense of achievement and recognition within the server. By assigning different roles based on contributions, skills, or accomplishments, you can acknowledge and reward members for their dedication and involvement.
6. Flexibility and Scalability: As your server grows, having a well-structured role separation system becomes even more critical. It allows for easy scalability, as you can quickly assign new members to specific roles and ensure they have the appropriate access and permissions from the start.
These benefits demonstrate how role separation can significantly enhance the functionality, organization, and overall user experience of your Discord server. By creating a well-defined structure and assigning roles strategically, you can establish a thriving community that functions smoothly and fosters positive engagement among members.
How to Separate Roles in Discord
Setting up role separation in Discord is a straightforward process. Here’s a step-by-step guide to help you get started:
Step 1: Create Roles
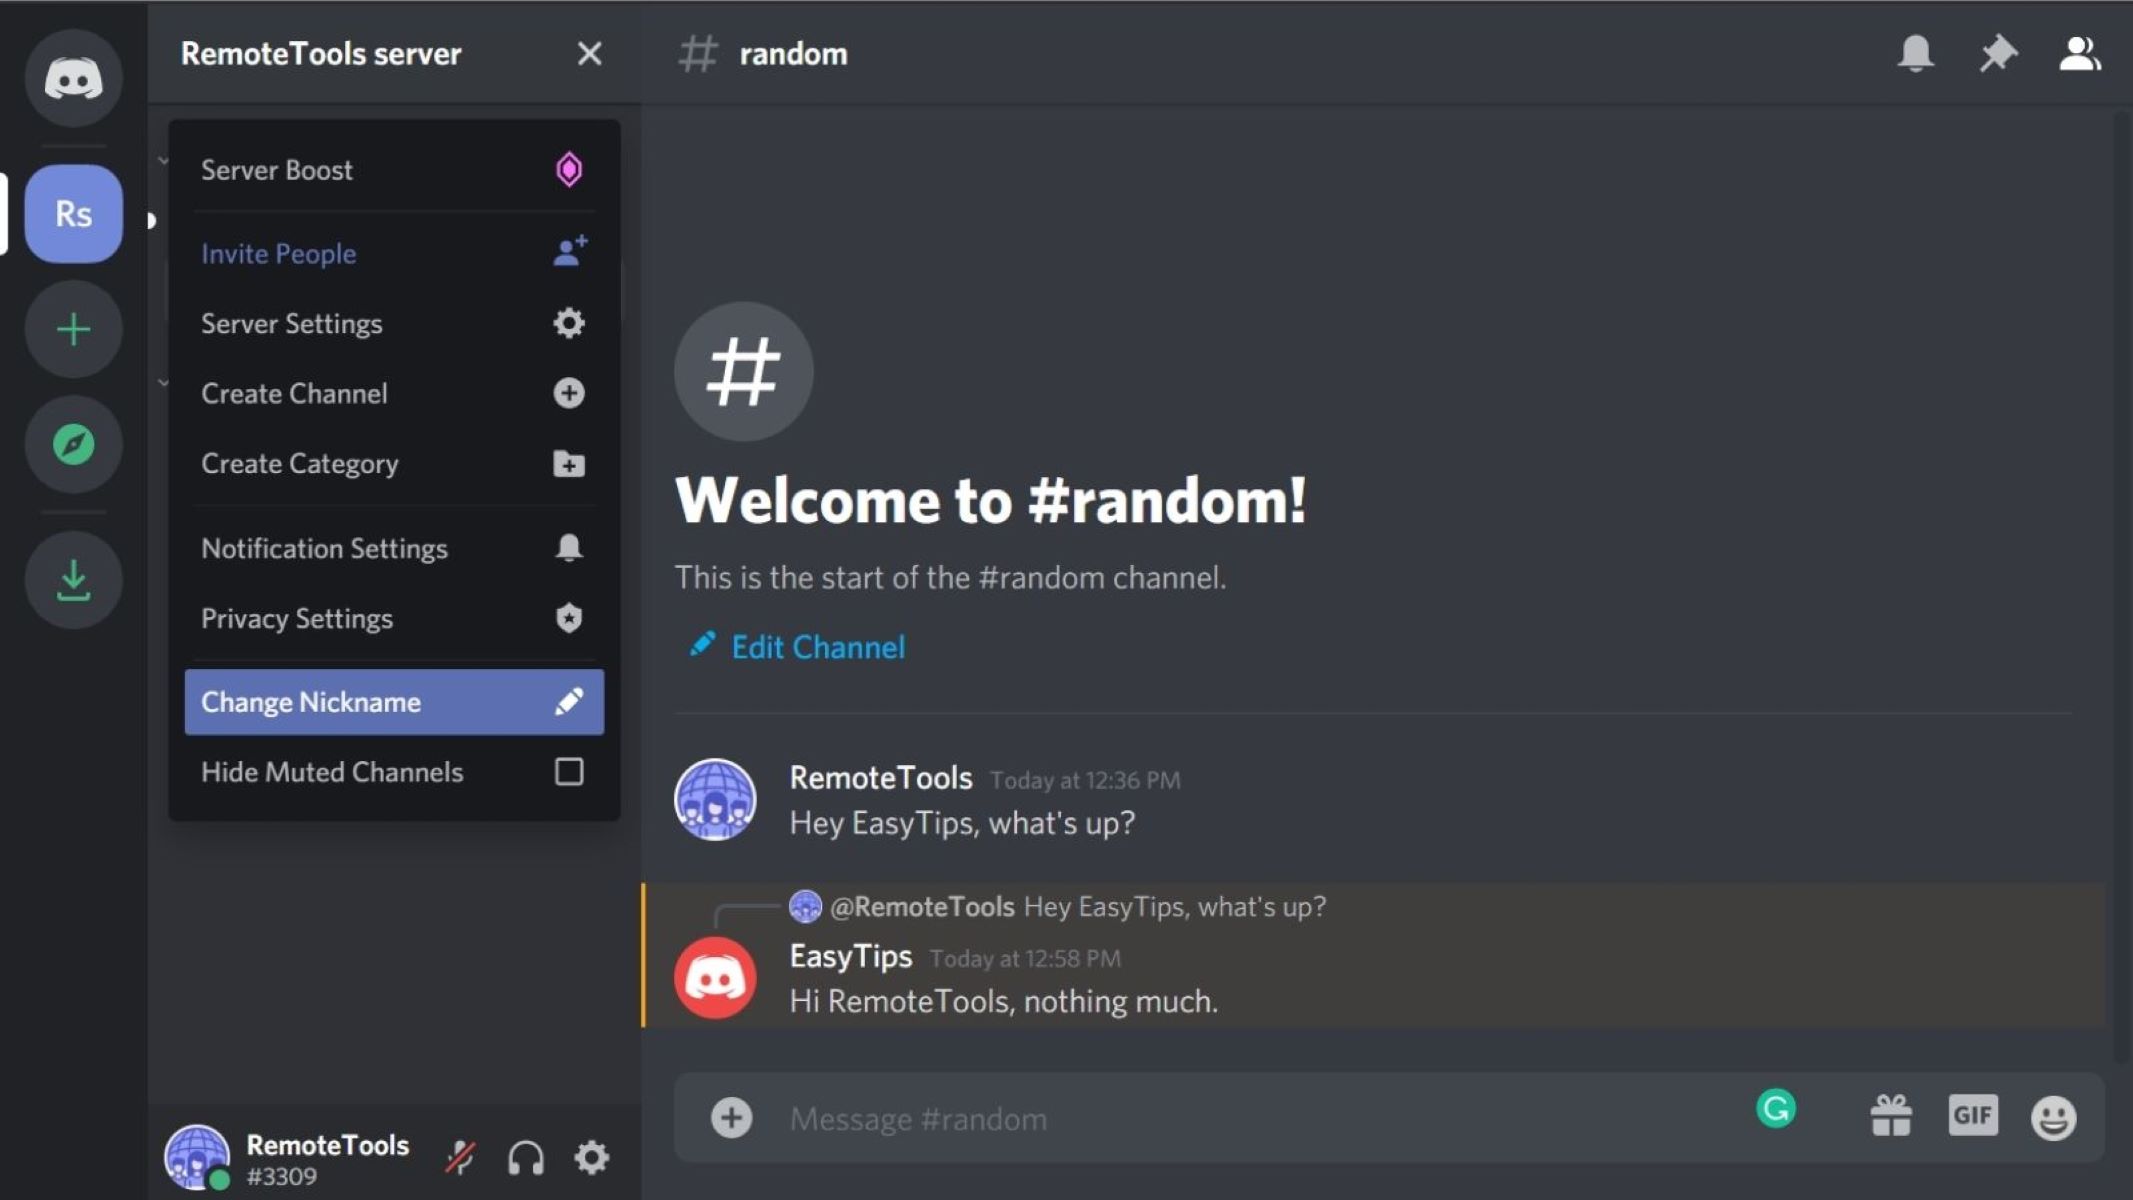
To begin, access your Discord server settings by clicking on the server name and selecting “Server Settings.” Under the “Roles” tab, click on the “+” button to create a new role. Give the role a name and choose a color that represents it. Repeat this step for each role you want to create.
Step 2: Assign Permissions to Roles
Once you have created the roles, assign specific permissions to each role. Under the “Roles” tab, click on a role name to access its settings. Enable or disable various permissions, such as the ability to send messages, manage channels, kick or ban members, and more. Tailor these permissions based on the responsibilities and access levels you want each role to have.
Step 3: Assign Roles to Members
Next, assign the roles to your server members. Go to your server’s member list by clicking on the server name and selecting “Members.” Find the member you want to assign a role to, right-click their name, and select “Roles.” Check the box next to each role you want to assign to the member. You can assign multiple roles to a member if necessary.
Step 4: Customize Role Colors
Customizing role colors can help distinguish and differentiate roles visually. To change the color of a role, go to the “Roles” tab in the server settings and click on the role name. Under the “Role Color” section, select a color or enter a HEX code to change the role’s color. This allows you to create a more visually appealing and personalized server experience.
By following these steps, you can successfully separate roles in Discord and create a well-organized and efficient server environment. Remember to regularly review and update roles and permissions as your server evolves, ensuring that they align with the needs of your community and the responsibilities of each role.
Step 1: Create Roles
The first step in separating roles in Discord is to create the roles themselves. Roles act as labels or badges that you can assign to members of your server, granting them specific permissions and access levels. Here’s how you can create roles:
1. Open your Discord server settings by clicking on the server name and selecting “Server Settings.”
2. In the left sidebar, click on the “Roles” tab.
3. Click on the “+” button to add a new role.
4. Give the role a name that represents its purpose or function within the server. For example, you could have roles like “Admin,” “Moderator,” “Member,” or any other custom roles that suit your server’s needs.
5. Optionally, you can choose a color for the role by clicking on the color box next to the role name. This allows you to customize the visual representation of the role and make it easily distinguishable.
6. Once you have set the name and color, click “Save” to create the role.
7. Repeat steps 3-6 for each additional role you want to create.
Creating roles is an essential foundation for role separation in Discord. By assigning different roles to users, you can define their roles, responsibilities, and access levels within the server. For example, you can create roles for administrators who have full control over the server, moderators who manage chats and enforce rules, and members who have limited access but can still participate in discussions.
It’s important to choose role names that accurately reflect the purpose of each role. This not only helps members understand their responsibilities but also makes it easier for administrators to manage and assign roles effectively. Additionally, using different colors for each role can enhance visual organization and make it easier to identify members based on their roles.
Remember, roles can be edited and customized at any time based on the evolving needs of your server. Adjusting permissions and changing role names or colors can help fine-tune the organization and functionality of your Discord server as it grows and develops.
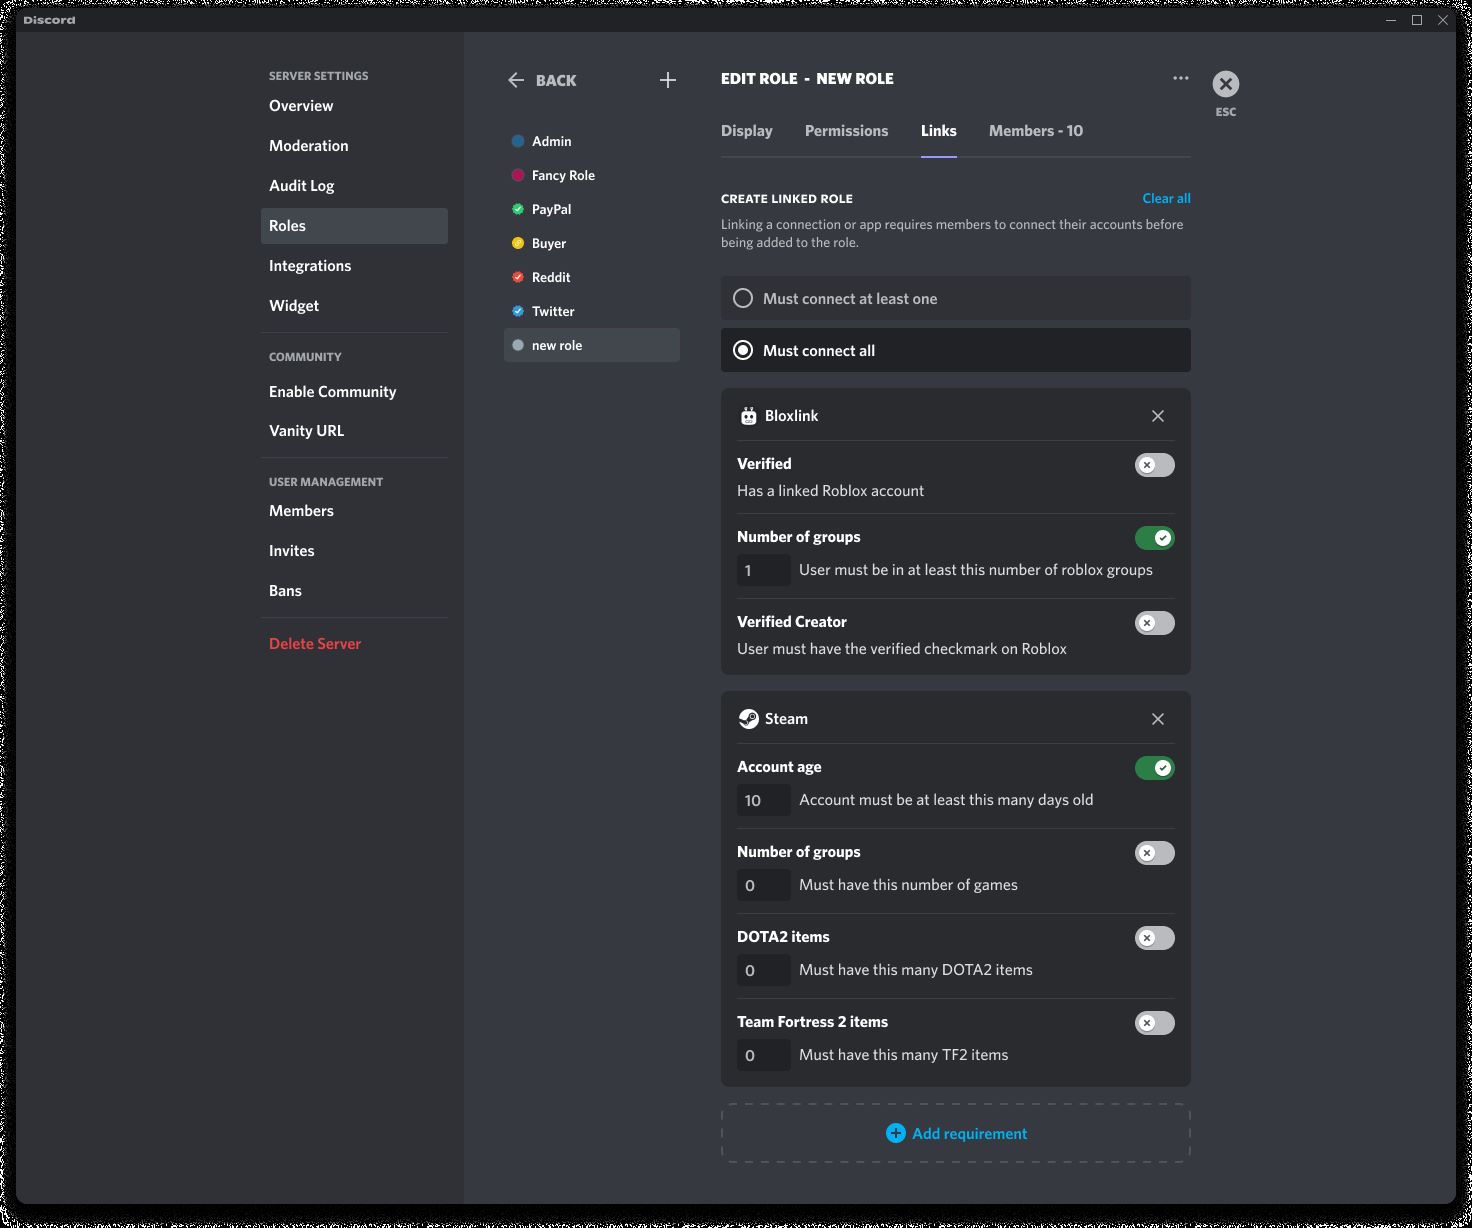
Step 2: Assign Permissions to Roles
After creating roles in Discord, the next step in role separation is to assign specific permissions to each role. Permissions determine what actions and features a member with a particular role can access within the server. By tailoring permissions to each role, you can ensure that members have the right level of control and access. Here’s how you can assign permissions to roles:
1. In your Discord server settings, navigate to the “Roles” tab.
2. Find the role for which you want to assign permissions and click on its name.
3. Under the “Role Permissions” section, you will see a list of various permissions that can be enabled or disabled.
4. Customize the permissions by toggling the switches on or off based on your preferences. Keep in mind that enabling or disabling a permission applies to all members with that role.
5. Some common permissions you might consider include:
- Manage Channels: This permission allows a role to create, delete, and edit channels within the server.
- Kick Members/Ban Members: These permissions grant the ability to remove members from the server temporarily or permanently, respectively.
- Manage Roles: This permission enables a role to create, edit, and assign roles to other members.
- Send Messages/Read Messages: These permissions control whether a role can send messages or read messages in the server’s text channels.
6. Customize permissions for each role in accordance with their responsibilities and the level of access you want them to have.
7. Save the changes after assigning the desired permissions to the role.
Assigning permissions appropriately is crucial for effective role separation. It ensures that members have the necessary access and control without compromising the security and organization of the server. By carefully selecting and fine-tuning permissions for each role, you can maintain a smooth and efficient operation that aligns with your server’s goals and guidelines.
Regularly review and update the permissions assigned to roles as your server evolves. This will help accommodate any changes in responsibilities or requirements, ensuring that the roles remain relevant and effective. Additionally, it’s important to strike a balance between providing enough permissions for members to fulfill their roles and preventing abuse or misuse of power.
By assigning permissions to roles, you establish clear boundaries and create a structured environment that encourages collaboration and efficient server management. Examine the specific needs of your server and allocate permissions accordingly, empowering members to contribute effectively while maintaining a secure and organized community.
Step 3: Assign Roles to Members
Once you have created roles and assigned appropriate permissions to each role, the next step in role separation in Discord is to assign these roles to specific members. By assigning roles, you give members distinct titles and responsibilities within the server. Here’s how you can assign roles to members:
1. Go to your Discord server and click on the server name to open the drop-down menu.
2. Select “Server Settings” from the menu options.
3. In the left sidebar, click on the “Members” tab.
4. Find the member you want to assign a role to.
5. Right-click on their name and select “Roles” from the context menu.
6. Check the box next to each role you want to assign to the member.
7. If necessary, repeat steps 4-6 for other members.
Assigning roles to members allows you to define their positions and responsibilities within the server. For example, you may have roles like “Admin,” “Moderator,” “Member,” or any other custom roles you created. By assigning these roles, you can streamline communication, establish authority levels, and ensure that each member has access to the appropriate channels and privileges.
When assigning roles, consider the role’s purpose and the member’s responsibilities. Ensure that you assign roles based on the member’s suitability and trustworthiness. For example, you might assign the “Admin” role to server administrators who have full control, the “Moderator” role to individuals responsible for enforcing rules and resolving conflicts, and the “Member” role to regular participants.
It’s important to note that members can have multiple roles, allowing for flexibility and customization. For instance, a member can have both the “Moderator” role and the “Member” role, granting them access to moderation tools and the ability to participate in discussions as a regular member.
Regularly review and update the roles assigned to members as needs change or new members join the server. By keeping roles up-to-date, you can ensure that responsibilities are properly distributed and that members have the appropriate access and permissions.
By assigning roles to members, you create a sense of structure and organization within your Discord server. This fosters efficient communication, clear responsibilities, and effective collaboration among the various members of your community.
Step 4: Customize Role Colors
Customizing role colors in Discord allows you to visually differentiate between different roles, making it easier to identify members based on their assigned roles. By assigning unique colors to specific roles, you can enhance the visual organization and aesthetics of your server. Here’s how you can customize role colors:
1. Open your Discord server settings by clicking on the server name and selecting “Server Settings.”
2. In the left sidebar, click on the “Roles” tab.
3. Locate the role for which you want to customize the color and click on its name.
4. Under the “Role Color” section, click on the color box to open the color picker.
5. Choose a color from the picker or enter a HEX code to specify a custom color.
6. Preview the color changes in the role settings.
7. Once you are satisfied with the color, click “Save” to apply it to the role.
The ability to customize role colors adds a visually appealing element to your Discord server. By assigning distinct colors to various roles, you can quickly identify members based on their roles, enhancing communication and organization within the server.
When choosing colors for roles, consider using colors that align with their purpose or significance. For example, you might assign vibrant and eye-catching colors to roles with higher authority or responsibility, while using more subtle or neutral colors for regular or lesser roles. Additionally, try to use colors that are easy to distinguish from each other to avoid confusion.
Customizing role colors can also help create a sense of identity and recognition within the server. Members can easily identify and recognize each other based on the colors associated with their roles, fostering a sense of community and camaraderie.
Remember, you can always revisit and modify role colors to suit the evolving needs and aesthetics of your server. Regularly review the color choices for each role to ensure they align with the overall theme and branding of your server. Make sure that the colors you choose are visually pleasant and do not clash with other elements in your server’s design.
By customizing role colors, you can enhance the visual appeal and organization in your Discord server, making it easier to identify and differentiate between members based on their roles.
Conclusion
Separating roles in Discord is a fundamental aspect of effective server management. By creating roles, assigning permissions, and customizing role colors, you can establish clear hierarchies, streamline communication, and ensure that each member has the appropriate access and responsibilities within the server.
The benefits of role separation include improved organization, efficient moderation, enhanced collaboration, and a sense of recognition for members. By defining roles and assigning permissions based on their specific responsibilities, you can create a well-structured server environment that fosters positive engagement and a sense of community.
Remember to regularly review and update the roles and permissions as your server evolves. This ensures that they remain relevant and aligned with the needs of your server’s growing community.
By following the step-by-step guide outlined in this article, you can successfully separate roles in Discord and create a server environment that is tailored to your specific needs. So, go ahead and take advantage of the role separation feature offered by Discord, and watch as your server becomes a well-organized and thriving community.
Harness the power of role separation in Discord to create a space where every member can contribute effectively, communicate efficiently, and enjoy a seamless and engaging experience.