Introduction
Welcome to the world of Patreon and Discord integration! If you’re a content creator looking to build a strong and engaged community, connecting Patreon to Discord is a fantastic way to reward your loyal supporters and create an exclusive space for them to connect with you and each other.
Patreon, a popular membership platform, allows creators to receive recurring financial support from their fans, while Discord provides a versatile and interactive platform for communities to communicate and engage with each other. By linking these two platforms, you can seamlessly provide special perks and benefits to your patrons based on their support level.
In this article, we’ll guide you through the step-by-step process of connecting Patreon to Discord, setting up membership tiers and rewards, designating roles, and granting access to your loyal supporters. Additionally, we’ll show you how to customize and automate Discord announcements to keep your community informed and engaged.
Before we dive into the details, it’s important to note that setting up Patreon integration requires a bit of technical knowledge. You’ll need to be familiar with both Patreon and Discord interfaces, as well as have a basic understanding of HTML and webhooks. However, don’t worry if you’re not a tech expert – we’ll break down the process into simple and easy-to-follow steps.
By the end of this guide, you’ll be able to seamlessly connect Patreon to Discord and provide an exclusive space for your patrons to interact, while also rewarding them with access to special perks and benefits. Let’s get started!
Step 1: Create a Discord server
The first step in connecting Patreon to Discord is to create a Discord server. A server acts as a centralized hub where your community can gather, chat, and collaborate.
If you’re new to Discord, don’t fret – the server creation process is simple and straightforward. Follow these steps to get started:
- Log in to your Discord account or create a new one if you don’t have an existing account.
- Once you’re logged in, click on the “+” button on the left sidebar. This will prompt a pop-up menu where you can select “Create a Server”.
- Choose a name for your Discord server. This could be your channel or brand name, or something that aligns with the community you’re building.
- Next, select a region that is closest to you or your target audience. Choosing a nearby region will help ensure a smooth and low-latency experience for your community members.
- Now, click on the “Create” button to finalize the server creation process.
Congratulations! You’ve successfully created a Discord server. The next step is to configure your server settings and customize it to match your brand or community identity. You can edit the server name, add a profile picture, and create different channels for different topics or purposes.
It’s a good idea to set up rules and guidelines for your server to ensure a positive and inclusive environment for your community members. You can do this by creating a “Rules” channel or adding a rules section in the server’s description. Make sure to clearly communicate what behavior is expected and what kind of content is allowed or prohibited.
Once you’ve set up your server and configured the necessary settings, you’re ready to proceed to the next step: connecting Patreon to your Discord server. Let’s move on!
Step 2: Connect Patreon to your Discord server
Now that you have created your Discord server, it’s time to connect it to your Patreon account. This will allow you to automate the granting of special roles and access to your patrons based on their membership level.
Follow these steps to connect Patreon to your Discord server:
- Log in to your Patreon account and navigate to the “Creator Account” section.
- In the left-hand sidebar, click on “Apps”.
- Under the “Connected Apps” section, click on the “Connect More Apps” button.
- Search for “Discord” in the search bar and select the official Discord app from the search results.
- Click on the “Connect” button next to the Discord app.
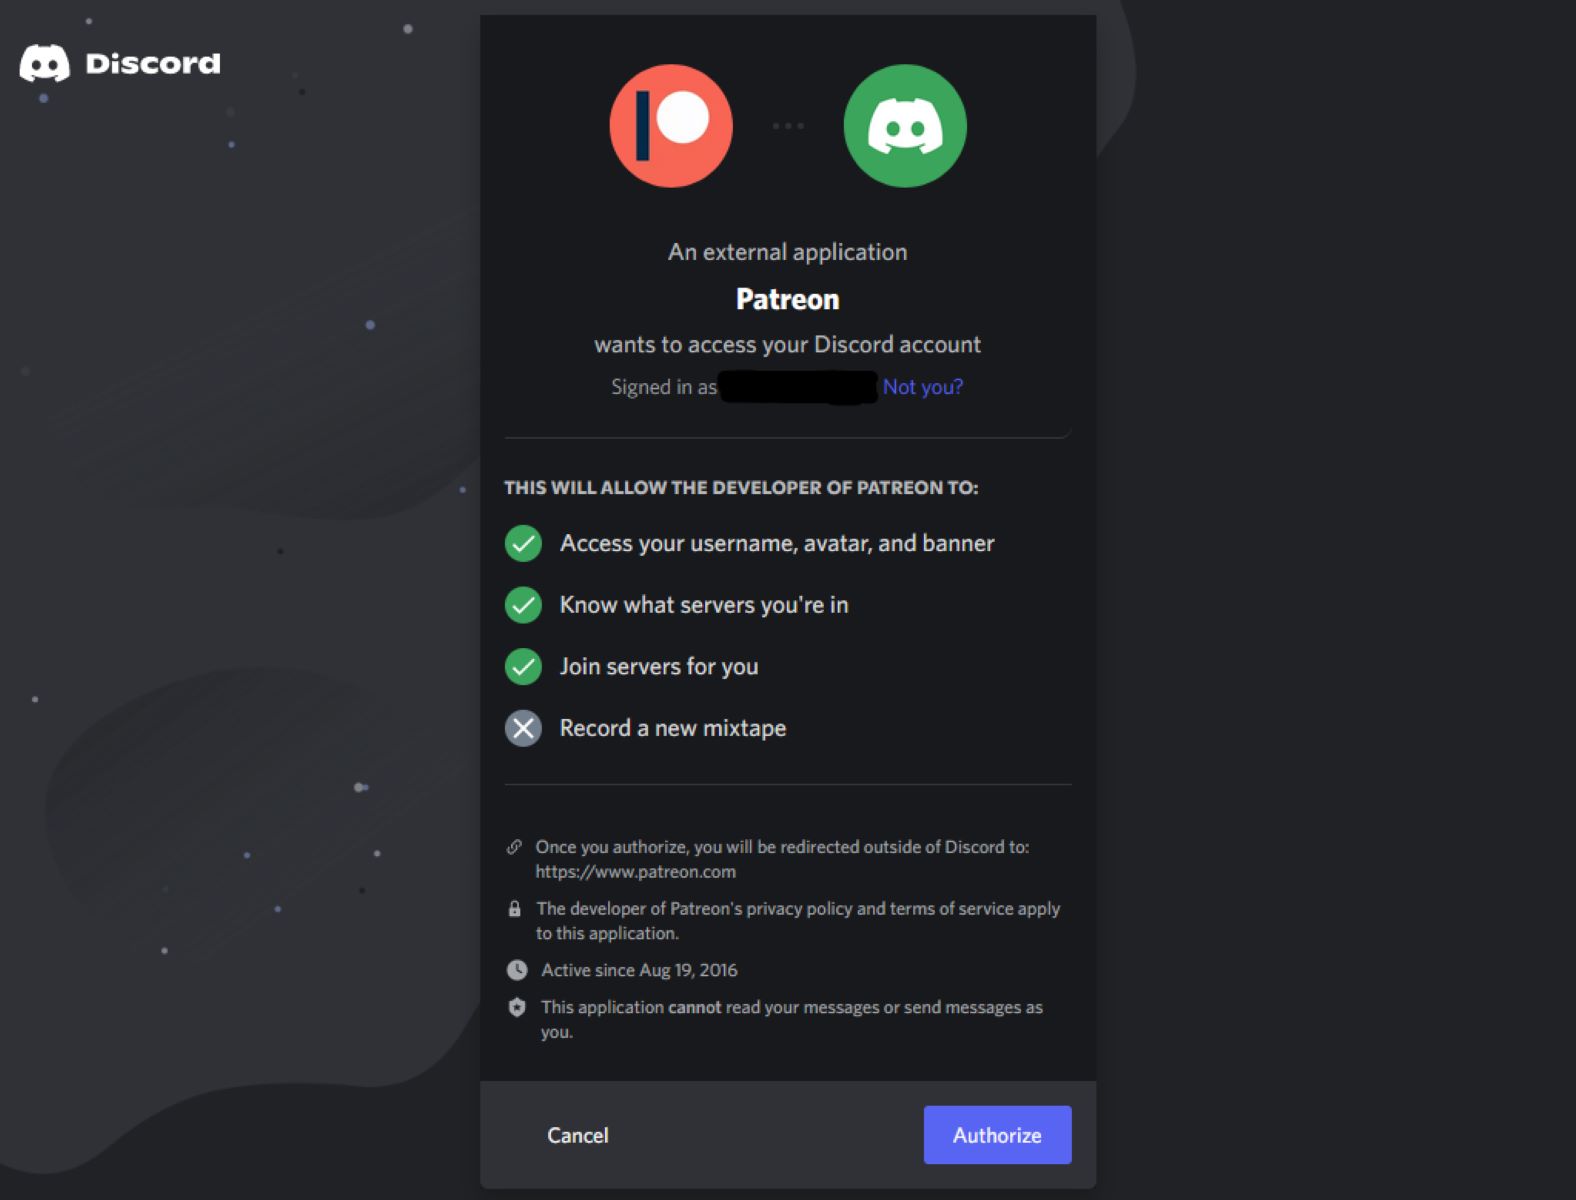
- You will be prompted to authorize the connection between Patreon and Discord. Review the permissions that the app requires and click on “Authorize” to proceed.
- In the pop-up window that appears, choose the Discord server you created earlier from the drop-down menu and click on “Continue”.
- On the next screen, customize the allocation of roles and access for each tier of membership. You can designate specific roles for each tier or grant access to certain channels based on membership level.
- Once you’ve configured the settings to your liking, click on “Save” to finalize the connection between Patreon and Discord.
Congratulations! You have successfully connected Patreon to your Discord server. Now, whenever someone becomes a patron or updates their membership on Patreon, their roles and access in your Discord server will be automatically adjusted based on their membership level.
This integration not only saves you time and effort but also enhances the sense of exclusivity and community for your patrons. They will be able to access special channels, enjoy unique benefits, and engage with other like-minded supporters.
Now that you have established the connection between Patreon and Discord, it’s time to move on to the next step: setting up Patreon membership tiers and rewards. Let’s continue!
Step 3: Set up Patreon membership tiers and rewards
Once you have connected Patreon to your Discord server, it’s time to create enticing membership tiers and rewards for your patrons. By offering exclusive perks, you can incentivize fans to support your content and become valuable members of your community.
Follow these steps to set up Patreon membership tiers and rewards:
- Log in to your Patreon account and go to your Creator Dashboard.
- Click on the “Earnings” tab and then select “Tiers” from the dropdown menu.
- Click on the “New Tier” button to create a new membership tier.
- Give your tier a name and set a monthly or per creation amount for the membership fee.
- Add a description for the tier, highlighting the exclusive benefits and perks that members will receive.
- Consider offering unique rewards such as access to premium content, behind-the-scenes updates, early access to new releases, exclusive live streams, or personalized messages.
- Repeat the process to create multiple tiers with different benefits and price points to cater to a range of fans.
- Once you have set up your tiers, make sure to clearly communicate the benefits and rewards to your audience through your Patreon page and other promotional channels.
By providing valuable and enticing rewards, you can encourage your supporters to become patrons and enjoy the exclusive perks you offer. This not only helps to generate a stable income but also fosters a sense of belonging and appreciation within your community.
Remember to regularly review and update your membership tiers and rewards to keep them fresh and exciting. Pay attention to feedback from your patrons and consider adding new benefits or modifying existing ones based on their preferences.
Now that you have set up your membership tiers and rewards, it’s time to proceed to the next step: designating Patreon roles in Discord. Let’s move on!
Step 4: Designate Patreon roles in Discord
Designating roles in Discord based on Patreon membership levels is an essential step in providing exclusive access and privileges to your patrons. By assigning specific roles, you can visually distinguish patrons and ensure they have the appropriate permissions within your Discord server.
Follow these steps to designate Patreon roles in Discord:
- Open your Discord server and click on the server name in the top-left corner to access the server settings.
- In the server settings menu, click on “Roles”.
- Click on the “+” button to create a new role.
- Give the role a name that corresponds to the membership level or tier on Patreon.
- Customize the role settings, such as color and permissions, to differentiate it from other roles.
- Repeat the process to create roles for each Patreon membership tier you have.
- Drag and drop the roles in the order that reflects the hierarchy of your membership tiers, with the highest tier at the top.
- Click on the “Save Changes” button to apply the role settings.
Once the roles are created and arranged, you can automatically assign them to your patrons based on their membership level. Discord offers various methods to achieve this, such as using bots or integrating with a Patreon bot.
Take the time to test the role assignments and ensure that they are working correctly. Verify that patrons are receiving the appropriate roles when they become a member or update their tier on Patreon.
By assigning roles in Discord, you visually show appreciation for your patrons and provide a clear distinction between different membership levels. This allows your community members to easily identify and connect with others at the same support level.
Now that you have designated Patreon roles in Discord, it’s time to move on to the next step: granting access to Patreon supporters. Let’s continue!
Step 5: Grant access to Patreon supporters
Now that you have set up Patreon membership tiers, connected Patreon to Discord, and designated roles in Discord based on membership levels, it’s time to grant access to your loyal Patreon supporters. This will ensure that they can enjoy the exclusive benefits and privileges associated with their membership tier.
Follow these steps to grant access to Patreon supporters:
- Log in to your Discord server and go to the server settings.
- Click on “Roles” in the server settings menu.
- For each membership tier, locate the respective role that you have designated.
- Click on the role to access its settings.
- Under the “Members” section, click on the “+” button to add members.
- A list of all your Discord server members will appear. Search for the Patreon supporter you wish to grant access to and click on their name to select them.
- Repeat this process to add all the Patreon supporters who should have access to the respective membership tier.
- Click on the “Save Changes” button to apply the access permissions.
By granting access to your Patreon supporters in Discord, you ensure that they can fully enjoy the benefits and privileges associated with their membership level. This reinforces their support and encourages them to engage more actively with your community.
Remember to periodically review your Patreon supporters and update their access permissions in Discord. When supporters change or cancel their Patreon membership, make sure to adjust their roles or remove them from the corresponding tier to accurately reflect their current status.
Now that you have granted access to your Patreon supporters, it’s time to move on to the next step: customizing and automating Discord announcements. Let’s continue!
Step 6: Customize and automate Discord announcements
Customizing and automating Discord announcements is a great way to keep your community engaged and informed about the latest updates, events, and exclusive content. By setting up automated announcements, you can ensure that your patrons receive timely and relevant information without having to manually share it every time.
Follow these steps to customize and automate Discord announcements:
- Utilize a Discord bot or integration tool that supports automatic announcements, such as MEE6 or Dyno.
- Log in to the respective tool’s website and authorize it to access your Discord server.
- Configure the settings to determine when and what type of announcements should be made.
- Consider creating different announcement channels or categories to separate different types of updates (e.g., general announcements, new content releases, exclusive event notifications).
- Customize the appearance of the announcements, such as formatting the text, adding images or GIFs, or embedding links to related resources.
- Set up triggers or conditions for the announcements to be made automatically. For example, you can configure the bot to announce when new content is released, when a certain membership level is reached, or when specific events or milestones occur.
- Test the announcement feature to ensure that it is working correctly and delivering the intended messages to your community.
- Regularly review and update your automated announcement settings based on the evolving needs and preferences of your community.
Automating Discord announcements allows you to streamline communication and ensure that important updates reach your patrons in a timely manner. It saves you time and effort while keeping your community informed and engaged.
However, remember to strike a balance and avoid overwhelming your community with too many announcements. Consider the frequency and relevance of the updates to maintain their interest and avoid appearing spammy.
With customized and automated announcements, you can effectively share news, updates, and exclusive content, fostering a vibrant and well-informed community within your Discord server.
Now that you have customized and automated Discord announcements, you’ve completed the final step in connecting Patreon to Discord. Congratulations on successfully setting up a rewarding and engaging community space for your patrons!
Conclusion
Integrating Patreon with Discord opens up a world of possibilities for content creators to engage and reward their loyal supporters. By following the steps outlined in this guide, you have learned how to connect Patreon to Discord, set up membership tiers and rewards, designate roles, grant access, and customize automated announcements.
By connecting Patreon to Discord, you have created an exclusive space where your patrons can interact, access premium content, and enjoy unique perks. This integration not only strengthens your relationship with your supporters but also fosters a sense of community and belonging.
Setting up membership tiers and rewards on Patreon allows you to entice fans to become patrons by offering enticing benefits. By differentiating tiers based on support levels, you provide a clear incentive for fans to contribute and support your creative endeavors.
Designating roles in Discord based on Patreon membership tiers allows for easy identification and differentiation within your community. This not only visually distinguishes your patrons but also ensures that they have the appropriate permissions and access to exclusive channels or content.
Granting access to Patreon supporters within your Discord server ensures that they can fully enjoy the exclusive benefits and privileges based on their membership level. This strengthens their sense of appreciation and encourages them to actively engage with your community.
Customizing and automating Discord announcements keeps your community informed and engaged by sharing important updates, events, and exclusive content. By setting up automated announcements, you can save time and effort while delivering timely and relevant messages to your patrons.
Overall, Patreon and Discord integration offers a seamless way to build and nurture a thriving community around your content. By leveraging the power of these platforms, you can provide exceptional experiences to your supporters, foster a sense of exclusivity, and create a space where they can connect, collaborate, and celebrate your creative journey.