Introduction
Sending an email from your phone has become an essential part of our daily communication. Whether you need to send an urgent message to a colleague or share important documents with a client, having the ability to send emails on the go is incredibly convenient. In this guide, we will walk you through the steps to send an email from your phone, ensuring that you stay connected and productive no matter where you are.
With the advancements in smartphone technology, setting up and using email accounts on your phone has never been easier. Whether you use an iPhone or an Android device, the process is relatively straightforward. In this step-by-step guide, we will show you how to set up your email account, compose a new email, add recipients, set a subject line, attach files, and send your email, all from the convenience of your phone.
By following these steps, you will be able to send emails from your phone with ease, saving you time and ensuring that you stay connected and organized. So, let’s dive right in and get started!
Step 1: Setting up your email account on your phone
Before you can send an email from your phone, you need to set up your email account on your device. Here’s how you can do it:
1. Open the email app on your phone. This could be the default email app provided by your phone’s manufacturer or a third-party app that you prefer.
2. Tap on “Add Account” or “Set up a new account” option. This may vary slightly depending on the email app you are using.
3. Select the email service provider you use, such as Gmail, Yahoo, Outlook, or any other provider.
4. Enter your email address and password in the designated fields. Make sure you double-check the information to avoid any errors.
5. Tap “Next” or “Sign In” to proceed. The app will automatically try to connect to the email server and verify your account details.
6. Once your email account is successfully verified, you may be prompted to give permission for the app to access your emails, contacts, and calendar. Review the permissions and tap “Allow” or “Accept” to grant the necessary access.
7. Depending on the email app, you may have additional settings to configure, such as the syncing frequency, notifications, or signature. Customize these settings according to your preferences.
8. Finally, tap “Finish” or “Done” to complete the setup process. Your email account is now configured on your phone, and you are ready to start sending and receiving emails.
Setting up your email account on your phone is a one-time process. Once it’s set up correctly, you won’t need to go through these steps again unless you want to add another email account.
Now that you have successfully set up your email account on your phone, it’s time to move on to the next step: composing a new email.
Step 2: Composing a new email
Once you have set up your email account on your phone, you can start composing a new email. Follow these steps to draft your message:
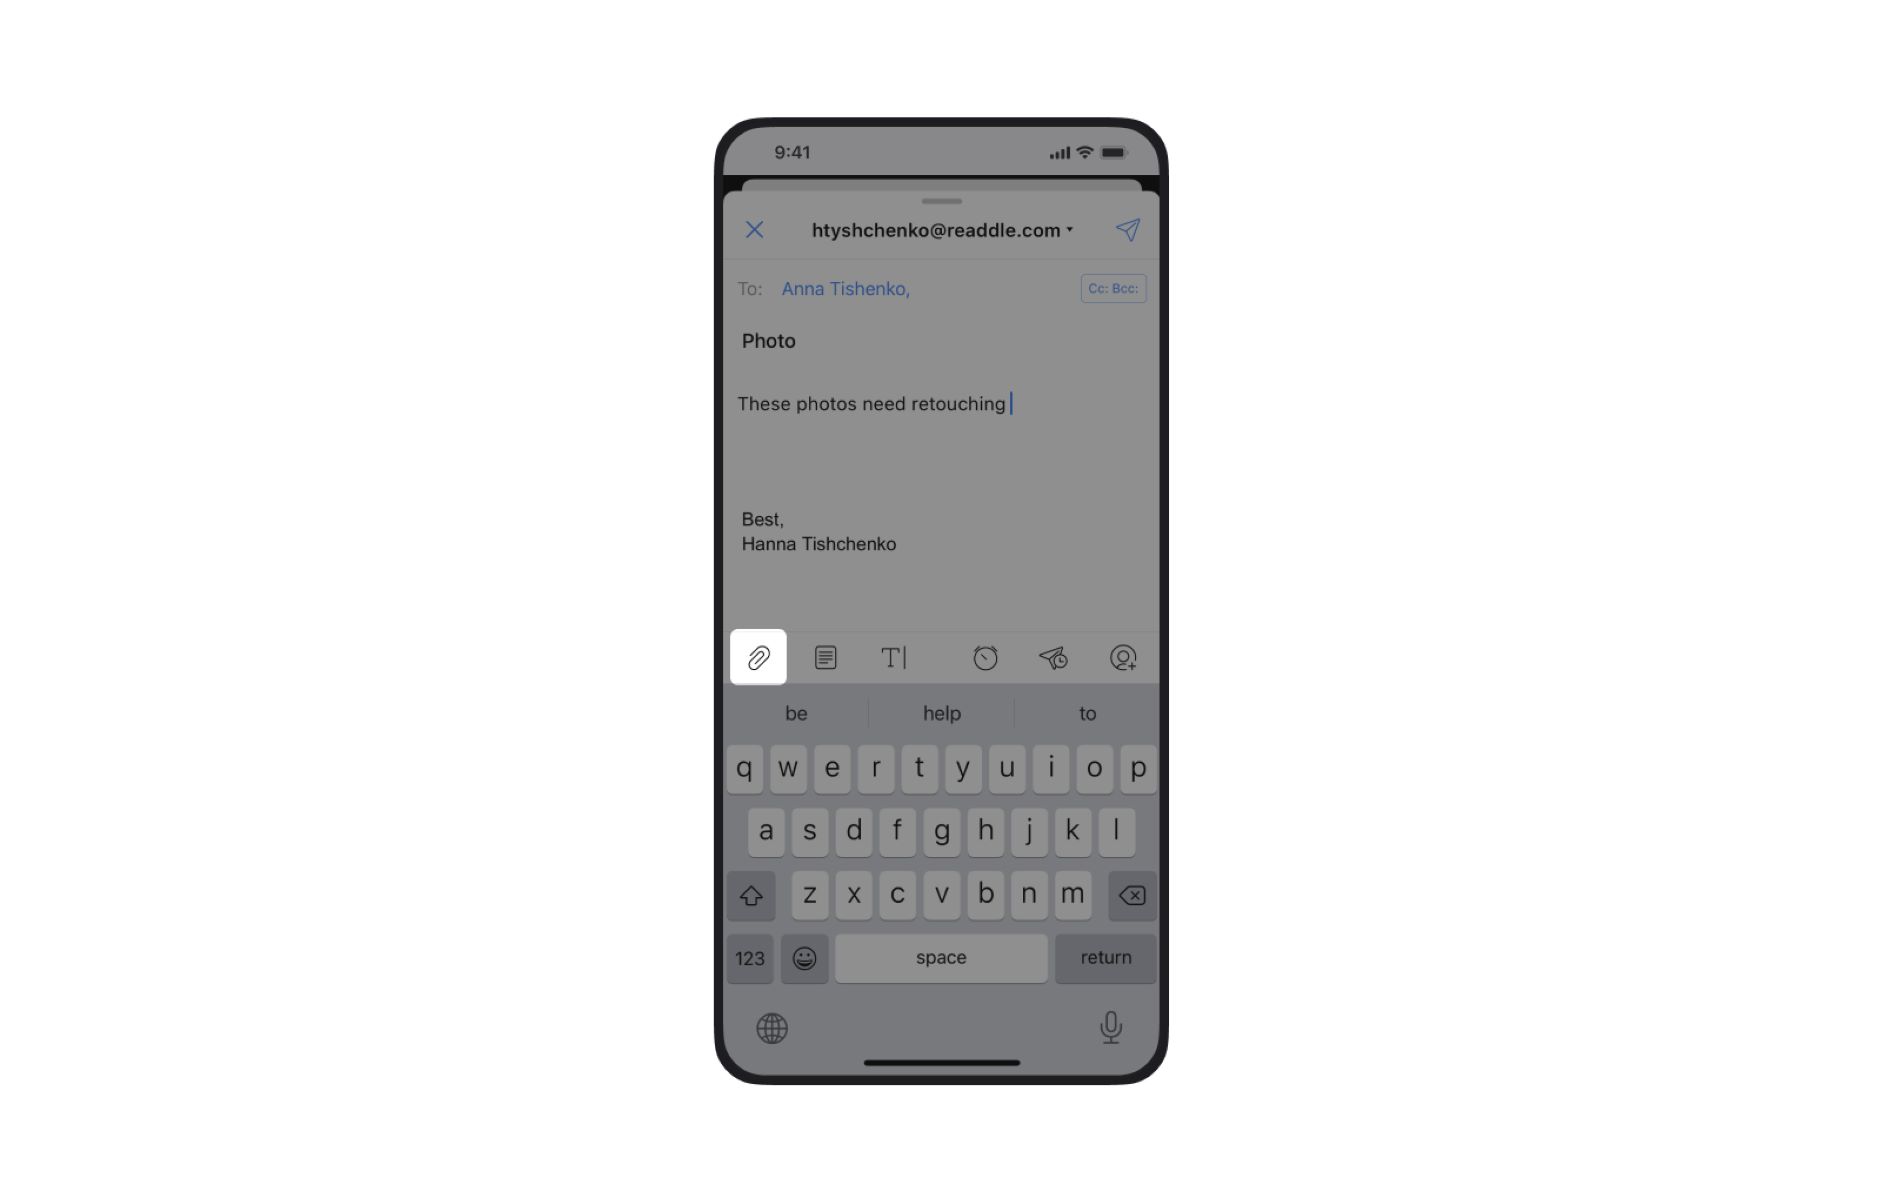
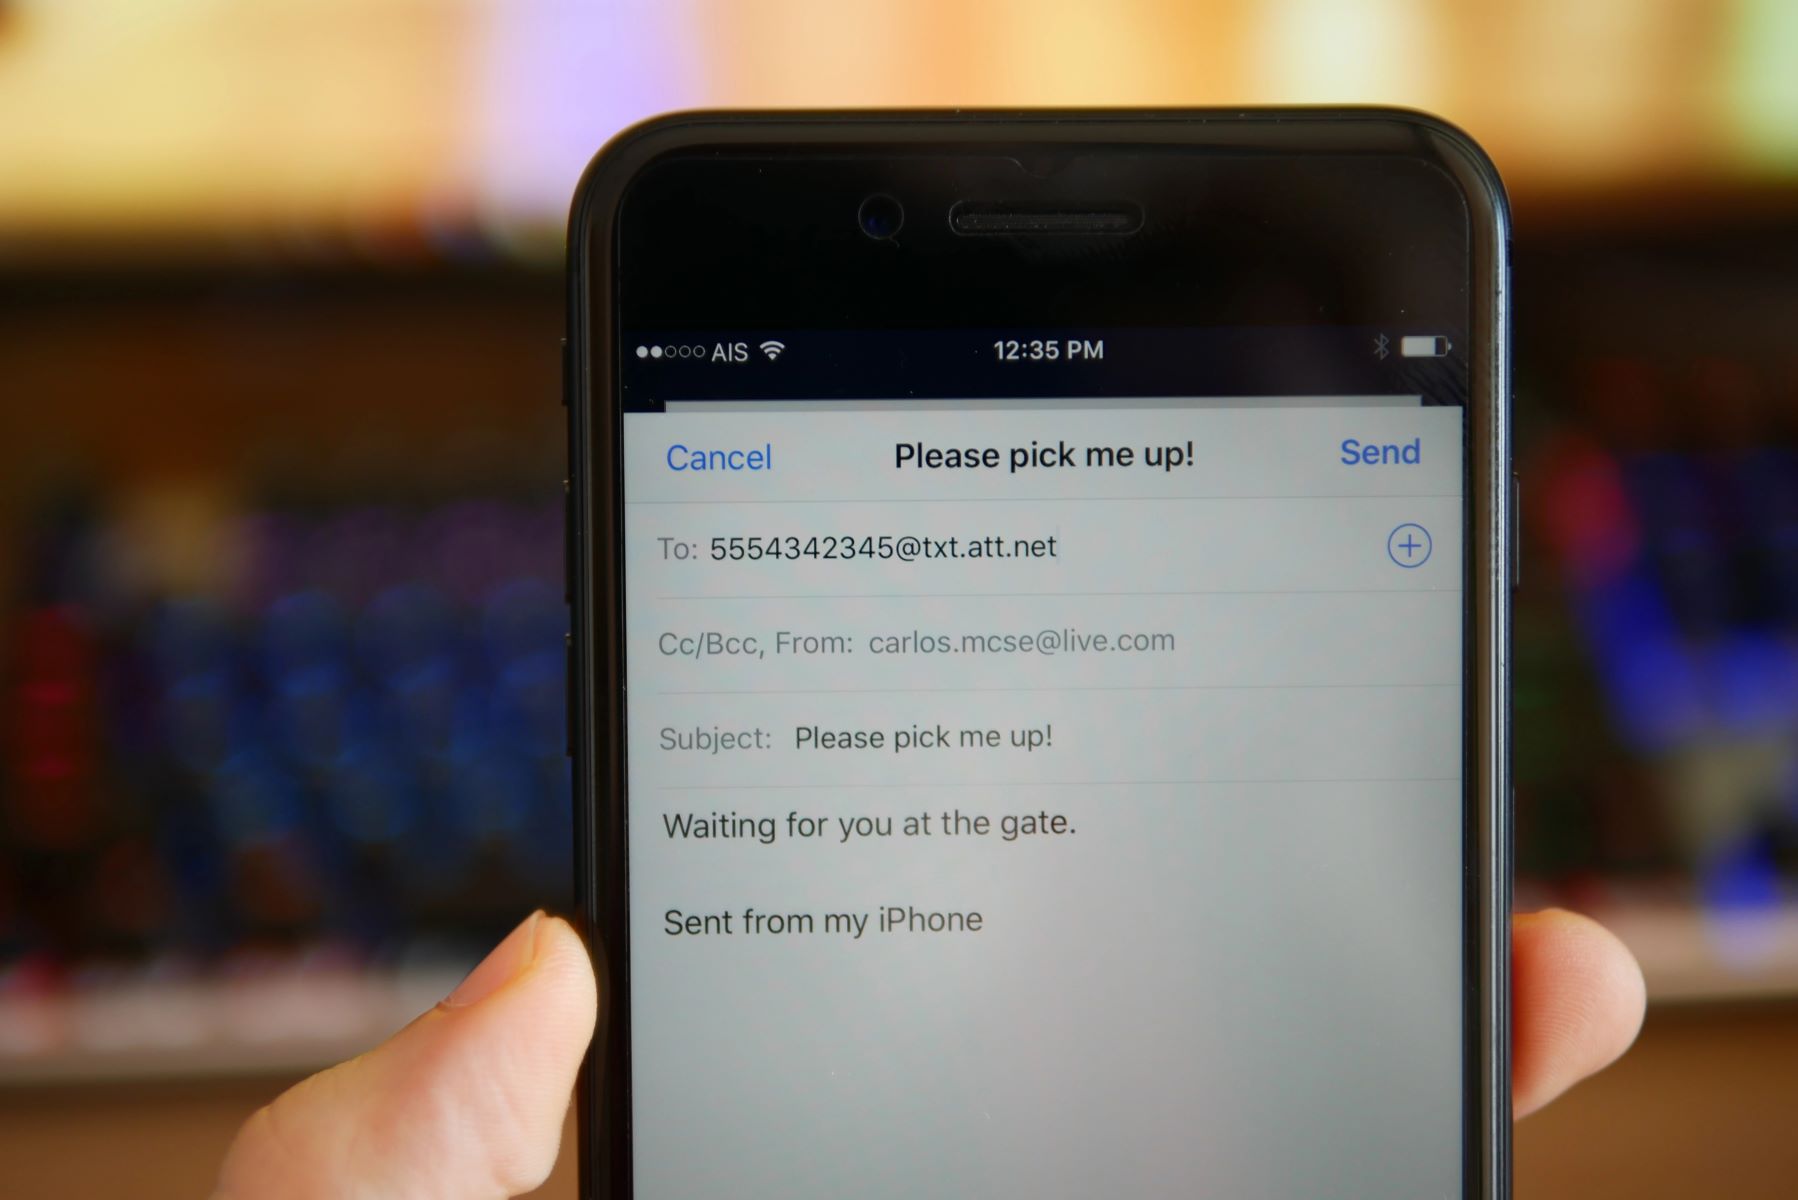
1. Open the email app on your phone and tap on the “Compose” or “New Email” button. It is usually represented by a pencil or a “+” icon.
2. A new email draft will open, where you will see fields for the recipient, subject line, and email content.
3. Start by entering the recipient’s email address in the “To” field. You can type in the full email address or select it from your contacts list by tapping on the respective icon.
4. If you need to send the email to multiple recipients, you can add more email addresses in the “CC” or “BCC” fields. The “CC” field stands for “carbon copy” and the “BCC” field stands for “blind carbon copy.” Recipients in the “CC” field will be visible to others, while recipients in the “BCC” field will remain hidden.
5. Next, move on to the “Subject” field and enter a concise yet descriptive subject line for your email. The subject line gives recipients a glimpse of what the email is about, so make it clear and relevant.
6. With the recipient and subject line in place, it’s time to write the content of your email. Tap on the main body of the email to bring up the on-screen keyboard and start typing.
7. Use the formatting options on the email toolbar to format your text as needed. You can make text bold, italic, or underline, adjust the font style or size, align the text, and even create numbered or bulleted lists to organize your content.
8. If you need to take a break while composing the email, you can save it as a draft by tapping on the “Save” or “Draft” button. This allows you to come back to it later without losing any progress.
9. Once you have finished writing your email, review it for any errors or typos. You can use the spell-check feature provided by the email app to help you with this.
10. When you are satisfied with the email, click on the “Send” button to send it to the recipient(s).
Composing a new email on your phone allows you to conveniently communicate with others while on the go. Now that you know how to compose an email, let’s move on to the next step: adding recipients.
Step 3: Adding recipients
When sending an email, it’s important to add the recipients correctly to ensure that your message reaches the intended individuals. Here’s how you can add recipients to your email:
1. Start by composing a new email using the steps mentioned in the previous section.
2. In the “To” field, enter the email address of the primary recipient. You can manually type in the full email address or select it from your contacts list by tapping on the respective icon.
3. If you need to add additional recipients, you can do so by tapping on the “CC” or “BCC” fields. The “CC” field stands for “carbon copy” and the “BCC” field stands for “blind carbon copy.” Recipients in the “CC” field will be visible to others, while recipients in the “BCC” field will remain hidden.
4. To add recipients in the “CC” field, tap on it and enter the email address(es) of the individuals you want to include. Separate multiple email addresses with commas.
5. If you want to add recipients in the “BCC” field, tap on it and enter the email address(es) in the same manner as mentioned above. Remember that recipients added in the “BCC” field will not be visible to other recipients.
6. You can also add recipients from your contacts list by tapping on the respective icon next to the recipient field. This will bring up your phone’s contacts, and you can select the desired individuals by tapping on their names.
7. If you need to remove a recipient, you can do so by tapping on the “x” icon next to their email address in the recipient field.
8. After adding all the recipients, review the email to ensure that the addresses are entered correctly. Double-check for any errors or typos in the email addresses.
9. Once you are satisfied with the recipient list, you can proceed with composing the subject line and email content, as explained in the previous sections.
Adding recipients correctly is crucial to ensure effective communication via email. By following these steps, you can easily include the necessary recipients in your emails. Now, let’s move on to the next step: setting the subject line and email content.
Step 4: Subject line and email content
The subject line and email content play a vital role in conveying your message effectively and grabbing the recipients’ attention. Here’s how you can craft them appropriately:
1. After adding recipients to your email, move on to the subject line field. Write a concise and descriptive subject that accurately summarizes the content of your email. A well-crafted subject line helps recipients understand the purpose of your email at a glance.
2. Avoid leaving the subject line blank or using generic subjects like “Hi” or “Hello.” Instead, provide a specific and informative subject, such as “Meeting Reminder: Friday, 2 PM” or “Proposal for ABC Project.”
3. Keep the subject line brief, ideally within 5-8 words, so it is easily visible and does not get cut off on the recipient’s email preview.
4. After setting the subject line, proceed with the email content. Start by greeting the recipients with a polite and professional opening, such as “Dear [Recipient’s Name]” or “Hello [Recipient’s Name].”
5. Clearly state the purpose of the email in the opening paragraph. Whether it’s an inquiry, a request, or an announcement, make sure the recipients understand the main objective of your message right from the beginning.
6. Organize the content of your email into paragraphs, using proper spacing and indentation. This helps improve readability and makes it easier for recipients to skim through the email if needed.
7. Be clear and concise in your writing. Use simple and straightforward language to convey your message effectively. Avoid excessive jargon or technical terms that may confuse the recipients.
8. When elaborating on your main points or providing details, consider using bullet points or numbering. This helps break down information into digestible chunks and promotes better understanding.
9. Use paragraphs to separate different topics or ideas. This makes it easier for recipients to follow the flow of your email and locate specific information if needed.
10. Before sending the email, review the content for any grammatical or spelling errors. Use the built-in spell-check feature of your email app to help you with this.
By focusing on the subject line and email content, you can ensure that your message is well-structured, engaging, and easy to comprehend. Now, let’s move on to the next step: attaching files to your email.
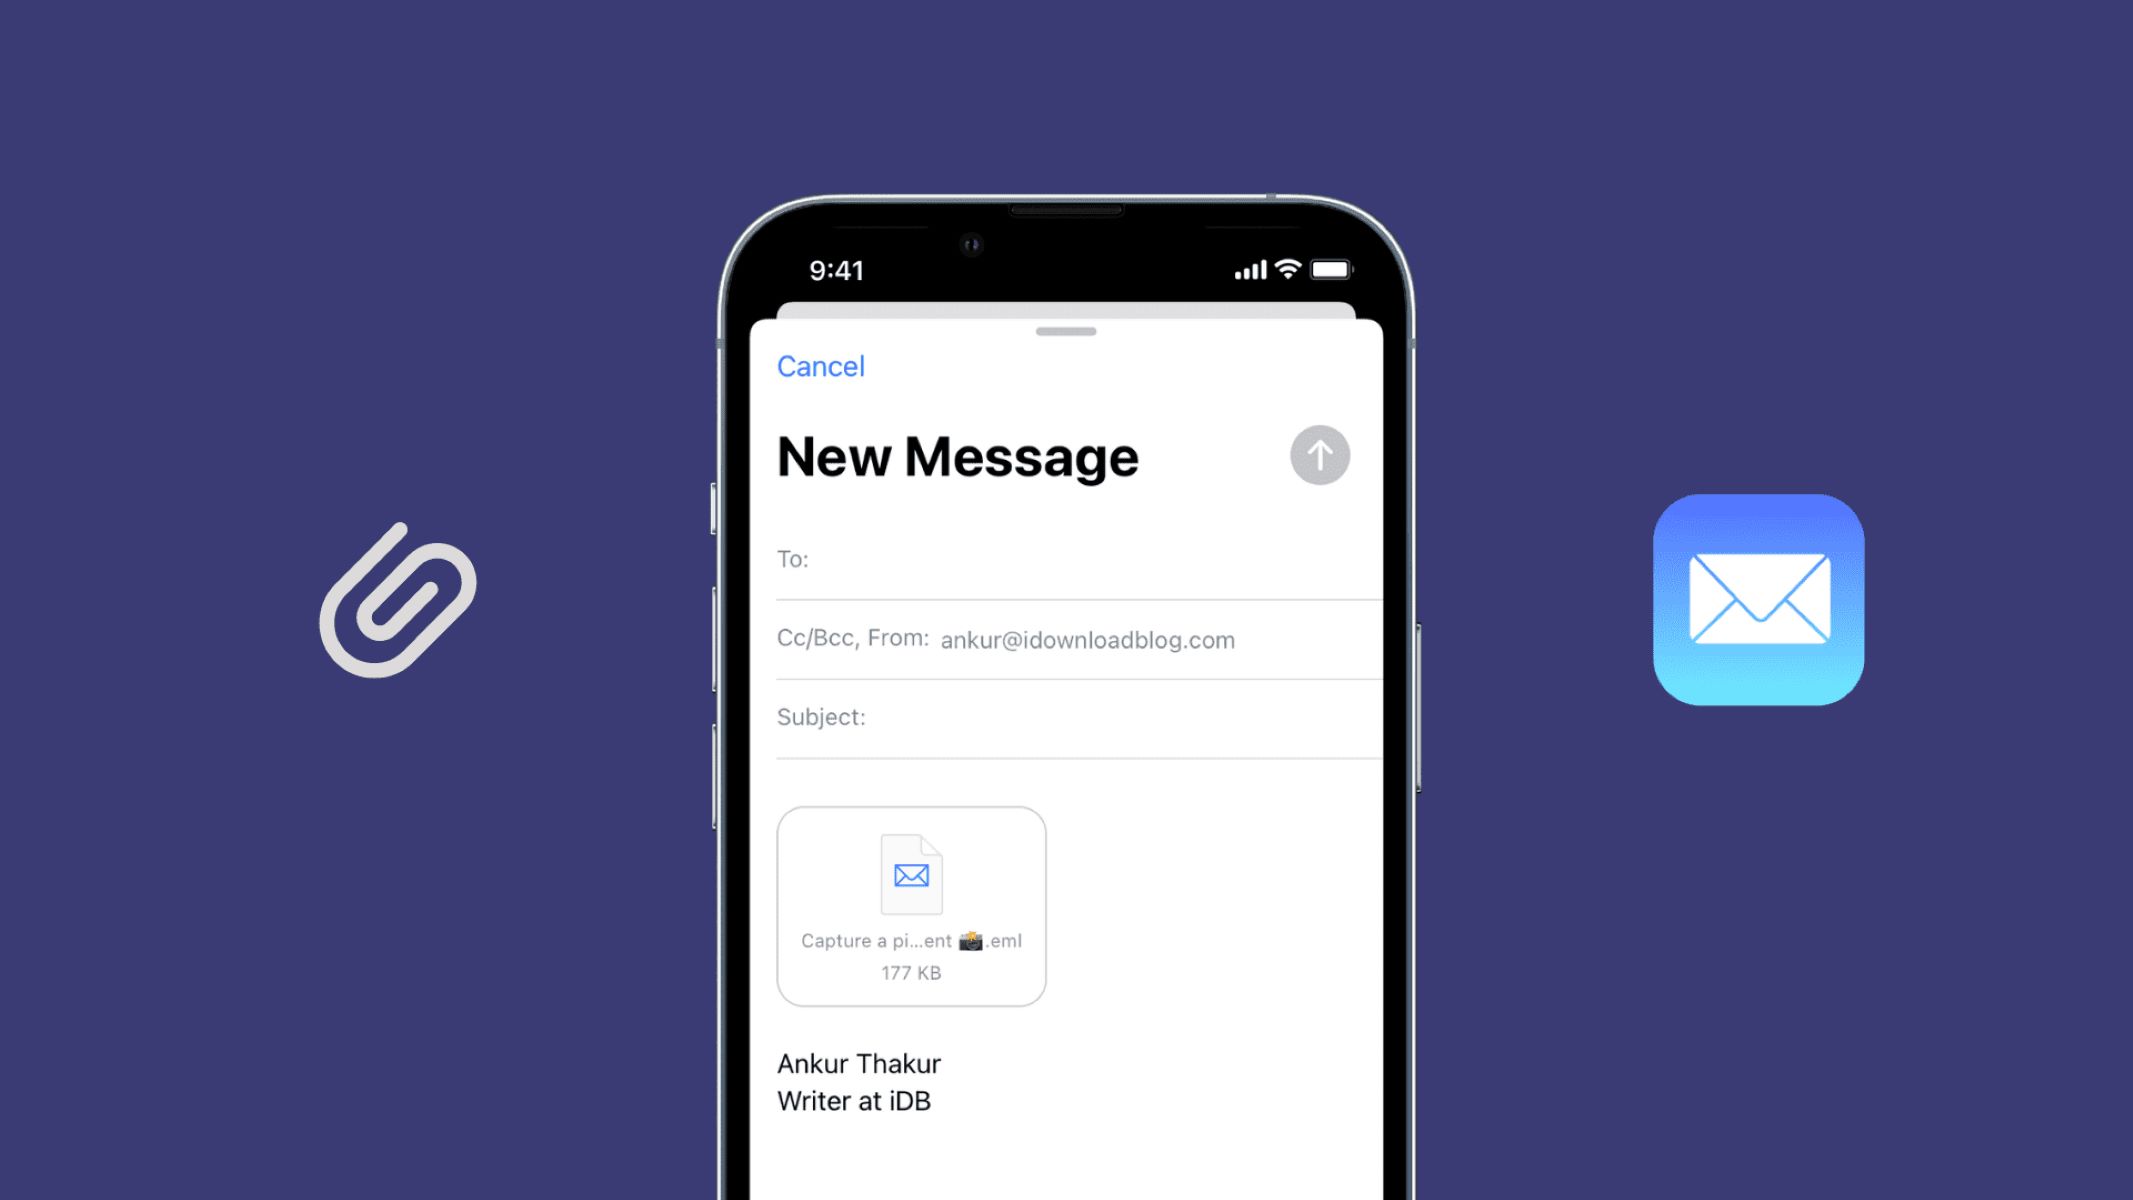
Step 5: Attaching files
Attaching files to your email allows you to share important documents, images, or any other files with the recipients. Follow these steps to attach files to your email:
1. While composing a new email, look for the attachment icon (usually represented by a paperclip) in the email toolbar or options menu. Tap on it.
2. Your phone’s file manager or gallery will open, allowing you to browse through your files and choose the file you want to attach. Navigate to the location where the file is saved.
3. Tap on the file you want to attach. The file will then be added to the email as an attachment. The name of the file will usually appear below the subject line or in a designated area of the email interface.
4. If you need to attach multiple files, you can repeat the process by tapping on the attachment icon again and choosing another file. Keep in mind that some email providers may have limitations on the size or number of attachments you can send.
5. Once all the desired files are attached, you can proceed with writing the remaining email content, such as the message or additional instructions related to the attachments.
6. Remember to keep the email file size within acceptable limits, as some recipients may have restrictions on the file size they can receive. If the file size exceeds the limit, consider compressing or resizing it to reduce the size.
7. To ensure that the recipients are aware of the attached files, you can mention them specifically in the email content. You might say something like, “Please find attached the meeting agenda and presentation slides…” This helps provide clarity and ensures that the recipients know what to expect.
8. Once you have finished composing the email and have attached all the necessary files, review everything to ensure accuracy and completeness.
9. If you need to remove an attached file, you can do so by tapping on the cross or delete icon next to the file name. This will remove the file from the email.
Attaching files to your email enhances your communication by allowing you to share relevant information or documents. Now that you have successfully attached files, let’s move on to the next step: adding additional options.
Step 6: Adding additional options
When sending an email from your phone, you have the option to customize additional settings to enhance your communication. Here are some additional options you can consider:
1. High priority: Depending on the email app you are using, you may have the option to set the email as high priority. This notifies the recipients that the email requires their immediate attention.
2. Read receipt: Some email apps offer the option to request a read receipt. When enabled, you will receive a notification when the recipient opens your email. This can be useful for keeping track of important messages.
3. Delivery options: Certain email apps allow you to set the time or date for the email to be delivered. This can be helpful if you want to schedule emails to be sent at specific times, especially for business or time-sensitive messages.
4. Attachments as links: Instead of attaching large files directly to the email, you can choose to upload them to a cloud storage service (such as Google Drive or Dropbox) and provide the recipients with a link to access them. This can help reduce the overall email size and ensure that the files are easily accessible.
5. Encryption: If you need to send sensitive or confidential information, consider using encryption options provided by your email app. Encryption ensures that your email content and attachments are secure and can only be accessed by the intended recipients.
6. Signature: Customize your email signature to include your name, job title, contact information, or any other relevant details. This allows recipients to easily identify who the email is from and provides a professional touch to your communication.
7. Reply options: Some email apps offer the ability to set default reply options. You can choose to have the reply sent to the original sender only or to all recipients of the email.
8. Auto-saving drafts: Many email apps have an auto-save feature that automatically saves your email drafts periodically. This ensures that you don’t lose any progress if your device unexpectedly shuts down or if you need to switch to another task temporarily.
Take advantage of these additional options to tailor your email to your specific needs and preferences. They can help streamline your communication and provide a more personalized touch. Now, let’s move on to the final step: sending the email.
Step 7: Sending the email
Now that you have composed your email, added recipients, attached any necessary files, and customized additional options, it’s time to send the email. Follow these steps to send your email from your phone:
1. Double-check the email content, subject line, and any attached files to ensure accuracy and completeness. Review for any grammatical or spelling errors that may have been missed during the composition process.
2. If the email app has a “Send” or “Send Email” button, tap on it to send the email immediately. Alternatively, some apps may have an icon that looks like an envelope or an arrow pointing upwards, which serves the same purpose.
3. Once you tap the send button, the email will be sent from your phone and delivered to the recipients. You may receive a confirmation message or a visual indication that the email has been sent successfully.
4. It’s important to note that the delivery time of your email may vary depending on factors such as network connectivity and the recipient’s email server. If you have requested a read receipt or scheduled delivery, make sure to keep an eye out for any corresponding notifications or confirmations.
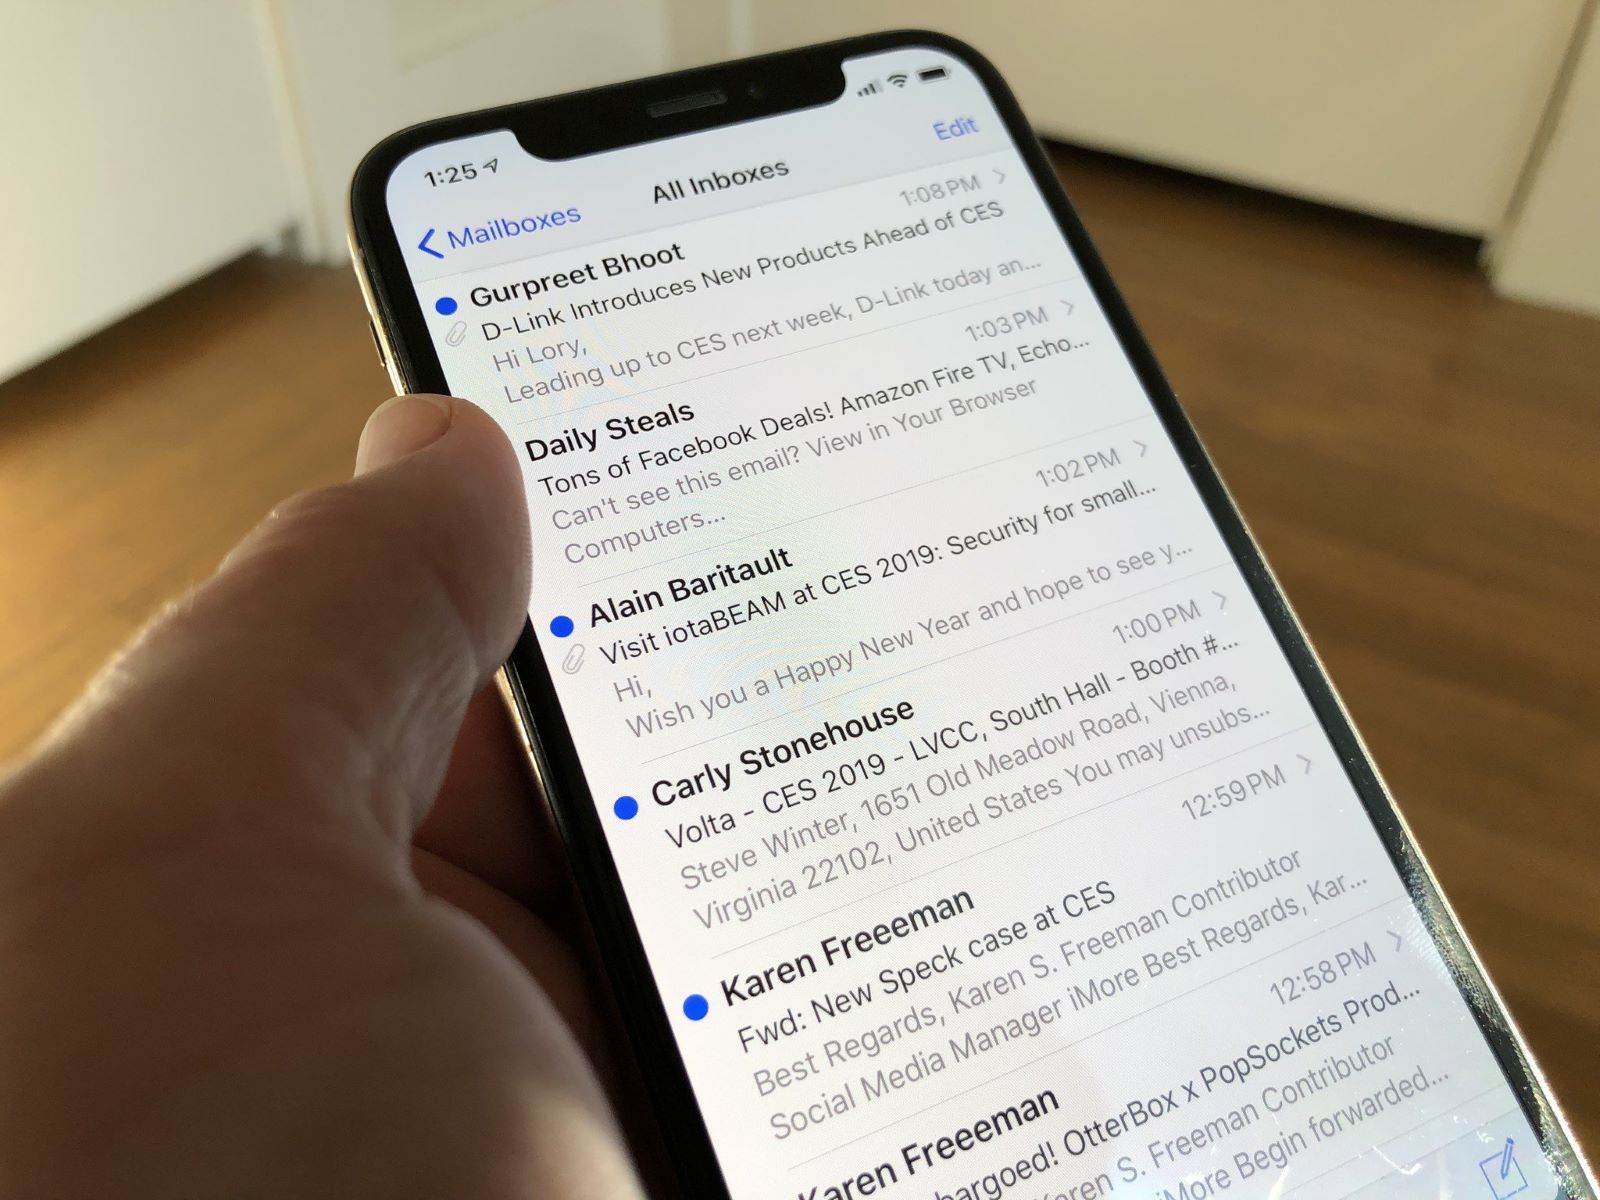
5. Once the email has been sent, it will appear in your Sent folder or a similar designated folder within your email app. This allows you to refer back to the email if needed or keep track of your outgoing messages.
6. If you realize you made a mistake or need to make any changes after sending the email, some email apps offer the option to recall or retract the email. However, this feature usually depends on multiple factors, including the email server and the recipient’s email client, so it may not always be available or effective.
By following these steps, you can ensure that your email is sent promptly and efficiently from your phone. Sending emails on the go allows for quick communication and helps you stay connected no matter where you are. Congratulations on successfully sending your email!
Conclusion
In today’s fast-paced world, the ability to send emails from your phone is a valuable tool that keeps you connected and productive, no matter where you are. By following the steps outlined in this guide, you can easily set up your email account on your phone, compose new emails, add recipients, set subject lines, attach files, customize additional options, and send your emails with ease.
Setting up your email account on your phone is a one-time process that establishes a direct connection between your phone and your email service provider. Once set up, you can conveniently access and manage your emails directly from your phone, saving you time and ensuring that you can stay on top of your communications.
When composing a new email, carefully consider the subject line to provide recipients with a clear understanding of the email’s purpose. Craft your email content with clarity, using proper formatting and organization techniques to facilitate readability. Attach relevant files to enhance your communication and reduce the need for additional emails or follow-up conversations.
Take advantage of additional options available in your email app to further tailor your communication, such as setting the priority level, requesting read receipts, scheduling email delivery, encrypting sensitive information, and personalizing your email signature. These options allow you to customize your email experience and ensure effective communication with your recipients.
Finally, when you are ready, send your email confidently, knowing that your message has been successfully delivered. Keep in mind that network connectivity and recipient email servers may affect delivery times. Monitor your sent folder or any corresponding notifications for confirmation of successful email transmission.
Sending emails from your phone provides flexibility and convenience, enabling you to stay connected and communicate efficiently while on the go. The ability to manage your email communications effectively is a valuable skill that enhances your productivity and professionalism in both personal and professional settings.
Now that you have mastered the art of sending emails from your phone, you can confidently stay connected, collaborate with others, and ensure your messages are received and understood. Embrace this powerful communication tool as you navigate through the digital landscape, and enjoy the convenience of sending emails from the palm of your hand.