Introduction
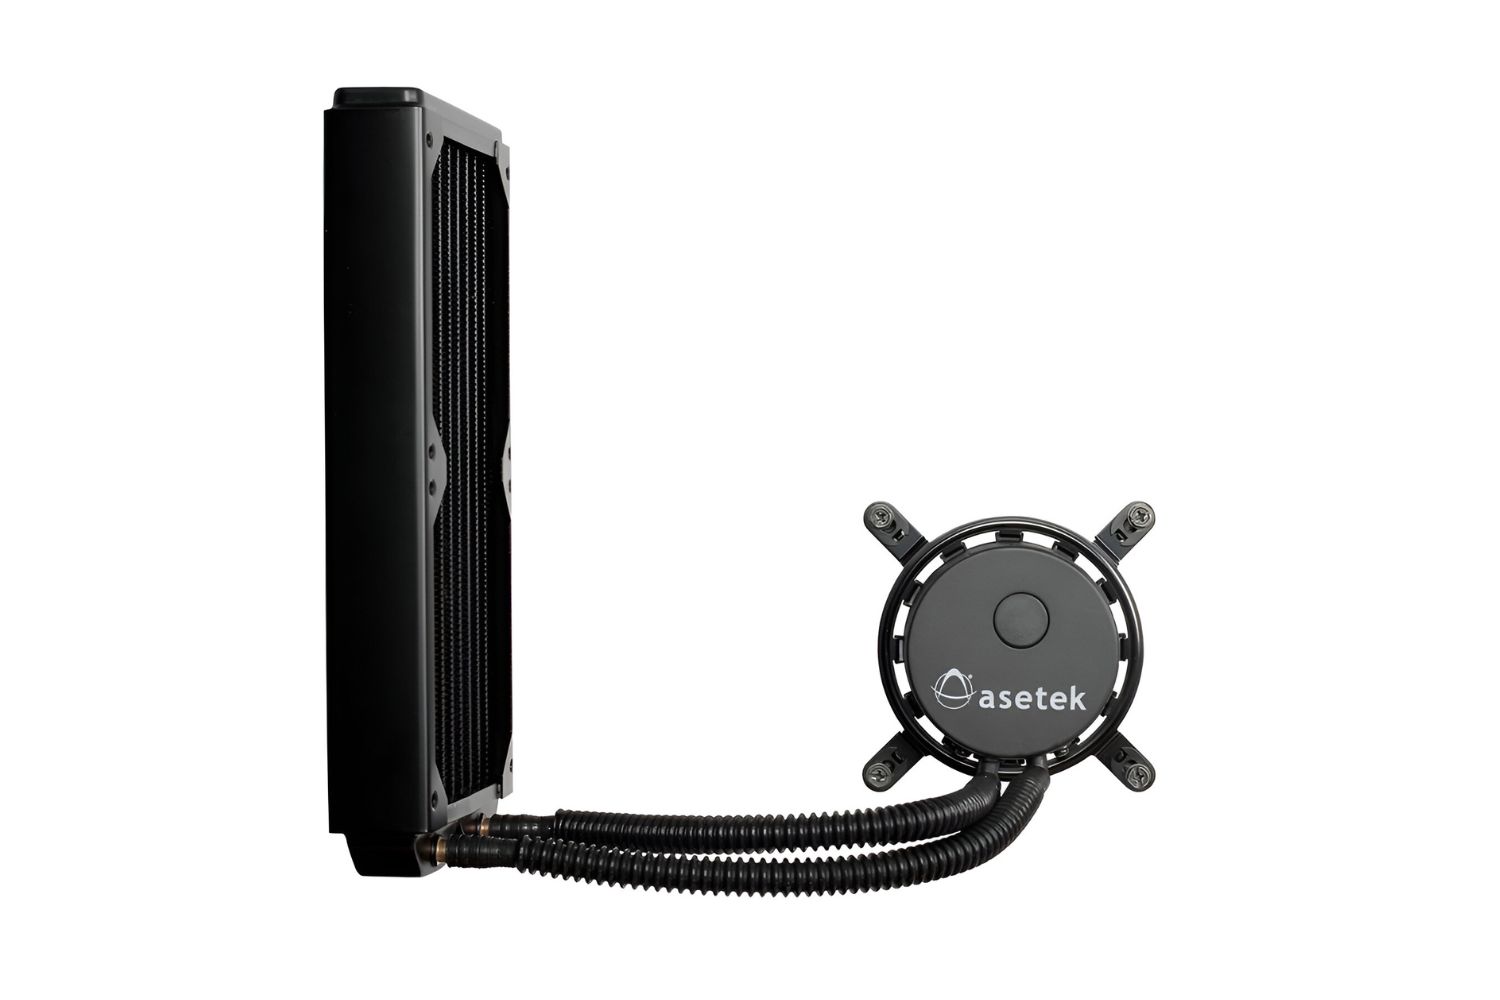
Removing a liquid CPU cooler can be a delicate process, but with the right tools and careful execution, it can be done safely. The Asetek 550LC 120mm liquid CPU cooler is a popular choice among many PC enthusiasts, known for its efficient cooling capabilities.
Whether you’re upgrading your cooler or performing maintenance on your computer, it’s important to follow the correct procedures to ensure a smooth removal process. This guide will walk you through the step-by-step instructions to safely remove the Asetek 550LC cooler from your system.
Before we begin, it’s essential to note that handling computer components requires caution and attention to detail. Ensure that you are working in a well-lit, static-free environment, and take necessary precautions to protect sensitive components. Additionally, if you are uncomfortable with performing these steps yourself, it’s always wise to seek the assistance of a professional.
In the following sections, we will outline the tools and materials needed for the removal process, as well as provide detailed instructions to guide you through each step. By the end of this guide, you’ll be equipped with the knowledge to safely remove the Asetek 550LC 120mm liquid CPU cooler and proceed with your PC maintenance or upgrade.
Tools and Materials Needed
Before you begin the process of removing the Asetek 550LC 120mm liquid CPU cooler, make sure you have the following tools and materials on hand:
-
Screwdriver set: You’ll need a set of screwdrivers, including both Phillips and flathead, to remove any screws securing the cooler to your CPU.
-
Thermal paste remover: Having thermal paste remover is crucial when removing the cooler, as it helps to ensure a clean surface for reapplication later on.
-
Lint-free cloth or paper towels: These materials are necessary to wipe away any thermal paste residue or debris from the CPU and surrounding area.
-
Isopropyl alcohol: This alcohol solution is commonly used to clean electronic components and is essential in properly preparing the CPU and radiator for reinstallation or the application of new thermal paste.
-
Anti-static wrist strap: Wearing an anti-static wrist strap can help mitigate the risk of damaging sensitive electronic components by safely grounding you during the process.
-
Anti-static mat or surface: Providing an anti-static mat or surface to work on further minimizes the chances of static electricity interfering with your computer’s components.
-
Replacement thermal paste: If you plan on reusing the Asetek 550LC or installing a new cooler, it’s important to have some high-quality thermal paste on hand for optimal heat transfer.
By having these tools and materials ready, you can ensure a smoother removal process and minimize the risk of damaging any components. It’s always a good practice to gather everything you’ll need before starting to avoid any unnecessary interruptions or delays.
Step 1: Power off your computer
Before you begin removing the Asetek 550LC 120mm liquid CPU cooler, it’s crucial to power off your computer completely. This step ensures your safety and prevents any potential damage to your hardware during the removal process.
Follow these steps to power off your computer:
-
Save any work and close all open applications to prevent data loss.
-
Click on the “Start” menu in Windows or the Apple menu on macOS, and select the “Shut Down” option. Alternatively, you can press and hold the power button until the computer turns off.
-
Wait for a few moments to ensure that the computer has completely powered down. You can verify this by checking for any indicator lights that may be on or listening for any fan or hard drive noise.
-
Once you’re sure that your computer is powered off, unplug the power cord from the power outlet. This step ensures that there is no electrical current running through the system, removing the risk of electric shock.
By following these steps, you can safely power off your computer and prepare it for the next steps in the removal process. Remember to exercise caution and be mindful of electrical hazards while working with your computer’s internal components.
Step 2: Disconnect the power cables
Once you have successfully powered off your computer, the next step is to disconnect the power cables to ensure a safe removal of the Asetek 550LC 120mm liquid CPU cooler. Follow these instructions to properly disconnect the power cables:
-
Locate the power supply unit (PSU) at the back of your computer tower. It is usually positioned at the top or bottom of the case.
-
Identify the power cables connected to the CPU cooler. These cables are typically labeled “CPU” or “CPU Power” and are connected near the top of the motherboard.
-
Gently grasp the connector and carefully wiggle it back and forth while firmly pulling it away from the motherboard to unplug it. Be cautious not to pull too hard, as this could damage the connectors or the motherboard itself.
-
Repeat this process for any additional power connectors that are attached to the CPU cooler.
Once you have disconnected all the necessary power cables, ensure that the cables are neatly placed and out of the way to avoid any interference during the remaining steps. This step is essential to prevent any accidental tugging or damage to other components when removing the Asetek 550LC cooler.
By following these instructions, you have now successfully disconnected the power cables from your CPU cooler, ensuring a safe and hassle-free removal process. Remember to handle the cables with care and exercise caution to avoid any unnecessary damage to your computer’s components.
Step 3: Remove the side panel
In order to access the Asetek 550LC 120mm liquid CPU cooler, you will need to remove the side panel of your computer case. Follow these steps to safely remove the side panel:
-
Ensure that your computer is still powered off and unplugged from the power source.
-
Locate the screws or fasteners securing the side panel to your computer case. These are typically located at the back or on the rear side of the case.
-
Using a screwdriver or appropriate tool, carefully remove the screws or fasteners holding the side panel in place. Set them aside in a safe place to avoid misplacing them.
-
Once the screws or fasteners are removed, gently slide the side panel towards the back of the case, away from the front panel.
-
Once the side panel is free, carefully lift it off and set it aside in a secure location.
With the side panel removed, you now have better access to the internal components of your computer, including the Asetek 550LC cooler. Take a moment to inspect the inside of the case and familiarize yourself with the layout and location of the cooler.
It’s important to note that different cases may have different mechanisms for removing the side panel. If you encounter any difficulties or have a unique case design, refer to the manufacturer’s documentation or online resources for specific instructions related to your case model.
By following these steps, you have successfully removed the side panel of your computer case, allowing for easier access to the Asetek 550LC liquid CPU cooler. Ensure that the side panel is stored in a safe place to avoid damage and to reattach it later when the removal process is complete.
Step 4: Locate the Asetek 550LC liquid CPU cooler
Now that you have removed the side panel of your computer case, it’s time to locate the Asetek 550LC 120mm liquid CPU cooler. Follow these steps to find the cooler:
-
Take a moment to visually inspect the inside of your computer case. Look for a large radiator with two hoses connected to it. The radiator is usually positioned near the top or rear of the case and is attached to the CPU through these hoses.
-
Trace the hoses from the radiator to the CPU socket on your motherboard. The CPU socket is usually located near the center of the motherboard and is where the processor is installed.
-
Identify the pump unit attached to the CPU socket. The pump unit is a small block or heatsink-like structure with a power cable connector. It is responsible for circulating the liquid coolant to cool the CPU.
Once you have located the Asetek 550LC liquid CPU cooler, familiarize yourself with its positioning and orientation. Take note of any additional attachments or mounting brackets that may be present and will need to be removed in the following steps.
It’s important to exercise care when handling the Asetek 550LC cooler and its components. The radiator, hoses, and pump unit are delicate and need to be handled gently to avoid any damage.
By following these steps, you have successfully located the Asetek 550LC liquid CPU cooler in your computer case. Understanding its positioning and components will make it easier to proceed with the next steps of the removal process.
Step 5: Unplug the fan connector
Now that you have located the Asetek 550LC liquid CPU cooler, the next step is to unplug the fan connector. This will allow you to detach the cooler from the motherboard and remove it safely. Follow these steps to unplug the fan connector:
-
Locate the fan connector on the pump unit of the Asetek 550LC cooler. It is usually a small, three or four-pin connector.
-
Gently grip the sides of the fan connector and carefully pull it straight out from the corresponding motherboard header. Be cautious not to apply excessive force or pull at an angle, as this could damage the connector or the motherboard.
-
Once the fan connector is unplugged, set it aside in a safe place. Take care not to misplace it, as you will need to reconnect it later if you decide to reinstall the Asetek 550LC cooler or install a replacement cooler.
It’s important to note that the fan connector may be secured with a locking mechanism or clip. If this is the case, you may need to release the lock or clip before attempting to unplug the fan connector.
By following these steps, you have successfully unplugged the fan connector from the Asetek 550LC liquid CPU cooler. This allows for easier removal of the cooler in the subsequent steps of the process. Ensure that you handle the fan connector with care to avoid any damage.
Step 6: Disconnect the radiator tubes
With the fan connector unplugged, it’s time to disconnect the radiator tubes from the Asetek 550LC liquid CPU cooler. This step will allow for the complete removal of the cooler from your system. Follow these steps to disconnect the radiator tubes:
-
Inspect the radiator and locate the tubes that are connected to it. These tubes are responsible for carrying the liquid coolant to and from the CPU.
-
Identify the fittings or connectors on the ends of the tubes where they attach to the radiator. There may be compression fittings, quick-release fittings, or other types of connectors.
-
Depending on the type of fittings, you may need to unscrew or release any locking mechanisms to detach the tubes from the radiator. Check for any screws, collars, or clips that need to be loosened or removed.
-
Gently twist or pull the tubes to disconnect them from the radiator. Take care not to use excessive force, as this could damage the fittings or cause leaks. If the tubes are stuck, you can try wiggling them gently while applying a small amount of pressure to loosen them.
-
Once the tubes are disconnected from the radiator, set them aside, ensuring they are positioned in a way that prevents any liquid from spilling out. You can use paper towels or cloth to catch any drips, if necessary.
It’s worth mentioning that liquid may still be present inside the tubes even after disconnecting them. Take care not to tilt or shake the cooler excessively to avoid any spills or leaks.
By following these steps, you have successfully disconnected the radiator tubes from the Asetek 550LC liquid CPU cooler. This prepares the cooler for removal in the upcoming steps. Remember to handle the tubes and fittings with care to prevent any damage or leaks.
Step 7: Remove the mounting screws
With the radiator tubes disconnected, it’s time to remove the mounting screws that secure the Asetek 550LC liquid CPU cooler to the motherboard. Follow these steps to safely remove the mounting screws:
-
Inspect the pump unit of the Asetek 550LC cooler and locate the mounting screws. These screws are typically positioned around the CPU socket and secure the cooler in place.
-
Using a screwdriver, carefully loosen and unscrew each mounting screw in a counterclockwise direction. Take your time and ensure that you have a firm grip on the screwdriver to avoid slipping and potentially damaging the motherboard or screws.
-
As you unscrew each mounting screw, hold onto the Asetek 550LC cooler to prevent it from falling or moving while still attached to the motherboard. Support it with your other hand or place it on a stable surface.
-
Continue to remove each mounting screw until all of them are fully unscrewed and released from the motherboard.
It’s important to note that different coolers may have varying numbers and arrangements of mounting screws. Refer to the manufacturer’s instructions or documentation for specific details related to your Asetek 550LC cooler.
By following these steps, you have successfully removed the mounting screws from the Asetek 550LC liquid CPU cooler. The cooler should now be free from the motherboard, though it may still be connected to the CPU by thermal paste. We will address the removal of the cooler itself in the next step.
Step 8: Gently lift and remove the Asetek 550LC cooler
With the mounting screws removed, it’s time to carefully lift and remove the Asetek 550LC liquid CPU cooler from the motherboard. Follow these steps to safely complete this process:
-
Hold the Asetek 550LC cooler firmly by the pump unit. Ensure you have a secure grip to prevent any accidental drops or damage.
-
Gently lift the cooler straight up from the CPU socket. Take care to lift it evenly and avoid any excessive twisting or tilting that could cause strain on the CPU or other components.
-
As you lift the cooler, you may feel some resistance due to the thermal paste adhering the cooler to the CPU. Slowly and gently wiggle the cooler from side to side, using a gentle pulling motion, to help break the bond between the cooler and the CPU.
-
Once the cooler is loose, continue to lift it until it is completely detached from the motherboard. Place it on a clean, dry, and static-free surface.
It’s important to note that the thermal paste on the CPU may be sticky and could spread or drip if not handled carefully. Avoid touching or spreading the thermal paste as much as possible.
By following these steps, you have successfully lifted and removed the Asetek 550LC liquid CPU cooler from the motherboard. Take a moment to inspect the CPU and ensure that the thermal paste has been properly lifted with the cooler, minimizing the need for additional cleaning.
Step 9: Clean the CPU and surrounding area
Now that the Asetek 550LC cooler has been removed, it’s time to clean the CPU and the surrounding area before proceeding with any further steps. Follow these steps to effectively clean the CPU and ensure proper heat transfer:
-
Using a lint-free cloth or paper towel, gently wipe away any excess thermal paste that may be present on the surface of the CPU. Take care not to apply excessive pressure or allow any debris to come into contact with the pins or delicate components.
-
Apply a small amount of thermal paste remover to a clean portion of the cloth or a cotton swab. Carefully rub the surface of the CPU to remove any remaining traces of thermal paste. Be thorough but gentle, ensuring that all remnants are removed.
-
Inspect the surrounding area of the CPU for any thermal paste residue or debris. Use the cloth or cotton swab with a small amount of thermal paste remover to clean the area surrounding the CPU socket and any adjacent components.
-
Once the CPU and the surrounding area are clean, use isopropyl alcohol and a clean, lint-free cloth or paper towel to wipe away any remaining residue and ensure a pristine surface. This step helps to create an optimal bond between the CPU and the new cooler or freshly applied thermal paste.
It’s important to note that handling the CPU should be done with extreme care to avoid damaging the pins or other sensitive components. Make sure to ground yourself and handle the CPU by its edges, avoiding any direct contact with the pins or the bottom surface.
By following these steps, you have successfully cleaned the CPU and the surrounding area, preparing it for the installation of a new cooler or the reapplication of thermal paste.
Step 10: Install a new cooler or reapply thermal paste
With the CPU and the surrounding area cleaned, you are now ready to either install a new cooler or reapply thermal paste on the CPU before reinstalling the Asetek 550LC liquid CPU cooler. Follow these steps to complete this process:
-
If you are installing a new cooler, carefully follow the manufacturer’s instructions provided with the new cooler. Each cooler may have specific requirements and installation steps that need to be followed.
-
If you are reapplying thermal paste, apply a small amount, about the size of a pea, to the center of the cleaned CPU surface. Spread the thermal paste evenly across the surface using a plastic card or a thermal paste spreader. The goal is to achieve a thin and uniform layer of thermal paste.
-
If you are reinstalling the Asetek 550LC cooler, align the pump unit with the CPU socket, ensuring that it is properly positioned. Slowly lower the cooler onto the CPU, making sure that the screws on the pump unit align with the mounting holes on the motherboard.
-
Once the cooler is in place, begin securing it by reattaching the mounting screws. Use a screwdriver to tighten the screws in a diagonal pattern, ensuring even pressure and secure attachment of the cooler to the CPU socket.
It’s crucial to refer to the manufacturer’s instructions or documentation specifically tailored to the cooler you are installing to ensure a proper and secure installation.
By following these steps, you have successfully installed a new cooler or reapplied thermal paste to the CPU. This step is critical to maintaining proper heat transfer and ensuring the longevity and performance of your CPU.
Step 11: Reassemble your computer
Now that you have completed the CPU cooler installation or thermal paste reapplication, it’s time to reassemble your computer and get it up and running again. Follow these steps to properly reassemble your computer:
-
Take a moment to ensure that the CPU cooler installation or thermal paste application was successful and that everything is securely in place. Double-check that all screws are tightened, connectors are properly plugged in, and cables are organized.
-
If you removed any additional components during the removal process, such as graphics cards or RAM modules, reattach them to their respective slots following the manufacturer’s instructions. Ensure a secure connection by firmly pressing them into place.
-
Reattach the side panel to the computer case by aligning it with the case and sliding it back into position. Secure it with the screws or fasteners that were removed earlier, tightening them in a clockwise direction.
-
Reconnect the power cables to the appropriate connectors on the motherboard and other components, ensuring a secure and proper fit. Refer to the labels on the cables or consult the motherboard manual for guidance.
-
Plug in your computer and power it on. Listen for any unusual noises or observe any error messages on the screen. If everything appears to be functioning properly, proceed to check the CPU temperature and monitor it for any abnormalities using appropriate software.
Once you have checked that your computer is operating smoothly, you have successfully reassembled your computer after removing and reinstalling the Asetek 550LC liquid CPU cooler or reapplying thermal paste. Take a moment to ensure that all components are functioning correctly and that the CPU temperature is within acceptable limits.
Congratulations! You have completed the process of safely removing and reassembling your computer’s CPU cooler. Enjoy the improved cooling performance and the optimized functionality of your system.
Conclusion
Removing and reinstalling a CPU cooler, such as the Asetek 550LC 120mm liquid CPU cooler, or reapplying thermal paste, is a task that requires caution and attention to detail. Following the steps outlined in this guide can help you safely navigate the process and ensure optimal cooling performance for your computer.
Remember to always power off your computer and disconnect the power cables before beginning any work on the CPU cooler. Take your time to locate the cooler, unplug the fan connector, disconnect the radiator tubes, remove the mounting screws, and lift the cooler carefully from the CPU. Clean the CPU and the surrounding area before installing a new cooler or reapplying thermal paste, and then reassemble your computer, ensuring that all components are securely in place and cables are properly connected.
Throughout the entire process, exercise caution, handle components carefully, and follow any specific instructions provided by the cooler manufacturer. It’s also a good practice to ground yourself and work in a static-free environment to avoid damaging sensitive electronic components.
By successfully completing these steps, you can maintain the longevity and performance of your CPU and ensure that it operates within optimal temperature ranges. Proper cooling is crucial for the stability and reliability of your computer, especially if you engage in resource-intensive tasks such as gaming, video editing, or 3D rendering.
If you feel unsure or uncomfortable performing these steps yourself, it’s always wise to seek the assistance of a professional technician who can safely handle the process for you.
We hope this guide has provided you with the necessary knowledge and guidance to safely remove and reinstall a CPU cooler or reapply thermal paste. Your computer will thank you for the improved cooling efficiency, which can lead to better performance and reliability.