How To Rotate Screen PC
Introduction
Have you ever found yourself needing to rotate your screen on a PC? Whether you want to change the orientation for better viewing, accommodate a different setup, or simply solve a display issue, rotating your screen can be a useful solution.
In this article, we will explore various methods to rotate the screen on your PC. You don’t need to be a tech guru to follow these steps, as we will guide you through each method with clear instructions. So, let’s dive in and learn how to rotate your PC screen easily and efficiently.
Before we get started, it’s important to note that the specific steps may vary slightly depending on your operating system and graphics driver. However, the underlying principles remain the same, so you should be able to adapt these methods to your specific setup.
Now, without further ado, let’s explore the different ways to rotate your screen on a PC.
Step 1: Check Screen Orientation Settings
The first step in rotating your PC screen is to check the screen orientation settings. Most operating systems provide an option to adjust the display orientation, allowing you to rotate the screen to your desired position.
Here’s how you can check the screen orientation settings:
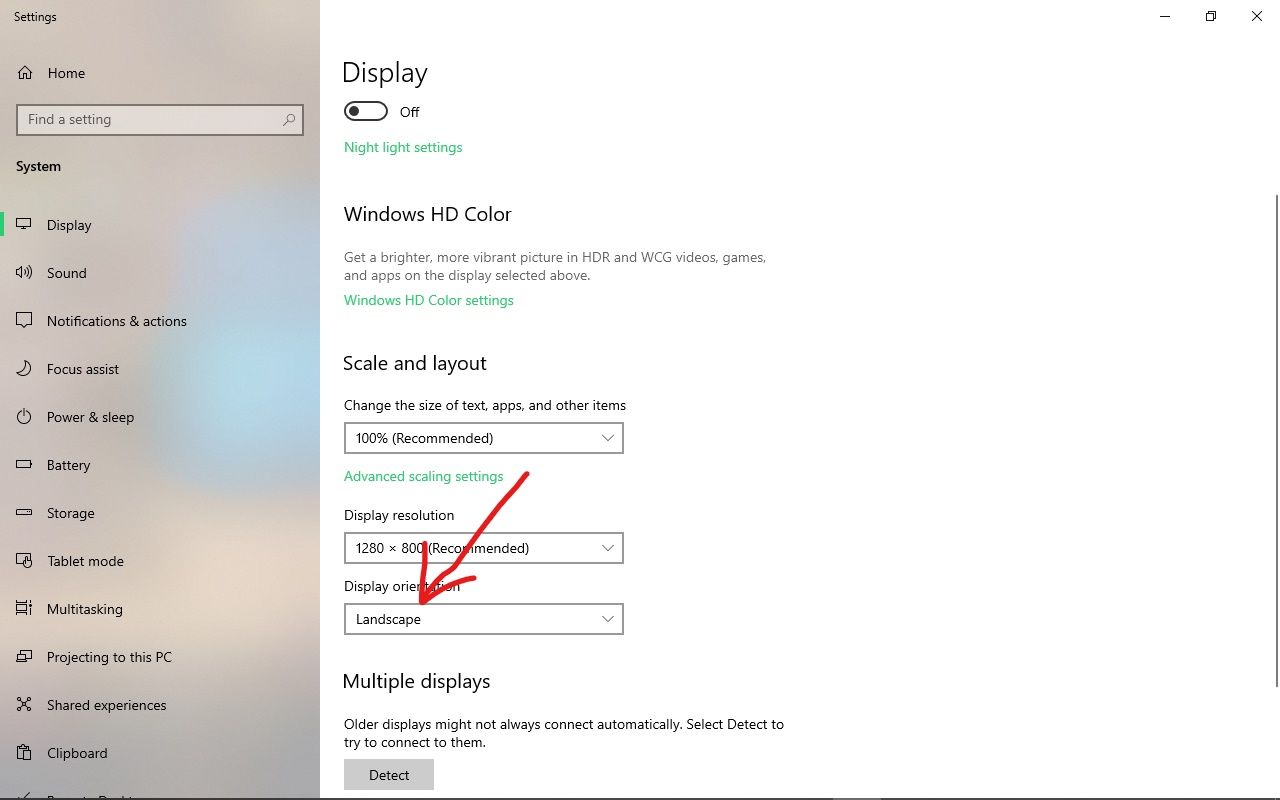
- Right-click on the desktop and select “Display settings” from the context menu.
- In the Display settings window, navigate to the “Orientation” drop-down menu.
- Click on the drop-down menu and select the desired screen orientation option, such as “Portrait,” “Landscape,” “Portrait (flipped),” or “Landscape (flipped).”
- Click on “Apply” to save the changes.
Once you have selected the appropriate orientation, the screen will rotate accordingly. If you find that the desired orientation is not available in the drop-down menu, don’t worry! There are other methods you can try to rotate your screen.
Checking the screen orientation settings is the simplest and most straightforward method to rotate your screen. However, if this method doesn’t work for you, don’t worry! We have several alternative methods that you can try in the following steps.
Step 2: Rotate Screen Using Keyboard Shortcuts
If you’re looking for a quick and easy way to rotate your PC screen, using keyboard shortcuts can be a convenient option. Many graphics drivers and operating systems offer specific key combinations that allow you to rotate the screen instantly.
Here’s how you can rotate the screen using keyboard shortcuts:
- Hold down the “Ctrl” and “Alt” keys on your keyboard.
- While holding these keys, press one of the arrow keys (up, down, left, or right) to rotate the screen accordingly.
For example, if you want to rotate the screen 90 degrees to the right, you would hold down “Ctrl” and “Alt” and press the right arrow key.
If the screen does not rotate with the first key combination you try, it’s possible that your graphics driver or operating system uses a different set of keyboard shortcuts. In that case, you can try the following:
- Hold down “Ctrl”, “Alt”, and the “Shift” keys together, then press one of the arrow keys.
- Alternatively, try pressing “Ctrl” and “Alt” along with the “R” or “P” keys, as these combinations are commonly used by some graphics drivers.
Experiment with these keyboard shortcuts until you find the combination that works for your system. Once the screen rotates, you can release the keys, and your new screen orientation will be set.
Using keyboard shortcuts is a quick and efficient way to rotate your PC screen without having to access any settings menus. However, if this method doesn’t work or is not available on your system, don’t worry! There are still other methods to try which we will cover in the following steps.
Step 3: Rotate Screen Using Display Settings
If the previous methods didn’t work or you prefer a more detailed approach, you can rotate your PC screen using the display settings in your operating system. This method allows you to customize various display parameters, including screen orientation.
Follow these steps to rotate your screen using display settings:
- Right-click on the desktop and select “Display settings” from the context menu.
- In the Display settings window, scroll down to find the “Orientation” drop-down menu.
- Click on the drop-down menu and select the desired screen orientation, such as “Portrait,” “Landscape,” “Portrait (flipped),” or “Landscape (flipped).”
- Preview the orientation by clicking on the “Apply” button. If you’re satisfied with the changes, click on “Keep changes” to make them permanent.
By using the display settings, you can also adjust other parameters, such as resolution and scaling, to further customize your display experience.
Keep in mind that the exact steps and options may vary depending on your operating system version and graphics driver. However, the concept of adjusting screen orientation through the display settings should be similar across different systems.
Rotating the screen through the display settings gives you more flexibility and control over your display preferences. However, if this method doesn’t provide the desired results, there are still alternative methods to try, which we will explore in the following steps.
Step 4: Use Graphics Driver Control Panel to Rotate Screen
If you have an advanced graphics driver installed on your PC, you may have access to a dedicated control panel that offers additional customization options, including screen rotation. This method allows you to utilize the features provided by your graphics driver to rotate the screen.
Here’s how you can use the graphics driver control panel to rotate your screen:
- Right-click on the desktop and look for an option that says “Graphics Options,” “Graphics Properties,” or something similar. This option will open the control panel specific to your graphics driver.
- Navigate through the control panel and look for a section related to display settings.
- In the display settings section, locate the option to adjust screen orientation. It may be listed as “Rotation,” “Orientation,” or something similar.
- Click on the appropriate option and select the desired screen rotation, such as 90 degrees, 180 degrees, or 270 degrees.
- Apply the changes and check if the screen rotates accordingly. If the changes are satisfactory, save the settings.
Since the control panel interface and options can vary between different graphics drivers, it’s important to explore the control panel thoroughly to find the specific section for adjusting screen orientation.
If you’re unsure about how to access the graphics driver control panel or if the control panel is not available on your system, you may need to update your graphics driver or consult the manufacturer’s documentation for further guidance.
Using the graphics driver control panel provides advanced customization options for screen orientation. However, if this method is not applicable to your system or doesn’t yield the desired results, don’t worry! There’s still one more method we can explore in the next step.
Step 5: Rotate Screen Using Third-party Software
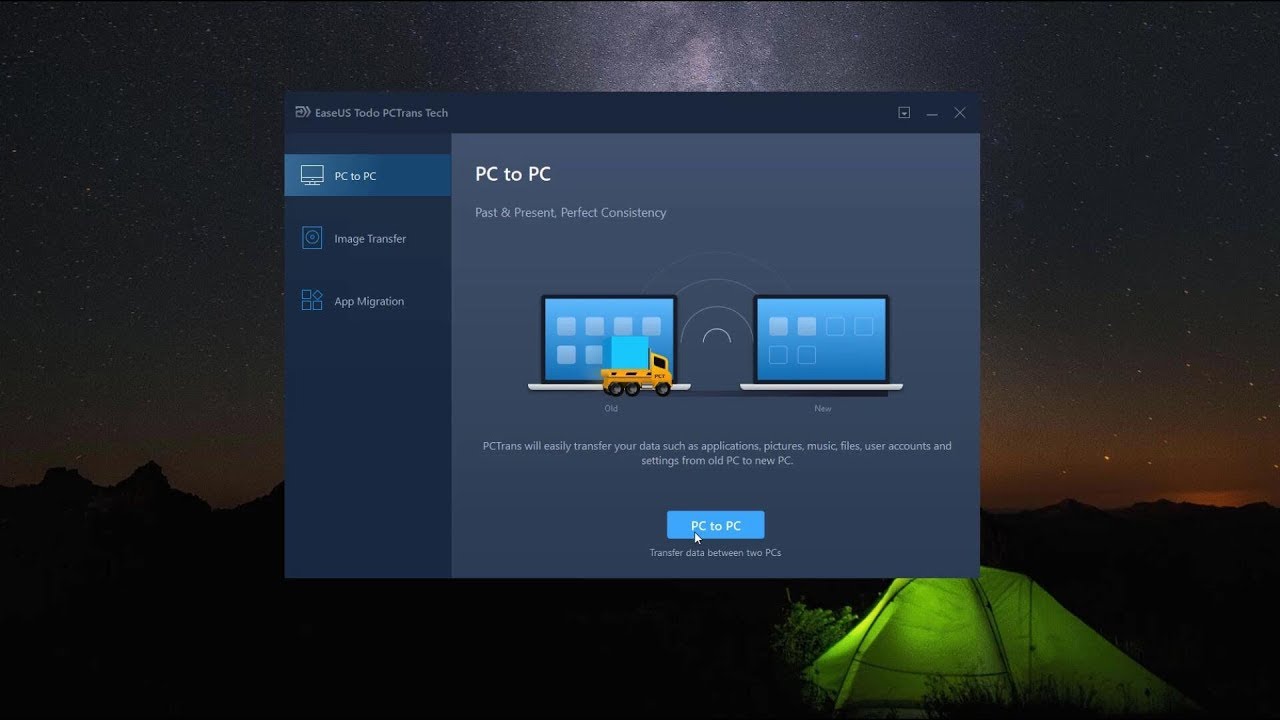
If the previous methods didn’t work for you or you’re looking for additional options and features, using third-party software can be a viable solution to rotate your PC screen. There are several third-party applications available that specialize in screen rotation and provide advanced functionalities.
Here’s how you can rotate your screen using third-party software:
- Research and choose a reliable third-party software that suits your needs. Look for user reviews and ratings to ensure its effectiveness and compatibility with your system.
- Download and install the software on your PC.
- Launch the software and navigate to the screen rotation settings.
- Select the desired screen orientation option.
- Apply the changes and check if the screen rotates accordingly.
Third-party software often offers additional features, such as hotkey customization, multi-monitor support, and automatic rotation based on screen orientation sensors. These features can enhance your screen rotation experience and provide more flexibility.
Remember, when using third-party software, it’s essential to download it from reputable sources to ensure the software’s security and avoid potential malware or compatibility issues.
If you encounter any difficulties or issues with the third-party software, consult their support documentation or reach out to the software developer’s support team for assistance.
By leveraging third-party software, you can access advanced screen rotation functionalities that may not be available through the built-in options of your operating system or graphics driver.
Conclusion
Rotating your PC screen can be a practical solution to enhance your viewing experience, accommodate different setups, or troubleshoot display issues. In this article, we explored five different methods to rotate your screen on a PC.
We started by checking the screen orientation settings, which is the simplest way to adjust the screen rotation. If that didn’t work, we explored using keyboard shortcuts for a quick and easy solution. Additionally, we delved into using the display settings in your operating system to fine-tune the screen orientation. For users with advanced graphics drivers, we discussed using the graphics driver control panel to access more customization options. Finally, we touched upon the option of utilizing third-party software for advanced features and functionalities.
Remember, the specific steps and options might vary depending on your operating system, graphics driver, and installed software. It’s essential to explore the options available to you and adapt the methods accordingly.
By following these methods, you can easily rotate your PC screen to the desired orientation and improve your overall computing experience. Whether you’re a regular user, a gamer, or a professional, having the ability to adjust your screen rotation can make a significant difference in your productivity and enjoyment.
We hope this article has provided you with the necessary guidance to rotate your PC screen successfully. Experiment with the different methods and find the one that works best for you. Enjoy your new screen orientation!


