Introduction
Resetting a gaming laptop is often necessary to resolve various issues such as software glitches, performance slowdowns, or simply to start fresh. It can help ensure optimal performance and a smooth gaming experience. However, it is essential to approach the reset process carefully to avoid data loss and potential damage to your laptop.
In this article, we will guide you through the steps required to reset your gaming laptop. We will cover both soft and hard reset methods, as well as additional steps such as reinstalling the operating system, updating drivers and software, and restoring your backed-up data.
Before proceeding with the reset, it is crucial to back up any important files, documents, or game saves. Backing up your data will prevent permanent loss and allow you to easily restore it once the reset is complete. You can use external storage devices such as USB drives or cloud storage services to keep your files safe.
Once you have backed up your data, it is recommended to disconnect all external devices such as controllers, headphones, or any other peripherals. This will ensure a smooth reset process and prevent any potential compatibility issues.
Now, let’s dive into the different methods you can use to reset your gaming laptop and get it back to optimal performance!
Back Up Your Data
Before proceeding with any reset method, it is crucial to back up your data to prevent permanent loss. Resetting your gaming laptop may erase all files, settings, and applications, so taking the time to create a backup is essential.
There are several ways to back up your data. One option is to use an external storage device such as a USB drive or an external hard drive. Simply connect the device to your laptop and copy all important files and folders onto it. Make sure to include personal documents, photos, videos, and any other data you want to keep safe.
Another option is to utilize cloud storage services. Popular options include Google Drive, Dropbox, or Microsoft OneDrive. These services offer a certain amount of free storage space, with the option to purchase additional storage if needed. Simply upload your files to the cloud and ensure they are synced properly.
When backing up your data, it is important to organize and label your files appropriately. This will make it easier to locate and restore specific files after the reset. Consider creating separate folders for documents, photos, and videos, or organizing them based on categories or projects.
It is also a good idea to create a system image backup, especially if you want to restore your laptop to its current state after the reset. A system image backup captures the entire operating system, including installed programs and settings. This can be done using built-in backup tools such as Windows Backup and Restore or third-party software like Macrium Reflect.
Once you have successfully backed up all your important data, double-check that everything has been copied correctly and ensure you can access your files from the backup device or cloud storage. This will provide peace of mind during the reset process, knowing that your valuable data is secure.
The next step is to disconnect all external devices from your gaming laptop before proceeding with the reset. This will ensure a smoother and more reliable reset process, as certain peripherals or devices may cause compatibility issues during the reset.
Disconnect All Devices
Before initiating the reset process on your gaming laptop, it is essential to disconnect all external devices connected to it. This includes peripherals such as gaming controllers, headsets, external monitors, and any other USB devices.
Disconnecting external devices ensures a smooth and uninterrupted reset process without any potential compatibility issues. Sometimes, certain devices may interfere with the reset process or cause software conflicts that can affect the overall performance of your laptop after the reset.
Unplug any USB devices, including flash drives or external hard drives, that may be connected to your gaming laptop. These devices can be safely disconnected and reconnected after the reset process is complete.
If your laptop is connected to an external monitor through an HDMI or DisplayPort cable, disconnect it as well. This will prevent any resolution or display-related issues during the reset process.
Additionally, if you have any wired gaming peripherals such as a gaming mouse or keyboard connected to your laptop, it is recommended to disconnect them too. These peripherals may have specialized software or drivers installed, which could potentially interfere with the reset process.
Remember to carefully label and organize all the disconnected cables and peripherals to make it easier to reconnect them properly after the reset. This will help you avoid any confusion or frustration when setting up your gaming laptop again.
By disconnecting all devices before initiating the reset process, you are ensuring a clean and hassle-free reset. This will allow your laptop to be reset effectively, without any external factors causing potential disruptions or errors.
Perform a Soft Reset
A soft reset is a relatively simple method to reset your gaming laptop without erasing all your files and applications. It is a great first step to troubleshoot and resolve minor software-related issues that may be impacting your laptop’s performance.
To perform a soft reset, follow these steps:
- Save any open documents or files you are currently working on. It is essential to ensure that you don’t lose any unsaved data during the reset process.
- Close any running applications and programs. This will prevent any conflicts or errors during the reset.
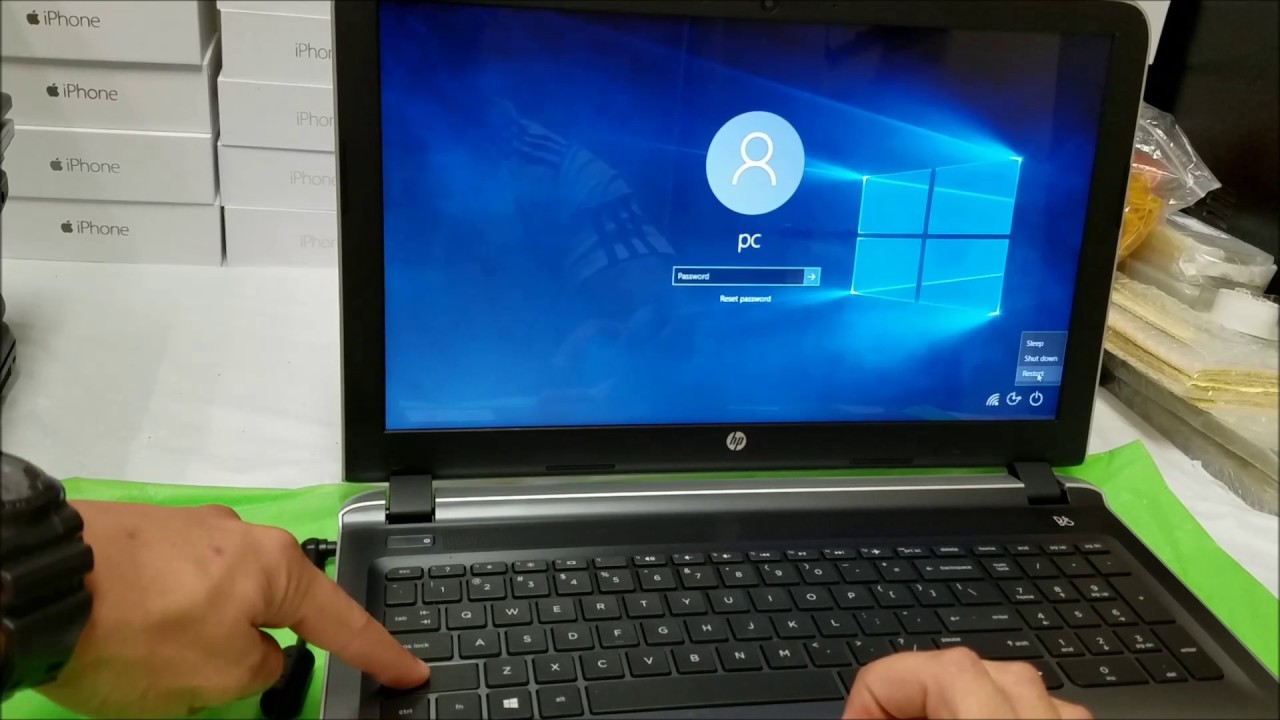
- Click on the “Start” button and select the “Restart” option from the power menu. Alternatively, you can press the Windows key on your keyboard, followed by the “Power” button, and select “Restart”.
- Your laptop will now begin the reboot process. Wait patiently for the system to restart.
- Once your laptop has restarted, you will be directed back to the login screen. Enter your credentials to log in to your account.
Performing a soft reset can help resolve temporary issues such as software glitches, slow performance, or unresponsive applications. It is recommended to try this method before moving on to more drastic steps like a hard reset or reinstallation of the operating system.
If you notice that the issues persist even after a soft reset, it may be necessary to proceed with a more extensive reset method to address the underlying problems.
Remember, a soft reset does not remove any personal files or installed applications. It simply restarts the system and clears temporary data, which can help refresh the laptop’s overall performance.
Perform a Hard Reset
If you are experiencing persistent issues with your gaming laptop, a hard reset may be necessary. A hard reset involves restoring your laptop to its original factory settings, wiping out all personal files, applications, and settings in the process. This method provides a clean slate and is particularly useful when dealing with severe software or performance issues.
Before proceeding with a hard reset, make sure you have backed up all important files and data, as they will be permanently deleted. Once you have done that, follow these steps to perform a hard reset:
- Click on the “Start” button and select the “Settings” option (represented by a gear icon) from the menu.
- In the Settings window, select the “Update & Security” option.
- In the left sidebar, choose the “Recovery” option.
- Under the “Reset this PC” section, click on the “Get started” button.
- You will be presented with two options: “Keep my files” and “Remove everything”. Select the option that suits your needs. If you want to completely wipe your laptop and start from scratch, choose “Remove everything”.
- Follow the on-screen instructions to proceed with the reset process. Your laptop will restart and begin the reset procedure.
- During the reset, Windows may prompt you to choose between fully cleaning the drive or just removing your files. Select the option that aligns with your preferences.
- Wait for the reset process to complete. This may take some time, so be patient and avoid interrupting the process.
- Once the reset is finished, your gaming laptop will restart, and you will need to go through the initial setup process, such as choosing your region, language, and creating a new user account.
Performing a hard reset will remove all personal files, applications, and settings from your gaming laptop. It is a drastic step, but it can effectively resolve persistent issues that couldn’t be resolved with a soft reset or other troubleshooting methods.
Remember to reinstall your apps and restore your backed-up data after the hard reset is complete to regain full functionality and personalize your gaming experience.
Reinstall the Operating System
If you have tried soft reset and hard reset methods but are still facing significant issues with your gaming laptop, it may be necessary to reinstall the operating system. Reinstalling the operating system is a more extensive process that involves wiping the entire system and starting fresh with a clean installation of the operating system.
To reinstall the operating system, follow these steps:
- Before proceeding, ensure you have backed up all your important files and data.
- Check if your laptop came with a recovery partition or a recovery disk. If so, you can use these resources to initiate the reinstallation process. Consult your laptop’s documentation for specific instructions on accessing the recovery options.
- If you don’t have a recovery partition or disk, you can download the official installation media for your operating system from the manufacturer’s website. This media is typically available as an ISO file that you can burn to a USB drive or DVD.
- Insert the USB drive or DVD containing the installation media into your laptop.
- Restart your laptop and access the boot options menu. This can usually be done by pressing a specific key (such as F12 or Esc) repeatedly during the boot-up process. Select the option to boot from the USB drive or DVD.
- Follow the on-screen prompts to initiate the installation process and select the appropriate options, such as language preferences and installation type.
- When prompted, choose the option to perform a clean installation, which will format your hard drive and remove all existing data.
- Allow the installation process to complete. This may take some time, so be patient and avoid interrupting the process.
- Once the operating system is successfully installed, you will need to go through the initial setup process, including setting up user accounts, choosing privacy settings, and installing necessary drivers and updates.
- After the setup is complete, remember to reinstall your applications and restore your backed-up data to regain full functionality and personalize your gaming laptop.
Reinstalling the operating system can help resolve deep-seated software issues and offer a fresh start for your gaming laptop. It ensures that all system files and configurations are in a clean and optimal state, providing a stable foundation for your gaming experience.
Update Drivers and Software
After resetting or reinstalling the operating system on your gaming laptop, it is crucial to update your drivers and software to ensure optimal performance and compatibility. Outdated drivers and software can lead to various issues, including hardware malfunctions, stability problems, and performance degradation.
To update your drivers and software, follow these steps:
- Identify the components and hardware devices in your laptop that require driver updates. Common components include the graphics card, network adapter, sound card, and chipset.
- Visit the manufacturer’s website of each component or hardware device and navigate to the support or drivers/downloads section.
- Search for the latest drivers available for your specific model and operating system. Download the appropriate driver files.
- Once downloaded, run the driver installation files and follow the on-screen instructions to install the updated drivers.
- Restart your gaming laptop to ensure the changes are applied properly.
- Next, update your software applications. Open each application and look for a “Check for Updates” or “Update” option in the settings or help menu.
- If you have a lot of applications, consider using a software updater program that can scan your system and automatically update outdated software.
- Allow the software updates to install completely. This may require multiple restarts, depending on the number of updates needed.
- After updating your drivers and software, ensure that your gaming laptop is functioning properly. Test the performance and functionality of your games and other applications.
Updating your drivers and software is crucial for maintaining stability, compatibility, and optimal performance on your gaming laptop. It also ensures that you have the latest security patches and bug fixes, enhancing the overall user experience.
Remember to periodically check for driver and software updates to keep your gaming laptop up to date. Regularly updating your drivers and software will help address compatibility issues and ensure you can enjoy your games and applications with the best performance and stability possible.
Restore Your Backed Up Data
Once you have completed the reset process on your gaming laptop and updated all necessary drivers and software, it’s time to restore your backed-up data. Restoring your files and personal information will bring back your important documents, photos, videos, and game saves, allowing you to pick up where you left off before the reset.
Follow these steps to restore your backed-up data:
- Insert the external storage device (such as a USB drive or external hard drive) that contains your backed-up data into your gaming laptop.
- If you used a cloud storage service, navigate to the service’s website or use the corresponding desktop application to access your backed-up files.
- Locate your backed-up files and folders. Depending on how you organized your data, you may need to navigate through different folders or directories to find everything you want to restore.
- Select the files and folders you want to restore. You can either copy and paste them directly into the appropriate locations on your gaming laptop or use the restore/ import function, if available, in the backup software or cloud storage service.
- Continue this process for all the files and folders you wish to restore. Take your time to ensure that everything is correctly transferred.
- Once all your files and folders are restored, double-check that everything is in the right place and accessible.
If you previously created a system image backup, you have the option to restore your entire system to its previous state, including installed applications and settings. This can be done using the same backup tool or software that created the system image.
It is essential to carefully review and verify that all your backed-up data has been successfully restored. Open different files, access folders, and test any applications or games that rely on the restored data to ensure that everything is functioning as expected.
By restoring your backed-up data, you can regain access to your important files and continue where you left off before the reset. Ensure that you regularly back up your important data to prevent permanent loss and to have a reliable copy in case of future issues or resets.
Conclusion
Resetting a gaming laptop can be a valuable troubleshooting step to resolve software glitches, performance issues, and other persistent problems. By following the steps outlined in this article, you can successfully reset your gaming laptop while minimizing the risk of data loss and damage to your device.
Remember to back up your data before initiating any reset process to ensure that your important files and documents are safe. Disconnecting all external devices can also help create a smooth reset experience without any compatibility issues or disruptions.
If minor issues persist, a soft reset may be sufficient to refresh your system and resolve temporary software issues. However, if you are dealing with more significant problems or want a completely clean start, a hard reset or even a reinstallation of the operating system may be necessary.
After the reset process, make sure to update your drivers and software to ensure optimal performance and compatibility. Additionally, restoring your backed-up data will bring back your important files and allow you to resume your gaming experience.
It’s important to note that while resetting your gaming laptop can be an effective solution, it is always a good practice to troubleshoot and seek professional help if needed. Regularly maintain your laptop by keeping your software up to date and performing necessary hardware maintenance to prevent future issues.
By following the steps and recommendations in this article, you can confidently reset your gaming laptop and enjoy a smoother, more optimized gaming experience.