Introduction
Welcome to this guide on how to reset a Samsung Galaxy Tab E. Sometimes, you may encounter issues with your tablet such as freezing, crashing, or unresponsive screen. In these situations, performing a reset can often resolve the problem and bring your device back to its normal functioning.
The Samsung Galaxy Tab E is a popular Android tablet known for its sleek design, user-friendly interface, and versatile features. Whether you use it for work, entertainment, or staying connected with loved ones, it’s important to know how to perform a reset to troubleshoot any issues that may arise.
There are two methods to reset your Samsung Galaxy Tab E: a soft reset and a hard reset. A soft reset is a quick and convenient method that clears temporary system files and refreshes the device. On the other hand, a hard reset, also known as a factory reset, erases all data and settings, returning the tablet to its original factory state.
In this article, we will walk you through both methods, step by step, so you can choose the one that best suits your needs. However, please note that performing a hard reset will delete all your personal data, so it’s essential to back up your important files before proceeding.
Now, let’s dive into the different methods of resetting your Samsung Galaxy Tab E and get your tablet back to its optimal performance!
Reasons to Reset a Samsung Galaxy Tab E
There may be several reasons why you would need to reset your Samsung Galaxy Tab E. Let’s explore some common scenarios where a reset can be beneficial:
- Device Slowdown: Over time, your tablet’s performance may start to decline due to accumulated cache, temporary files, and background processes. A reset can help clear these issues and improve the overall speed and responsiveness of your device.
- Software Glitches: If you notice frequent app crashes, unresponsive buttons, or unusual error messages, it could be a sign of software glitches. Resetting your tablet can help resolve these issues by restoring the software to its default settings.
- Frozen or Unresponsive Screen: Sometimes, your Galaxy Tab E may freeze or become unresponsive, leaving you unable to interact with the device. Performing a reset can help bring the tablet back to a functional state and resolve any screen-related issues.
- Security Concerns: If you plan on selling or giving away your tablet, it is crucial to reset it to ensure that all your personal data and accounts are removed. This prevents unauthorized access to your sensitive information.
- App or System Updates: In some cases, after installing a new app or system update, your tablet may start experiencing compatibility issues or performance problems. Resetting your device can help resolve these issues and provide a fresh start for smoother operation.
It’s important to note that a reset should be considered as a troubleshooting measure and not a first-line solution for every issue. If you are facing a specific problem with a particular app or feature, it’s worth trying other troubleshooting steps, such as clearing app cache or updating software, before resorting to a reset.
Now that you understand the reasons why a reset can be beneficial, let’s move on to the methods of resetting your Samsung Galaxy Tab E.
How to Reset a Samsung Galaxy Tab E
Resetting your Samsung Galaxy Tab E can help resolve various issues and restore your tablet to its original state. In this section, we will walk you through two methods: a soft reset and a hard reset. Let’s get started!
Method 1: Soft Reset
A soft reset is a quick and simple process that clears temporary system files and refreshes your tablet. This method does not delete any personal data.
To perform a soft reset on your Samsung Galaxy Tab E, follow these steps:
- Press and hold the Power button on your tablet.
- In the power menu that appears, select the “Restart” option.
- Your tablet will now restart, and once it turns back on, check if the issue you were facing has been resolved.
If the soft reset does not fix the problem or if you want to perform a more thorough reset, you can try a hard reset.
Method 2: Hard Reset
A hard reset, also known as a factory reset, wipes all data and settings on your Samsung Galaxy Tab E. This method should only be used if a soft reset does not resolve the issue or if you plan on selling or giving away your tablet.
Before proceeding with a hard reset, it is crucial to back up your important data such as contacts, photos, and documents. Once you have done that, follow these steps:
- Power off your tablet by pressing and holding the Power button and selecting “Power off.”
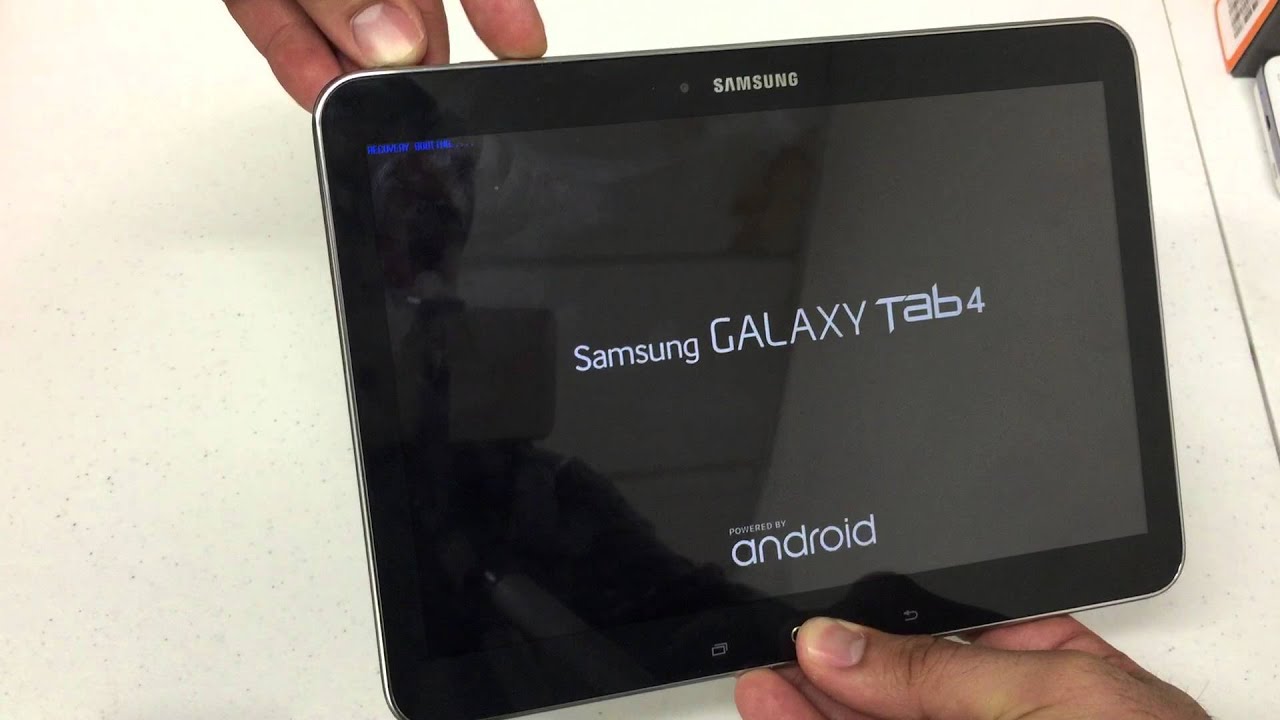
- Press and hold the Volume Up button and the Power button simultaneously until the Samsung logo appears on the screen.
- Release both buttons and wait for the Android Recovery menu to appear.
- Use the Volume Down button to navigate to the “Wipe data/factory reset” option.
- Press the Power button to select the option.
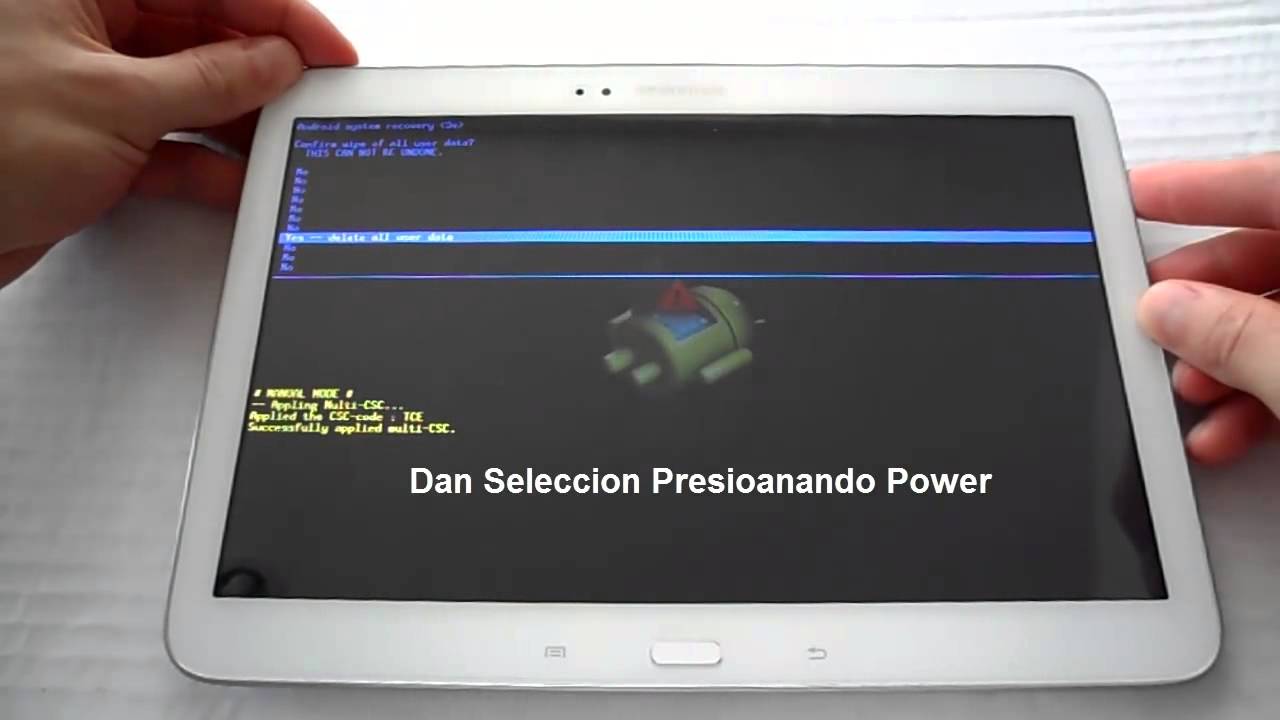
- Confirm the reset by navigating to the “Yes” option using the Volume Down button and selecting it with the Power button.
- Your tablet will now begin the reset process, which may take a few minutes.
- Once the reset is complete, use the Volume Down button to navigate to the “Reboot system now” option.
- Press the Power button to initiate the reboot.
After the reboot, your Samsung Galaxy Tab E will be restored to its factory settings. You can set it up as a new device or restore your data from the backup you created earlier.
Now that you know how to perform both a soft reset and a hard reset, you can choose the method that best fits your needs. Remember to backup your data before proceeding with a hard reset to avoid losing any important information.
Method 1: Soft Reset
A soft reset is a quick and straightforward method to resolve minor issues and refresh your Samsung Galaxy Tab E without losing any personal data. This method clears temporary system files and can help improve the performance of your tablet. Here are the steps to perform a soft reset:
- Press and hold the Power button located on the side or top of your Samsung Galaxy Tab E until a power menu appears on the screen.
- In the power menu, tap the “Restart” option. This will initiate the soft reset process.
- Wait for your tablet to power off and restart automatically.
- Once the tablet turns back on, check if the issue you were experiencing has been resolved.
A soft reset is often sufficient for troubleshooting common problems, such as unresponsive apps or sluggish performance. It clears temporary files and refreshes the device’s system, providing a fresh start without affecting your personal files and settings.
However, it’s important to note that a soft reset may not fix more severe issues or persistent problems. If you are still experiencing difficulties with your tablet after performing a soft reset, you may need to consider a hard reset, which will restore your tablet to its original factory settings.
Now that you know how to perform a soft reset, it’s time to explore the steps for a hard reset, if needed. Remember to always back up your data before proceeding with a hard reset to avoid permanent data loss.
Method 2: Hard Reset
If you’re facing persistent issues with your Samsung Galaxy Tab E and a soft reset hasn’t resolved the problem, a hard reset may be necessary. A hard reset, also known as a factory reset, restores your tablet to its original factory settings and erases all data and settings. It should be used as a last resort and only after you have backed up your important data.
Follow these steps to perform a hard reset on your Samsung Galaxy Tab E:
- Ensure that your tablet is powered off by pressing and holding the Power button and selecting “Power off” from the options.
- Press and hold both the Volume Up button and the Power button simultaneously. Keep holding them until you see the Samsung logo appear on the screen.
- Release both buttons and wait for the Android Recovery menu to appear.
- Use the Volume Down button to navigate to the “Wipe data/factory reset” option.
- Press the Power button to select the option. This will initiate the hard reset process.
- On the confirmation screen, use the Volume Down button to navigate to the “Yes” option, and press the Power button to select it. This confirms that you want to proceed with the factory reset.
- Wait for the reset process to complete. This may take a few minutes.
- Once the reset has finished, the Android Recovery menu will reappear.
- Use the Volume Down button to navigate to the “Reboot system now” option.
- Press the Power button to initiate the reboot process.
After the reboot, your Samsung Galaxy Tab E will be restored to its original factory settings. All personal data, including apps, settings, and files, will be deleted, so it’s crucial to have a backup. Once your tablet restarts, you can set it up as a new device or restore your data from a backup.
A hard reset should only be performed when absolutely necessary, as it erases all data and settings. It serves as a solution for severe software issues, persistent glitches, or when preparing to sell or give away your tablet. It provides a fresh start and can help resolve problems that could not be fixed through other troubleshooting methods.
Now that you are familiar with the steps involved in performing a hard reset on your Samsung Galaxy Tab E, you can use this method when needed. Remember to back up your data beforehand to prevent any permanent loss of important information.
Step 1: Backup Your Data
Before proceeding with a hard reset on your Samsung Galaxy Tab E, it is essential to back up your data to avoid permanent loss. A hard reset will erase all personal files, apps, settings, and other data stored on your tablet. By following this step, you can ensure that your important information is safeguarded and can be restored after the reset process.
Here are some recommended methods to back up your data:
- Cloud Storage: Use cloud storage services like Google Drive, Dropbox, or Samsung Cloud to store your essential files, documents, photos, and videos. Enable automatic backup or manually upload your data to the cloud. This way, you can access it from any device and easily restore it after the reset.
- Google Account: Sync your contacts, calendar, and other important data with your Google Account. This will ensure that your information is backed up on Google’s servers and can be easily restored to your Samsung Galaxy Tab E after the reset. You can also enable Google Photos to back up your pictures and videos automatically.
- External Storage: If your tablet has a microSD card slot, consider transferring important files and media to the external storage. Insert a compatible microSD card and copy your files to the card using the file manager app. This way, the data will remain safe during the reset process.
- USB Connection: Connect your Samsung Galaxy Tab E to a computer using a USB cable. Browse through the tablet’s internal storage and copy important files to your computer’s hard drive. Make sure to create a separate folder to keep the backup organized.
Irrespective of the backup method you choose, ensure that all your important files and data are safely stored before proceeding to the next steps of the hard reset process. Take your time to double-check and verify that everything you need is backed up.
By following this crucial step of backing up your data, you can have peace of mind knowing that your essential information is secure and ready to be restored once the hard reset on your Samsung Galaxy Tab E is complete.
Step 2: Power Off Your Device
Before proceeding with a hard reset on your Samsung Galaxy Tab E, it is important to power off your device completely. This step ensures that the reset process can be initiated smoothly and prevents any potential data corruption or system errors.
Follow these simple steps to power off your Samsung Galaxy Tab E:
- Press and hold the Power button located on the side or top of your tablet.
- A power menu will appear on the screen.
- From the power menu, select the “Power off” option.
- Your tablet will start the power-off process and shut down.
It is crucial to ensure that your tablet is completely powered off before proceeding to the next steps of the hard reset process. You can confirm this by ensuring that the screen is blank and no indicator lights are illuminated on the device.
Powering off your tablet helps to create a clean starting point for the hard reset process. It ensures that no apps or processes are running in the background that could interfere with the reset or cause potential errors.
Remember, a hard reset is a significant step that will erase all data and settings on your Samsung Galaxy Tab E, so it’s crucial to have a backup of your important files before proceeding. If you haven’t done so already, refer to the previous section on how to backup your data.
Now that you have powered off your tablet, you are ready to move on to the next step: entering recovery mode.
Step 3: Enter Recovery Mode
Entering Recovery Mode is a crucial step in the process of performing a hard reset on your Samsung Galaxy Tab E. Recovery Mode provides a dedicated environment for system maintenance and troubleshooting tasks.
Here’s how you can enter Recovery Mode on your Samsung Galaxy Tab E:
- Make sure your tablet is powered off completely.
- Press and hold both the Volume Up button and the Power button simultaneously.
- Continue holding the buttons until you see the Samsung logo appear on the screen.
- Once the Samsung logo appears, release both buttons.
This will boot your Samsung Galaxy Tab E into Recovery Mode, a separate environment from the standard Android operating system. The Recovery Mode screen displays various options that you can navigate using the volume buttons and select using the power button.
It’s important to note that different Samsung Galaxy Tab E models may have slightly different methods to enter Recovery Mode. If the above method does not work for your device, consult the user manual or search for specific instructions that correspond to your tablet model.
Entering Recovery Mode is a critical step as it allows you to access the necessary functions to perform a hard reset and restore your tablet to its factory settings. Once you have successfully entered Recovery Mode, you can proceed to the next step, which involves wiping the data and performing the factory reset.
Now that you have entered Recovery Mode, you’re one step closer to performing a hard reset on your Samsung Galaxy Tab E.
Step 4: Wipe Data/Factory Reset
Once you have successfully entered Recovery Mode on your Samsung Galaxy Tab E, you can proceed to the next step: wiping the data and performing a factory reset. This step erases all data, apps, and settings on your tablet, returning it to its original factory state.
Follow these steps to wipe the data and perform a factory reset on your Samsung Galaxy Tab E:
- Using the Volume Down button, navigate to the “Wipe data/factory reset” option on the Recovery Mode screen.
- Once the option is highlighted, press the Power button to select it.
- On the confirmation screen, navigate to the “Yes” option using the Volume Down button.
- Press the Power button to confirm and initiate the factory reset process.
Note that the exact wording and positioning of the options may vary depending on the version of Android or the specific custom interface on your Samsung Galaxy Tab E. However, the general steps remain the same.
It’s important to proceed with caution as performing a factory reset will permanently erase all data on your tablet. Therefore, make sure you have backed up your important files and data before proceeding with this step.
Once the factory reset process begins, it may take several minutes to complete. The tablet will automatically wipe all data, apps, and settings and return to its original factory state. You will see a progress bar or indicators on the screen during this process.
After the factory reset is complete, your Samsung Galaxy Tab E will be clean and restored to its original settings. It will be as if you just took it out of the box for the first time.
Now that you have wiped the data and performed a factory reset, you are ready for the final step before your tablet can be functional again: confirming the reset and rebooting the device.
Step 5: Confirm and Reboot
After performing a factory reset on your Samsung Galaxy Tab E, you need to confirm the reset and initiate a reboot of the device. This step finalizes the reset process and allows your tablet to boot up with the restored factory settings.
Follow these steps to confirm and reboot your Samsung Galaxy Tab E:
- Using the Volume Down button, navigate to the “Reboot system now” option on the Recovery Mode screen.
- Once the option is highlighted, press the Power button to select it.
Your tablet will now begin the reboot process. It may take a few moments for the device to restart, so please be patient during this stage. The tablet will go through the initial setup process as if being turned on for the first time.
Once the reboot is complete, your Samsung Galaxy Tab E will be restored to its factory settings, with all data and settings erased. You can now set up the tablet as a new device or restore your data from your backup.
It is important to note that setting up your tablet again after a factory reset will require you to go through the initial setup process, including connecting to a Wi-Fi network, signing in with your Google account, and configuring your preferences and settings.
Congratulations! You have successfully completed the hard reset process on your Samsung Galaxy Tab E. The tablet should now be clean and ready for use with the default factory settings.
Remember to take the necessary precautions to ensure your data is backed up before proceeding with a factory reset. This will help you restore your personal files and settings after the reset process is complete.
Now that you have completed all the steps to reset your device, you can enjoy a fresh start with your Samsung Galaxy Tab E.
Conclusion
Performing a reset on your Samsung Galaxy Tab E can be a valuable troubleshooting step to resolve various issues and restore the tablet to its optimal performance. In this guide, we covered two methods to reset your device: a soft reset and a hard reset. Each method serves a different purpose and can be used based on the severity of the problem you are facing.
A soft reset is a quick and simple process that refreshes your tablet by clearing temporary system files. It is often effective in resolving minor issues such as freezing or unresponsive apps. On the other hand, a hard reset, also known as a factory reset, erases all data and settings, returning the tablet to its original factory state. It should be used when more severe issues persist or when preparing to sell or give away your device.
Before performing a hard reset, it is crucial to back up your important data to avoid permanent loss. You can use various methods such as cloud storage, Google accounts, external storage, or USB connections to ensure your data is safely stored and can be restored after the reset process.
Remember to power off your tablet before initiating the reset process and carefully follow the steps to enter Recovery Mode, wipe the data, and confirm the reset. Once the reset is complete, you can reboot your tablet and set it up as a new device or restore your data from the backup you created.
By following these steps, you can effectively troubleshoot issues, improve performance, and enjoy a fresh start with your Samsung Galaxy Tab E.
Thank you for using this guide, and we hope it has been helpful in resolving any issues you were facing with your Samsung Galaxy Tab E. If you require further assistance or have any questions, feel free to seek additional support from the Samsung support team or relevant online forums.