Introduction
Welcome to our step-by-step guide on how to open a Samsung Galaxy Tab 3! If you’re curious and adventurous, or maybe you need to fix an issue with your tablet, this guide will take you through the process of opening up your device and accessing its internal components. Opening a Samsung Galaxy Tab 3 may seem daunting at first, but with the right tools and careful attention, it can be a straightforward and rewarding experience.
Before we get started, it’s important to note that opening your Samsung Galaxy Tab 3 will void any warranties you may have, so proceed at your own risk. Additionally, make sure to follow all the steps carefully to avoid causing any damage to your device. With that said, let’s jump right into it!
In this guide, we will walk you through the process step-by-step, starting with gathering the necessary tools and ending with reassembling and testing the tablet. Along the way, we will provide detailed instructions and tips to ensure a smooth and successful opening process. Whether you’re a tech enthusiast or simply looking to save on repair costs, this guide will equip you with the knowledge to open your Samsung Galaxy Tab 3.
Before we dive into the nitty-gritty, let’s briefly discuss why you might want to open your Samsung Galaxy Tab 3. There could be several reasons, such as replacing a cracked screen, fixing a faulty button, or even upgrading internal components like the battery or storage. By opening up your tablet, you gain access to its internal hardware, allowing for repairs and upgrades that can extend the lifespan and functionality of your device.
Throughout this guide, we will provide clear instructions and helpful tips to ensure a smooth opening process. So, if you’re ready to take on the challenge and venture into the inner workings of your Samsung Galaxy Tab 3, let’s get started with gathering the necessary tools!
Step 1: Gather the necessary tools
Before you begin the process of opening your Samsung Galaxy Tab 3, you’ll need to gather the following tools:
- A small Phillips screwdriver – This will be used to remove the screws holding the device together.
- A plastic opening tool – This tool will help in prying open the tablet without causing any damage to the front panel.
- A tweezers – This will come in handy for disconnecting ribbon cables and handling small components.
- A plastic spudger – This tool can be used to gently pry apart clips and connectors.
- A heat gun or hairdryer – This optional tool can be used to soften adhesives if necessary.
Having these tools readily available will make the opening process much smoother and reduce the risk of damage to your tablet. It is important to use the correct tools to avoid any mishaps. Now that you have your tools prepared, let’s move on to the next step: powering off the tablet.
Note: It is essential to work in a well-lit and clean environment to prevent losing any small components or getting dust and debris inside your tablet.
Make sure to keep these tools in a safe and organized manner to avoid misplacing any of them during the opening process. It’s also a good idea to have a clean, soft cloth or an anti-static mat to place your tablet on while you work. This protects the tablet from scratches and helps prevent any static electricity from damaging the internal components.
Remember, opening your Samsung Galaxy Tab 3 requires careful handling and precision. Taking your time to gather the necessary tools beforehand will ensure a smooth and successful process. Once you have all your tools ready, we can proceed to the next step: powering off the tablet.
Step 2: Power off the tablet
Before you proceed with opening your Samsung Galaxy Tab 3, it’s crucial to power off the tablet to avoid any potential damage or accidents during the process. Here’s how you can do it:
- Hold down the power button located on the top-right edge of the tablet.
- A power menu will appear on the screen.
- Select the “Power off” option from the menu.
- Wait for a few seconds until the screen turns completely black, indicating that the tablet is powered off.
It is essential to ensure that the tablet is completely turned off before you begin opening it. This ensures the safety of both you and the device. Taking the time to power off the tablet properly minimizes the risk of accidental electrical shock or damage to internal components.
If your tablet is unresponsive or frozen and you are unable to power it off using the normal method, you can perform a force restart instead. To do this, simply press and hold the power button for about 10 seconds until the device powers off. This is a useful option if the tablet is not responding to touch or button presses.
Once your Samsung Galaxy Tab 3 is powered off, you can proceed to the next step: removing the back cover. Remember to handle the tablet with care and avoid applying excessive force. Now that you have safely powered off the tablet, let’s move on to the next step of the opening process.
Step 3: Remove the back cover
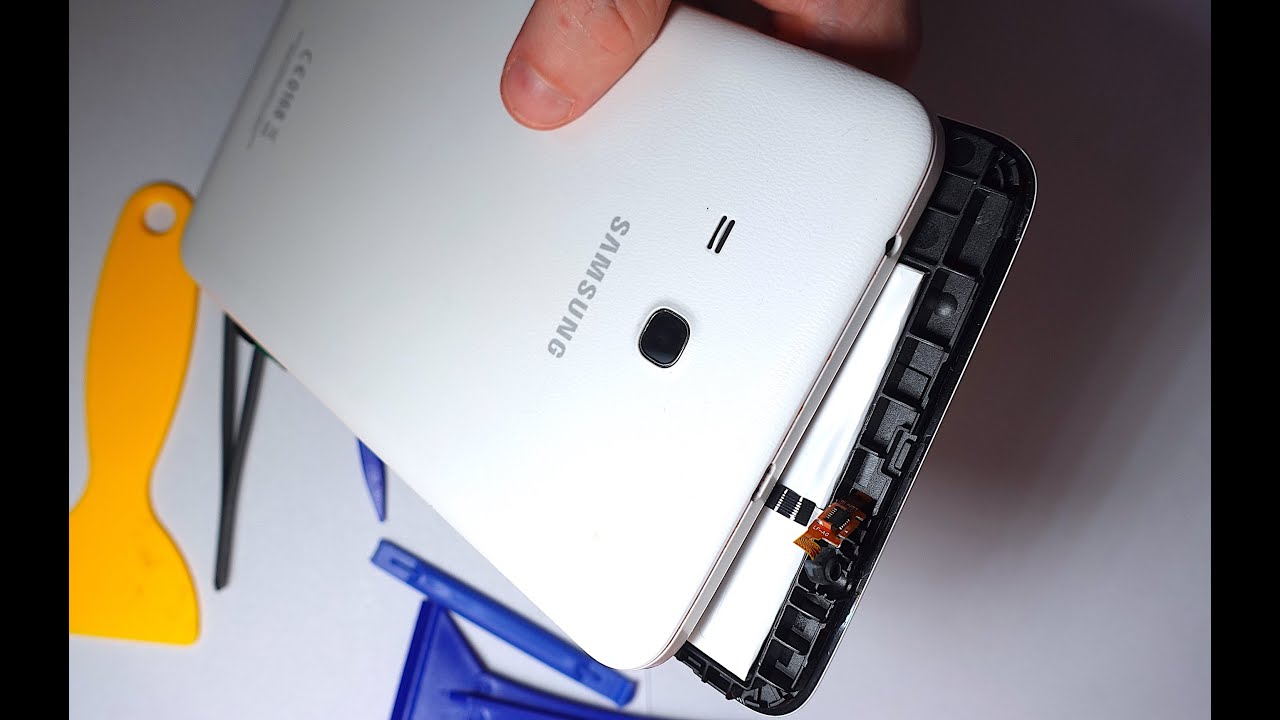
Now that your Samsung Galaxy Tab 3 is powered off, it’s time to remove the back cover. The back cover of the tablet is where most of the internal components are housed, and removing it will give you access to the internal workings of the device. Here’s how you can remove the back cover:
- Locate the small notch or groove on the bottom of the tablet’s back panel.
- Insert a plastic opening tool or your fingernail into the notch.
- Gently pry up the back cover.
- Apply even pressure along the edges of the tablet to release the clips securing the back cover.
- Continue to carefully lift the back cover until it is completely separated from the front panel.
It’s important to be patient and gentle while removing the back cover to avoid damaging the delicate clips that secure it in place. If you encounter any resistance, double-check to ensure that all the clips have been released before proceeding. Applying excessive force can cause the clips to break, making it difficult to reattach the back cover later.
Once the back cover is detached, set it aside in a safe place to prevent it from getting scratched or damaged. You now have access to the internal components of your Samsung Galaxy Tab 3. Take a moment to admire the sleek design and contemplate the wonders that lie within!
The back cover removal step is crucial as it grants you entry to the tablet’s internals. In the next step, we will guide you through the process of disconnecting the tablet’s battery to ensure your safety and prevent any mishaps. So without further ado, let’s move on to step 4!
Step 4: Disconnect the battery
With the back cover successfully removed from your Samsung Galaxy Tab 3, it’s time to disconnect the battery. Disconnecting the battery is a crucial step to ensure your safety and prevent any accidental damage to the tablet’s internal components. Here’s how you can do it:
- Locate the battery connector on the motherboard.
- Using a plastic opening tool or a pair of tweezers, gently lift the connector upwards.
- Take care not to apply excessive force or bend the connector, as this may cause damage.
- Once the battery connector is lifted, carefully wiggle it back and forth to loosen it.
- Gently pull the battery connector away from the motherboard to disconnect the battery.
It’s important to note that disconnecting the battery ensures that there is no power flowing through the device, reducing the risk of electrical shock or damage to sensitive components. Therefore, it’s crucial to disconnect the battery before proceeding with any further steps.
When handling the battery connector, ensure that your hands are clean and dry. Avoid touching any other metal components on the motherboard to prevent static discharge, which can damage the sensitive electronics within your tablet.
Once the battery is disconnected, you can proceed with confidence to the next step. In step 5, we will guide you on how to locate and remove the screws that secure the tablet’s front panel. So let’s dive right in!
Step 5: Locate and remove the screws
Now that the battery has been safely disconnected, we can move on to the next step of opening your Samsung Galaxy Tab 3. In this step, we will guide you through locating and removing the screws that secure the tablet’s front panel. Follow these instructions carefully:
- Using a small Phillips screwdriver, locate and remove the screws on the edges of the tablet’s front panel.
- Set the screws aside in a safe place where they won’t get lost or mixed up.
- Depending on the specific model of your tablet, there may be multiple screws to remove.
- Remember to keep track of the locations of the screws as some may be different in size or length.
Removing the screws is a crucial step as they hold the front panel securely in place. By removing them, you will be able to proceed to the next step of separating the front panel from the back panel.
As you remove each screw, it is a good practice to arrange them in a specific pattern or use a magnetic mat with labeled sections. This will help ensure that you know where each screw belongs during the reassembly process, making it easier to put everything back together correctly.
Once you have successfully removed all the screws, keep them in a safe place and prepare yourself for the next step: carefully separating the front panel from the back panel. Make sure to handle your tablet with care to avoid any unnecessary damage during the process. Let’s move on!
Step 6: Carefully separate the front panel from the back panel
With the screws removed, it’s time to carefully separate the front panel from the back panel of your Samsung Galaxy Tab 3. This step requires patience and precision to avoid causing any damage to the delicate components. Follow these instructions to ensure a successful separation:
- Insert a plastic opening tool or your fingernail into the small gap between the front panel and the back panel.
- Gently and slowly slide the tool along the edges to release any clips or adhesive holding the panels together.
- Apply even pressure and be mindful not to exert too much force, as this may cause the front panel to crack or the clips to break.
- Continue to work your way around the edges of the tablet until the front panel is completely separated from the back panel.
As you separate the front panel, you may encounter some resistance due to adhesive or clips holding it in place. In such cases, you can use a heat gun or a hairdryer on a low heat setting to gently warm the edges of the tablet. This can help loosen the adhesive, making it easier to separate the panels without causing damage.
Take your time during this step and be patient. Rushing or using excessive force can result in irreversible damage to your tablet. It’s better to proceed slowly and cautiously to ensure a successful separation.
Once you have successfully separated the front panel from the back panel, set the back panel aside in a safe place. Congratulations! You have now gained access to the internal components of your Samsung Galaxy Tab 3. In the next step, we will guide you through disconnecting the ribbon cables to fully remove the front panel. Let’s proceed!
Step 7: Disconnect the ribbon cables
With the front panel successfully separated from the back panel of your Samsung Galaxy Tab 3, it’s time to disconnect the ribbon cables that connect the front panel to the motherboard. Disconnecting these cables is necessary to fully remove the front panel and gain access to the internal components. Follow these steps to safely disconnect the ribbon cables:
- Locate the ribbon cables connecting the front panel to the motherboard.
- Gently lift the connectors securing the ribbon cables using a plastic opening tool or a pair of tweezers.
- Avoid applying excessive force or bending the connectors, as they are delicate.
- Once the connectors are raised, gently pull the ribbon cables out of the connectors.
- Make sure to disconnect all applicable ribbon cables, including those for the display, touch screen, and any other components.
It’s crucial to handle the ribbon cables with care during this step to prevent damage. Take your time and be gentle when removing them from their connectors. If the cables seem stuck, avoid pulling too hard, as this can cause them to tear or break. Instead, use a gentle wiggling motion while pulling to release them without causing any harm.
Remember to keep track of which cable corresponds to which connector. If necessary, take photos or make notes to ensure proper reconnection during the reassembly process. Mixing up the connections may lead to issues when you reassemble the tablet.
Once you have successfully disconnected all the ribbon cables, you can safely remove the front panel from your Samsung Galaxy Tab 3. Set the front panel aside in a safe place, taking care to protect it from any damage. Now that the front panel is detached, you have clear access to the internal components of your tablet. In the next step, we will guide you through removing any remaining screws. Let’s proceed!
Step 8: Remove any remaining screws
Now that you have successfully disconnected the ribbon cables and removed the front panel of your Samsung Galaxy Tab 3, it’s time to remove any remaining screws that may be securing the internal components in place. Removing these screws will allow you to access and work on specific parts of the tablet. Follow these steps to ensure a thorough removal of the remaining screws:
- Inspect the internal components of your tablet and identify any screws that are still in place.
- Using a small Phillips screwdriver, carefully loosen and remove each screw one by one.
- Keep the screws organized and set them aside in a secure location.
- As you remove each screw, take note of its location and size to ensure proper reassembly later.
It’s important to remove all the screws that secure the components in place. Failure to do so may lead to difficulties during reassembly or potential damage when attempting to access specific internal parts.
Take your time and use caution when removing the screws. Apply steady and even pressure to avoid slipping and damaging the surrounding components. Using a magnetic screwdriver or placing a magnet near the screwdriver tip can help prevent screws from falling and getting lost in the process.
Once you have removed all the remaining screws, keep them organized and set them aside in a safe place. Remember to keep track of their corresponding locations for an easier reassembly process. Now that the screws are out, you can proceed to the next step, where we will guide you through lifting off the front panel. Let’s continue!
Step 9: Lift off the front panel
With all the necessary screws removed, you are now ready to lift off the front panel of your Samsung Galaxy Tab 3. Lifting off the front panel will grant you access to the internal components and allow you to perform repairs or upgrades as needed. Follow these steps to safely lift off the front panel:
- Start by gently lifting one corner of the front panel using a plastic opening tool or your fingertips.
- Work your way around the edges, separating the adhesive or clips that hold the front panel in place.
- Apply even pressure and take your time to avoid applying too much force or causing damage to the front panel.
- Continue to lift and separate the front panel until it is fully detached from the rest of the tablet.
- Set the front panel aside in a safe and clean location, ensuring that it does not come into contact with any dust or debris.
It is important to exercise caution and be patient during this step to prevent any accidental damage to the front panel or the internal components. Take your time to ensure a clean and successful separation.
If you encounter resistance while lifting off the front panel, double-check that all the screws have been removed and that you have successfully disconnected all the ribbon cables. Applying excessive force can lead to cracks or breaks in the front panel.
Once the front panel is completely detached, store it in a protective covering or on a clean, soft cloth to prevent any scratches or damage. Now that you have successfully removed the front panel, you are one step closer to accessing and working on the internal components of your Samsung Galaxy Tab 3. In the next step, we will guide you through accessing the internal components of the tablet. Let’s proceed!
Step 10: Access the internal components
With the front panel safely lifted off your Samsung Galaxy Tab 3, you now have access to the internal components of the tablet. This step allows you to inspect, repair, or replace specific parts as needed. Here’s how you can access the internal components:
- Gently inspect the internal components of your tablet, taking note of any areas you need to access or work on.
- Carefully disconnect any additional cables or connectors that may be securing certain components in place.
- Identify the specific part or area you wish to access and take necessary precautions.
- Proceed with the repair, replacement, or modification of the desired component.
- When working on the internal components, be mindful of their sensitivity and handle them with care.
Take your time to assess the internal components before proceeding with any modifications or repairs. This will ensure a better understanding of the specific areas you need to access, saving you valuable time and effort.
While accessing the internal components, it is vital to remain cautious and gentle to avoid any accidental damage. Be aware of any delicate cables, fragile connectors, or sensitive parts that may require extra care during the process.
Follow proper procedures and refer to reliable repair guides or resources specific to your Samsung Galaxy Tab 3 model for more detailed instructions on working with the internal components. This will help ensure a successful and efficient repair or upgrade process.
Once you have completed the necessary repairs or modifications, you can proceed to the next step: reassembling and testing your tablet. But before we get there, make sure to securely handle the internal components and keep them in a safe location to avoid any damage. Great progress so far! Let’s move on!
Step 11: Reassemble and test the tablet
Congratulations! You have reached the final step of opening your Samsung Galaxy Tab 3. In this step, we will guide you through the process of reassembling the tablet and conducting a thorough test to ensure everything is working properly. Follow these steps for a successful reassembly and testing:
- Start by carefully aligning the front panel with the back panel of your tablet.
- Gently press the front panel into place, making sure all the clips align and secure it firmly.
- Once the front panel is in position, reinsert any previously removed screws to secure it in place.
- Refer to your notes or photographs from earlier to ensure the screws are correctly placed.
- Reconnect the ribbon cables you disconnected earlier, making sure they are securely attached.
- Carefully press down on the connectors to ensure a firm and secure connection.
- Double-check that all cables, connectors, and screws are properly in place.
- Finally, power on your Samsung Galaxy Tab 3 and conduct a thorough test.
- Check all the features, buttons, and functionalities to ensure they are working as expected.
- If any issues arise, carefully troubleshoot or retrace your steps to identify and resolve the problem.
During the reassembly process, be mindful of the alignment and proper seating of the front panel, screws, and ribbon cables. Take your time to ensure everything is securely in place to prevent any loose connections or parts.
Once you have reassembled the tablet, power it on and test all the essential functions. Check the display, touch responsiveness, buttons, speakers, and any other features to ensure they are working correctly. This thorough testing will verify that the tablet is fully functional and ready for use.
If any issues persist or if certain components are not working as expected, consider revisiting the specific steps related to those components or consult a professional technician for further assistance.
With your Samsung Galaxy Tab 3 reassembled and fully tested, you have successfully completed the process of opening and accessing the internal components of your tablet. Take pride in your accomplishment, and enjoy the renewed functionality and satisfaction that comes with being able to diagnose and address issues on your own. Well done!
Conclusion
Congratulations on successfully opening your Samsung Galaxy Tab 3 and gaining access to its internal components! By following the steps outlined in this guide, you have learned how to gather the necessary tools, power off the tablet, remove the back cover, disconnect the battery, locate and remove screws, separate the front panel from the back panel, disconnect ribbon cables, lift off the front panel, access the internal components, and finally, reassemble and test the tablet.
Opening your Samsung Galaxy Tab 3 can be an exciting and rewarding experience, whether you’re looking to perform repairs, upgrades, or simply satisfy your curiosity about the inner workings of your device. It’s important to approach the process with patience, caution, and the right tools to ensure success and avoid any accidental damage to the tablet or its components.
Throughout the process, we emphasized the importance of taking your time, handling components with care, and keeping track of screws and cables. Proper organization and attention to detail will make the reassembly process easier and help you avoid any confusion or complications.
Remember, opening your Samsung Galaxy Tab 3 may void any warranties, so proceed at your own risk. If you’re uncomfortable or unsure about any step, it’s always best to seek professional assistance from a qualified technician.
By being able to open and access the internal components of your tablet, you have gained a deeper understanding of its workings and the ability to troubleshoot and perform repairs or upgrades when needed. This can save you time and money on professional repairs, allowing you to maintain and extend the lifespan of your device.
We hope this guide has been informative and valuable in your journey to open your Samsung Galaxy Tab 3. Thank you for following along, and we wish you success in all your future endeavors with your tablet!