Introduction
When it comes to troubleshooting or optimizing the performance of a Mini PC, sometimes the best solution is to reset it. Resetting a Mini PC can help resolve software issues, improve system stability, and restore it to its original factory settings. Whether you’re experiencing slowdowns, encountering frequent errors, or simply want to start fresh, knowing how to reset your Mini PC is a valuable skill.
In this article, we will explore various methods to reset a Mini PC. These methods are applicable to Mini PCs running different operating systems, including Windows, Linux, and macOS. So, regardless of the type of Mini PC you own, you’ll find a suitable method to reset it.
It’s important to note that resetting a Mini PC will erase all data and installed programs. Therefore, it’s crucial to back up any important files or applications before proceeding with a reset. Once you’ve backed up your data, you can confidently follow the steps provided and reset your Mini PC without worrying about losing any valuable information.
In the following sections, we’ll cover different methods to reset a Mini PC. These methods range from using the Windows Settings menu, utilizing the power button, accessing the BIOS/UEFI menu, to reinstalling the operating system. By understanding these methods, you’ll be equipped with the knowledge to troubleshoot and optimize your Mini PC effectively.
Why Resetting a Mini PC is Necessary
Resetting a Mini PC can prove to be a valuable solution in a variety of scenarios. Here are some reasons why resetting a Mini PC may be necessary:
1. Resolve Software Issues: Over time, a Mini PC can accumulate temporary files, corrupted data, and conflicting software that can lead to performance issues. Resetting the Mini PC can help clear out these issues, providing a fresh start and improved system stability.
2. Speed up Performance: As you use a Mini PC, various applications and processes run in the background, consuming system resources. Over time, this can slow down the performance of the Mini PC. Resetting it can free up resources and revitalize the system, resulting in improved speed and responsiveness.
3. Remove Malware and Viruses: If a Mini PC becomes infected with malware or viruses, it can cause significant damage to the system, compromising security and privacy. Resetting the Mini PC eliminates these threats by wiping out the affected files and restoring the system to its default state.
4. Restore Factory Settings: If you’ve made extensive changes to the settings of your Mini PC and want to revert back to the original system settings, resetting the Mini PC is the easiest way to achieve this. By resetting, you will bring the Mini PC back to its factory state, allowing you to start fresh.
5. Prepare for Resale or Reuse: If you plan to sell your Mini PC or pass it on to someone else, resetting it is essential to protect your personal data. Resetting ensures that all your personal files, accounts, and data are removed from the Mini PC, maintaining your privacy and security.
6. Troubleshoot Persistent Issues: If you’re facing recurring issues with your Mini PC, such as frequent crashes, startup errors, or random system freezes, resetting can help in diagnosing and resolving these problems. By resetting, you eliminate any software-related factors that may be causing the issues.
Regardless of the reason for resetting, it’s important to consider taking a backup of any necessary files, documents, or applications before initiating the reset process. This ensures that you don’t lose any valuable data during the reset and can easily restore it once the process is complete.
Method 1: Resetting a Mini PC Using Windows Settings
If you’re using a Mini PC running Windows, resetting it using the built-in Windows Settings is a straightforward and convenient method. Here’s how you can do it:
1. Click on the Start Menu: In the bottom-left corner of your screen, click on the “Start” button, typically represented by the Windows icon.
2. Access the Settings Menu: From the Start Menu, click on the “Settings” option. It is represented by a gear icon and will open the Windows Settings menu.
3. Select the “Update & Security” Option: In the Windows Settings menu, locate and click on the “Update & Security” option. This will open a new window with various update and security settings.
4. Navigate to the “Recovery” Section: Within the left-hand pane of the “Update & Security” menu, locate and click on the “Recovery” option. This will display recovery options for your Mini PC.
5. Choose the Reset Option: Under the “Reset this PC” section, click on the “Get Started” button. Windows will present you with two options: “Keep my files” or “Remove everything”. Choose the option that suits your needs.
6. Follow the On-screen Instructions: Once you select an option, Windows will provide on-screen instructions to guide you through the reset process. These instructions may vary depending on the option you selected.
7. Wait for the Reset to Complete: The reset process may take some time to complete, so be patient. Your Mini PC will restart several times during the process as Windows restores the system to its default settings.
8. Set Up Your Mini PC: After the reset is complete, you will be prompted to set up your Mini PC like you did when you first purchased it. Follow the on-screen instructions to configure your language, time zone, privacy settings, and user accounts.
Resetting your Mini PC using Windows Settings is an effective way to restore its functionality and resolve any software-related issues. However, keep in mind that this method will remove all installed applications and personal files, so it’s crucial to back up any important data beforehand.
Method 2: Resetting a Mini PC Using the Power Button
If you are unable to access the Windows Settings menu or encounter system issues that prevent you from performing a software reset, you can try resetting your Mini PC using the power button. Here’s how:
1. Shut Down Your Mini PC: Start by shutting down your Mini PC. You can do this by clicking on the “Start” button and selecting the “Shut Down” option from the power menu. If your Mini PC is unresponsive, press and hold the power button until it turns off.
2. Disconnect the Power Cable: Once your Mini PC is turned off, unplug the power cable from the back of the device. Ensure that all power sources, including batteries or external power supplies, are disconnected.
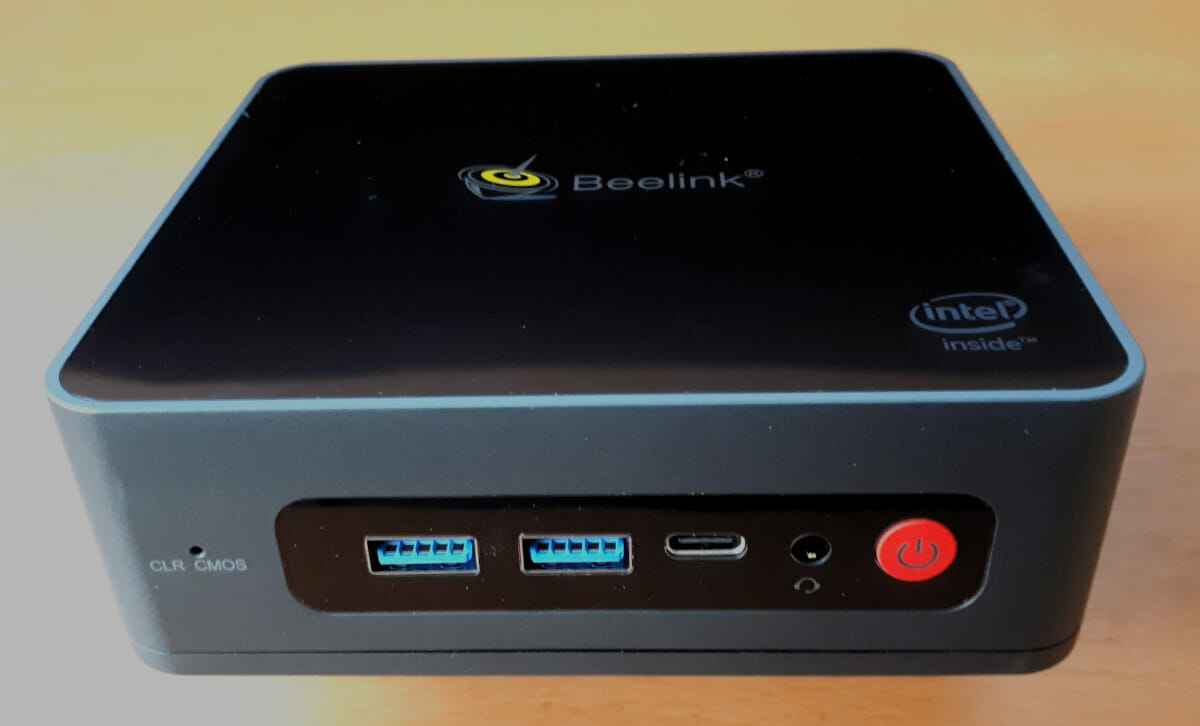
3. Press and Hold the Power Button: Locate the power button on your Mini PC’s chassis. Press and hold it for at least 10-15 seconds. This will discharge any remaining power in the system.
4. Reconnect the Power Cable: After releasing the power button, plug the power cable back into your Mini PC. Ensure that all connections are secure.
5. Power On Your Mini PC: Press the power button again to turn on your Mini PC. It will boot up and initiate the reset process automatically.
6. Follow the On-screen Instructions: Depending on your Mini PC’s manufacturer and model, you may see a prompt to enter the BIOS/UEFI menu or an option to reset the system. Follow the on-screen instructions to proceed with the reset.
7. Wait for the Reset to Complete: The reset process may take some time, as your Mini PC restores its default settings. It will reboot multiple times during the process, so it’s important to allow the system to complete the reset without interruption.
8. Set Up Your Mini PC: Once the reset is complete, you will be prompted to set up your Mini PC. Follow the on-screen instructions to configure your language, time zone, privacy settings, and user accounts.
Resetting your Mini PC using the power button is a useful method when you cannot access the Windows Settings menu. However, keep in mind that this method will still erase all your installed applications and personal files, so make sure to back up important data before proceeding.
Method 3: Resetting a Mini PC Using the BIOS/UEFI Menu
If you need to perform a more advanced reset or if the previous methods are not available, you can try resetting your Mini PC using the BIOS/UEFI menu. Here’s how:
1. Access the BIOS/UEFI Menu: Start by turning on your Mini PC and repeatedly pressing the designated key to access the BIOS/UEFI menu. The specific key varies depending on the manufacturer, but commonly used keys include Del, F2, F10, or Esc. Refer to your Mini PC’s documentation or the manufacturer’s website for the correct key to access the BIOS/UEFI menu.
2. Navigate to the “Reset” or “Restore Defaults” Option: Once you’re in the BIOS/UEFI menu, use the arrow keys to navigate to the “Reset” or “Restore Defaults” option. It may be located under a tab such as “Exit,” “Advanced,” or “Settings.” The terminology and location can vary depending on your Mini PC’s make and model.
3. Select the Reset Option: Highlight the “Reset” or “Restore Defaults” option and press Enter to select it. You may be prompted to confirm your decision.
4. Wait for the Reset to Complete: The reset process will vary depending on your Mini PC’s BIOS/UEFI. It may take a few moments as your Mini PC restores its default settings and reconfigures the hardware.
5. Save and Exit: Once the reset is complete, navigate to the “Exit” tab or a similar option in the BIOS/UEFI menu. Select the “Save Changes and Exit” option. This will save the changes made during the reset process and restart your Mini PC.
6. Set Up Your Mini PC: After the restart, your Mini PC will boot up with the default BIOS/UEFI settings. Follow the on-screen instructions to set up your Mini PC, including language preferences, time zone settings, and any additional configurations required.
Resetting a Mini PC using the BIOS/UEFI menu provides a comprehensive reset, restoring both software and hardware settings to their default state. However, keep in mind that this method will erase all installed applications and personal files, so take the necessary steps to back up important data before proceeding. Additionally, exercise caution when navigating the BIOS/UEFI menu to avoid making unintended changes to other settings.
Method 4: Resetting a Mini PC by Reinstalling the Operating System
If you’re experiencing severe software issues or want to completely wipe your Mini PC and start fresh, you can reset it by reinstalling the operating system. Here’s how you can do it:
1. Create Installation Media: Start by creating installation media for the operating system you want to reinstall. This typically involves downloading the installation files from the official website of the operating system or using a recovery partition or USB drive provided by the Mini PC manufacturer.
2. Back Up Your Data: Before proceeding with the reinstallation, it’s essential to back up all your important data. This includes files, documents, photos, and any other data you want to preserve. Copy the data to an external storage device or upload it to a cloud storage service.
3. Insert the Installation Media: Insert the installation media (USB drive or DVD) into your Mini PC’s appropriate port.
4. Restart Your Mini PC: Restart your Mini PC and boot from the installation media. You may need to access the BIOS/UEFI menu (refer to Method 3) to change the boot order and prioritize the installation media.
5. Begin the Installation: Follow the on-screen prompts to start the operating system installation. Select the language, time zone, and other preferences as instructed.
6. Select the Installation Type: During the installation, you’ll be presented with different options. Choose the option that allows you to perform a clean installation or reinstall the operating system. This option will overwrite the existing system files and settings.
7. Format the Drive: If prompted, select the hard drive or partition where the current operating system is installed. Choose the formatting option to erase the existing data and prepare the drive for the fresh installation.
8. Follow the Installation Wizard: Continue following the installation wizard, which will guide you through the remaining steps of the reinstallation process. This includes creating a new user account, setting up network connections, and configuring additional system preferences.
9. Install Drivers and Applications: After the operating system installation is complete, you may need to install device drivers and necessary applications specific to your Mini PC’s hardware. Refer to the manufacturer’s website or the provided documentation for the appropriate drivers and required software.
Reinstalling the operating system is an extensive process that ensures a completely clean slate for your Mini PC. It removes any previously installed applications and data, giving you a fresh start. However, it’s important to note that this method requires more technical knowledge and careful preparation. Be sure to follow the instructions and have all the necessary installation media and drivers before proceeding with the reinstallation.
Conclusion
Resetting a Mini PC is an essential process that can help resolve software issues, improve performance, and bring your Mini PC back to its original factory settings. Whether you choose to reset using Windows Settings, the power button, the BIOS/UEFI menu, or by reinstalling the operating system, each method offers a unique approach to achieve a fresh start.
By following the appropriate method for your Mini PC, you can troubleshoot persistent issues, remove malware or viruses, restore factory settings, or prepare your Mini PC for resale or reuse. Before initiating a reset, it’s crucial to back up any important data and applications to avoid data loss.
In this article, we covered four different methods to reset a Mini PC. Method 1 involved using the Windows Settings menu, providing a user-friendly approach accessible to Windows users. Method 2 focused on resetting through the power button, useful when Windows is unresponsive. Method 3 explored resetting using the BIOS/UEFI menu, offering a comprehensive reset of both software and hardware settings. Method 4 discussed the option of reinstalling the operating system for a complete refresh.
Remember, each method may involve specific considerations and potential risks, so it’s important to understand the process and exercise caution. Additionally, consult the Mini PC manufacturer’s documentation or website for specific instructions tailored to your device.
Whether you want to optimize performance, troubleshoot issues, or start fresh, knowing how to reset your Mini PC is a valuable skill. Keep these methods in mind and choose the one that best suits your needs. With proper preparation and a step-by-step approach, you can reset your Mini PC effectively and enjoy a smoother computing experience.


