Introduction
Replacing the power supply unit (PSU) in your Gateway DX4870 computer can be a necessary task if you’re experiencing issues with power or if you’re looking to upgrade to a higher wattage unit. The power supply unit is responsible for providing electrical power to all the components in your computer, and a faulty or inadequate PSU can cause various issues, including system instability, random shutdowns, or failure to power on.
Fortunately, replacing the power supply unit is a relatively straightforward process that can be done with basic tools and minimal technical knowledge. In this guide, we will walk you through the step-by-step process of replacing the power supply unit in your Gateway DX4870 computer.
Before diving into the process, it’s important to note that working inside a computer case involves handling sensitive components, which may be damaged by static electricity. Therefore, it’s crucial to take necessary safety precautions and handle the components with care.
In the following sections, we will guide you through each step of the process, from gathering the necessary tools to testing the new power supply unit. By following these instructions, you’ll be on your way to successfully replacing the power supply unit in your Gateway DX4870 and ensuring the continued smooth operation of your computer.
Safety Precautions
Before you begin replacing the power supply unit in your Gateway DX4870 computer, it’s essential to take certain safety precautions to protect yourself, your computer, and its components. Here are some important safety measures to keep in mind:
- Ensure that your computer is completely turned off and unplugged from the power source before starting the process. This will prevent any electrical shock or damage to the components.
- Always ground yourself before touching any internal components of your computer. This can be done by touching a metal surface such as a doorknob or using an anti-static wrist strap to discharge any static electricity.
- Avoid wearing clothing made of synthetic fabrics or working on carpeted surfaces, as they can generate static electricity. Opt for wearing cotton clothing and work on a non-static surface like a wooden table.
- Handle the power supply unit and other internal components with care and avoid applying excessive force or bending any cables. Mishandling can lead to damage or malfunctioning of the components.
- Take note of the correct orientation and alignment of the power supply unit before disconnecting or removing it. This will help ensure proper reinstallation later.
- If you’re unsure about any step or encounter any difficulties, it’s always a good idea to consult the Gateway DX4870 computer’s user manual or seek professional assistance.
By following these safety precautions, you can reduce the risk of harm to yourself and your equipment while replacing the power supply unit. It’s essential to prioritize your safety throughout the entire process to ensure a successful and incident-free power supply replacement.
Step 1: Gathering the Necessary Tools and Equipment
Before you begin replacing the power supply unit in your Gateway DX4870 computer, it’s important to gather all the necessary tools and equipment. This will ensure that you have everything you need to complete the process smoothly. Here are the tools and equipment you’ll need for this task:
- Screwdriver: You’ll need a Phillips-head screwdriver to remove the screws securing the computer case.
- Anti-static wrist strap: This optional but highly recommended accessory will help protect your computer components from static electricity.
- Replacement power supply unit: Make sure to purchase a compatible power supply unit with the appropriate wattage for your computer model. Check the Gateway DX4870’s user manual or the existing power supply unit for these specifications.
- Documentation: Keep the Gateway DX4870’s user manual handy for reference purposes.
Having these tools and equipment readily available will save you time and frustration during the power supply replacement process. Ensure that you have everything listed above before proceeding to the next steps.
Step 2: Shutting Down the Computer and Disconnecting the Power
Before you can safely proceed with replacing the power supply unit in your Gateway DX4870 computer, you need to shut down the computer and disconnect all sources of power. Follow these steps to do so:
- Save your files and close any open programs.
- Click on the “Start” button in the bottom left corner of your screen and select “Shut Down” from the options.
- Wait for the computer to completely shut down before proceeding to the next step. You can confirm this if the fans stop spinning and the lights on the computer case turn off.
- Unplug the power cord from the electrical outlet. Make sure you also disconnect any peripheral devices connected to the computer, such as printers or external hard drives.
- To ensure that no residual power remains, press and hold the computer’s power button for about five seconds.
By following these steps, you have successfully shut down your Gateway DX4870 computer and disconnected the power. This is a crucial safety measure to prevent any electrical shock or damage while working on the power supply unit. Now you can proceed to the next step of opening the computer case.
Step 3: Opening the Computer Case
Now that you have shut down the Gateway DX4870 computer and disconnected the power, it’s time to open the computer case to gain access to the power supply unit. Follow these steps to open the computer case safely:
- Place your computer on a flat, stable surface such as a desk or table.
- Locate the screws or latches securing the computer case. In most cases, you’ll find screws on the back panel of the computer case.
- Using a Phillips-head screwdriver, carefully remove the screws that are securing the side panel of the computer case. Set the screws aside in a safe place as you’ll need them later.
- Gently slide or lift the side panel away from the computer case to expose the internal components.
Once the computer case is open, be cautious not to touch any components inside unless necessary. The internal components are delicate, and static electricity can cause damage. It’s recommended to ground yourself by either touching a metal surface or wearing an anti-static wrist strap.
Opening the computer case is an important step in gaining access to the power supply unit. With the case open, you can proceed to the next step of identifying the power supply unit within the computer.
Step 4: Identifying the Power Supply Unit
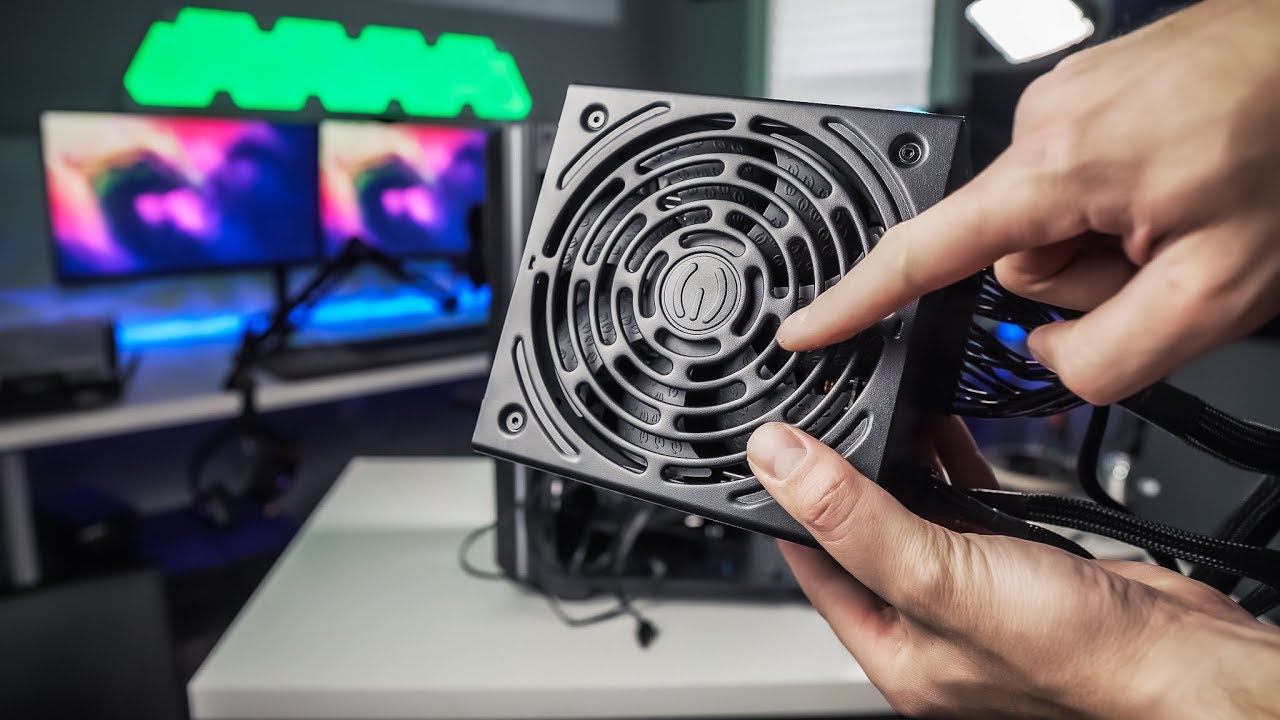
After opening the computer case of your Gateway DX4870, it’s time to identify the power supply unit (PSU) within the computer. The power supply unit is a rectangular metal box typically located at the top or bottom rear of the computer case. Follow these steps to locate the power supply unit:
- Visually scan the inside of the computer case to locate the rectangular metal box.
- Look for a bundle of cables coming out of the back of the rectangular case. These cables are connected to various components of the computer.
- Note the size of the power supply unit. It is usually larger in size compared to other components within the computer case.
- Look for any labels or markings on the power supply unit, which may indicate the wattage or model.
Identifying the power supply unit is crucial as it helps ensure that you are replacing the correct component later in the process. Take note of any relevant information, such as the wattage and model, as you may need this when purchasing the replacement power supply unit.
Once you have identified the power supply unit, you can proceed to the next step of disconnecting the power supply cables from the unit to prepare for its removal.
Step 5: Disconnecting the Power Supply Cables
With the power supply unit identified within your Gateway DX4870 computer, it’s time to disconnect the power supply cables from the unit. This step is essential before removing the power supply unit. Follow these steps to disconnect the power supply cables:
- Take a moment to observe the cables connected to the power supply unit. Note how they are connected and the specific ports they are plugged into.
- Starting from the top of the power supply unit, locate the power cables connected to the motherboard and carefully unplug them. These cables are typically labeled as “Main Power” or “Motherboard Power.”
- Move on to disconnecting any additional power cables connected to other components such as the hard drive, optical drive, and graphics card. Gently unplug the cables by pulling them away from the power supply unit.
- If any cables are tightly secured with cable ties or clips, remove them to free up the cables for disconnection.
- Ensure that all power cables are fully disconnected from the power supply unit before proceeding to the next step.
It’s important to be gentle when disconnecting the power supply cables. Avoid pulling on the cables directly as this can damage the connectors or components. Instead, grip the connector firmly and carefully wiggle it from side to side as you pull it out.
Once you have successfully disconnected all the power supply cables, you are ready to proceed to the next step of removing the power supply unit from your Gateway DX4870.
Step 6: Removing the Power Supply Unit
Now that you have disconnected the power supply cables from your Gateway DX4870 computer, it’s time to remove the existing power supply unit. Follow these steps to safely remove the power supply unit:
- Locate the screws or fasteners securing the power supply unit to the computer case. These screws are typically found at the back of the power supply unit.
- Using a Phillips-head screwdriver, carefully remove the screws or fasteners, holding the power supply unit in place. Set the screws aside in a safe place as you may need them later.
- Gently slide the power supply unit towards the side or back of the computer case to disengage it from its mounting brackets.
- Be cautious of any cables or wires that may still be connected to the power supply unit. Ensure that all cables are completely disconnected before attempting to remove the unit.
- Once the power supply unit is free from any attachments, carefully lift it out of the computer case, ensuring that no cables or wires are caught or tangled.
It’s important to handle the power supply unit with care, as it is a delicate component. Avoid dropping or applying excessive force to prevent any damage.
With the power supply unit successfully removed from your Gateway DX4870, you can now proceed to the next step of installing the new power supply unit.
Step 7: Installing the New Power Supply Unit
With the old power supply unit removed from your Gateway DX4870 computer, it’s time to install the new power supply unit. Follow these steps to safely and correctly install the new power supply unit:
- Take the new power supply unit out of its packaging and ensure that it matches the specifications of the old unit, such as wattage and form factor.
- Position the new power supply unit in the computer case, aligning it with the mounting holes.
- Slide the power supply unit into place, ensuring that it is securely seated and aligned with the mounting brackets.
- Use the screws that you set aside earlier to fasten the power supply unit to the computer case. Tighten the screws firmly, but avoid over-tightening to prevent damage to the unit or the case.
- If the new power supply unit has any additional power cables or connectors, make sure they are easily accessible and properly oriented for easy connection later.
During the installation process, ensure that the power supply unit is aligned correctly and properly seated. It should fit snugly within the computer case without any loose connections or gaps.
Once you have successfully installed the new power supply unit, you are ready to proceed to the next step of reconnecting the power supply cables.
Step 8: Reconnecting the Power Supply Cables
Now that the new power supply unit is securely installed in your Gateway DX4870 computer, it’s time to reconnect the power supply cables. Follow these steps to ensure a proper and secure connection:
- Take note of the cables and connectors that were originally connected to the old power supply unit. Refer to any labels or markings on the cables to ensure correct placement.
- Starting with the main power cable, locate the corresponding port on the new power supply unit. Align the connector and gently push it into place until it clicks or feels firmly connected.
- Continue connecting the additional power cables to their corresponding ports on the new power supply unit. These may include cables for the motherboard, hard drive, optical drive, and graphics card, among others.
- Ensure that each cable is securely connected, with no loose connections or gaps between the cable and the port.
- If any cables were previously secured with cable ties or clips, reattach them to ensure a tidy and organized cable management.
It’s important to double-check that all power supply cables are properly connected before proceeding. Loose or improperly connected cables can cause power issues or prevent the computer from starting up correctly.
By reconnecting the power supply cables, you have successfully completed this step of the power supply replacement process. You’re now ready to move on to the next step of closing the computer case.
Step 9: Closing the Computer Case
With the power supply cables reconnected to the new unit in your Gateway DX4870 computer, it’s time to close the computer case. Follow these steps to ensure a secure and properly closed case:
- Double-check that all cables and components inside the computer case are positioned correctly and not obstructing the closing of the case.
- Align the side panel of the computer case with the edges of the case. Ensure that any tabs or hooks on the panel are properly aligned with the corresponding slots or grooves on the case.
- Slide or gently press the side panel back into place until it is flush with the case.
- Secure the side panel of the computer case by tightening the screws you had previously removed. Ensure that the screws are tightened evenly but not overly tight, as this can damage the case or the screws themselves.
Once the computer case is securely closed, it’s important to visually inspect the case to ensure that it is properly aligned, with no gaps or openings that may affect the airflow or cause any potential risks to the components.
Closing the computer case marks the completion of the physical installation of the power supply unit in your Gateway DX4870. You are now ready to move on to the final step of testing the new power supply unit.
Step 10: Testing the New Power Supply Unit
After successfully installing the new power supply unit in your Gateway DX4870 computer and closing the case, it’s time to test the functionality of the new unit. Follow these steps to ensure that the new power supply unit is operating correctly:
- Double-check that all power supply cables are securely connected to their respective components, including the motherboard, hard drive, optical drive, and graphics card.
- Plug the power cord back into the electrical outlet.
- Press the power button on your Gateway DX4870 computer to turn it on.
- Observe the computer as it powers up. Listen for any unusual sounds, such as clicking or grinding noises, which might indicate a problem with the power supply unit.
- Check that the computer boots up properly and displays the operating system without any issues. Monitor the computer for any irregularities, such as sudden shutdowns or system instability.
- Run stress tests or perform resource-intensive tasks to put a load on the system and evaluate the performance and stability of the new power supply unit.
By testing the new power supply unit, you can ensure that it is functioning correctly and providing adequate power to all components in your Gateway DX4870 computer. If you encounter any issues during the testing phase, it’s advisable to consult a professional or refer to the user manual for further troubleshooting steps.
Congratulations! You have successfully completed the process of replacing the power supply unit in your Gateway DX4870 computer. With the new power supply unit in place, you can enjoy a stable and reliable power source for your computer’s components.
Conclusion
Replacing the power supply unit in your Gateway DX4870 computer is a straightforward process that can be accomplished with basic tools and minimal technical knowledge. By following the step-by-step guide outlined in this article, you can ensure a successful power supply unit replacement and restore optimal power delivery to your computer’s components.
Throughout the process, it’s crucial to prioritize safety by taking necessary precautions to protect yourself and your computer from any potential harm. Remember to shut down the computer, disconnect the power, and handle the components with care to avoid static electricity and other hazards.
Gathering the necessary tools and equipment, opening the computer case, identifying the power supply unit, disconnecting the power supply cables, removing the old power supply unit, installing the new unit, reconnecting the power supply cables, closing the computer case, and testing the new power supply unit are the essential steps involved in a successful replacement.
After completing the installation and testing phase, you should have a fully functional power supply unit providing reliable power to your Gateway DX4870 computer. If you encounter any issues during the process or have concerns about the replacement, it’s always recommended to consult the user manual or seek professional assistance.
By following these guidelines, you can ensure the smooth operation of your computer system and enjoy a stable power supply for optimal performance. Replacing the power supply unit is an essential maintenance task that can extend the lifespan of your computer and prevent potential issues down the line.
Take pride in your accomplishment and enjoy the benefits of a new power supply unit in your Gateway DX4870 computer. With a reliable and efficient power supply, you can continue to work, play, and enjoy your computing experience without any interruptions.


