Introduction
Welcome to our step-by-step guide on how to replace the screen on your Asus tablet. Accidents happen, and a cracked or damaged screen can be frustrating. Instead of dishing out a hefty sum for professional repairs or replacing the entire tablet, you can save both time and money by replacing the screen yourself.
Before we dive into the process, it’s important to note that screen replacement requires a certain level of technical skill. If you’re not comfortable with working on delicate electronic devices, we highly recommend consulting a professional. However, if you’re up for the challenge, we’ll provide the guidance you need to successfully replace the screen.
Replacing the screen on your Asus tablet is not only a cost-effective solution, but it also allows you to regain the full functionality and aesthetic appeal of your device. Whether you have a cracked screen, unresponsive touch functionality, or any other screen-related issue, our guide will help you through the process.
In this comprehensive guide, we will walk you through the necessary steps, from gathering the tools and supplies to powering off the device, removing the back cover, disconnecting the battery, replacing the broken screen, and reassembling the tablet. Each step will be detailed and accompanied by clear instructions, ensuring a smooth and hassle-free experience.
By following our guide, you can restore your Asus tablet to its former glory without the need for professional assistance. Let’s get started on your journey to a brand-new, fully functional screen for your Asus tablet!
Step 1: Gather the necessary tools and supplies
Before you begin the screen replacement process, it’s essential to have all the necessary tools and supplies on hand. This will help ensure a smooth and efficient repair without any unnecessary delays. Here’s a list of items you’ll need:
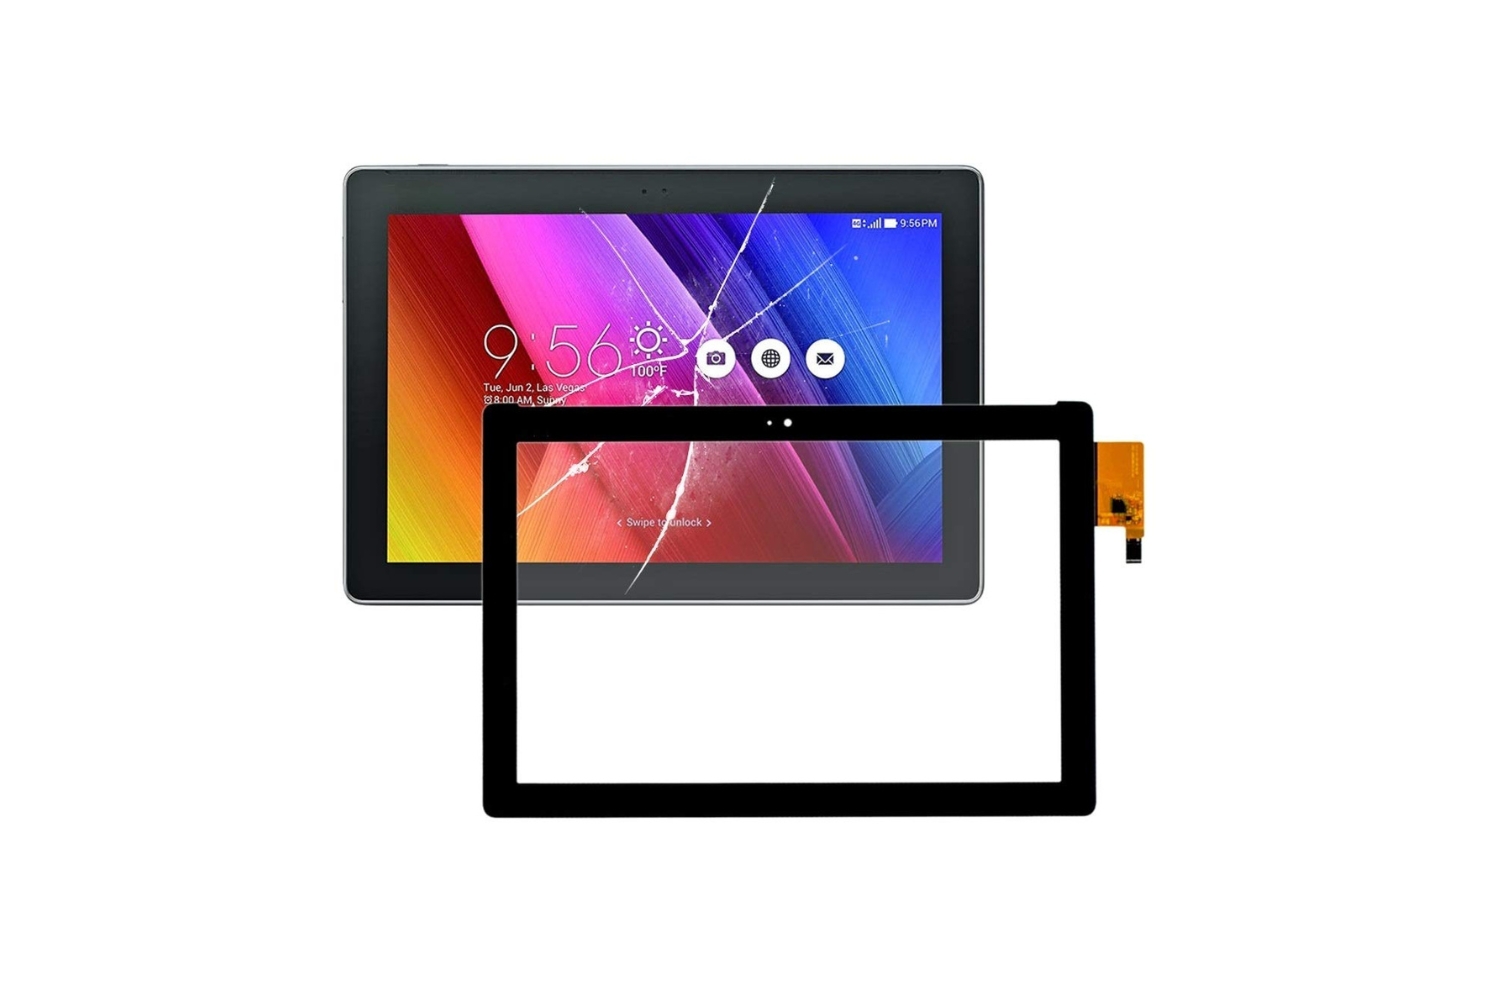
- Replacement screen: Make sure you have a compatible replacement screen specifically designed for your Asus tablet model. You can find these screens online or from reputable electronic parts suppliers.
- Small screwdriver set: A set of precision screwdrivers with various head types will be required to remove screws and open the tablet.
- Plastic pry tools: These tools are used to safely pry open the tablet without causing any damage to the components or the back cover.
- Tweezers: Tweezers will help you handle small and delicate components during the disassembly process.
- Double-sided adhesive tape: This adhesive tape is used to secure the replacement screen in place. Make sure it’s of good quality and specifically designed for screen replacements.
- Cleaning cloth: A soft microfiber cloth or a cleaning solution specifically designed for screens will help you clean the device and remove any fingerprints or smudges.
- Container or magnetic mat: Use a container or a magnetic mat to keep track of the screws and small components you remove during the disassembly process. This will prevent them from getting lost.
- Heat gun or hairdryer: Depending on your device model, you may need to use a heat gun or a hairdryer to soften the adhesive holding the old screen in place.
- Protective gloves and eyewear: Wearing gloves and protective eyewear is recommended to ensure your safety during the repair process.
Make sure you have all these tools and supplies readily available before you start replacing the screen on your Asus tablet. Having everything organized and within reach will make the repair process much more convenient and efficient.
Step 2: Power off the Asus tablet
Before you begin disassembling your Asus tablet, it’s crucial to power it off completely to avoid any potential damage or electrical hazards. Here’s how to safely power off your device:
- Locate the power button on your Asus tablet. Depending on the model, it’s usually located on the side or top of the device.
- Press and hold the power button for a few seconds.
- A menu should appear on the screen with various options, including the option to power off your device. If the menu doesn’t appear, continue holding the power button until the screen turns off.
- Once the screen is off, release the power button.
- Confirm that your Asus tablet is powered off by ensuring that the screen remains black and unresponsive.
By following these steps, you have successfully powered off your Asus tablet. It’s important to wait for a few moments to ensure that the device is completely powered down before proceeding to the next steps. This will prevent any potential electrical shocks or damage during the disassembly process.
Remember to handle your tablet with care throughout the repair process to avoid pressing any buttons accidentally. It’s also a good idea to work on a clean and static-free surface to minimize the risk of damaging internal components.
Now that your Asus tablet is powered off and you’re ready to proceed, let’s move on to the next step: removing the back cover.
Step 3: Remove the back cover
With your Asus tablet powered off, it’s time to remove the back cover. This step will grant you access to the internal components and prepare the tablet for screen replacement. Follow these instructions to safely remove the back cover:
- Inspect the edges of your Asus tablet’s back cover. Look for any visible screws or clips that may be securing it in place.
- Using a small screwdriver or a plastic pry tool, carefully insert it into the gap between the back cover and the main body of the tablet.
- Gently apply pressure and work your way around the edges to release the clips or screws holding the back cover.
- Once all the clips or screws are released, you should be able to lift the back cover away from the tablet’s main body.
- Set the back cover aside in a safe place where it won’t get damaged or misplaced.
Depending on your Asus tablet model, the back cover may require some force to remove, but be cautious not to apply excessive pressure to avoid damaging any internal components. If you encounter resistance while trying to remove the back cover, double-check for any remaining screws or clips that may still be holding it in place.
It’s worth noting that some tablets may have adhesive holding the back cover in place. In such cases, you may need to use a heat gun or a hairdryer to gently warm the adhesive and loosen its grip. Be careful not to overheat the device or damage the back cover in the process.
With the back cover successfully removed, you’re now ready to proceed to the next step: disconnecting the battery to ensure your safety during the screen replacement process.
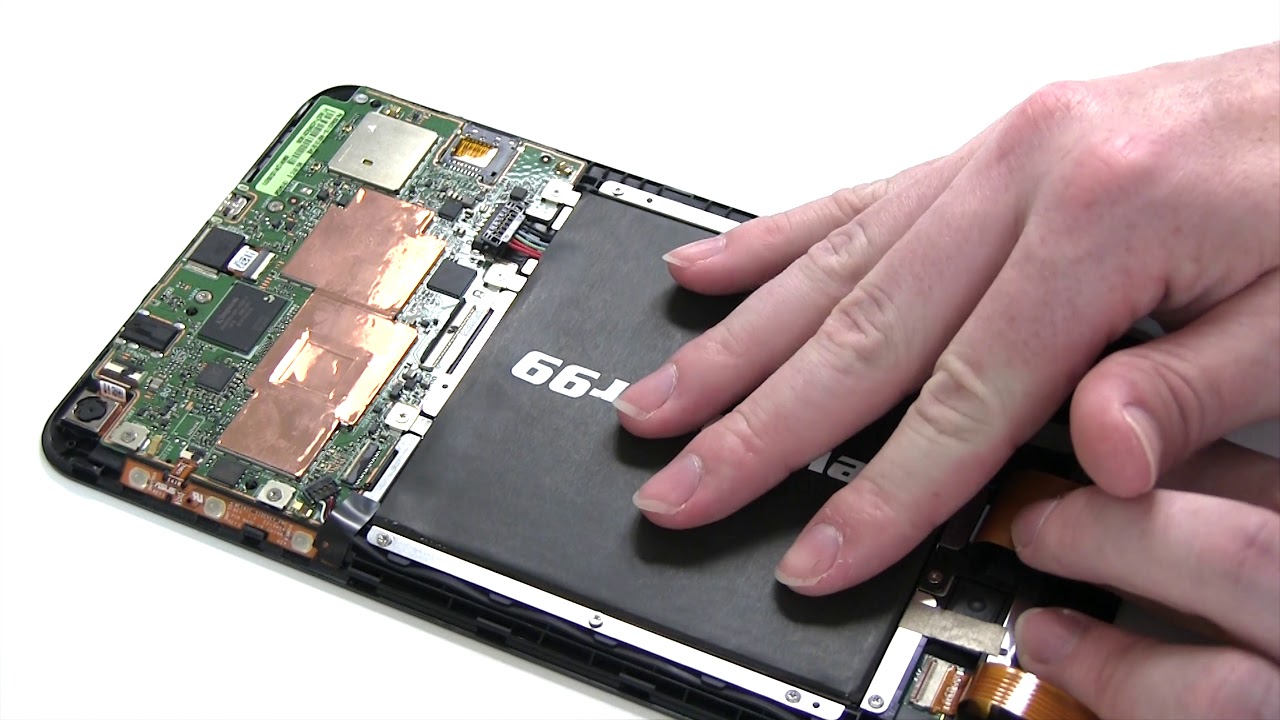
Step 4: Disconnect the battery
Before you begin working on the internal components of your Asus tablet, it’s crucial to disconnect the battery to avoid any potential electrical hazards. Follow these steps to safely disconnect the battery:
- Locate the battery connector on the motherboard of your Asus tablet. It’s usually a small white or black connector with wires connected to it.
- Using a pair of tweezers or your fingers, gently lift up the connector’s tab. Be careful not to pull on the wires.
- Once the tab is lifted, gently disconnect the battery connector by pulling it straight up.
- Set the disconnected battery connector aside.
By disconnecting the battery, you eliminate the risk of accidentally powering on the tablet or causing a short circuit while working on the screen replacement. It’s important to note that some tablets may have additional connectors or screws securing the battery in place. If you notice any, you’ll need to disconnect or remove them before disconnecting the battery connector.
When working with the battery, it’s crucial to handle it with care. Avoid bending or twisting the wires, as this can cause damage to the connector or the battery itself. Place the disconnected battery connector in a safe location where it won’t get misplaced or damaged.
Now that the battery is safely disconnected, you’re ready to move on to the next step: disconnecting other internal components to fully access and replace the broken screen.
Step 5: Disconnect other internal components
With the battery safely disconnected, it’s time to disconnect other internal components of your Asus tablet to gain full access to the broken screen. Follow these steps to disconnect the necessary components:
- Inspect the internal components and cables connected to the motherboard of your tablet. These may include cables for the camera module, speakers, volume buttons, and any other components directly attached to the screen or motherboard.
- Gently locate and disconnect the connectors or cables attached to these components. Use a pair of tweezers or your fingers to carefully lift up any connectors or tabs securing the cables.
- Ensure that all necessary components are disconnected, making note of their positions or how they were originally connected.
- If there are any screws securing the components in place, use a screwdriver to remove them, carefully setting the screws aside in a designated space.
As you disconnect the internal components, it’s important to be gentle and precise to avoid damaging any delicate cables or connectors. Take note of the sequence and order of components you disconnect, as this will aid in reassembling the tablet later on.
Remember to handle the components with care, avoiding unnecessary bending or twisting of cables. If you encounter resistance when disconnecting a cable, double-check for any tabs or locks holding it in place. Gently lift these tabs or locks before attempting to disconnect the cable.
Once all the necessary components are disconnected and any securing screws are removed, you’re now one step closer to replacing the broken screen on your Asus tablet. The next step will involve removing the damaged screen carefully.
Step 6: Remove the broken screen
With the internal components disconnected, it’s time to remove the broken screen from your Asus tablet. Follow these steps carefully to ensure a successful removal:
- Inspect the edges of the screen and frame for any adhesive or screws holding it in place. Take note of their locations for reassembly.
- If there are any securing screws, use a screwdriver to remove them. Place the screws in a safe location where they won’t get misplaced.
- Gently lift the broken screen from one corner, applying upward pressure to release any adhesive holding it to the frame.
- Continue lifting the screen, ensuring that you’re not applying excessive force that could cause damage to the underlying components.
- If necessary, use a plastic pry tool or a spudger to carefully loosen any remaining adhesive or clips securing the screen to the frame.
- Once the broken screen is completely disconnected, carefully set it aside and prepare for the installation of the new screen.
During this step, it’s crucial to exercise caution and handle the broken screen with care. Watch out for any sharp edges or loose glass fragments that could cause injury. Dispose of the broken screen safely and responsibly.
If you encounter any resistance while lifting the screen, double-check for any remaining adhesive or securing screws that may still be holding it in place. Avoid using excessive force as it could lead to further damage to the device.
With the broken screen successfully removed, it’s time to move on to the exciting part: attaching the new screen and bringing your Asus tablet back to life.
Step 7: Attach the new screen
Now that the broken screen has been removed, it’s time to attach the new screen to your Asus tablet. Follow these steps carefully to ensure a successful installation:
- Inspect the frame of your tablet and clean any dust, debris, or adhesive residue that may be present. A soft, lint-free cloth or mild cleaning solution can be used for this purpose.
- If your new screen came with a protective film or cover, carefully remove it before proceeding.
- Position the new screen over the frame, aligning it correctly with the openings for the camera, speakers, and buttons.
- Gently press the new screen onto the frame, applying even pressure to ensure a secure and snug fit. Take care not to apply excessive force that could damage the screen or other components.
- If the new screen includes adhesive strips, remove the backing and carefully attach the screen to the frame, aligning it precisely.
- Once the new screen is securely in place, press gently along the edges to ensure proper adhesion.
Throughout this step, it’s crucial to handle the new screen with extreme care to avoid any damage. Avoid touching the screen itself or pressing too hard, as this could result in cracks or other issues.
Take your time to align the new screen properly with the frame, making sure that all openings and cutouts line up correctly. This will ensure that all components, such as the camera and buttons, function correctly.
If your new screen did not come with adhesive strips, you may need to use double-sided adhesive tape to secure the screen to the frame. Make sure to cut the tape to the appropriate length and apply it carefully to ensure a secure and stable connection.
With the new screen successfully attached to the frame, you’re one step closer to completing the screen replacement process. But first, let’s move on to reconnecting the internal components.
Step 8: Reconnect the internal components
Now that the new screen is securely in place, it’s time to reconnect the internal components of your Asus tablet. Follow these steps to ensure a proper reconnection:
- Retrieve the internal components, such as the camera module, speakers, volume buttons, and any other components that were disconnected previously.
- Align the connectors or cables of each component with their respective ports on the motherboard.
- Gently push the connectors or cables into their ports until they are fully inserted.
- If there were any securing screws removed earlier, use a screwdriver to reattach them to hold the components in place.
- Double-check that all cables and connectors are secure and properly seated.
During this step, it’s important to be gentle while reconnecting the components to avoid damaging any cables or connectors. Take note of how each component was originally connected and make sure to follow the same sequence for reconnection.
If the connectors feel tight or difficult to insert, ensure that they are properly aligned with their ports. Avoid forcing the connectors as this could cause damage. Double-check that all connectors are fully inserted and securely in place.
Once all the components are reconnected, you can proceed to the next step: reattaching the battery to power on your Asus tablet.
With the internal components successfully reconnected, your Asus tablet is starting to resemble its original state. However, there are still a few steps remaining to complete the screen replacement process. Let’s move on to the next step: reattaching the battery.
Step 9: Reattach the battery
With the internal components reconnected, it’s time to reattach the battery to power on your Asus tablet. Follow these steps to safely and effectively reattach the battery:
- Retrieve the disconnected battery connector that was set aside earlier.
- Align the battery connector with the corresponding port on the motherboard.
- Gently slide the battery connector into its port until it is fully inserted. Ensure that it is securely seated and properly aligned.
- If necessary, secure the battery connector in place by gently pressing down or flipping the tab that holds it.
During this step, it’s important to handle the battery connector with care and avoid applying excessive force. Ensure that the connector is properly aligned with its port before attempting to insert it. Double-check that the connector is fully inserted and securely seated, as this will ensure a reliable connection.
If the battery connector has a tab or lock mechanism, be sure to engage it properly to hold the connector in place. This will prevent any accidental disconnection while using your Asus tablet.
With the battery reattached, your Asus tablet is ready for the final steps of the screen replacement process. One last crucial step remains: reassembling the back cover.
Step 10: Snap the back cover back into place
With the battery reattached and all internal components properly connected, it’s time to snap the back cover of your Asus tablet back into place. Follow these steps to complete the screen replacement process:
- Align the edges of the back cover with the corresponding edges of the tablet’s main body.
- Gently press down on the back cover, starting from one side and working your way around the edges.
- Apply even pressure along the edges to ensure that the clips or screws are securely fastened.
- Listen for audible clicks or feel for a snug fit to indicate that the back cover is properly snapped back into place.
- Inspect the edges of the tablet to ensure that the back cover is aligned and flush with the main body.
During this step, it’s important to be gentle and patient while aligning and attaching the back cover. Take your time to ensure that all clips or screws properly engage with the main body of the tablet. Applying even pressure along the edges will help ensure a secure fit.
If you encounter any resistance or difficulty in snapping the back cover into place, double-check for any misaligned clips or screws. Make any necessary adjustments to ensure a proper fit.
Once the back cover is securely fastened and properly aligned, your Asus tablet is almost ready. Give it a final visual inspection to confirm that everything looks as it should.
Congratulations! You have successfully replaced the screen on your Asus tablet. You can now power on your device and enjoy its fully functional and visually appealing screen.
It’s important to note that the screen replacement process may vary slightly depending on the model of your Asus tablet. Always refer to the specific instructions provided by the manufacturer or consult a professional if you have any doubts or concerns.
Conclusion
Congratulations on successfully replacing the screen on your Asus tablet! By following this step-by-step guide, you have saved both time and money by performing the repair yourself. Not only have you restored the functionality of your device, but you have also gained the satisfaction of accomplishing a technical task.
Remember, screen replacement requires a certain level of technical skill and attention to detail. If you feel unsure or uncomfortable during any step of the process, it’s always best to seek professional assistance. Safety should be a top priority when working with electronic devices.
Throughout this guide, we have covered the necessary tools and supplies, the process of powering off the tablet, removing the back cover, disconnecting the battery and internal components, removing the broken screen, attaching the new screen, reconnecting the internal components, and finally, snapping the back cover back into place.
With the new screen in place, power on your Asus tablet and enjoy its fully restored functionality and visually appealing display. Remember to handle your tablet with care to prevent any future damage and consider investing in protective measures such as a screen protector or case.
We hope this guide has been helpful in assisting you with the screen replacement process. If you have any further questions or encounter any issues, don’t hesitate to consult the manufacturer’s documentation or reach out to a professional for support.
Thank you for choosing our guide, and best of luck with your newly repaired Asus tablet!


