Introduction
Android tablets are highly versatile devices that allow users to customize their home screens with various icons for quick access to apps, shortcuts, and widgets. While having icons on your Android tablet’s home screen can be convenient, sometimes they can become overwhelming or cluttered. If you find yourself with too many icons or simply want to remove unnecessary ones, this article will guide you through several methods to help you clean up your home screen and organize your apps.
Removing icons from your Android tablet’s home screen can improve the visual appeal, streamline navigation, and make it easier to find the apps you use most frequently. Additionally, removing unused icons can help declutter your tablet’s interface and free up valuable screen space.
In this guide, we will explore different methods for removing icons from your Android tablet’s home screen. We will cover how to remove icons directly from the home screen, disable pre-installed apps, uninstall third-party apps, use third-party launchers, and create folders to better organize your icons. Whether you are a tech-savvy user or new to Android tablets, these methods will provide you with the flexibility to customize your home screen according to your preferences.
Before proceeding, it’s important to note that the specific steps and options may vary slightly depending on the Android version and the tablet’s manufacturer. However, the general principles discussed here should apply to most Android tablets.
Now, let’s dive into the various methods you can use to remove icons from your Android tablet’s home screen and customize it to suit your needs.
Method 1: Removing Icons from Home Screen
One of the simplest ways to remove icons from your Android tablet’s home screen is by using the default launcher settings. Here’s how you can do it:
- Unlock your Android tablet and navigate to the home screen containing the icons you want to remove.
- Press and hold the icon you wish to remove. After a brief moment, options for customization will appear on the screen. These options may vary depending on the launcher installed on your tablet.
- Drag the icon to the “Remove” or “Delete” option that appears at the top or bottom of the screen. Once you release your finger, the icon will be removed from the home screen.
- If you want to remove multiple icons simultaneously, repeat the steps above for each icon you wish to remove.
- Once you have removed the desired icons, you can press the home button to exit the customization mode and return to the main home screen.
Keep in mind that removing icons from the home screen does not uninstall the corresponding apps from your tablet. It simply removes the shortcut from the home screen, and you can still access the app from the app drawer or the search function.
This method allows you to quickly declutter your home screen by removing icons that you do not frequently use or no longer need. It can help you create a cleaner and more organized interface, making it easier to find the apps and shortcuts that are most important to you.
It’s important to note that the steps and options for removing icons from the home screen may vary slightly depending on the Android version and the launcher installed on your tablet. If you’re using a customized launcher or a third-party launcher, the process may differ. However, the general principle of long-pressing the icon and dragging it to the “Remove” or “Delete” option should apply in most cases.
Now that you’ve learned how to remove icons from the home screen, let’s explore additional methods for managing and organizing your icons on your Android tablet.
Method 2: Disabling Pre-installed Apps
Many Android tablets come pre-loaded with a variety of apps that you may not use or need. These pre-installed apps can take up storage space and clutter your app drawer. Disabling them can help free up storage and streamline your tablet’s interface. Here’s how you can disable pre-installed apps:
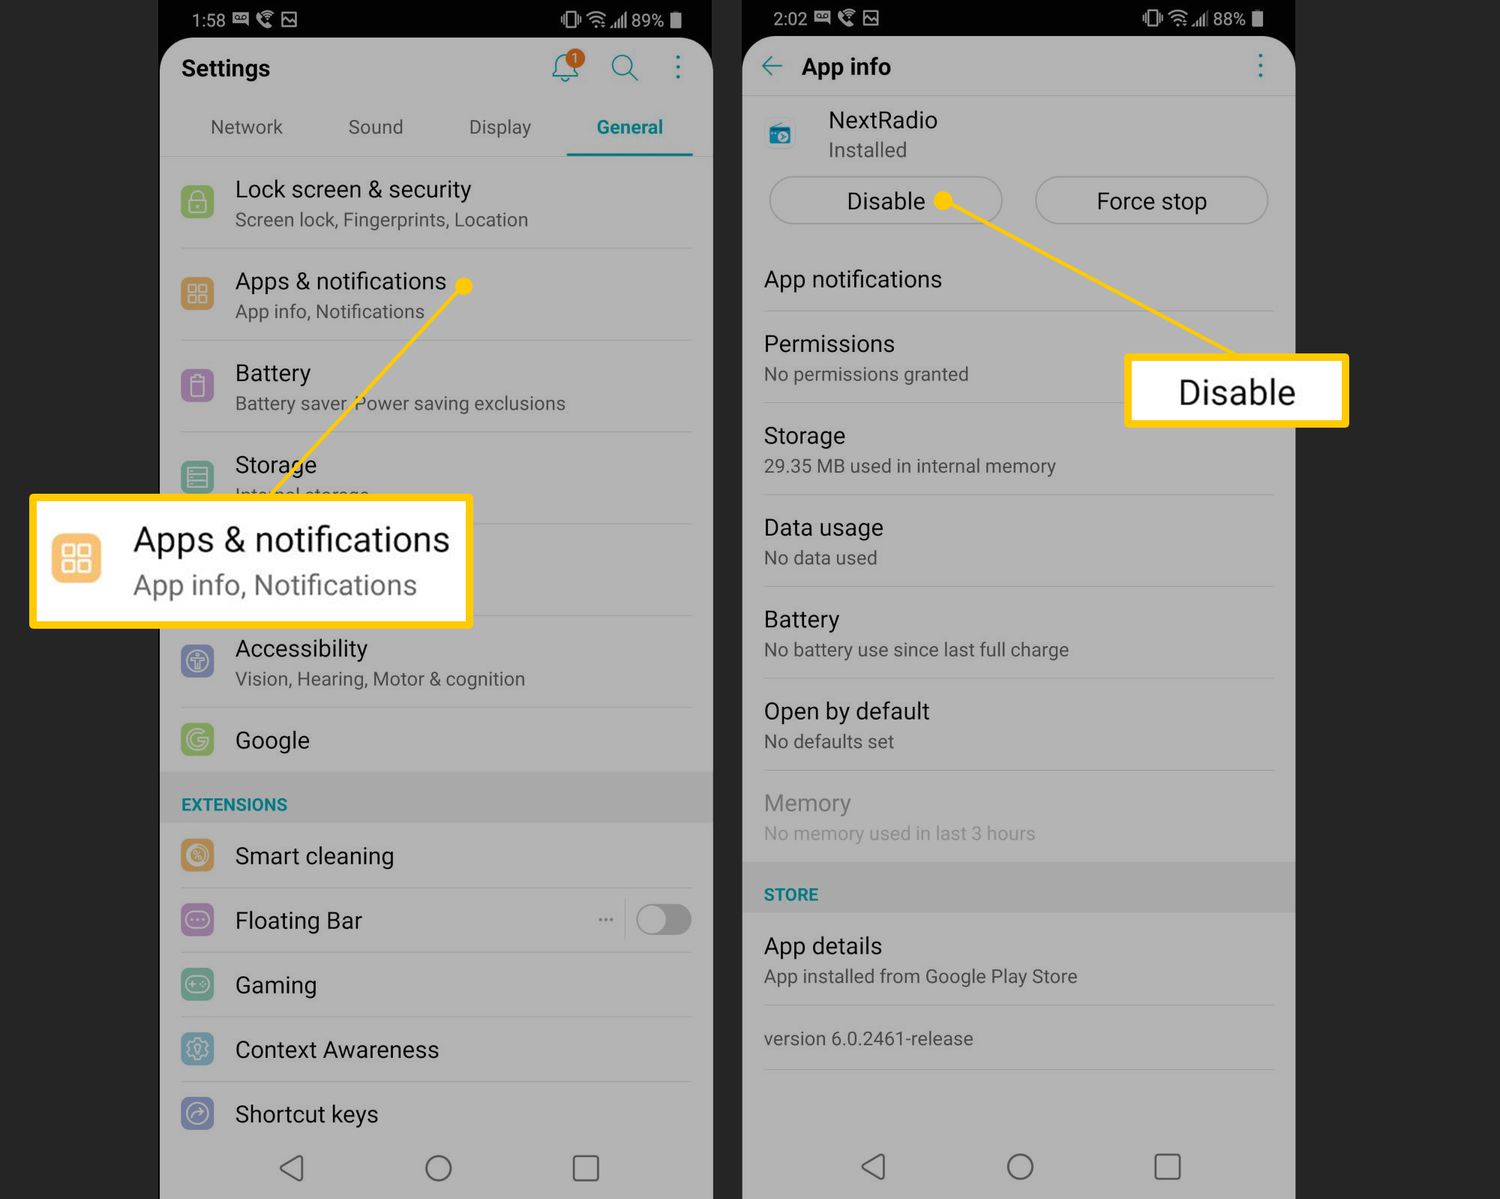
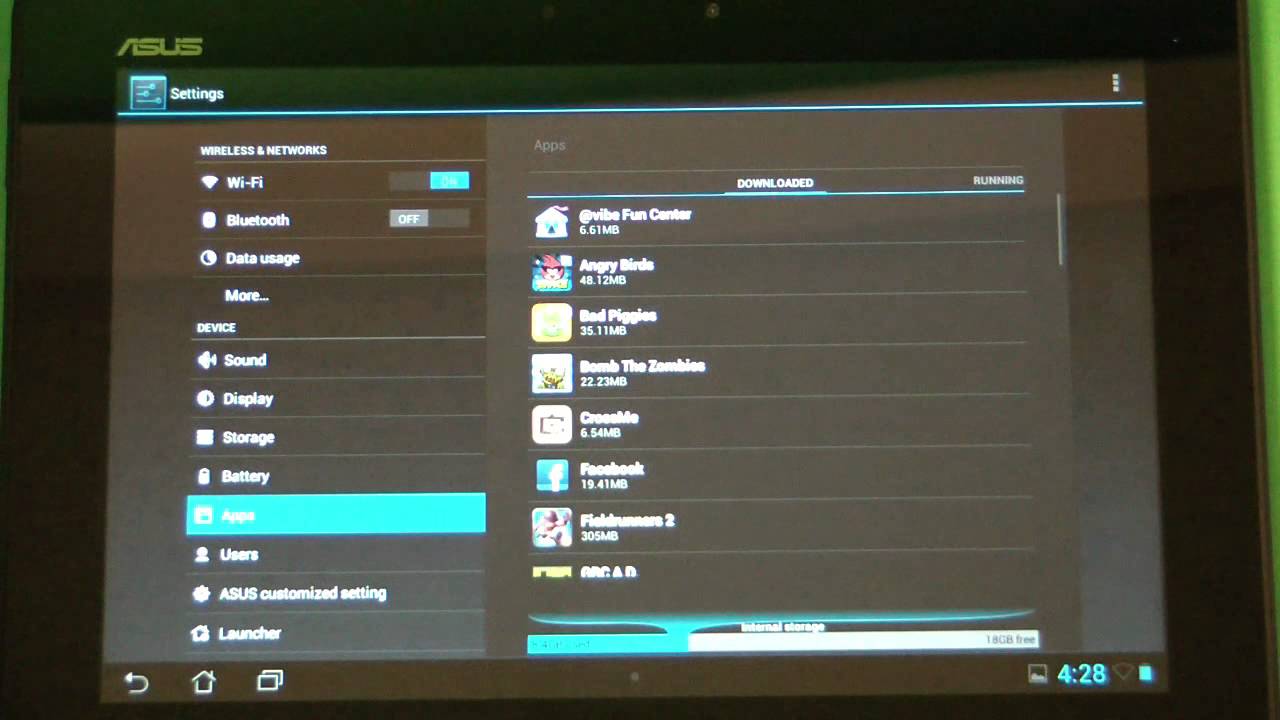
- Open the Settings app on your Android tablet. You can usually find it in the app drawer or by swiping down from the top of the screen and tapping on the gear icon.
- Scroll down and select the “Apps” or “Applications” option. This may vary slightly depending on the Android version and the tablet’s manufacturer.
- In the list of apps, locate the pre-installed app you want to disable. You can scroll through the list or use the search function at the top to find it more quickly.
- Tap on the app to open its details page.
- On the app details page, you should see an option labeled “Disable” or a toggle switch to disable the app. Tap on it to disable the app.
- A confirmation prompt may appear, informing you that disabling the app may affect other features or functionalities. Read the prompt carefully and tap “Disable” to proceed.
- The app will now be disabled and will no longer appear in your app drawer or on your home screen. However, keep in mind that it will still occupy storage space on your tablet.
By disabling pre-installed apps that you don’t use, you can not only declutter your tablet’s interface but also potentially improve its performance. Disabling these apps prevents them from running in the background, saving valuable system resources.
If you ever decide to re-enable a disabled app, you can follow similar steps and tap on the “Enable” option instead of “Disable.” However, it’s important to exercise caution when disabling or enabling apps, as some system apps are necessary for your tablet’s proper functioning.
Now that you know how to disable pre-installed apps, let’s explore another method for removing icons from your Android tablet.
Method 3: Uninstalling Third-Party Apps
In addition to pre-installed apps, you may have also downloaded and installed third-party apps on your Android tablet. If you no longer use or need these apps, uninstalling them can help declutter your device and free up storage space. Here’s how you can uninstall third-party apps:
- Open the Settings app on your Android tablet.
- Scroll down and select the “Apps” or “Applications” option.
- In the list of apps, find the third-party app you want to uninstall. You can scroll through the list or use the search function to locate it more quickly.
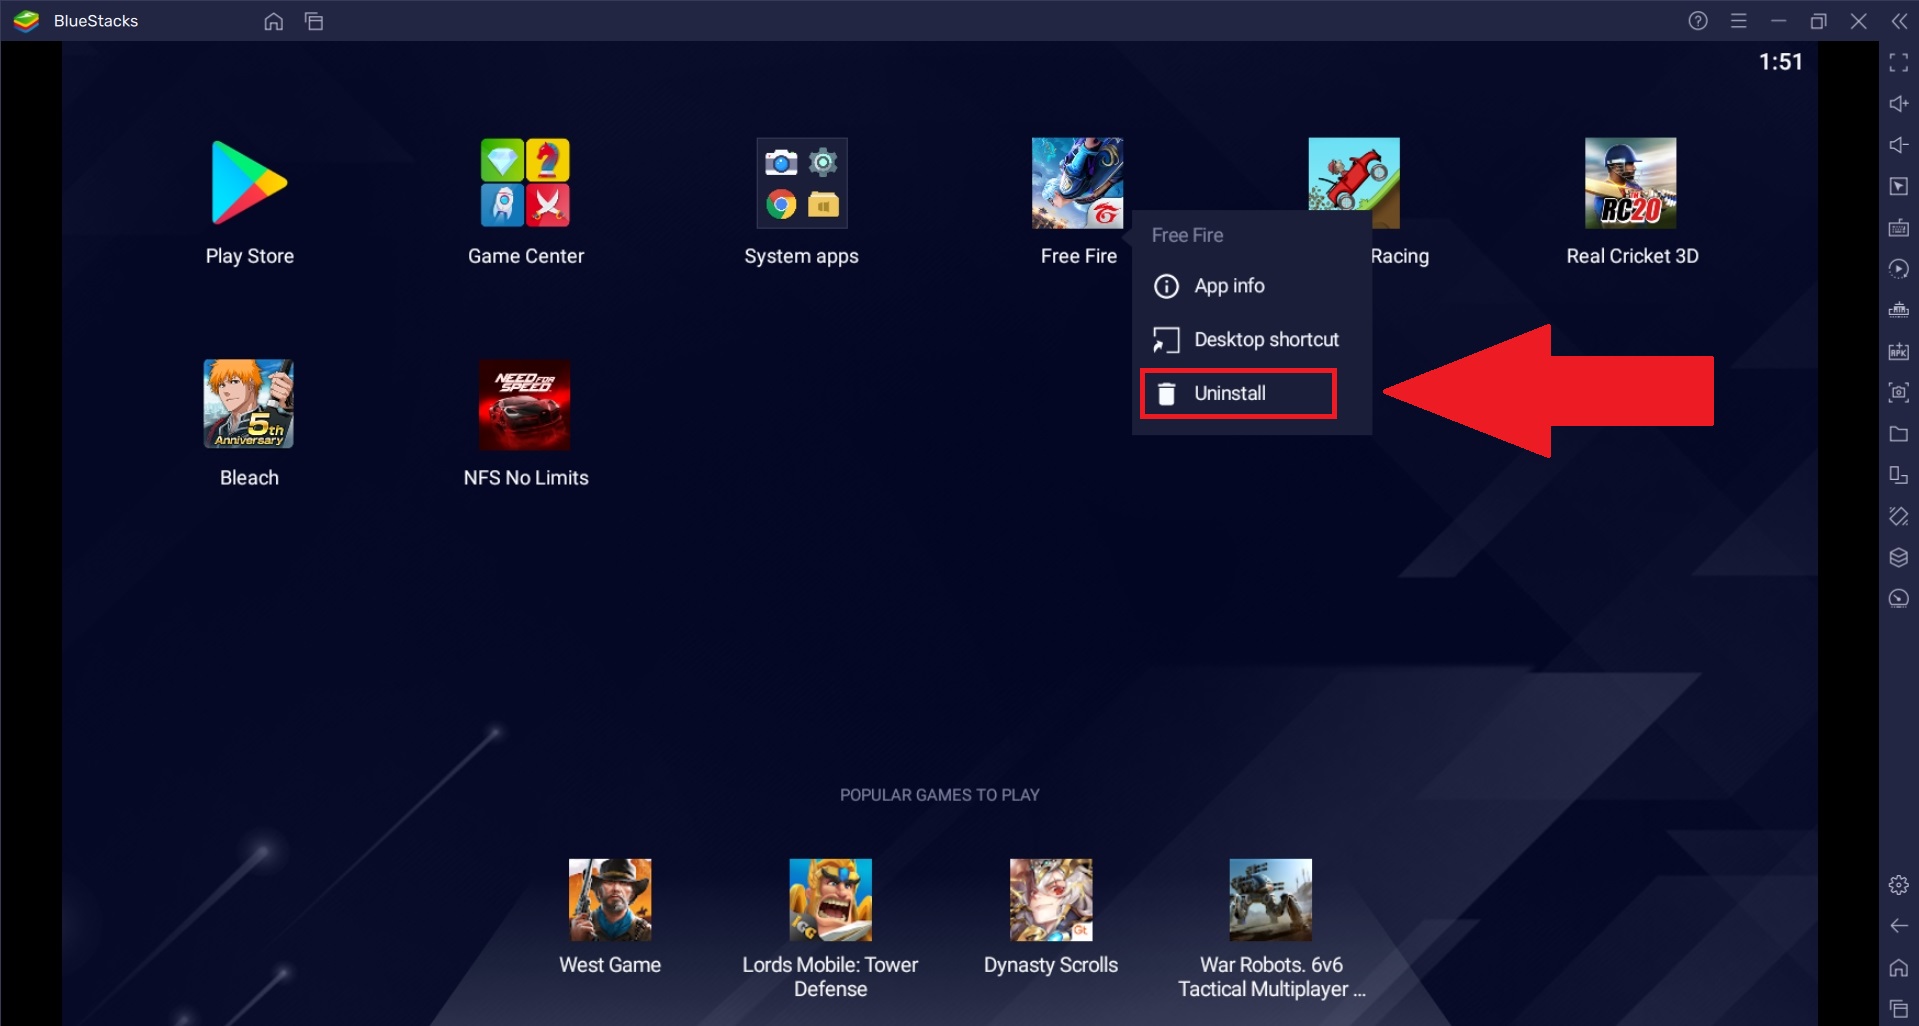
- Tap on the app to open its details page.
- On the app details page, you should see an option labeled “Uninstall” or “Remove.” Tap on it to initiate the uninstallation process.
- A confirmation prompt will appear, asking if you want to uninstall the app and delete its data. Review the prompt and tap “OK” to confirm.
- The app will be uninstalled from your Android tablet, and its icon will no longer appear in your app drawer or on your home screen.
Uninstalling unnecessary third-party apps not only helps to keep your tablet organized but also allows you to reclaim valuable storage space. Removing unused apps can improve your device’s performance and ensure that you have enough space for the apps and content that matter to you.
It’s worth noting that some pre-installed apps and system apps cannot be uninstalled using this method. However, you can still disable them using the method mentioned earlier in this article.
Remember to exercise caution when uninstalling apps, especially if they are apps you are not familiar with. It’s recommended to only uninstall apps that you are certain you no longer need or use. If you are unsure, it’s better to disable the app first and monitor the impact before fully uninstalling it.
Now that you know how to uninstall third-party apps, let’s explore another method for customizing your Android tablet’s home screen.
Method 4: Using Third-Party Launchers
If you’re looking for a more customizable and flexible way to remove icons and personalize your Android tablet’s home screen, you can consider using third-party launchers. These alternative launcher apps offer a wide range of features, including the ability to hide, remove, or organize icons according to your preferences. Here’s how you can use third-party launchers to customize your home screen:
- Go to the Google Play Store on your Android tablet and search for “third-party launchers.”
- Browse through the available options and select a launcher that suits your needs. Popular choices include Nova Launcher, Microsoft Launcher, and Apex Launcher.
- Download and install the chosen launcher on your tablet.
- Once installed, you will typically be prompted to set the new launcher as your default home screen app. Follow the on-screen instructions to do so.
- After setting the third-party launcher as your default, you can access its settings and customization options.
- Navigate through the launcher’s settings to find options related to hiding or removing icons on the home screen.
- Depending on the launcher, you may be able to hide icons, create custom app drawers, or group similar apps into folders.
- Explore the various customization features offered by the launcher and adjust them to your liking.
Using a third-party launcher gives you greater control over the look and feel of your Android tablet’s home screen. You can remove icons that you don’t use, create custom layouts, apply different themes, and customize other aspects of the interface. This level of customization allows you to tailor your home screen to match your personal style and preferences.
Keep in mind that while third-party launchers provide extensive customization options, they may have a learning curve and could slightly impact your device’s performance. Additionally, you may need to reconfigure widgets and shortcuts on your new home screen after switching to a third-party launcher. However, the enhanced flexibility and customization possibilities are often well worth the effort.
Now that you’re familiar with using third-party launchers to customize your home screen, let’s explore another method for organizing your icons on your Android tablet.
Method 5: Creating Folders to Organize Icons
If you have a large number of apps and icons on your Android tablet’s home screen, creating folders can help you better organize them and make it easier to find specific apps. By categorizing your apps into folders, you can reduce clutter and streamline your home screen. Here’s how to create folders to organize icons:
- Unlock your Android tablet and navigate to the home screen.
- Press and hold any app icon you wish to include in a folder.
- Once the icon starts to wiggle or a menu appears, drag the icon onto another app icon you want to group together.
- Release the icon to drop it onto the second app icon and create a folder.
- A new folder will be created, and you can now name it according to the category of apps you plan to place inside. To name the folder, simply tap on the text field below the folder and enter a descriptive name.
- Add additional apps to the newly created folder by dragging and dropping each desired app icon onto the folder.
- Continue moving and adding app icons to folders until you have organized your icons to your liking.
- Once you have created and organized your folders, you can tap outside the folder or press the home button to exit the customization mode and return to the main home screen.
Creating folders allows you to sort your apps into logical categories, such as “Games,” “Productivity,” “Social Media,” or any other classification that suits your needs. This method helps reduce clutter on your home screen and makes it easier to find and access specific apps without the need to scroll through multiple pages.
Keep in mind that some launchers may have variations in the folder creation process or offer additional customization options for folders. Take the time to explore your launcher’s settings to make the most of its organizational features and create a home screen layout that works best for you.
Now that you know how to create folders to better organize your icons, let’s recap the different methods discussed in this article.
Conclusion
Customizing and organizing the icons on your Android tablet’s home screen can greatly enhance your user experience and make it easier to access the apps and features you use most frequently. In this article, we explored several methods to help you remove icons, declutter your home screen, and personalize your device.
We started with the simple method of removing icons directly from the home screen by long-pressing and dragging them to the “Remove” or “Delete” option. This method is quick and effective for decluttering your home screen without uninstalling the corresponding apps.
We then discussed disabling pre-installed apps, which not only declutters your app drawer but also frees up storage space and potentially improves performance. Disabling these apps prevents them from running in the background and using system resources.
If you want to remove third-party apps that you no longer use, we provided instructions on how to uninstall them from your Android tablet. Uninstalling unused apps not only frees up storage space but also helps keep your tablet’s interface organized and efficient.
For users seeking more customization and flexibility, we recommended using third-party launchers. These alternative home screen apps offer a wide range of features, including the ability to hide, remove, or organize icons according to individual preferences. Third-party launchers allow you to tailor your home screen to your personal style and create a more unique and personalized experience.
Lastly, we explored the method of creating folders to organize icons. By categorizing your apps into folders, you can reduce clutter and make it easier to find specific apps. This method is particularly useful for users with a large number of apps on their home screen.
Remember, while customizing and organizing your home screen can improve usability and visual appeal, it’s important to find a balance and avoid overcrowding your screen. Choose the methods that work best for you and create a home screen layout that enhances your productivity and enjoyment on your Android tablet.
Now that you have learned these methods, it’s time to apply them to your own Android tablet and create a home screen that reflects your style and preferences. Start decluttering, organizing, and customizing your home screen to optimize your Android tablet experience.