Introduction
Welcome to our step-by-step guide on how to get rid of apps on your Android tablet. As you use your tablet over time, you may find that you have accumulated a number of apps that you no longer need or use. These unused apps can take up valuable storage space and slow down your device. Removing unnecessary apps not only frees up space but also helps improve the performance of your tablet.
In this guide, we will walk you through the process of uninstalling apps from your Android tablet. Whether you want to remove apps that you no longer use, or you are looking to streamline your device’s functionality, we have you covered with easy-to-follow steps.
Before we begin, it’s important to note that the instructions may vary slightly depending on the Android version and the tablet model you have. However, the overall process remains similar across devices, ensuring you can follow these steps regardless of your specific tablet.
So, let’s get started and learn how to declutter your Android tablet by removing unnecessary apps!
Step 1: Navigate to the Apps Menu
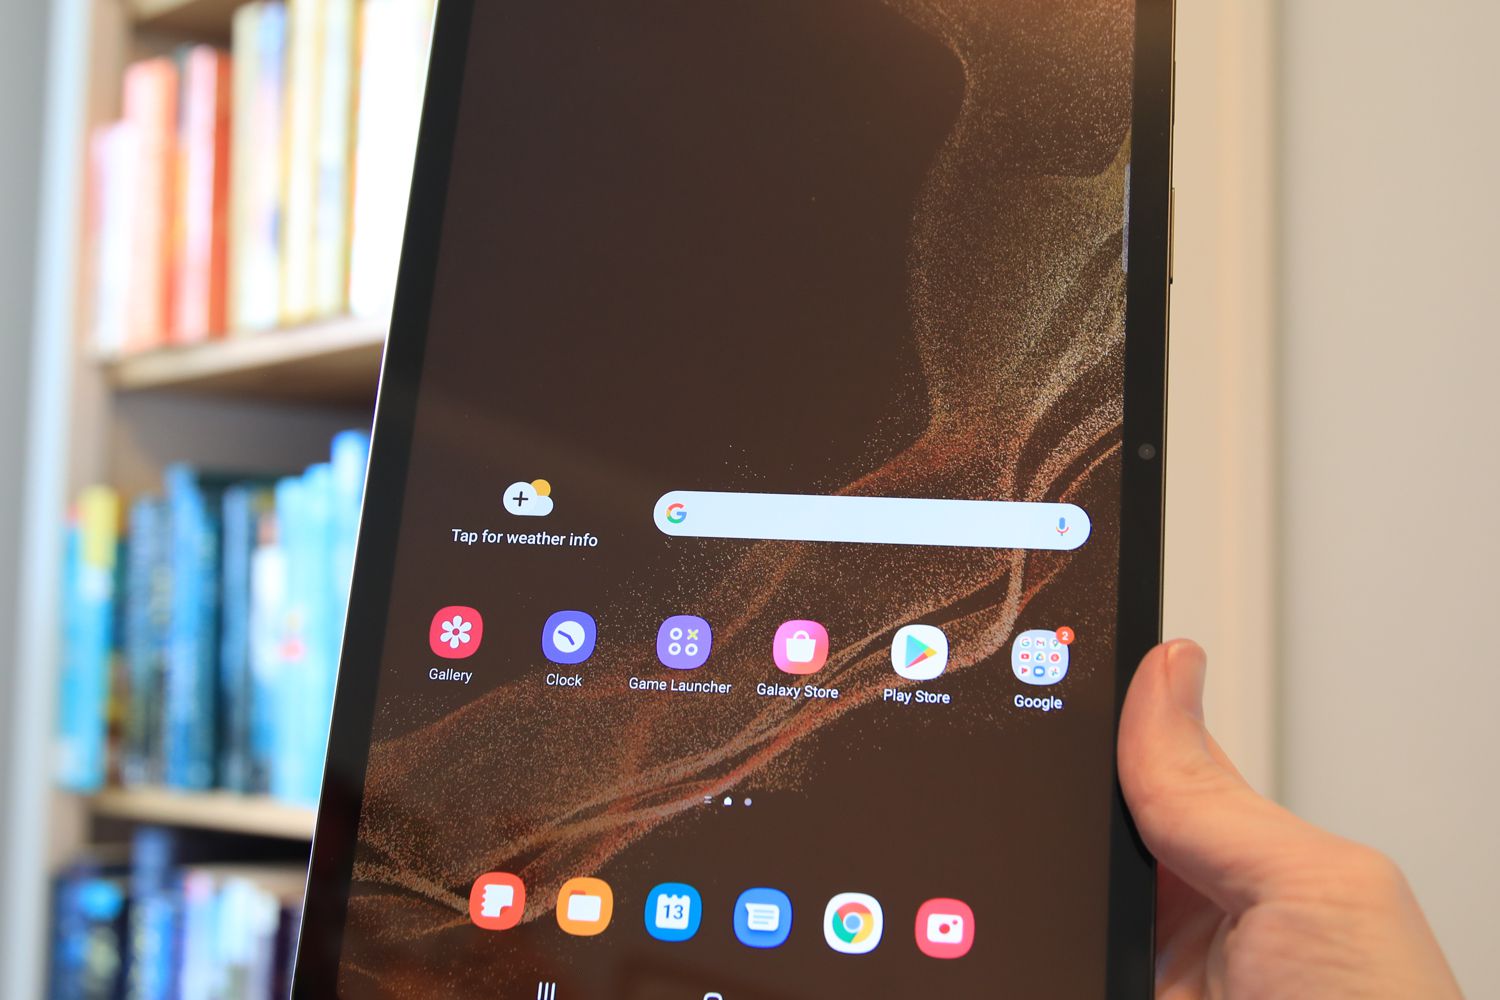
The first step to uninstalling apps on your Android tablet is to navigate to the Apps Menu. This menu displays all the apps installed on your device, making it easy to locate and manage them.
To access the Apps Menu, you will typically find an icon on your home screen that resembles a grid of dots or squares. The location and appearance of this icon may vary depending on your tablet’s manufacturer and Android version. However, it is commonly found at the bottom center or bottom right of the home screen.
Once you have located the Apps Menu icon, follow these steps:
- Tap on the Apps Menu icon to open it.
- You will be taken to a screen that displays all the apps installed on your tablet.
- Scroll through the list to find the app you want to uninstall.
Alternatively, you can also swipe left or right on the home screen to access the Apps Menu directly, without tapping on the icon. This may vary depending on the launcher you are using.
Once you have successfully accessed the Apps Menu and located the app you want to remove, you are ready to move on to the next step.
Step 2: Long-press the App Icon
After accessing the Apps Menu and finding the app you want to uninstall, the next step is to long-press the app icon. Long-pressing allows you to access additional options and actions related to the app.
To long-press the app icon, follow these steps:
- Locate the app icon on the Apps Menu.
- Press and hold your finger on the app icon.
- After a moment, you will see a contextual menu or options appear on the screen.
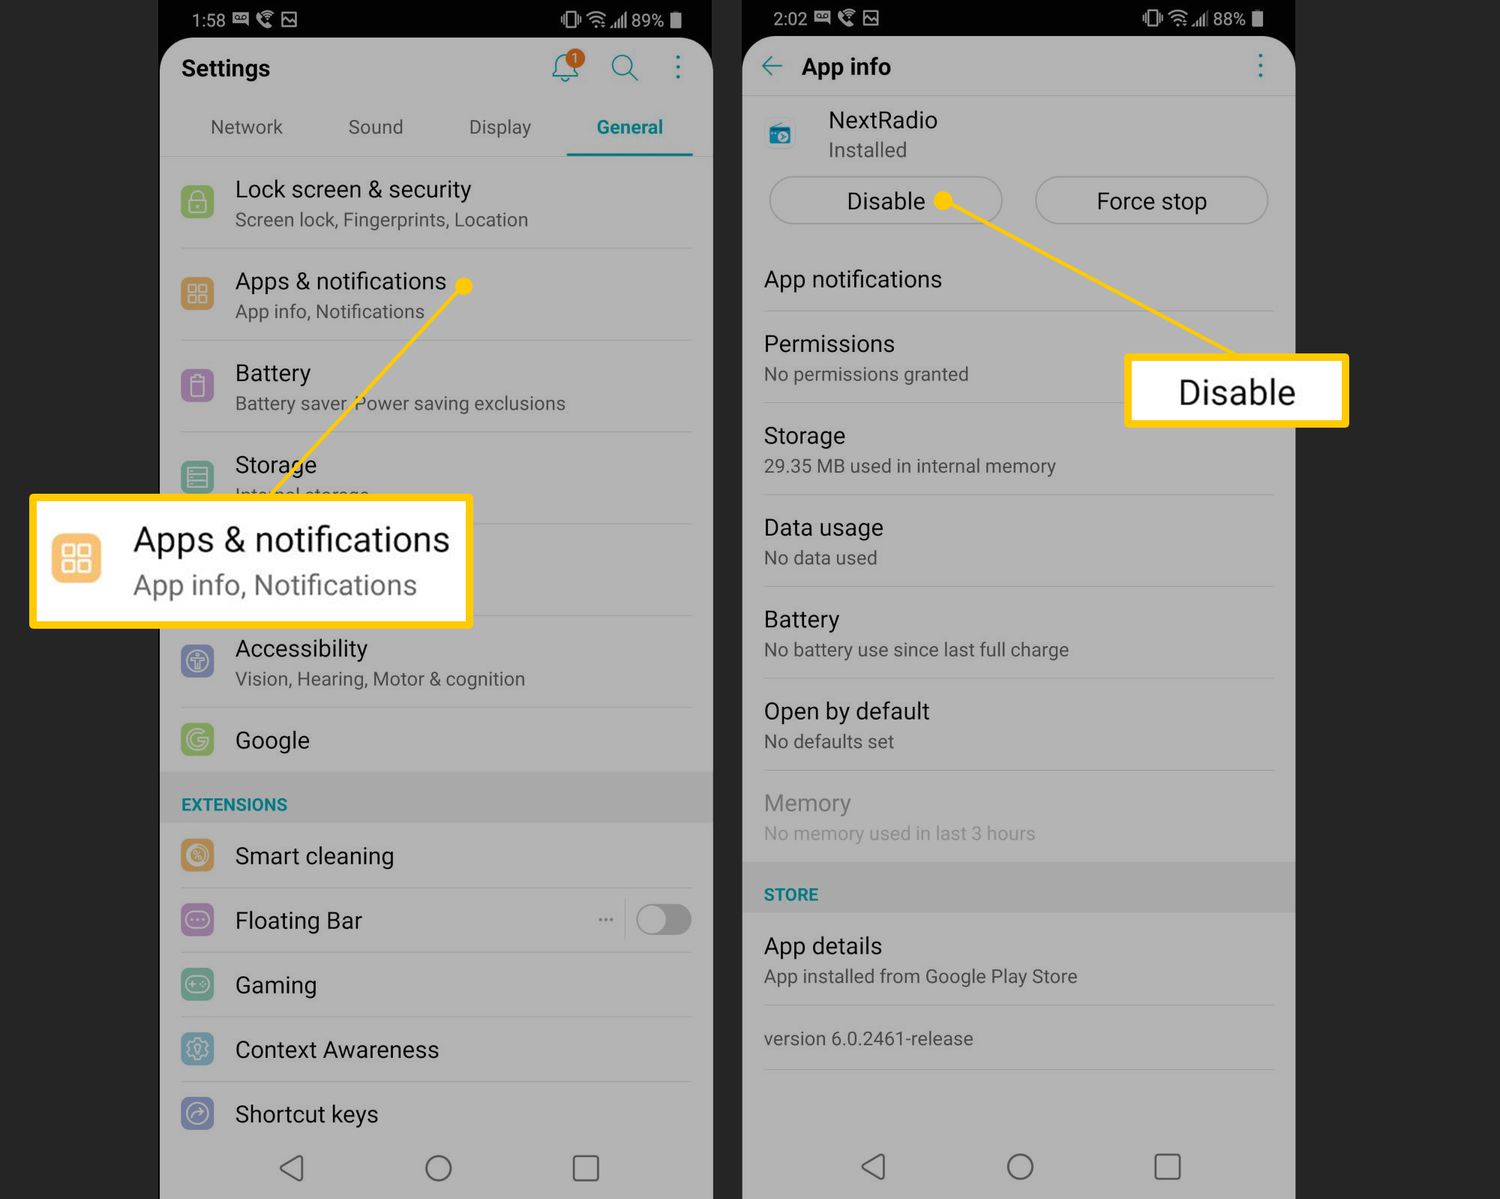
It’s important to note that the appearance of the contextual menu may vary depending on the Android version and tablet model you have. However, it commonly includes options like “Uninstall,” “App Info,” “Remove,” or a trash bin icon.
In some cases, you may need to tap the ellipsis (three-dot) icon, usually located at the top right corner of the screen, to access additional options, including the uninstall option.
Once you have successfully long-pressed the app icon and accessed the contextual menu, it’s time to proceed to the next step.
Step 3: Drag the App Icon to Uninstall
Once you have accessed the contextual menu by long-pressing the app icon, the next step is to drag the app icon to initiate the uninstallation process. This action allows you to remove the app from your Android tablet.
To drag the app icon and uninstall the app, follow these steps:
- Still keeping your finger on the app icon, start dragging it towards the top or the topmost part of the screen.
- As you drag the app icon, you may notice a “Remove” or “Uninstall” option appear on the screen, usually at the top or side.
- Continue dragging the app icon until it reaches the “Remove” or “Uninstall” option.
- Once the app icon is positioned over the “Remove” or “Uninstall” option, release your finger from the screen.
After completing these steps, you have successfully dragged the app icon to initiate the uninstallation process. The app will be marked for removal, and you will proceed to the next step to confirm the uninstallation.
Please note that if the app is a system app or a pre-installed app that came with your tablet, you may not be able to uninstall it using this method. System apps are integral to the functioning of your device and require additional steps, including rooting, to remove them. We will cover this in Step 5 of this guide.
Now that you have dragged the app icon, let’s move on to the next step to complete the uninstallation process.
Step 4: Confirm the Uninstallation
After dragging the app icon to initiate the uninstallation process, the next step is to confirm the uninstallation. This step ensures that you want to proceed with removing the app from your Android tablet.
To confirm the uninstallation, follow these steps:
- Once you have released your finger from the screen after dragging the app icon, a confirmation message will appear on the screen.
- The confirmation message will typically ask if you want to uninstall the app and may include additional details or warnings.
- Read the confirmation message carefully to ensure you are uninstalling the correct app.
- If you are certain about uninstalling the app, tap on the “OK,” “Uninstall,” or similar option to confirm.
After confirming the uninstallation, the app removal process will begin. It may take a few moments for the system to uninstall the app completely. Once the process is complete, the app will be removed from your Android tablet, freeing up storage space and ensuring improved performance.
If you change your mind and do not want to uninstall the app, you can tap on the “Cancel,” “Don’t uninstall,” or similar option to halt the process.
Now that you have confirmed the uninstallation, you have successfully removed the app from your Android tablet. Keep in mind that some apps may leave behind residual files or data even after uninstallation. If you wish to completely remove all traces of the app, you can consider using third-party cleaning apps or manually deleting any leftover files.
Step 5: Remove System Apps (Rooting Required)
In certain cases, you may come across system apps or pre-installed apps on your Android tablet that cannot be uninstalled using the previous methods. System apps are usually essential components of the operating system and cannot be removed without rooting your device.
Rooting is a process that grants you privileged access to the Android system, allowing you to make changes and modifications that are otherwise restricted. Keep in mind that rooting your device may void your warranty and can potentially lead to software instability if not done correctly.
If you are comfortable with the risks involved and want to remove system apps, follow these steps:
- Research and find a reliable rooting method for your specific tablet model and Android version. Various online resources and forums provide detailed instructions and tools for rooting Android devices.
- Follow the instructions carefully and root your tablet using the selected method. This process typically involves enabling developer options, unlocking the bootloader, and installing a custom recovery.
- Once your device is rooted, you can use third-party apps or tools to remove system apps. Titanium Backup and System App Remover are popular options for removing system apps.
- Launch the selected app and navigate to the list of installed apps on your tablet.
- Select the system app you wish to remove and follow the on-screen prompts to uninstall it.
Please exercise caution when removing system apps, as deleting the wrong app can potentially harm the functionality of your device. It is recommended to research each system app thoroughly before attempting to remove it.
Remember that rooting your device is an advanced process, and it is always a good idea to backup your important data before proceeding. Additionally, keep in mind that rooting may void your warranty, and any future software updates may require unrooting and re-rooting of your device.
By following these steps and successfully removing unnecessary system apps, you can have more control over your Android tablet’s functionality and optimize its performance according to your preferences.
Conclusion
Congratulations! You have reached the end of our guide on how to get rid of apps on your Android tablet. By following the steps outlined in this guide, you can effectively declutter your device and improve its overall performance.
We started by navigating to the Apps Menu, where you can easily locate the apps installed on your tablet. Then, we learned how to long-press the app icon to access the contextual menu, providing us with options to manage the app.
Next, we covered the process of dragging the app icon to initiate the uninstallation. This step allowed us to remove unwanted apps from our Android tablet, freeing up valuable storage space.
Furthermore, we discussed the importance of confirming the uninstallation, ensuring that you are removing the correct app and preventing any accidental removals.
Lastly, we explored the process of removing system apps, which require rooting your device. We highlighted the risks involved and recommended thorough research before attempting to remove system apps.
Remember to exercise caution when uninstalling apps, as some system apps are integral to the functioning of your device. If in doubt, it’s always a good idea to consult experts or forums specific to your device and Android version.
Now that you have the knowledge and tools to remove unwanted apps from your Android tablet, feel free to customize your device to suit your needs and preferences. Enjoy a clutter-free experience and maximize the potential of your tablet!