Introduction
Welcome to this helpful guide on how to recall email on Outlook! We’ve all been there – an important email sent in haste that we instantly regret. Whether it’s a typo, a sensitive attachment, or simply sending a message to the wrong recipient, the feeling of panic can be overwhelming. Thankfully, Microsoft Outlook offers a convenient feature that allows you to recall emails, giving you the chance to correct any mistakes or prevent unintended recipients from reading your message.
In this article, we will walk you through the step-by-step process of recalling an email on Outlook. We will cover everything from opening Outlook and navigating to the Sent Items folder to checking the status of the recall and confirming its success. By following these instructions, you’ll be able to take control of your email communication and avoid any potential mishaps.
Before we dive into the specific steps, it’s important to note that the recall feature is only available for emails sent within an organization’s internal network. It may not work if the recipient is using a different email platform or if the email has already been opened and read. Nonetheless, it’s worth trying to recall the email in these situations, as Outlook will notify you of the outcome, whether successful or not.
Now that we’ve set the stage, let’s get started with the first step: opening Outlook and navigating to the Sent Items folder.
Step 1: Open Outlook and navigate to the Sent Items folder
The first step in recalling an email on Outlook is to open the application and navigate to the Sent Items folder. This is where all the emails you have sent are stored, making it easy for you to locate the specific message you want to recall.
To begin, launch Outlook on your computer or device. You can typically find the Outlook application in your Start menu or by searching for it using the search bar. Once you have opened Outlook, you will be greeted with the main interface, which displays your inbox, calendar, and other features on the left-hand side of the screen.
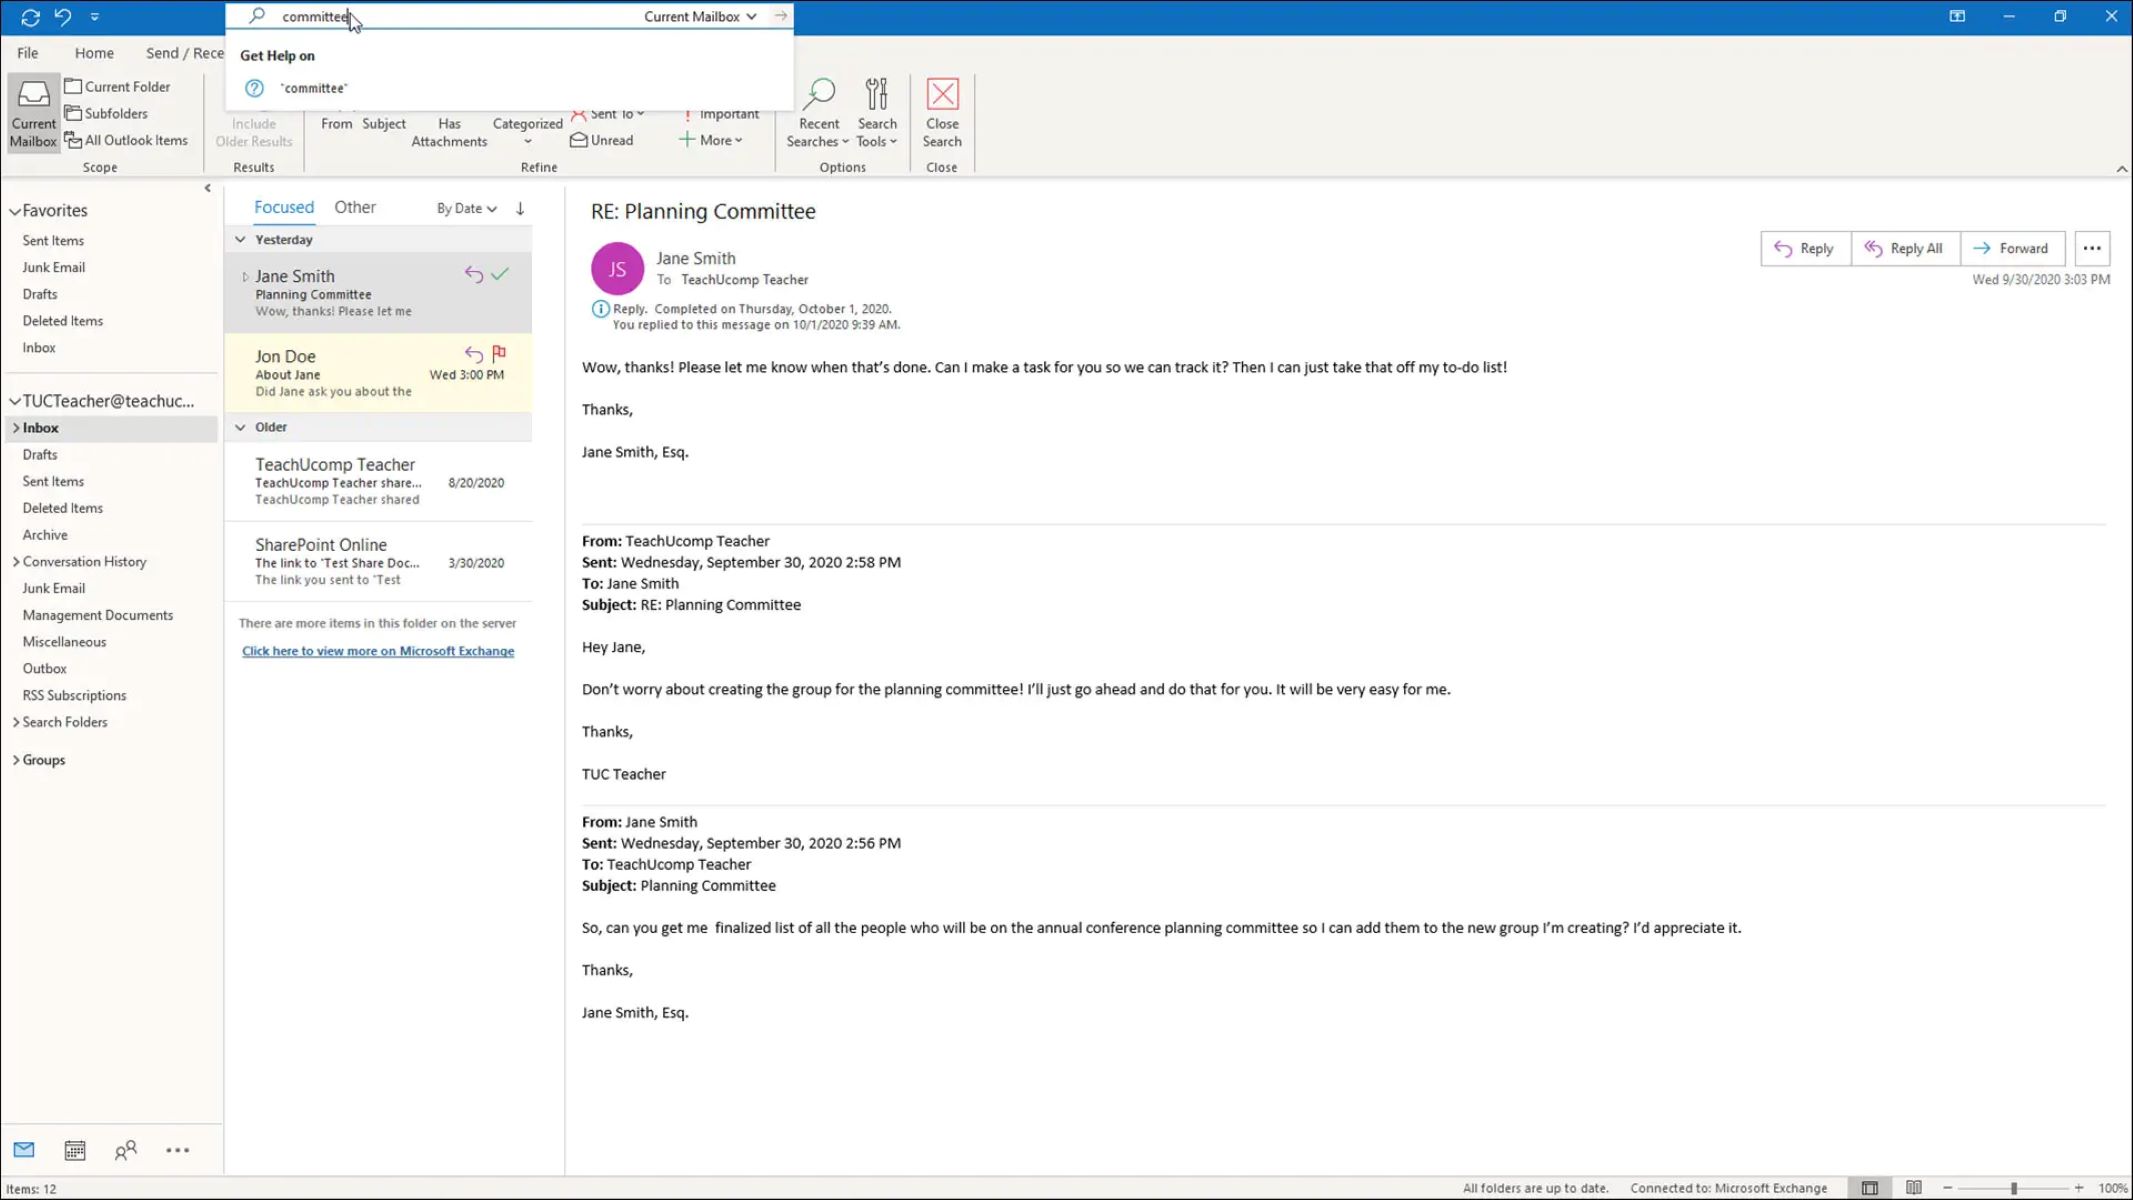
To access the Sent Items folder, look for the “Mail” tab at the bottom of the screen and click on it. This will take you to the Mail view, where you can see all your received and sent emails organized into different folders. The Sent Items folder is usually located below the Inbox folder.
When you click on the Sent Items folder, you will see a list of all the emails you have sent, ordered by date and time. Scroll through the list or use the search bar at the top to locate the email you wish to recall. You can also use the provided sorting and filtering options to help you find the email more quickly.
Once you have found the email you want to recall, you’re ready to proceed to the next step. Remember to take your time and double-check that you’ve selected the correct email, as the recall feature cannot be undone. It’s important to be certain before initiating the recall process.
Now that you know how to open Outlook and navigate to the Sent Items folder, let’s move on to step two: opening the email you want to recall.
Step 2: Open the email you want to recall
Once you have successfully navigated to the Sent Items folder in Outlook, it’s time to open the email that you want to recall. This step is crucial as it allows you to view the contents of the email and ensure that it is indeed the one you wish to retract.
To open the email, simply click on it in the Sent Items folder. This action will open the email in a new window, displaying the sender, recipient(s), subject line, and the body of the message. Take a moment to review the content and confirm that it is the correct email that needs to be recalled.
If you are unsure whether this is the right email, you can also click on the email and preview its contents in the Reading Pane. The Reading Pane is a handy feature in Outlook that allows you to view the selected email without opening a separate window. This can be particularly useful if you want to double-check the email before proceeding with the recall.
It’s important to note that you can only recall emails that haven’t been read by the recipient yet. If the email has already been opened, the recall may not be successful. However, Outlook will still notify you of the outcome, so it’s worth a try even in such cases.
Once you have confirmed that you have the correct email and it hasn’t been read yet, you’re ready to proceed to the next step: clicking on the “Actions” tab in the Ribbon. We’ll cover this in detail in the next section.
Step 3: Click on the “Actions” tab in the Ribbon
After opening the email you want to recall, the next step is to click on the “Actions” tab in the Ribbon. The Ribbon is the toolbar that runs across the top of the Outlook window and contains various tabs with different sets of commands for performing different actions.
To locate the “Actions” tab, make sure you have the email open in its own window. Look at the top of the window, just below the title bar, and you’ll find the Ribbon with several tabs, including “File”, “Home”, “Send/Receive”, and more. Click on the “Actions” tab to reveal a drop-down menu of options related to email actions.
In the “Actions” tab drop-down menu, you will find a range of options such as “Reply”, “Reply All”, “Forward”, “Archive”, and more. Among these options, look for “Recall This Message” and click on it to initiate the recall process.
Keep in mind that the availability of the “Recall This Message” option may vary depending on the version of Outlook you are using. If you don’t find the option in the initial drop-down menu, click on the “More Actions” option to expand the list and see if it’s included there.
By clicking on the “Actions” tab and selecting the “Recall This Message” option, you are taking the necessary step to recall the email. The recall process will allow you to either delete unread copies of the email or replace it with a new message, which we will cover in the next section.
Now that you’ve clicked on the “Actions” tab in the Ribbon, let’s move on to step four: selecting the appropriate recall option from the drop-down menu.
Step 4: Select “Recall This Message” from the drop-down menu
After clicking on the “Actions” tab in the Ribbon, it’s time to select the “Recall This Message” option from the drop-down menu. This step is crucial as it allows you to specify whether you want to delete unread copies of the email or replace it with a new message.
Once you click on the “Recall This Message” option, a new dialog box will appear with two recall options: “Delete unread copies of this message” and “Delete unread copies and replace with a new message”.
If you choose the “Delete unread copies of this message” option, Outlook will attempt to delete the email from the recipient’s mailbox. However, keep in mind that this option is not foolproof, as the recipient may have already read the email or it may have been automatically moved to a different folder.
On the other hand, if you opt for the “Delete unread copies and replace with a new message” option, you can choose to send an updated version of the email with the necessary changes. This can be useful if you want to rectify a mistake or provide additional information.
When selecting the appropriate recall option, consider the urgency and nature of the situation. If it’s a minor error that can be easily explained through a new message, choosing the second option may be more suitable. However, if it’s a sensitive or confidential message, deleting unread copies without replacement may be the better choice.
After selecting the desired recall option, click “OK” to initiate the recall process. Outlook will then attempt to execute your chosen action, and the status of the recall will be checked in the next steps.
Now that you have selected “Recall This Message” from the drop-down menu, let’s proceed to step five: determining the outcome of the recall based on your chosen option.
Step 5: Choose whether you want to delete unread copies of the email or replace with a new message
After selecting “Recall This Message” from the drop-down menu, you will need to choose whether you want to delete unread copies of the email or replace it with a new message. This step allows you to specify the desired outcome of the recall process based on your specific needs.
If you choose the option to “Delete unread copies of this message,” Outlook will attempt to remove the email from the recipient’s mailbox before they have a chance to read it. However, it’s important to note that this option is not guaranteed to be successful. The email may have already been opened or moved to a different folder, making recall impossible.
The alternative option is to “Delete unread copies and replace with a new message.” This allows you to send an updated version of the email to the recipient, replacing the original message with the necessary changes. This option can be useful if you need to correct a mistake, provide additional information, or clarify any confusion caused by the initial email.
When deciding between these options, consider the urgency and importance of the email. If the content of the email is time-sensitive and requires immediate action, it may be best to delete unread copies without replacement to minimize any potential confusion or misunderstanding. On the other hand, if the changes or updates you need to make are crucial and can be easily communicated through a new message, selecting the option to replace may be more suitable.
Once you have made your decision, click “OK” to proceed with the selected recall option. Outlook will then initiate the recall process based on your choice. Remember that the success of the recall depends on multiple factors, including the recipient’s email settings and whether they have already viewed or interacted with the email. Regardless of the outcome, Outlook will notify you, which we will cover in the next steps.
Now that you have chosen whether to delete unread copies or replace with a new message, let’s move on to step six: clicking “OK” to recall the email.
Step 6: Click “OK” to recall the email
After selecting the recall option that suits your needs, the next step is to click “OK” to initiate the recall process. This crucial step puts your chosen recall action into motion and prompts Outlook to attempt to recall the email based on your preferences.
Once you click “OK,” Outlook will start the recall process, attempting to remove the email from the recipient’s mailbox or replace it with a new message if you have chosen that option. The process may take a few moments, depending on the size of the email and the internet connection speed.
Keep in mind that the success of the recall depends on several factors, such as the recipient’s email client settings, whether they have read or interacted with the email, and the overall network environment. Outlook will provide you with a notification indicating the outcome of the recall, whether it was successful or not.
If the recall is successful, Outlook will notify you that the email has been deleted or replaced, giving you the reassurance that the intended recipients will not see the original message or have received an updated version if you opted for replacement.
However, if the recall is not successful, Outlook will inform you of the reasons why. This could be due to the recipient already opening the email, the email being moved to a different folder, or the recipient using a different email client that does not support the recall feature. Despite the unsuccessful recall attempt, it’s essential to remember that Outlook will provide you with this feedback so that you are aware of the outcome.
Once you have clicked “OK” and the recall process is initiated, Outlook will check the status of the recall. In the next step, we will explore how you can check the status and confirm whether the recall was successful.
Step 7: Check the status of the recall
After initiating the recall process by clicking “OK,” it’s important to check the status of the recall to determine whether it was successful. Outlook provides a way to verify the outcome, helping you confirm whether the intended action of recalling the email was indeed carried out.
To check the status of the recall, navigate to the “Sent Items” folder in Outlook. Locate the email that you attempted to recall earlier and open it. In the email message window, you will find a notification indicating the status of the recall.
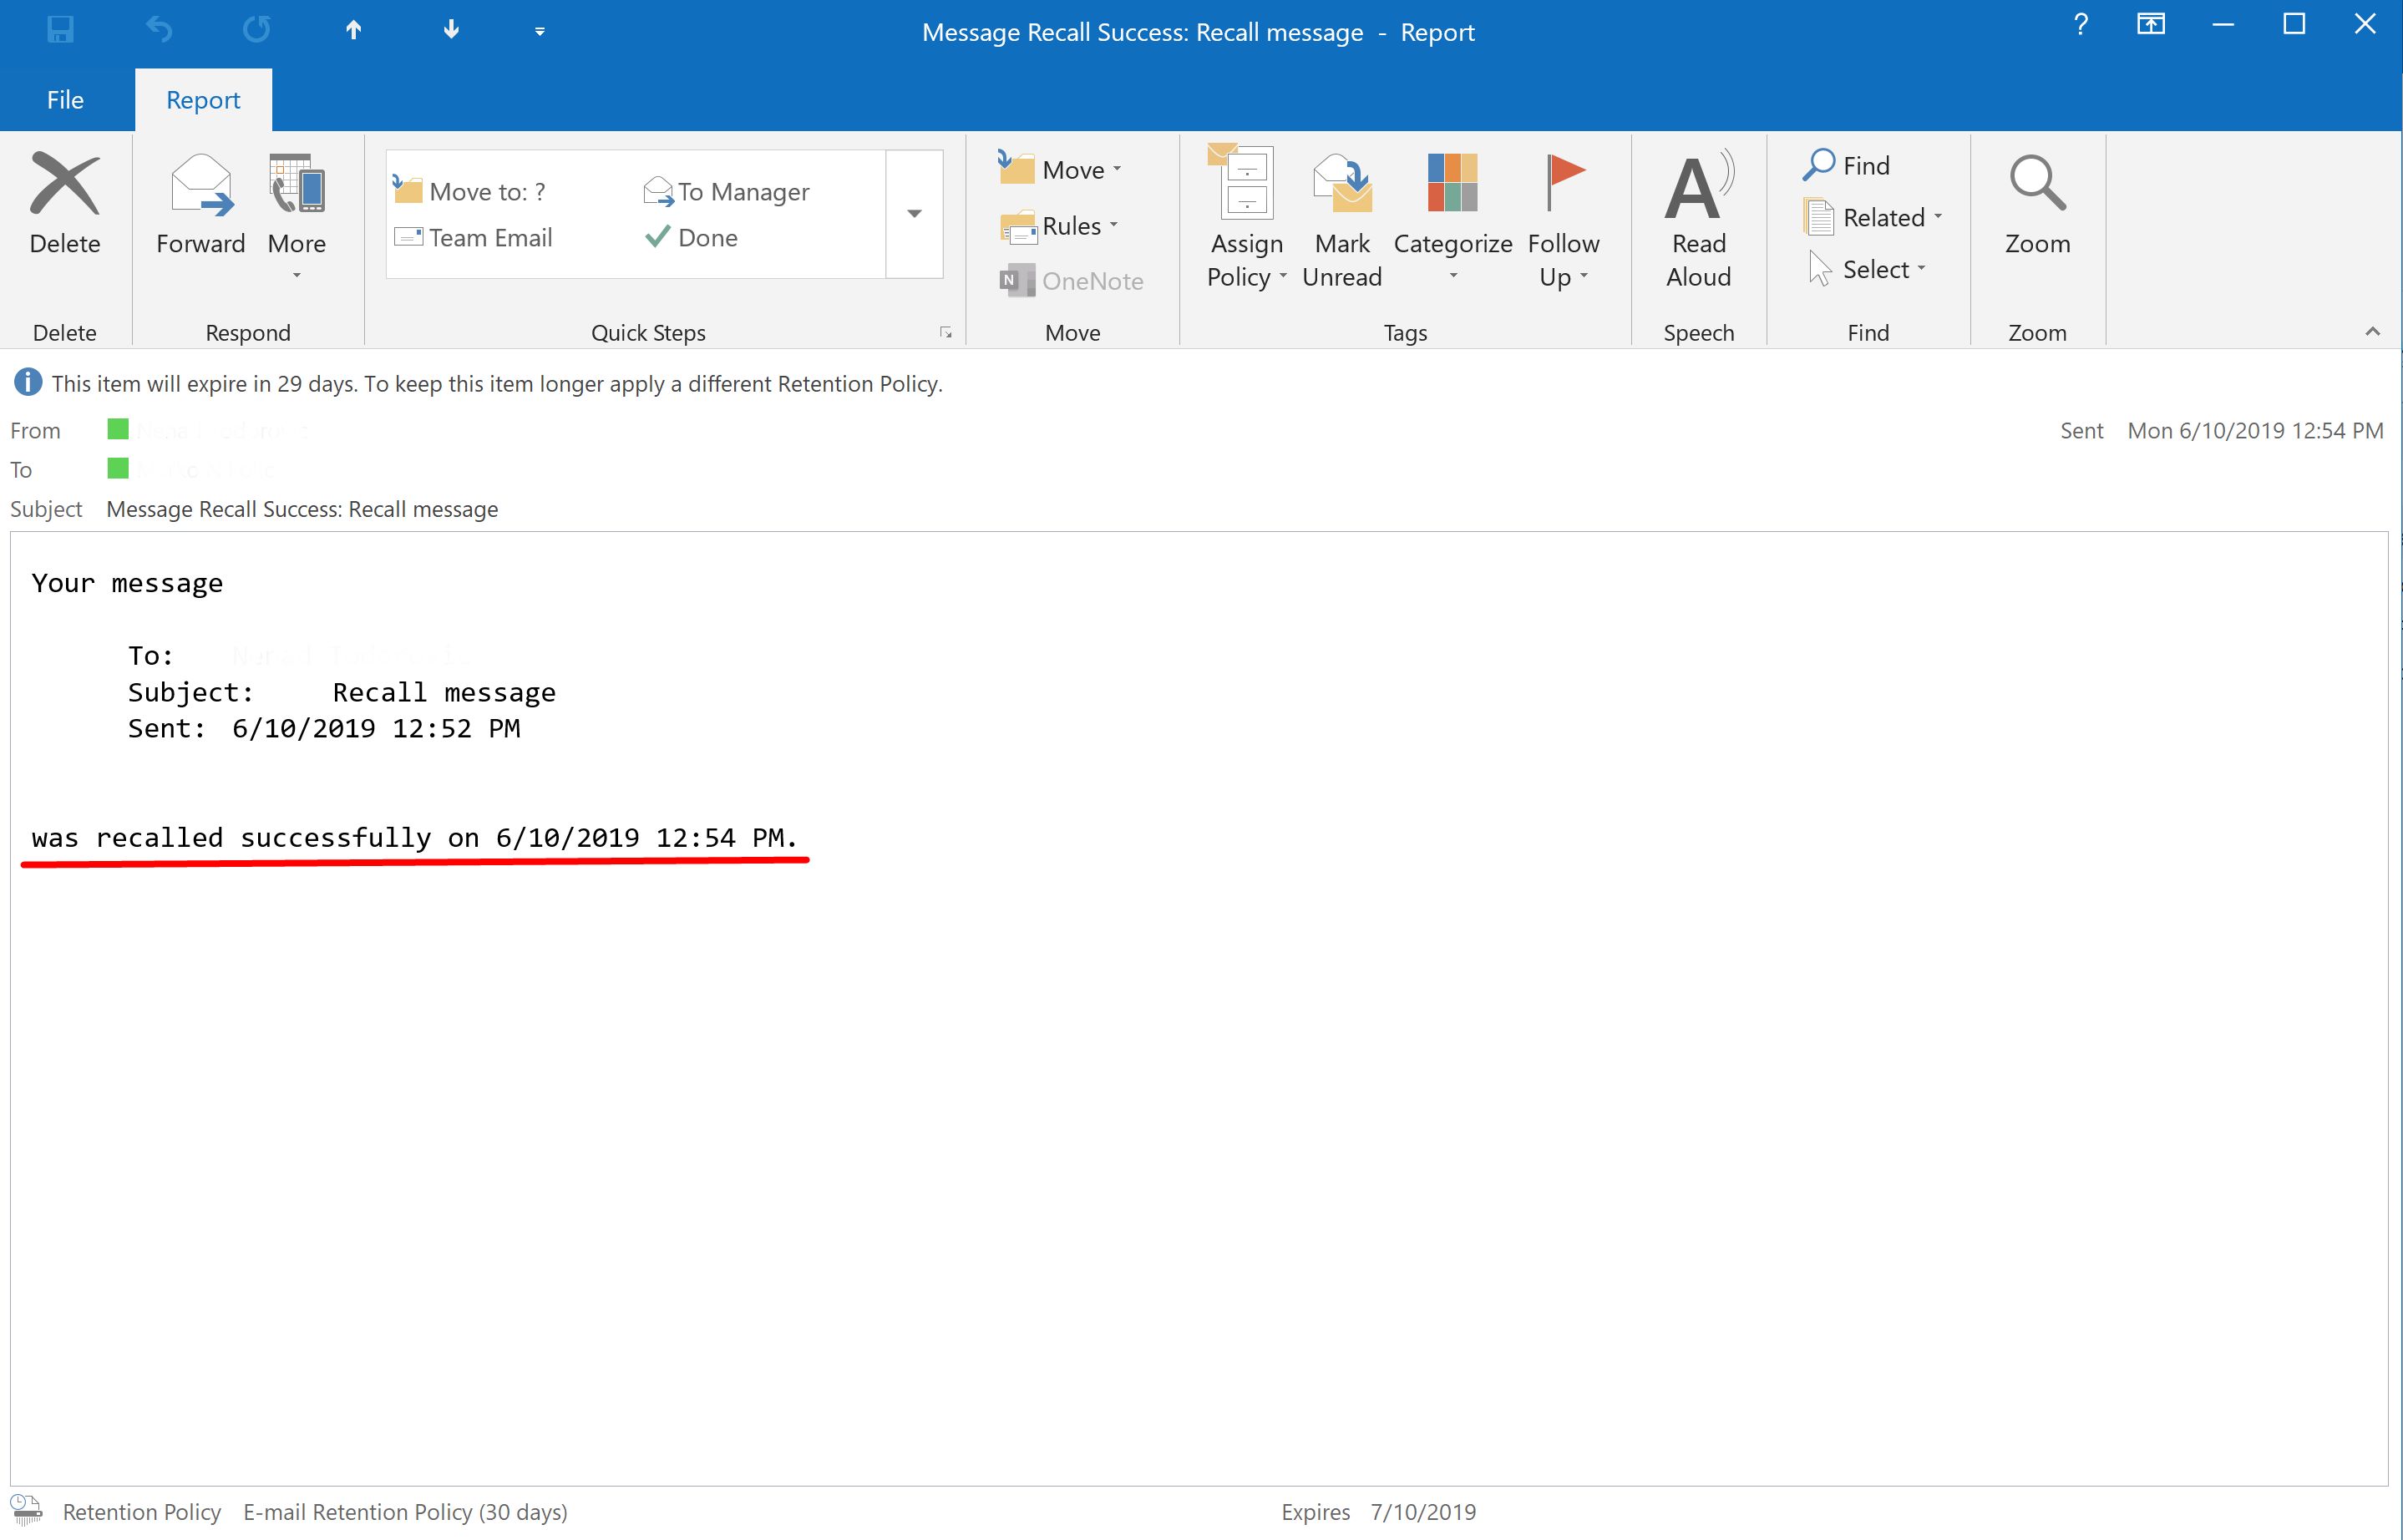
If the recall was successful, Outlook will indicate that the email was deleted or replaced as per your chosen recall option. This confirmation provides you with the assurance that the email has been successfully retrieved from the recipient’s mailbox or updated with the necessary changes.
However, if the recall was not successful, Outlook will notify you of the reasons behind the unsuccessful recall attempt. It could be due to the recipient already reading the email, the email being moved to a different folder, or limitations in the recipient’s email client that prevent the recall feature from working.
It’s essential to carefully review the status notification provided by Outlook. This will help you understand whether the recall was successful or not, allowing you to take appropriate actions based on the outcome. If the recall was unsuccessful, you may need to follow up with the recipient directly to address any concerns or provide any necessary clarification.
By checking the status of the recall, you can have peace of mind knowing the outcome of your attempt to recall the email. This step ensures that you are aware of the success or failure of the recall process and allows you to proceed accordingly.
Now that you have checked the status of the recall, let’s move on to the final step: confirming if the recall was successful or not.
Step 8: Confirm if the recall was successful
After checking the status of the recall, the final step is to confirm whether the recall was successful or not. This step allows you to ensure that the intended action of recalling the email has been carried out according to your preferences.
To confirm the success of the recall, review the status notification provided by Outlook in the email message window. If the recall was successful, Outlook will indicate that the email was either deleted from the recipient’s mailbox or replaced with the updated version as per your recall option.
If the recall was unsuccessful, the notification will provide details on why the recall did not work. This could be due to the recipient already opening the email, the email being moved to a different folder, or limitations in the recipient’s email client that prevent the recall feature from functioning.
Based on the status confirmation, you can determine the next course of action. If the recall was successful, you can rest assured that the email has been effectively removed from the recipient’s mailbox or replaced with the updated version. This provides you with the desired control over your email communication.
However, if the recall was unsuccessful, you may need to consider alternative measures. Depending on the situation, you might need to reach out to the recipient directly to address any issues, provide further clarification, or take necessary steps to rectify any mistakes made in the email.
Regardless of the outcome, it is crucial to maintain open communication and address any concerns that may have arisen due to the email recall. This will help ensure a better understanding between all parties involved and prevent any further confusion or misunderstanding.
By confirming whether the recall was successful or not, you can take appropriate action and move forward with confidence in your email communication.
Now that you have confirmed the recall status, you have successfully completed the process of recalling an email on Outlook.
Conclusion
Recalling emails on Outlook is a valuable feature that allows you to rectify mistakes, prevent unintended recipients from reading the email, and maintain control over your email communication. By following the step-by-step instructions outlined in this guide, you can successfully recall emails on Outlook and ensure that your messages are handled according to your preferences.
Starting with opening Outlook and navigating to the Sent Items folder, you learned how to locate the email you want to recall. Clicking on the “Actions” tab in the Ribbon allowed you to access the recall feature and select the appropriate recall option, whether it is deleting unread copies or replacing with a new message.
After clicking “OK” to initiate the recall, you then verified the status of the recall and confirmed whether it was successful or not. This confirmation enabled you to take further actions based on the outcome, such as reaching out to the recipient for clarification or addressing any concerns raised by an unsuccessful recall attempt.
While the recall feature in Outlook is a useful tool, it’s important to note that its success depends on various factors, including the recipient’s email settings and whether the email has been read. Additionally, the recall feature may not be available if the recipient is using a different email platform or if the email has already been moved or interacted with.
By familiarizing yourself with the recall process and being mindful of these factors, you can effectively use the recall feature to manage your email communication. Remember to double-check emails before sending them and consider the urgency and nature of the situation when choosing the appropriate recall option.
Overall, recalling emails on Outlook gives you a level of control and flexibility in managing your correspondence. By following the steps outlined in this guide, you can confidently navigate through the recall process and handle any email mishaps with ease.