Introduction
Have you ever sent an email and immediately regretted hitting the send button? Whether it’s a typo-ridden message, an unintentional reply-all, or sharing sensitive information with the wrong recipient, we’ve all been there. Fortunately, many email services now offer the ability to unsend emails, providing a lifeline to salvage our digital communication mishaps.
In this article, we will focus on Gmail, one of the most popular email providers, and walk you through the process of how to unsend an email. We will also explore alternative methods for other email clients such as Microsoft Outlook. By following these steps, you can regain control over your sent messages and avoid the embarrassment or consequences of a poorly composed email.
Before we delve into the details, it’s important to note that the ability to unsend an email is not guaranteed to be foolproof. While these methods can increase your chances of successfully canceling or recalling a sent email, they are not guaranteed to work 100% of the time. It’s always best to double-check your emails before sending them and exercise caution when sharing sensitive or confidential information.
Now, let’s embark on this journey of undoing the irreversible and learn how to unsend emails in Gmail.
Step 1: Enable the “Undo Send” feature in Gmail
Gmail’s “Undo Send” feature is a lifesaver when it comes to recalling an email that you just sent. However, by default, this feature is not enabled in Gmail, so you’ll need to take a few steps to enable it before you can start unsending emails.
To enable the “Undo Send” feature, follow these steps:
- Open Gmail on your computer and click on the gear icon in the top-right corner of the screen to access the settings menu.
- From the drop-down menu, select “Settings”.
- In the Settings page, navigate to the “General” tab.
- Scroll down until you find the “Undo Send” section.
- Check the box next to “Enable Undo Send”.
- Choose the cancellation period that suits your needs. The cancellation period determines how long you have to undo the sending of an email.
- Click on the “Save Changes” button at the bottom of the page.
Once you have enabled the “Undo Send” feature, the clock will start ticking on the cancellation period you selected. This means that after you send an email, you’ll have a limited amount of time to change your mind and unsend it before it gets delivered to the recipient’s inbox.
Now that you have successfully enabled the “Undo Send” feature in Gmail, you’re ready to proceed to the next step and learn how to utilize this feature to unsend your emails.
Step 2: Set the cancellation period
Setting the cancellation period for the “Undo Send” feature in Gmail is an important step to ensure that you have enough time to recall a sent email. The cancellation period determines the duration within which you can unsend an email after hitting the send button. By default, Gmail offers a cancellation period of 5 seconds, but you have the flexibility to adjust it to your preference.
To set the cancellation period in Gmail, follow these steps:
- Go to your Gmail inbox and click on the gear icon in the top-right corner of the screen to access the settings menu.
- Select “Settings” from the drop-down menu.
- Navigate to the “General” tab in the Settings page.
- Scroll down until you find the “Undo Send” section.
- Next to “Send cancellation period,” choose the desired cancellation period from the drop-down menu. Options range from 5 to 30 seconds.
- Click on the “Save Changes” button at the bottom of the page to apply the new cancellation period.
By extending the cancellation period, you provide yourself with more time to review your outgoing emails and correct any mistakes or change your mind about sending them. However, it’s important to find a balance between giving yourself ample time for cancellation and maintaining efficient email communication.
Keep in mind that the cancellation period starts as soon as you click the send button. Once the cancellation period elapses, the email will be sent and cannot be unsent.
Now that you have adjusted the cancellation period, you’re ready to move on to the next step and learn how to utilize the “Undo Send” feature to unsend your emails in Gmail.
Step 3: Sending an email and the “Undo” option
Now that you have enabled the “Undo Send” feature and set the desired cancellation period, it’s time to send an email and utilize the “Undo” option to unsend it if needed.
To send an email and have the option to undo the sending, follow these steps:
- Compose your email as you normally would.
- Double-check the recipient’s email address, subject line, and the content of your email to ensure accuracy and clarity.
- Click on the “Send” button to send the email.
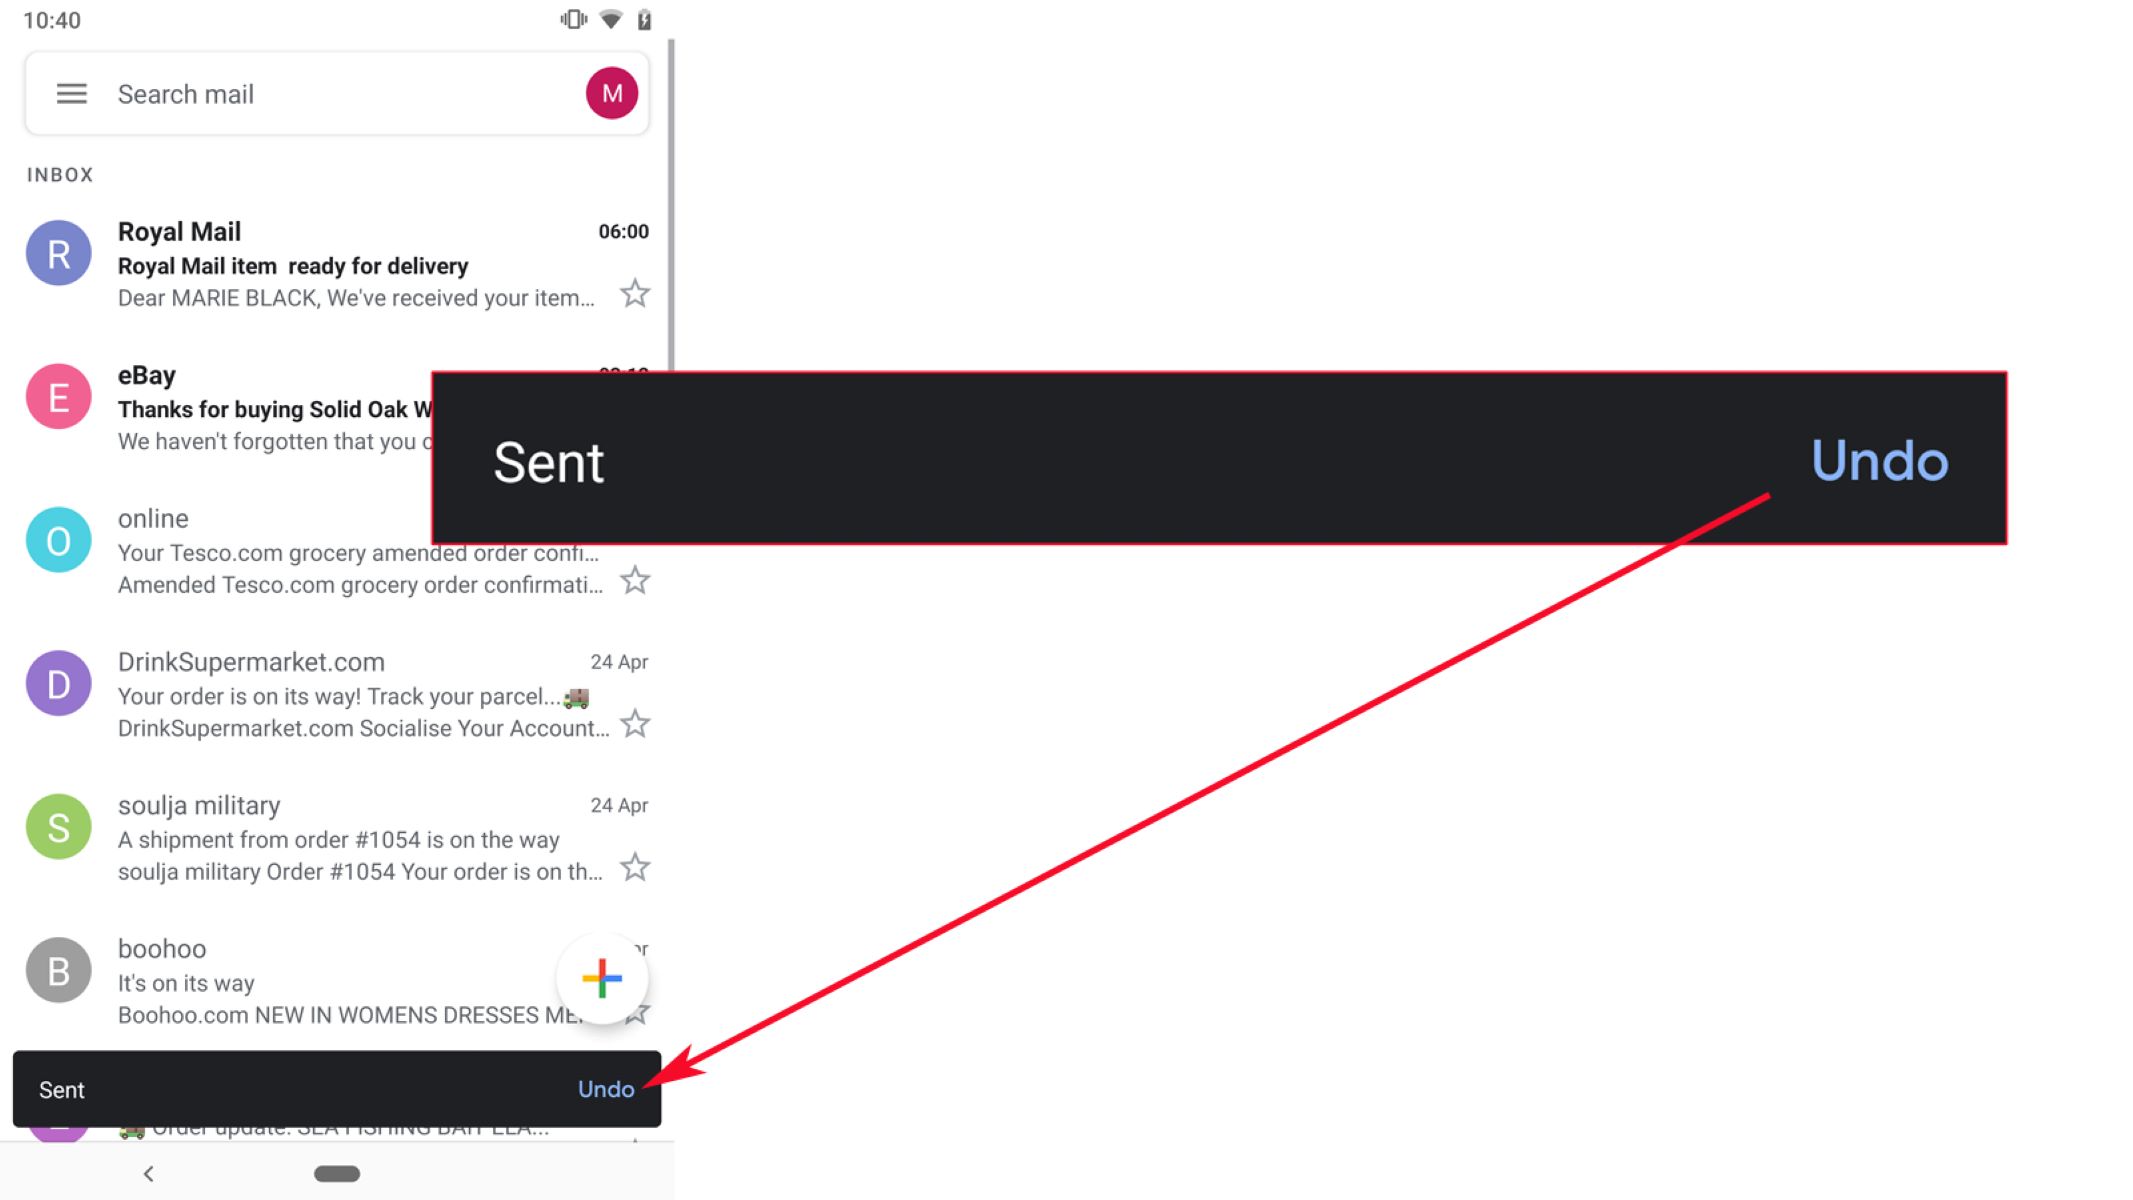
- After clicking “Send”, a notification will appear at the top of the screen with an “Undo” option.
- Click on the “Undo” option within the cancellation period to recall the email.
By clicking “Undo” within the allotted cancellation period, the email you sent will be retrieved, and you can make any necessary edits or changes before resending it. This provides an invaluable opportunity to correct mistakes or prevent unwanted messages from reaching their intended recipient.
It’s important to note that once the cancellation period expires, the “Undo” option will disappear, and the email will be delivered to the recipient’s inbox as usual. Therefore, it’s crucial to act quickly if you want to unsend an email.
Now that you’re familiar with how to send an email and utilize the “Undo” option, let’s proceed to the next step and learn how to confirm whether an email was successfully unsent.
Step 4: Confirming the email was successfully unsent
After utilizing the “Undo” option to recall an email in Gmail, it’s essential to confirm whether the email was successfully unsent. This confirmation will provide you with peace of mind and reassure you that the recipient did not receive the email.
To confirm whether an email was successfully unsent, follow these steps:
- After clicking “Undo” to recall the email, you will be redirected back to the compose window in Gmail.
- Review the email content, recipient, and any changes you made since the recall.
- Double-check that the email did not appear in your sent folder or the recipient’s inbox.
- Send a test email to yourself or another account to ensure that new emails are being sent as expected.
If the email does not appear in your sent folder and the recipient confirms they did not receive it, you can be confident that the email was successfully unsent. However, it’s crucial to perform these confirmation steps to ensure that no trace of the email remains.
Remember, the “Undo Send” feature in Gmail is not infallible, and there may be instances where an email cannot be recalled. It’s always best to double-check before sending any sensitive information or confidential messages.
Now that you know how to confirm the successful unsending of an email, let’s explore alternative methods for unsending emails in different email clients.
Step 5: Using third-party email clients to unsend emails
While Gmail provides the convenient “Undo Send” feature, other email clients may not offer a built-in option to unsend emails. However, there are third-party tools and extensions available that can allow you to achieve a similar functionality across different email platforms. Here, we will discuss a few popular options for unsending emails in different email clients.
1. Mailtrack: Mailtrack is a widely used email tracking and productivity extension available for various email clients such as Gmail, Outlook, and others. While its primary purpose is to track email opens and clicks, Mailtrack also offers an “Undo Send” feature. This allows you to recall an email if you change your mind within a specified timeframe. Install the Mailtrack extension for your preferred email client and follow the instructions to enable the “Undo Send” feature.
2. Boomerang: Boomerang is an email productivity tool that offers advanced scheduling, reminders, and “Send Later” features. It also provides an option to unsend emails. By using the Boomerang extension, you can schedule an email to be sent later and have the ability to cancel or edit the email before it gets sent. This can be a helpful feature for those using email clients like Outlook, Gmail, or others.
3. Microsoft Outlook Recall Email Feature: If you are using Microsoft Outlook as your email client, there is a built-in “Recall Email” feature that allows you to attempt to retrieve a sent message. To recall an email in Outlook, open the “Sent Items” folder, open the email you want to recall, go to the “Message” tab, and click on the “Actions” dropdown. From there, select “Recall This Message” and follow the instructions provided. However, keep in mind that the success of recalling an email is dependent on various factors, including the email server and the recipient’s settings.
These are just a few examples of third-party tools and features that can enhance the functionality of email clients when it comes to unsending emails. Depending on your preferred email client and the features available, you can explore different options to find the best fit for your needs.
Now that you’re familiar with using third-party email clients to unsend emails, let’s move on to explore an alternative method for recalling emails in Microsoft Outlook.
Step 6: Alternative method to recall emails in Microsoft Outlook
In addition to the built-in “Recall Email” feature in Microsoft Outlook, there is another alternative method you can try to recall an email. This method involves using the “Replace” feature, which allows you to replace the contents of the email that has been sent with an updated version.
To use the “Replace” feature to recall an email in Microsoft Outlook, follow these steps:
- Open your “Sent Items” folder in Outlook.
- Double-click on the email you want to recall to open it in a new window.
- Go to the “Message” tab and click on the “Actions” dropdown.
- Select “Edit Message”.
- Make the necessary changes to the email content or attachments.
- Click on the “File” tab and select “Save”.
By following these steps, you effectively replace the original content of the email with the updated version. However, it’s important to note that there are several limitations and conditions for the success of this method. The recipient must be using the same version of Outlook, and they should not have read the original email yet to ensure the updated version is displayed. Additionally, the success of this method relies on the email system allowing edits to be made to a sent email.
Before relying on the “Replace” method, it’s always advisable to double-check the email recipient and content before hitting the send button. Prevention is the best approach to avoid the need for recalling or modifying sent emails.
Now that you’re aware of an alternative method to recall emails in Microsoft Outlook, it’s time to wrap up and summarize what we’ve learned.
Conclusion
Unintentional emails happen to the best of us, but with the right tools and strategies, you can regain control over your digital communication. Gmail’s “Undo Send” feature offers a convenient way to unsend emails by enabling a cancellation period and utilizing the “Undo” option. Additionally, third-party tools like Mailtrack and Boomerang provide similar functionality for other email clients. For Microsoft Outlook users, the built-in “Recall Email” feature and the alternative “Replace” method offer options to recall or modify sent emails.
While these methods improve your chances of successfully unsending an email, it’s important to remember that they are not foolproof. Prevention is key—double-check your emails before sending and exercise caution when sharing sensitive or confidential information.
By taking advantage of these features and employing best practices for email communication, such as proofreading and careful review, you can minimize the risk of sending emails you later regret. Email mishaps can be preventable, making your digital correspondence more efficient, professional, and stress-free.
So, the next time you find yourself in a situation where you wish you could unsend an email, rest assured that these steps and methods are at your disposal. Take control of your digital communication and ensure that your messages are accurately delivered, saving yourself from any unnecessary embarrassment or consequences.