Introduction
Have you ever sent a photo on iMessage only to realize afterwards that it was the wrong picture or that you accidentally sent it to the wrong person? Don’t worry, you’re not alone. Fortunately, there is a way to undo this mistake and unsend a photo on iMessage.
iMessage, the popular messaging app exclusive to Apple devices, offers a range of features to make communication easy and convenient. From sending text messages to sharing photos and videos, iMessage provides a seamless experience for Apple users. However, it’s not uncommon to make mistakes while using the app. Accidentally sending the wrong photo can cause embarrassment or even damage relationships, but there’s no need to panic.
In this article, we will guide you through the steps to unsend a photo on iMessage, ensuring that your message remains private and your photos are shared only with the intended recipients. We will also provide troubleshooting tips and suggestions to help you prevent accidental sending in the future.
Whether you recently sent a photo to the wrong person, sent an inappropriate picture, or simply had a change of heart and want to retract a photo you sent, we’ve got you covered. Let’s get started and learn how to unsend a photo on iMessage.
Understanding the Basics
Before we dive into the process of unsending a photo on iMessage, it’s important to understand some key aspects of how iMessage works. This will help you grasp the steps involved and navigate the app with ease.
iMessage is Apple’s built-in messaging service that allows users to send text messages, photos, videos, and more to other Apple device users. Unlike traditional SMS messages, iMessage utilizes an internet connection, either through Wi-Fi or cellular data, to send and receive messages.
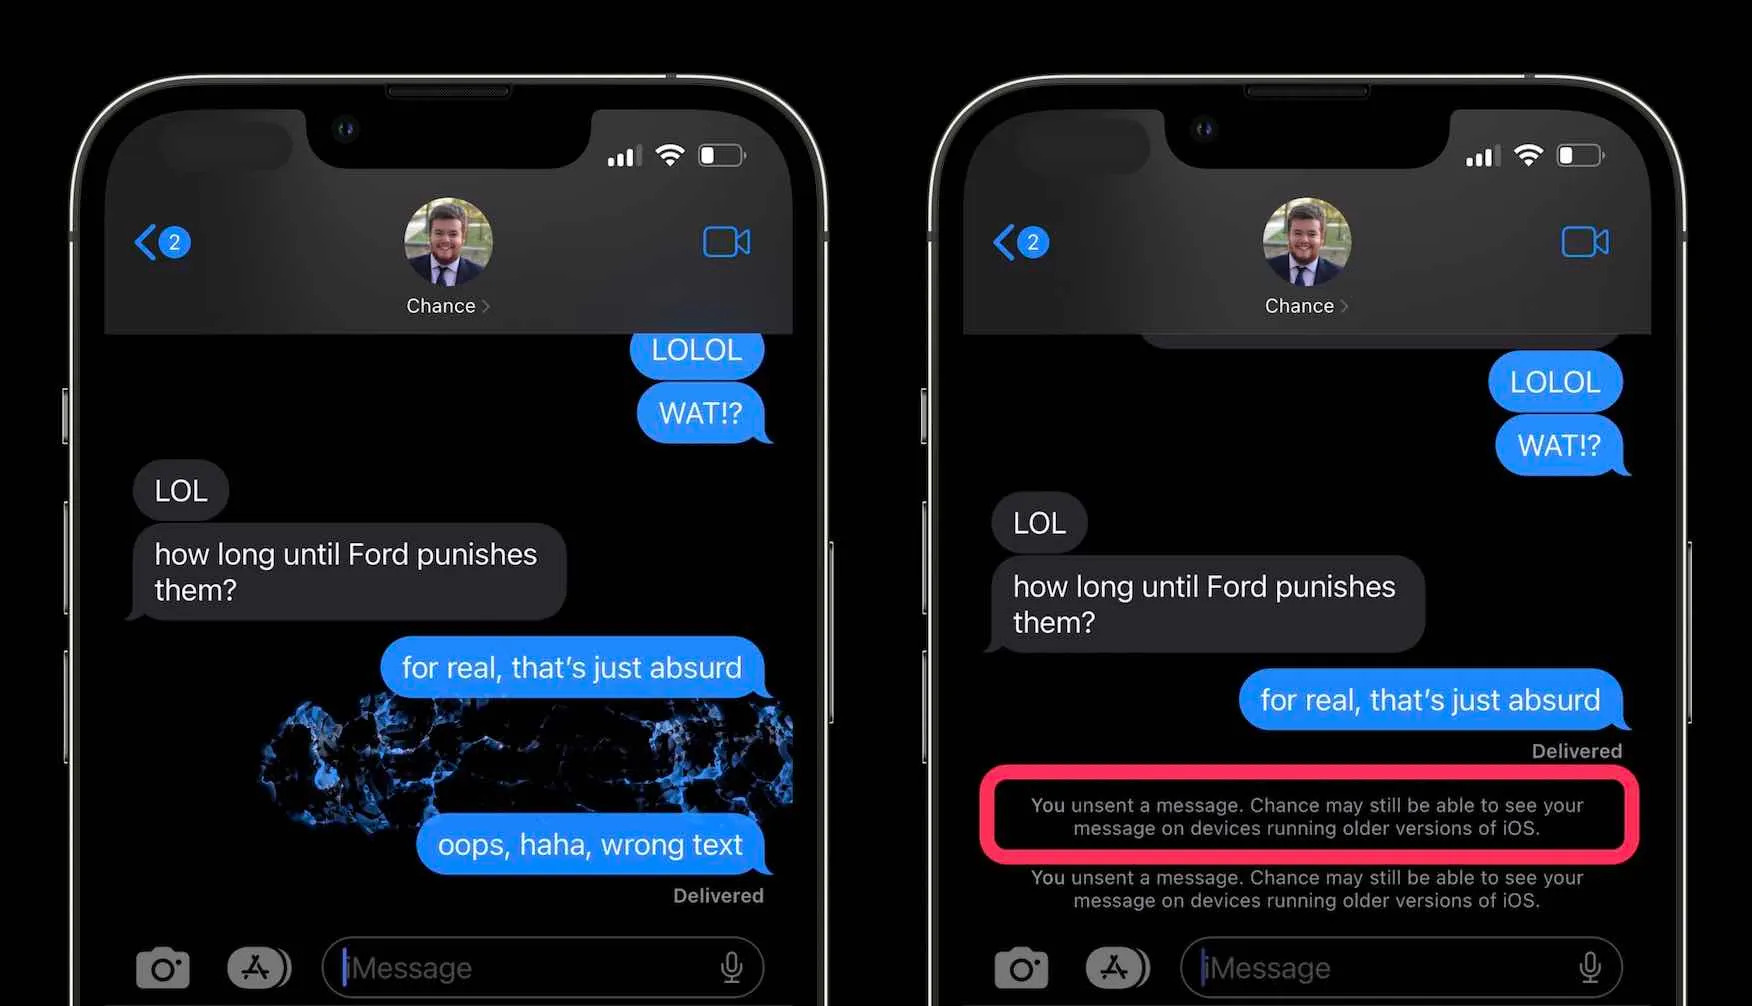
When you send a photo via iMessage, it gets uploaded to Apple’s servers and then delivered to the recipient’s device. This means that once the photo is sent, it’s out of your control. However, Apple has introduced a feature called “unsending” in more recent versions of iOS that allows you to retract a message or attachment before it’s been seen by the recipient.
It’s important to note that unsending a photo on iMessage is only possible if the recipient hasn’t opened or viewed the image yet. Once the message has been seen, you won’t be able to retract it. Therefore, it’s crucial to act quickly if you need to unsend a photo.
Now that we have a clearer understanding of how iMessage works and the limitations of unsending a photo, let’s move on to the steps you need to follow to successfully unsend a photo on iMessage.
Steps for Unsending a Photo on iMessage
To unsend a photo on iMessage, follow these simple steps:
- Open the Messages app on your iPhone or iPad.
- Navigate to the conversation where you sent the photo that you want to unsend.
- Find the photo within the conversation. It will be displayed as a thumbnail or in full view, depending on how it was sent.
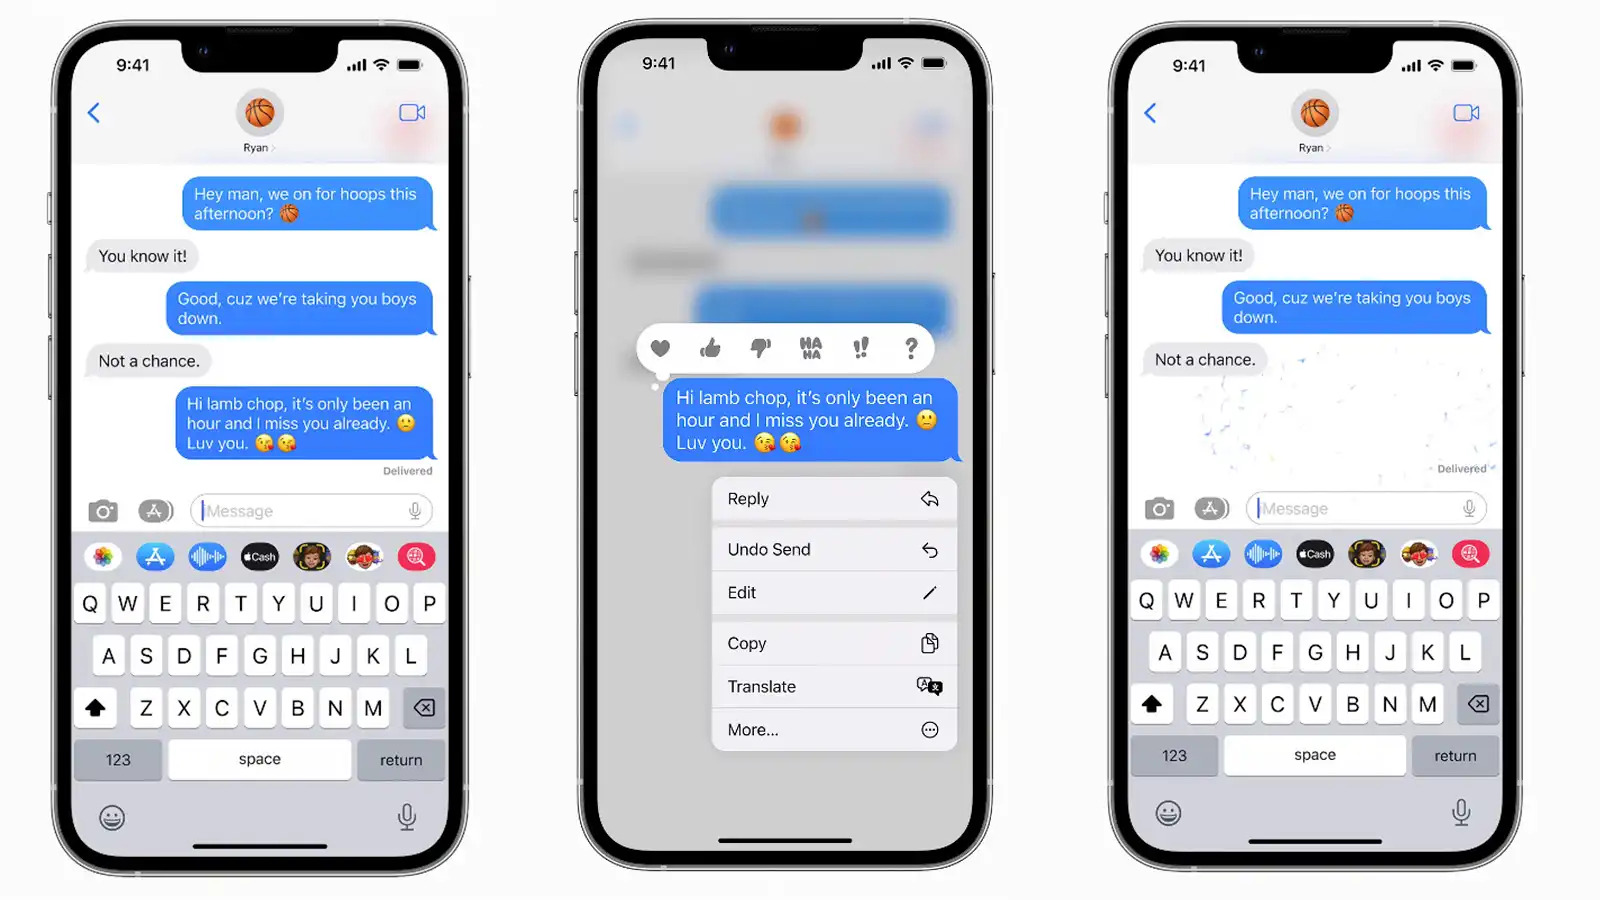
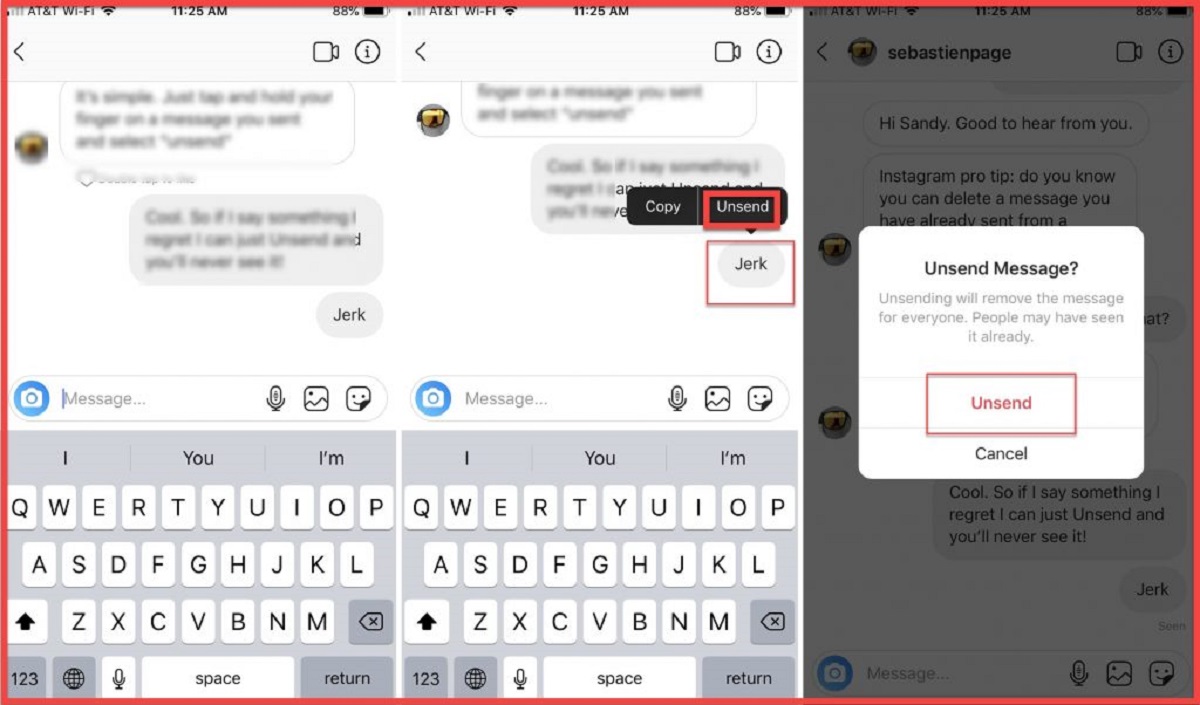
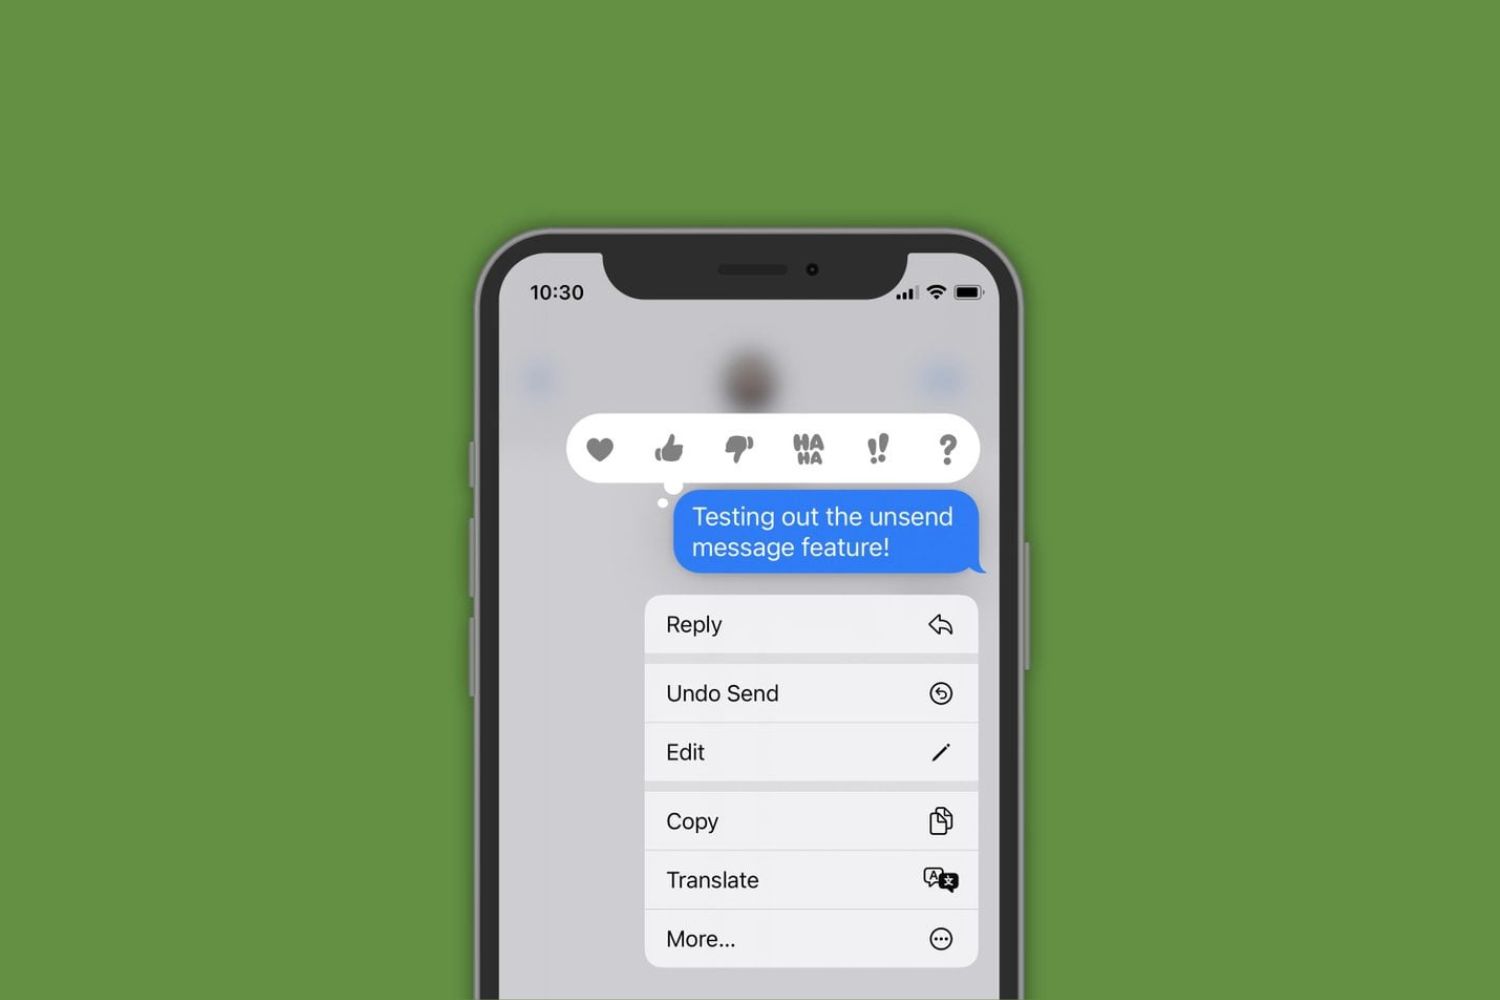
- Tap and hold the photo until the menu appears.
- In the menu that appears, select “More…”.
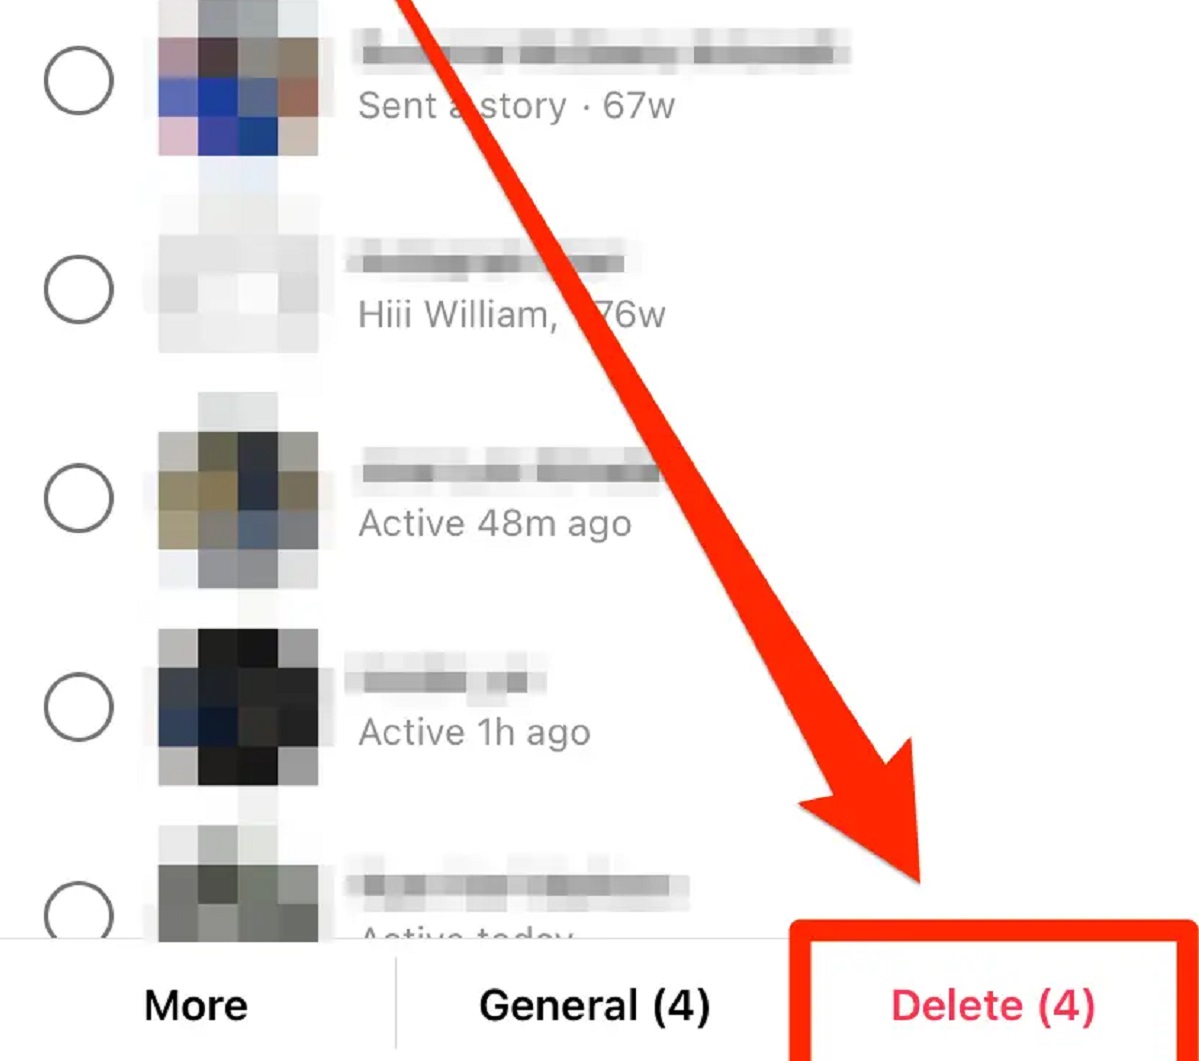
- A checkmark will appear on the photo, indicating that it’s selected. You can select multiple photos if needed.
- Once the photo(s) are selected, tap the trash can icon located at the bottom left corner of the screen.
- A confirmation pop-up will appear, asking if you want to delete the photo. Tap “Delete Photo” to proceed.
- The photo(s) will be removed from the conversation and cannot be accessed by the recipient(s) anymore.
It’s important to note that the process of unsending a photo is irreversible. Once you confirm the deletion, the photo will be permanently removed from the conversation on both your device and the recipient’s device.
Remember, unsending a photo is only effective if the recipient hasn’t viewed it yet. If the photo has been seen, there is no way to take it back through iMessage. Therefore, it’s crucial to act quickly and follow these steps as soon as you realize your mistake.
Now that you know how to unsend a photo on iMessage, let’s address some common troubleshooting issues that you may encounter.
Troubleshooting
While unsending a photo on iMessage is a relatively straightforward process, you may encounter some issues along the way. Here are some common troubleshooting tips to help you overcome potential hurdles:
- No “More…” option: If you don’t see the “More…” option when you tap and hold the photo, make sure you are running the latest version of iOS on your device. Some older versions may not have this feature. Consider updating your device to the latest iOS version through the Settings app.
- Photo not deleting: If you’re experiencing difficulty deleting a photo from the conversation, try force-closing the Messages app and reopening it. Sometimes, this can resolve minor glitches and allow you to delete the photo as intended.
- Internet connectivity issues: To successfully unsend a photo on iMessage, you need a stable internet connection. If you’re facing connectivity issues, ensure that you’re connected to a Wi-Fi network or have a reliable cellular data signal. Without a proper connection, the deletion may not go through.
- Recipient already viewed the photo: If the recipient has already opened and viewed the photo, it’s unfortunately no longer possible to unsend it. Remember, the unsending feature only works if the recipient hasn’t seen the image yet. In this case, it’s recommended to communicate with the recipient and address any concerns or issues directly.
- Multiple recipients: If you sent the photo to multiple recipients in a group chat, unsending the photo will remove it from everyone’s conversation. So, if you were hoping to only retract the photo from one specific person, keep in mind that it will be deleted for all recipients in the group.
If you encounter any other issues or complications while unsending a photo on iMessage, it’s recommended to consult Apple Support or visit an Apple Store for further assistance.
Now that we’ve covered troubleshooting, let’s move on to some essential tips to help you prevent accidental sending in the future.
Tips to Prevent Accidental Sending
Accidentally sending a photo on iMessage can happen to anyone, but there are measures you can take to minimize the chances of making this mistake. Here are some useful tips to help you prevent accidental sending in the future:
- Double-check before sending: Take a moment to review the content of your message, including any attached photos or media, before hitting the send button. By slowing down and checking for any errors, you can catch potential mistakes before they happen.
- Use the preview feature: iOS provides a preview feature that allows you to see the content of a message before sending it. Swipe right on the message screen to see a preview of what you’re about to send. This gives you an opportunity to spot any errors and make necessary changes before sending.
- Be mindful of your recipients: Before selecting recipients for a message, ensure that you’ve chosen the right individuals or group. This will help avoid sending a photo to the wrong person or unintentionally sharing private content with someone who shouldn’t see it.
- Enable confirmation prompts: Within the iMessage settings, you can enable the “Send Read Receipts” and “Ask Before Sending” options. The former will show you when your message has been read by the recipient, while the latter will prompt you for confirmation before sending photos or sensitive content.
- Consider using third-party apps: If you frequently find yourself making mistakes while using iMessage, you may want to explore third-party messaging apps that offer additional features, such as built-in photo editing or an extra layer of confirmation before sending media.
By implementing these tips, you can significantly reduce the chances of accidentally sending a photo on iMessage and the subsequent need to unsend it. Remember, prevention is always better than having to undo a mistake.
As we conclude this article, let’s recap what we’ve covered so far and offer some final thoughts.
Wrap Up
In this article, we’ve discussed the process of unsending a photo on iMessage, ensuring that your messages remain private and your photos are shared only with the intended recipients. We explored the basics of iMessage, the steps to unsend a photo, and offered troubleshooting tips to overcome any potential issues you might encounter.
Remember, unsending a photo is only possible if the recipient hasn’t viewed it yet, so it’s crucial to act quickly. By following the steps outlined in this article, you can retract a photo that was sent in error or without intending to share it.
To avoid the need to unsend photos, we also provided valuable tips to prevent accidental sending in the future. By double-checking before sending, using preview features, being mindful of recipients, enabling confirmation prompts, and considering third-party apps, you can minimize the chances of making these mistakes in the first place.
iMessage offers a seamless messaging experience for Apple users, but accidents happen. With the knowledge and tools outlined in this article, you can navigate iMessage confidently and ensure your messages and photos are sent and received as intended.
We hope this guide has been helpful in understanding how to unsend a photo on iMessage and preventing any future mishaps. If you have any further questions or need additional assistance, don’t hesitate to reach out to Apple Support or consult their online resources.
Happy messaging!