Introduction
As an Android user, effectively managing and responding to text messages is crucial for staying connected with friends, family, and colleagues. Whether you’re using a messaging app or the default messaging app on your Android device, knowing how to navigate and react to incoming text messages is essential for efficient communication.
In this guide, we’ll explore various tips and features that can help you master the art of reacting to text messages on Android. From reading and replying to messages to editing and sending media files, we’ll cover it all. So, let’s dive in and discover how you can make the most out of your text messaging experience on Android.
Before we get started, keep in mind that the specific steps and features described in this guide may vary slightly depending on your Android device and the messaging app you’re using. However, the general principles and concepts remain the same across most Android devices.
Ready to enhance your text messaging skills on Android? Let’s begin!
Read the Message
When you receive a text message on your Android device, the first step is to read it and understand its content. Follow these steps to efficiently read your messages:
- 1. Open the messaging app or swipe down from the notification panel to view the message preview.
- 2. Tap on the message to open it in full view.
- 3. Take your time to read the message carefully and comprehend the information provided.
Text messages often contain important details or requests, so it’s crucial to pay attention to the content. If there are any links or attachments in the message, make sure to review them as well.
Additionally, some messaging apps offer features like message threading, which groups related messages together in a conversation. This helps you keep track of the conversation flow and easily refer back to previous messages.
To navigate through the conversation, you can swipe or scroll up and down. You may also have the option to search for specific keywords or phrases within the message thread, which can be handy when trying to locate a specific piece of information.
Now that you’ve read the message, it’s time to compose a reply. Let’s move on to the next section!
Reply to the Message
After reading a text message on your Android device, the next step is to compose and send a thoughtful reply. Here’s how you can effectively respond to a message:
- 1. Tap on the text input field at the bottom of the messaging app to start typing your reply.
- 2. Begin by addressing the sender with a polite greeting or by mentioning their name.
- 3. Clearly express your response or answer to any questions or requests mentioned in the message.
- 4. Consider the tone of the original message and respond accordingly. If the message was lighthearted or casual, you can adopt a similar tone in your reply. For more formal or serious messages, maintain a professional tone.
- 5. Proofread your reply before sending it to ensure clarity and correctness.
In some messaging apps, you may have additional reply options, such as templates or quick replies. These can be predefined messages or suggested responses that can save you time. You can choose a suitable template or quick reply and customize it, if necessary, before sending.
If the message requires a more lengthy or detailed response, you can use the option of sending multiple text messages or switch to a voice message, which we’ll discuss in a later section.
Remember, effective communication involves actively listening to the message and providing an appropriate response. Take your time to craft a well-thought-out reply that conveys your message clearly and concisely.
Now that you’re ready to reply, let’s move on to the next section where we’ll discuss how to edit your reply if needed.
Edit Your Reply
While composing a reply to a text message on your Android device, it’s important to ensure that your message is error-free and conveys your intended meaning accurately. Luckily, most messaging apps on Android provide editing options that allow you to revise and polish your reply before sending it. Here are a few ways you can edit your reply:
- 1. Read through your message: After typing your response, take a moment to read it from start to finish. Look for any spelling mistakes, grammatical errors, or unclear phrasing. Make necessary revisions to improve the clarity and coherence of your message.
- 2. Use autocorrect and spell check: Many Android devices come equipped with built-in autocorrect and spell check features. These tools highlight misspelled words and suggest corrections as you type. Pay attention to these suggestions and make use of them to correct any inaccuracies.
- 3. Edit for tone and clarity: Consider the tone and intention behind your message. Ensure that your words accurately reflect your intended tone, whether it’s casual, formal, friendly, or professional. Make adjustments to the language and phrasing as needed.
- 4. Add or remove information: If you feel that additional information would enhance your reply or if certain details are unnecessary, you can make appropriate additions or deletions. However, be cautious not to alter the meaning or context of the conversation.
- 5. Preview before sending: Before hitting the send button, take advantage of any preview or review options available in your messaging app. This allows you to see how your message will appear to the recipient and make final adjustments if necessary.
Remember that communication through text messages lacks the visual and auditory cues of face-to-face conversations. Therefore, it’s vital to make your written communication as clear and error-free as possible to avoid any potential misunderstandings.
Now that you’ve reviewed and edited your reply, it’s time to send it. In the next section, we’ll discuss how to send photos or videos with your text messages on Android.
Send Photos or Videos
Text messages can go beyond just plain text. With your Android device, you have the option to easily share photos or videos with your contacts. Here’s how you can send media files through your text messages:
- 1. Open the messaging app and start composing a new message or reply to an existing conversation.
- 2. Look for an icon or button that represents adding an attachment. It is usually depicted as a paperclip or a camera icon.
- 3. Tap on the attachment icon and choose whether you want to take a photo/video with your device’s camera or select an existing photo/video from your gallery.
- 4. If you’re taking a photo/video, aim your camera at the subject and press the capture button to take the shot. If you’re selecting an existing photo/video, browse through your gallery and choose the desired file.
- 5. Once you’ve selected or captured the photo/video, it will be attached to your message. You can add a caption or description if desired.
- 6. Review your message, including the attached photo/video, to ensure everything looks good.
- 7. Finally, tap on the send button to deliver your message along with the attached media file.
Sending photos or videos can be a great way to visually enhance your text messages and share memorable moments with your contacts. Whether it’s a funny snapshot or a special event, sharing media files adds depth and richness to your communication.
Keep in mind that sending media files through text messages may incur data charges, especially if you’re using cellular data instead of a Wi-Fi connection. Make sure to check your data plan and settings to avoid any unexpected costs.
Now that you know how to send photos or videos, let’s explore another fun way to communicate: sending voice messages.
Send a Voice Message
Sometimes, the best way to express yourself is through your voice. With your Android device, you have the option to send voice messages, allowing you to communicate with a more personal touch. Follow these steps to send a voice message:
- 1. Open the messaging app and navigate to the conversation where you want to send a voice message.
- 2. Look for an icon or button that represents recording audio. It is usually depicted as a microphone or a voice message icon.
- 3. Tap on the recording audio icon to start recording your voice message. Hold the device close to your mouth to ensure clear audio capture.
- 4. Begin speaking your message, conveying your thoughts, feelings, or instructions clearly and concisely.
- 5. Once you have finished recording your voice message, release the recording audio icon to stop the recording.
- 6. Review your voice message to ensure it sounds satisfactory. If needed, you may have the option to preview or re-record the message before sending.
- 7. When you’re ready, tap on the send button to deliver your voice message to the recipient.
Sending voice messages adds a personal and authentic touch to your conversations. It allows the recipient to hear your tone of voice and emotions, creating a more engaging and meaningful communication experience.
Additionally, voice messages can be convenient when you’re on-the-go or in situations where typing may not be practical or convenient. Instead of struggling to type a lengthy message, simply record and send a voice message to convey your thoughts effortlessly.
Now that you’re familiar with sending voice messages, let’s explore how you can add emojis and stickers to your text messages for a more expressive communication style.
Add Emojis and Stickers
Text-based conversations can sometimes lack the expressive elements of face-to-face communication. However, with Android devices, you can make your text messages more colorful and emotive by using emojis and stickers. Here’s how you can add them:
- 1. Open the messaging app and compose a new message or reply to an existing conversation.
- 2. Look for an icon or button that represents emojis or stickers. It is typically a smiley face or a small pictorial icon.
- 3. Tap on the icon to open the emojis and stickers menu. You will see a wide variety of emojis, emoticons, and stickers available for selection.
- 4. Browse through the options and choose the emoji or sticker that best represents your thought or emotion.
- 5. Tap on the selected emoji or sticker to add it to your message. You can place it alongside your text or use it as a standalone expression.
- 6. Continue typing your message, adding more emojis or stickers as desired.
- 7. Review your message to ensure the emojis and stickers add the intended meaning and enhance your communication.
- 8. Finally, tap on the send button to deliver your message, complete with the added emojis or stickers.
Emojis and stickers provide a fun and visually appealing way to express yourself in your text messages. Whether you want to convey emotions like happiness, sadness, or excitement, or simply add a touch of playfulness to your conversation, emojis and stickers can effectively enhance your communication.
Furthermore, some messaging apps offer the option to download additional sticker packs, allowing you to personalize your messages even further. Explore the available options in your messaging app and make your conversations more vibrant and engaging.
Now that you’re familiar with adding emojis and stickers, let’s discuss the use of chat features, if available, for an enhanced messaging experience.
Use Chat Features (When Available)
Modern messaging apps on Android often come packed with additional chat features that can elevate your messaging experience. These features go beyond basic text messaging and offer enhanced functionality, allowing for more dynamic and interactive conversations. Here are some common chat features you might find:
- 1. Read receipts: With this feature enabled, you can see when your message has been read by the recipient(s). It provides an extra level of assurance that your message has been received and acknowledged.
- 2. Typing indicators: This feature shows when the person you’re chatting with is actively typing a response. It adds a real-time element to the conversation, indicating that someone is formulating a reply.
- 3. Group messaging: Group chats allow for communication with multiple people simultaneously. You can create groups for specific projects, events, or just casual conversations, making it easier to keep everyone in the loop.
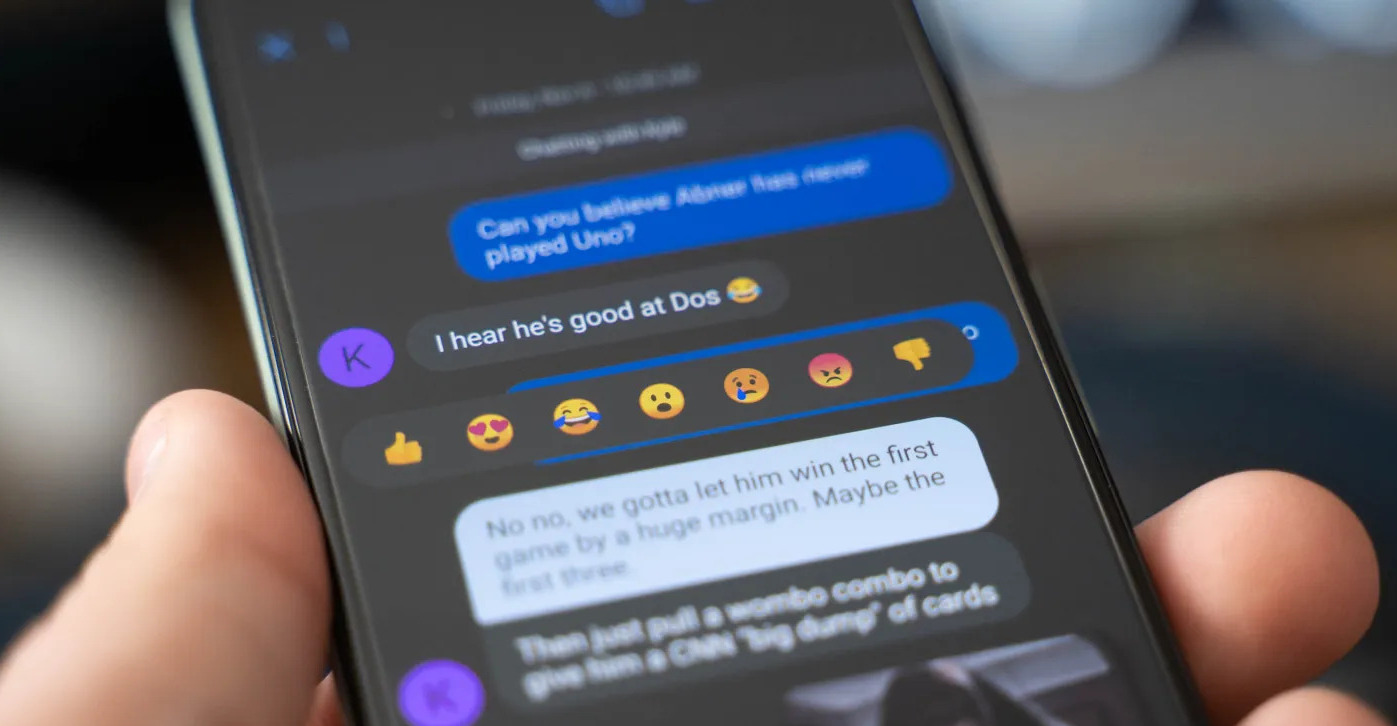
- 4. Reaction emojis: Some chat features allow you to react to individual messages with emojis. By simply tapping and holding a message, you can choose a specific reaction emoji to add a visual response without sending a text message.
- 5. Chatbots: In certain messaging apps, you may encounter chatbots – automated virtual assistants that can provide various services and answers to your queries. They can assist with tasks like booking appointments, providing information, or delivering customer support.
- 6. GIFs and media integrations: Some messaging apps offer built-in integration with GIF libraries or media platforms, allowing you to search and send GIFs, videos, or other media directly within the chat.
These chat features bring a new level of interaction and engagement to your conversations. They can enhance communication efficiency, provide a sense of presence, and make your chats more fun and expressive.
Keep in mind that chat features may vary depending on the messaging app you’re using and the version of the app. Some features may require both you and your contacts to have the same messaging app or be using a specific version to fully enjoy the benefits. Explore the settings and options within your messaging app to see what chat features are available to you.
Now that you’re aware of using chat features, let’s move on to another practical feature: scheduling text messages.
Schedule a Message
Have you ever wanted to send a text message at a specific time, but you didn’t want to rely on your memory to remember to send it? With Android devices, you have the option to schedule messages in advance. This feature allows you to compose a message and set a specific date and time for it to be automatically sent. Here’s how you can schedule a message:
- 1. Open your messaging app and compose a new message or reply to an existing conversation.
- 2. Write your message as you normally would, ensuring that it conveys the desired information or sentiment.
- 3. Instead of tapping on the send button right away, look for an option or icon that represents scheduling or delayed sending. This option is typically denoted by a clock or calendar icon.
- 4. Tap on the scheduling option and choose the date and time you want the message to be sent. You can select a specific day and set the exact hour and minute.
- 5. Once you have set the schedule, review the details to verify that everything is correct and that the message will be sent when you intend it to.
- 6. Finally, tap on the confirm or schedule button to schedule the message. The messaging app will take care of sending the message at the specified time, even if you’re not actively using your device.
Scheduling messages can be incredibly useful in various scenarios. You can use it to send birthday wishes, reminders, or important announcements, ensuring that your message reaches the recipient at the right moment.
Keep in mind that the scheduling feature may vary between different messaging apps. Some apps may have it built-in, while others may require third-party apps or plugins to enable this functionality. Explore the options within your messaging app or explore the Play Store to find a suitable scheduling app if needed.
Now that you know how to schedule messages, it’s time to explore how you can manage your existing messages by archiving or deleting them.
Archive or Delete Messages
Over time, your messaging app can become cluttered with numerous conversations and messages, making it harder to find important or relevant information. To keep your messaging app organized and decluttered, you have the option to archive or delete messages. Here’s how you can manage your messages:
- 1. Open your messaging app and navigate to the conversation or message you want to manage.
- 2. To archive a message, swipe or long-press on the conversation and look for an archive icon or option. Archiving a message moves it out of your main inbox or chat list and into an archived folder. This way, the conversation is still accessible if needed, but it no longer clutters your main view.
- 3. To delete a message, swipe or long-press on the conversation and look for a delete icon or option. Deleting a message permanently removes it from your messaging app, and you won’t be able to retrieve it.
- 4. Some messaging apps offer additional management options, such as marking messages as read or unread, or labeling them with categories or tags for easier organization.
- 5. Consider reviewing your conversations periodically and deciding whether to archive or delete old or irrelevant messages to maintain a clean and organized messaging environment.
Archiving or deleting messages can help you free up storage space, reduce clutter, and easily locate important conversations. It also allows you to focus on current and relevant messages, improving your overall messaging experience.
However, be cautious when deleting messages, especially if they contain sensitive or valuable information. Consider backing up important conversations or files before deleting them to avoid accidental data loss.
Now that you know how to archive or delete messages, let’s move on to another important aspect of text messaging – blocking unwanted messages.
Block Unwanted Messages
Dealing with unwanted or spam messages can be frustrating and disruptive to your messaging experience. However, Android devices offer the ability to block unwanted messages, providing you with control over who can contact you. Here’s how you can block unwanted messages:
- 1. Open your messaging app and navigate to the conversation from the sender you wish to block.
- 2. Look for options or settings related to blocking the contact. This can usually be found by tapping on the contact’s name or info within the conversation.
- 3. Tap on the block or spam option to block messages from that specific sender.
- 4. Some messaging apps might provide additional features like reporting spam or managing blocked contacts through dedicated sections in the app settings.
- 5. By blocking unwanted messages, you prevent further messages from that specific sender from reaching your inbox, reducing the hassle of dealing with unwanted or unsolicited content.
Blocking unwanted messages not only helps maintain a clean and clutter-free messaging experience, but it also provides a sense of security and control. It allows you to focus on meaningful and relevant conversations while minimizing disturbances from unwanted contacts.
It’s worth noting that blocking a contact may vary in different messaging apps, and some apps might have additional options to manage privacy, such as blocking unknown or hidden numbers.
Now that you know how to block unwanted messages, let’s explore how you can manage your message notifications on your Android device.
Enable Message Notifications
Message notifications on your Android device ensure that you stay informed and promptly respond to incoming messages. By enabling message notifications, you can receive alerts or sounds whenever a new message arrives, even if you’re not actively using your messaging app. Here’s how you can enable message notifications:
- 1. Open your messaging app and access the settings. This is typically done by tapping on the three-dot menu or accessing the app’s settings through the app drawer.
- 2. Look for a section related to notifications or message alerts.
- 3. Within the notification settings, you can customize various aspects, such as the notification sound, vibration pattern, LED color (if supported by your device), and whether to show a preview of the message in the notification.
- 4. Ensure that the “notifications” toggle or checkbox is turned on to enable message notifications.
- 5. Depending on your Android version and messaging app, you may have additional options to customize notifications further, such as configuring notification priority, setting quiet hours, or creating custom notification channels.
- 6. Once you’ve configured the message notification settings to your preference, exit the settings. You will now receive alerts whenever you receive a new message.
Enabling message notifications ensures that you stay updated and don’t miss out on important conversations. It allows you to quickly respond to messages, keeping the lines of communication open and efficient.
Keep in mind that excessive notifications can also be distracting or overwhelming. Consider finding a balance between staying informed and managing your notification settings to avoid unnecessary disturbances.
Now that you’ve enabled message notifications, you have better control over your communication. Let’s explore another important aspect of managing text messages – adjusting conversation settings.
Adjust Conversation Settings
Adjusting conversation settings on your Android device allows you to personalize your messaging experience and tailor it to your preferences. These settings provide you with control over various aspects of individual conversations, ensuring that your conversations are managed and organized efficiently. Here are some common conversation settings you can adjust:
- 1. Notification settings: Within a specific conversation, you can configure the notification settings to be unique for that conversation. This allows you to control whether you receive alerts, sounds, or vibrations specifically for that conversation.
- 2. Mute conversation: If you want to temporarily silence notifications for a particular conversation, you can use the “mute” option. This prevents the conversation from generating any sound or vibration alerts until you unmute it. It can be helpful when you’re in a meeting or need uninterrupted focus.
- 3. Pin or favorite conversation: Some messaging apps provide the option to pin or mark a conversation as a favorite. This places the conversation at the top of your chat list, making it easily accessible and preventing it from getting buried among other conversations.
- 4. Archive or hide conversation: If you want to declutter your main chat view without permanently deleting a conversation, you can use the archive or hide option. This moves the conversation out of your main chat list and into an archived folder or hidden conversations, making your chat list cleaner and more organized.
- 5. Change chat color or wallpaper: Depending on your messaging app, you may have the ability to customize the appearance of individual conversations. This can include changing the chat bubble colors, the background wallpaper, or other visual elements, allowing you to personalize your messaging experience.
- 6. Manage media and storage: In some messaging apps, you may have the option to adjust settings related to media and storage. This can include automatically downloading media files, changing storage locations, or setting limits on the amount of data used for media sharing.
By adjusting conversation settings, you have fine-grained control over how specific conversations are handled and displayed within your messaging app. Personalizing these settings ensures that your conversations are organized, easily accessible, and align with your preferences and priorities.
Remember to explore the settings menu of your messaging app to discover all the available conversation settings and customize them to suit your needs.
Now that you’re familiar with adjusting conversation settings, you have the tools to tailor your messaging experience on your Android device.