Introduction
Welcome to our guide on how to put a password on your SanDisk SSD. In this age of increasing data security concerns, protecting your valuable information is of utmost importance. Whether you use your SSD for personal or professional purposes, adding an extra layer of security through password protection can give you peace of mind.
By enabling password protection on your SanDisk SSD, you can ensure that only authorized individuals have access to your data. In the unfortunate event that your SSD gets lost or stolen, the password will prevent unauthorized access and protect your sensitive information from falling into the wrong hands.
In the following steps, we will explain how to enable password protection on your SanDisk SSD. We will guide you through the process of setting up a secure password and enabling hardware encryption to safeguard your data.
It is important to note that the process may vary slightly depending on the model of your SanDisk SSD and the software you are using. However, the general steps outlined in this guide will be applicable to most SanDisk SSDs.
Before we proceed, make sure that you have administrative access to your computer and that your SanDisk SSD is connected and recognized by your system. Let’s dive into the step-by-step process of putting a password on your SanDisk SSD to enhance its security.
Step 1: Understand the Need for a Password
Before you begin the process of putting a password on your SanDisk SSD, it is important to understand the need for this additional layer of security. Your SSD contains important data, such as personal documents, sensitive work files, or even confidential client information. By setting a password, you can protect this data from unauthorized access, ensuring that only you or authorized individuals can view and modify the content.
Password protection is especially crucial if you frequently carry your SanDisk SSD with you or if it is connected to a shared computer. In these scenarios, there is always a risk of unauthorized access, either intentionally or accidentally. By setting a password, you can prevent others from accessing your files if your SSD is lost, stolen, or accessed without your permission.
Even if you primarily use your SanDisk SSD on a personal device, adding a password is a wise step to safeguard your data. It provides an extra level of protection against potential security breaches, malware attacks, or unauthorized access from individuals who may gain physical or remote access to your computer.
Furthermore, password protection is essential for compliance with industry regulations and data privacy laws. Many industries, such as finance, healthcare, and legal, have strict guidelines for protecting sensitive information. By securing your SanDisk SSD with a password, you demonstrate a commitment to data security and ensure compliance with relevant regulations.
It is worth noting that password protection alone may not guarantee absolute security. However, it significantly reduces the risk of unauthorized access and acts as a deterrent. By implementing a strong password and following other security best practices, you can enhance the overall security of your SanDisk SSD and mitigate potential threats.
Step 2: Enable Hardware Encryption
To provide an added layer of security for your SanDisk SSD, you can enable hardware encryption. Hardware encryption ensures that the data stored on your SSD is automatically encrypted and can only be accessed with the correct encryption key or password.
Enabling hardware encryption varies depending on the model of your SanDisk SSD and the software provided. However, the general steps listed below should give you an understanding of the process:
- Check for hardware encryption support: First, verify whether your SanDisk SSD supports hardware encryption. You can find this information in the product specifications or the manufacturer’s website.
- Download necessary software: If your SanDisk SSD supports hardware encryption, visit the SanDisk website and download the appropriate encryption software. Follow the installation instructions provided by SanDisk to install the software on your computer.
- Open the encryption software: Once the software is installed, open it and navigate to the encryption settings. This may vary depending on the software, but typically you can find encryption settings in the system tray or within the software’s interface.
- Enable hardware encryption: Within the encryption settings, locate the option to enable hardware encryption. This option may be labeled differently depending on the software used but should be clearly indicated. Check the box or toggle the switch to enable hardware encryption.
- Create an encryption key: Once hardware encryption is enabled, you may be prompted to create an encryption key or password. It is important to choose a strong and unique encryption key that is not easily guessable. Avoid using common words, personal information, or sequential numbers. Ideally, your encryption key should include a combination of upper and lowercase letters, numbers, and special characters.
- Confirm and save the encryption key: After creating your encryption key, confirm it and save it in a secure location. It is crucial to keep your encryption key safe and easily accessible to authorized individuals while ensuring it is not readily available to unauthorized users.
Enabling hardware encryption adds an additional layer of protection to your SanDisk SSD, ensuring that even if someone gains physical access to your drive, they won’t be able to access the data without the correct encryption key or password. It is a highly recommended step to enhance the security of your data.
Step 3: Create a Secure Password
When putting a password on your SanDisk SSD, it is crucial to create a strong and secure password. A strong password significantly reduces the risk of unauthorized access and protects your data from potential threats. Here are some tips to help you create a secure password:
- Length: Ensure your password is at least 8-12 characters long. The longer the password, the harder it is for someone to guess or crack it.
- Complexity: Use a combination of uppercase and lowercase letters, numbers, and special characters in your password. This increases the complexity and makes it more difficult to guess.
- Avoid common phrases or words: Avoid using common phrases, dictionary words, or personal information in your password. Hackers often use automated programs that can easily guess common passwords.
- Unique password: Ensure your password is unique and not used for any other accounts or services. Reusing passwords increases the risk of multiple accounts being compromised if one password is compromised.
- Avoid sequential or repetitive patterns: Avoid using sequential or repetitive patterns, such as “123456” or “aaaaaa.” These patterns are easy to guess and should be avoided.
- Consider a passphrase: Instead of a single word, consider using a passphrase composed of multiple words. Passphrases can be easier to remember while providing a higher level of security. For example, “PurpleElephantSunset” is much stronger than a single-word password.
- Regularly update your password: It is important to change your password periodically to maintain security. Set a reminder to update your password every few months to ensure ongoing protection.
Remember, the strength of your password directly affects the security of your SanDisk SSD. Take the time to create a unique, complex, and secure password that is difficult to crack. This will greatly enhance the protection of your data and safeguard your valuable information.
Step 4: Enable Password Protection
Now that you’ve created a strong password, it’s time to enable password protection on your SanDisk SSD. Enabling password protection ensures that only individuals with the correct password can access the data stored on your SSD. Follow the steps below to enable password protection:
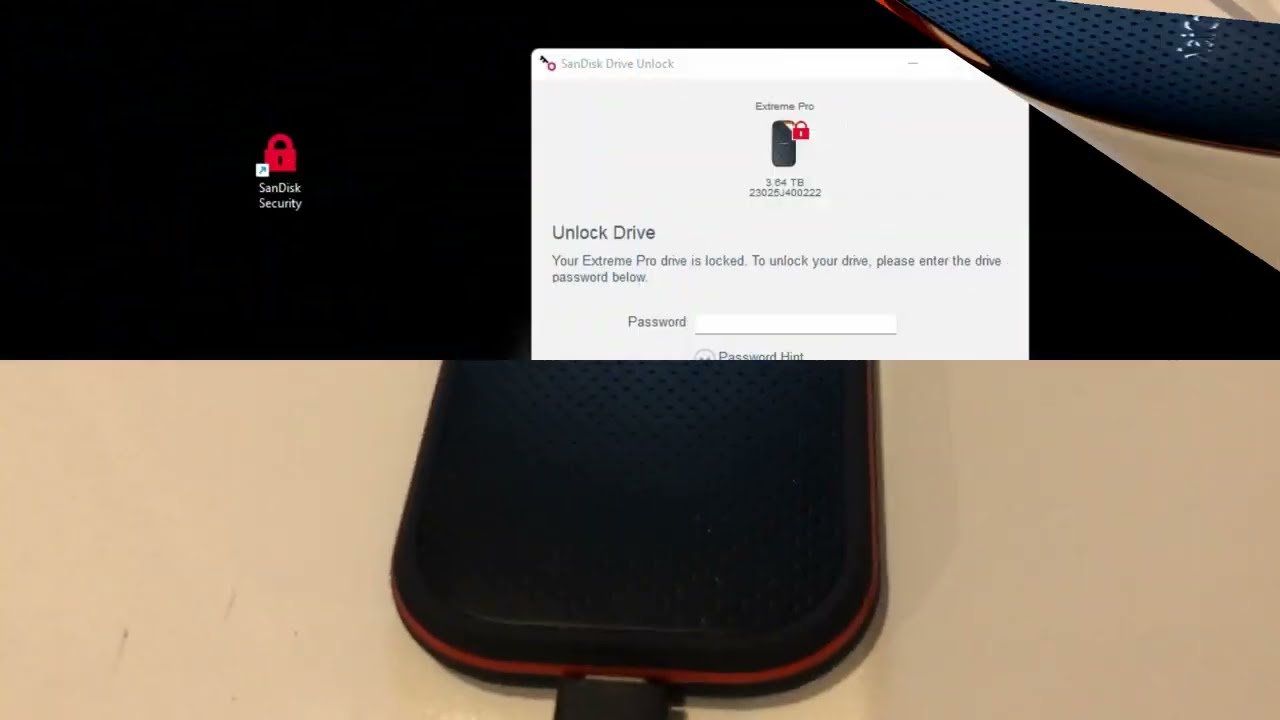
- Open the software: Launch the SanDisk SSD software on your computer. This software may vary depending on the model of your SSD, but it is usually pre-installed or can be downloaded from the SanDisk website.
- Navigate to security settings: Look for the security or password protection settings within the software. This may be located in a dedicated tab or under the settings menu.
- Enable password protection: Within the security settings, you should find an option to enable password protection. Check the box or toggle the switch to activate this feature.
- Select your password: You will be prompted to enter the password you created earlier. Carefully type in the password and confirm it when prompted. Make sure to double-check for typos to ensure accuracy.
- Save the changes: After entering and confirming your password, look for a “Save” or “Apply” button within the software interface. Click this button to save the changes and enable password protection on your SanDisk SSD.
Once password protection is enabled, the next time you access your SSD, you will be prompted to enter the password. This ensures that only authorized individuals can view and modify the data stored on the SSD. It is crucial to remember your password or keep it in a secure location, as a forgotten password may lead to data loss or the inability to access your files.
Enabling password protection provides an extra layer of security and peace of mind, knowing that your data is protected from unauthorized access. It is a valuable step in preventing data breaches and maintaining the confidentiality of your information.
Step 5: Reboot and Test
After enabling password protection on your SanDisk SSD, it is important to reboot your computer and test whether the password is working correctly. This step ensures that the password protection feature is fully functional and that you can successfully access your SSD using the newly set password. Follow the steps below to reboot and test your SanDisk SSD:
- Save your work: Before rebooting your computer, make sure to save any open documents or files. Close any running applications to avoid data loss or potential conflicts during the reboot process.
- Restart your computer: Click on the “Start” or “Windows” button and select the “Restart” option. Alternatively, you can press the “Ctrl + Alt + Delete” keys simultaneously and choose the “Restart” option from the menu.
- Enter the password: Once your computer reboots and you reach the login screen, you will be prompted to enter the password you set for your SanDisk SSD. Carefully type in the password and press “Enter” or click the “Login” button.
- Verify successful login: If the password was entered correctly, you should be able to log in to your computer and access your SanDisk SSD. Take a moment to navigate through your files and ensure that everything is functioning as expected.
- Test password protection: To further test the password protection, try accessing your SanDisk SSD from another user account or a different computer. You should be prompted to enter the password to gain access. If the password protection feature is working correctly, you will not be able to access the SSD without providing the correct password.
By rebooting and testing the password protection feature, you can ensure that your SanDisk SSD is securely protected and that unauthorized individuals are prevented from accessing your valuable data. If you encounter any issues during the testing process, consult the user manual or visit the SanDisk website for troubleshooting assistance.
Remember to always keep your password confidential and avoid sharing it with anyone. Regularly update your password and follow best practices for data security to maintain the integrity and privacy of your information.
Conclusion
Congratulations! You have successfully learned how to put a password on your SanDisk SSD, enhancing the security of your valuable data. By following the steps outlined in this guide, you have added an extra layer of protection to your SSD, safeguarding it from unauthorized access and potential security breaches.
Enabling hardware encryption, creating a secure password, and enabling password protection are essential steps to ensure the confidentiality and privacy of your information. By implementing these security measures, you can have peace of mind knowing that your data is safe even if your SanDisk SSD is lost, stolen, or accessed without your permission.
Remember to choose a strong and unique password, regularly update it, and follow best practices for data security. Additionally, keep your encryption key and password confidential, and avoid sharing them with unauthorized individuals.
It is worth noting that while password protection is a crucial step in securing your data, it is not the only safeguard you should rely on. Consider implementing other security measures, such as regular backups, antivirus software, and keeping your system up to date, to further enhance the protection of your SanDisk SSD and overall data security.
We hope this guide has been helpful in understanding the process of putting a password on your SanDisk SSD. Enjoy the peace of mind that comes with knowing your data is protected, and feel confident in the security of your valuable information.


