Introduction
Welcome to the world of Roku, a popular streaming platform that offers a wide range of entertainment options. With a Roku device, you can access your favorite movies, TV shows, music, and more, all from the comfort of your own living room. But to fully enjoy the Roku experience, you’ll need to know how to control it – and that’s where the Roku remote comes in.
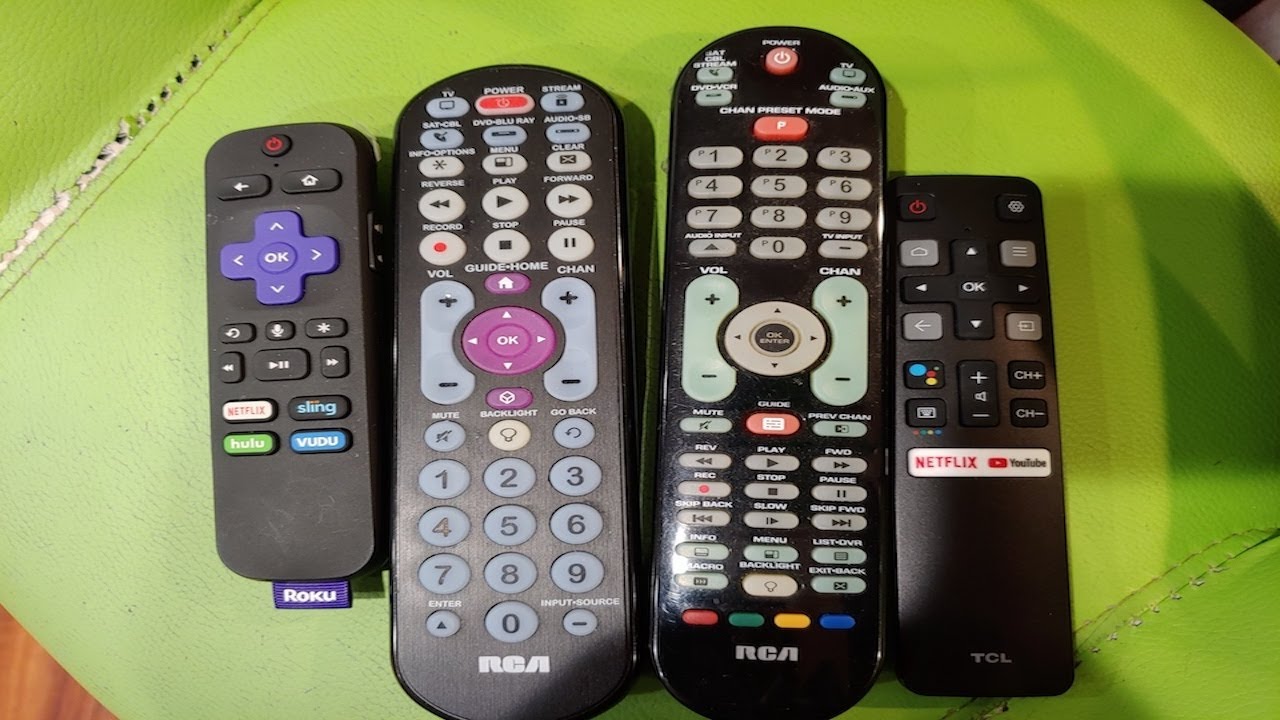
The Roku remote is a handy and essential tool that allows you to navigate through the Roku interface, select your desired content, and control the volume and power of your TV. It’s a compact and user-friendly device, designed to simplify your streaming experience.
In this guide, we’ll walk you through the process of programming your Roku remote, so you can take full advantage of its features. Whether you’re setting up your Roku for the first time or need to reprogram your remote, we’ve got you covered. So, let’s dive in and get your Roku remote up and running!
Understanding The Roku Remote
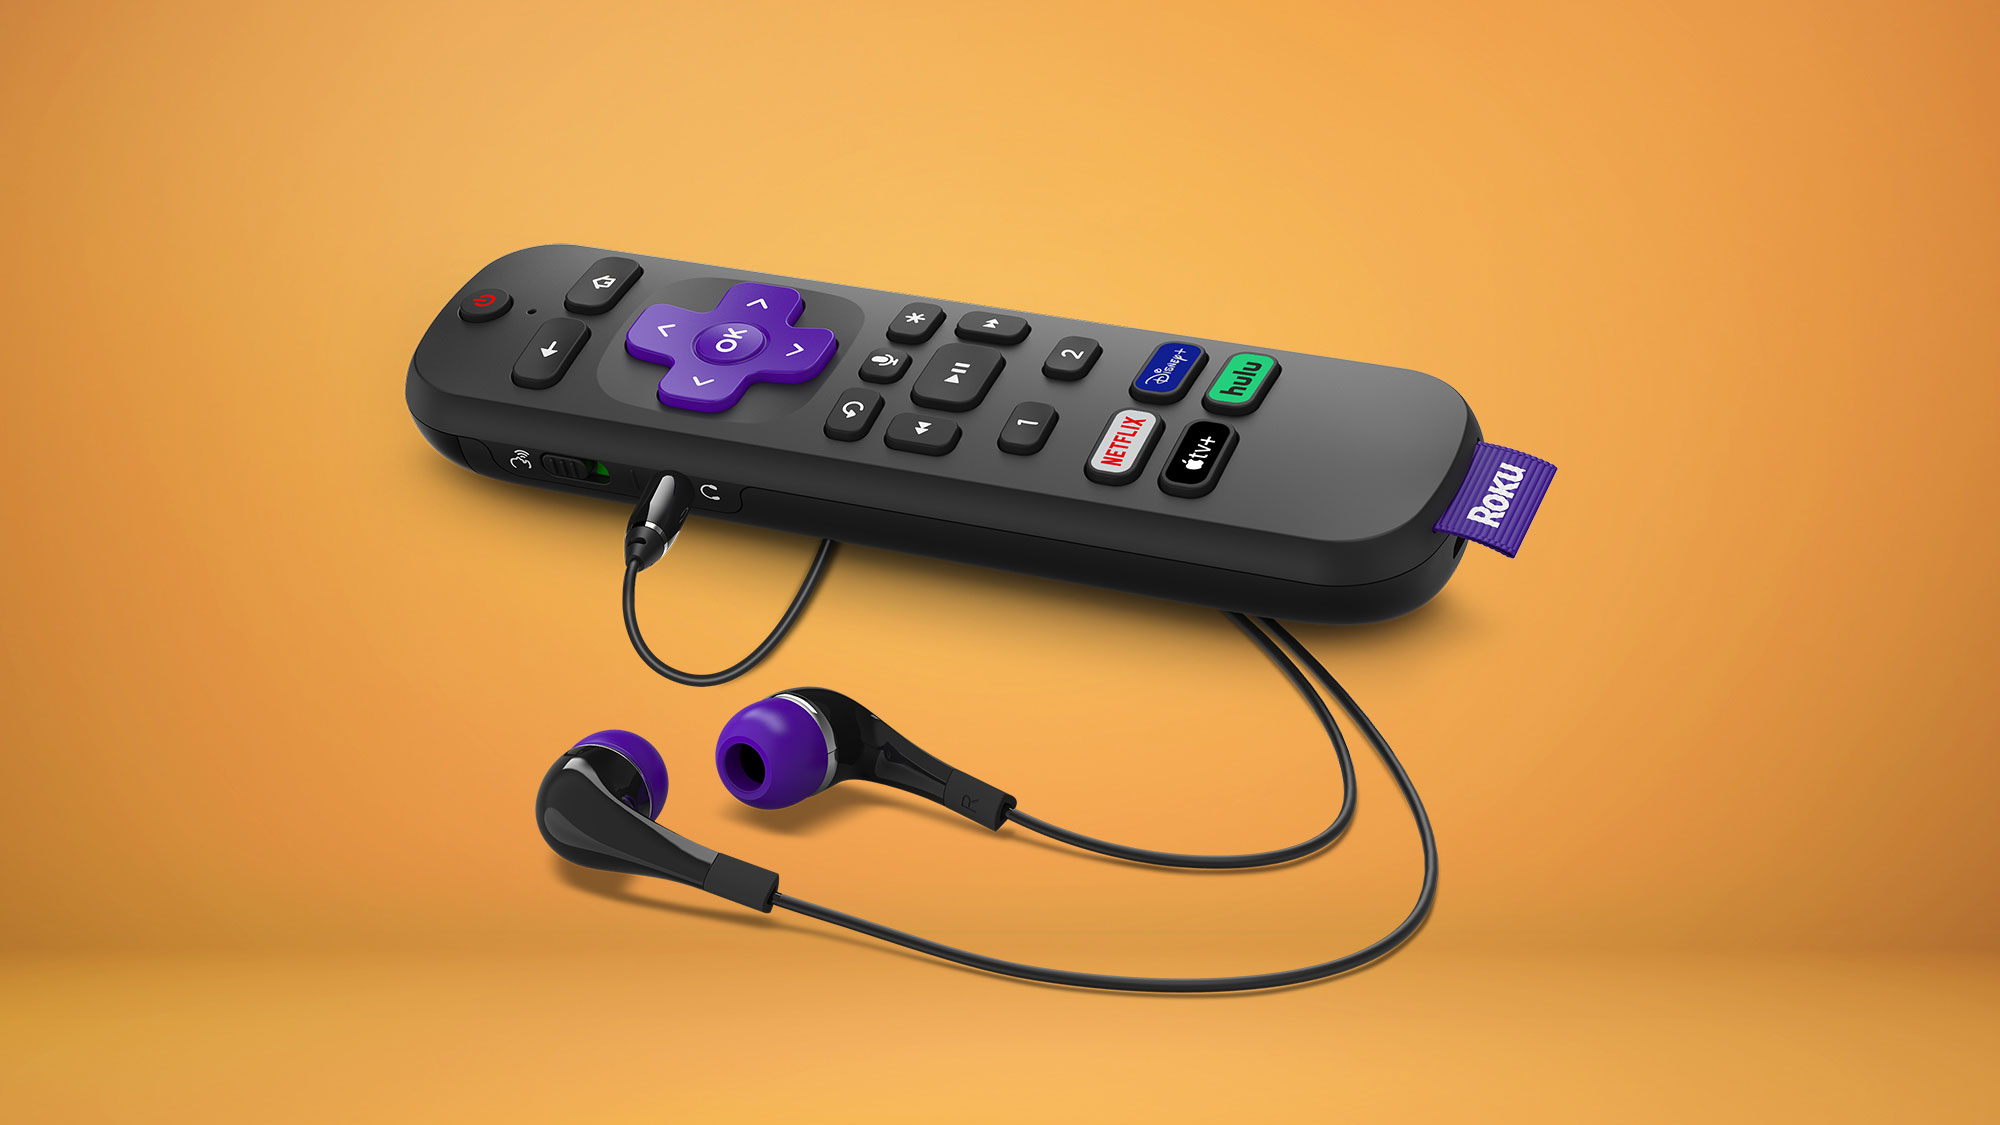
The Roku remote may appear simple at first glance, but it is packed with features and functionalities that make navigating through the Roku interface a breeze. Let’s take a closer look at the components and functions of the Roku remote:
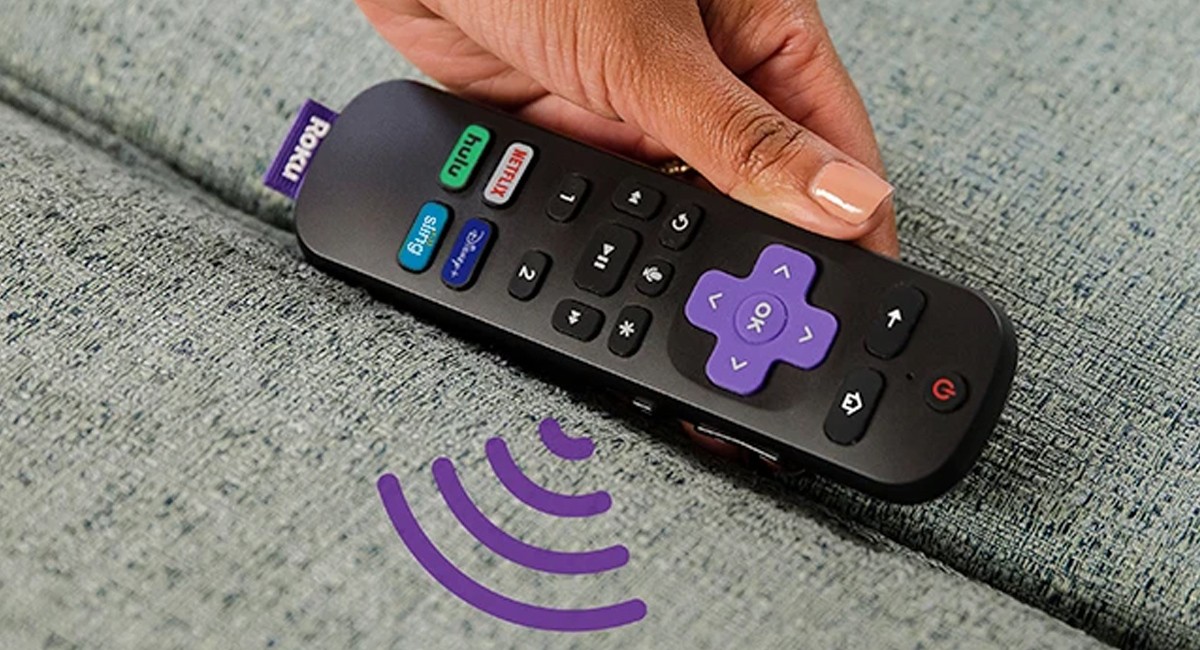
- Navigation Buttons: Located at the center of the remote, these directional buttons (up, down, left, right) allow you to navigate through menus and select options on your Roku device.
- OK Button: The OK button, typically found in the center of the directional buttons, is used to confirm your selections on the Roku interface.
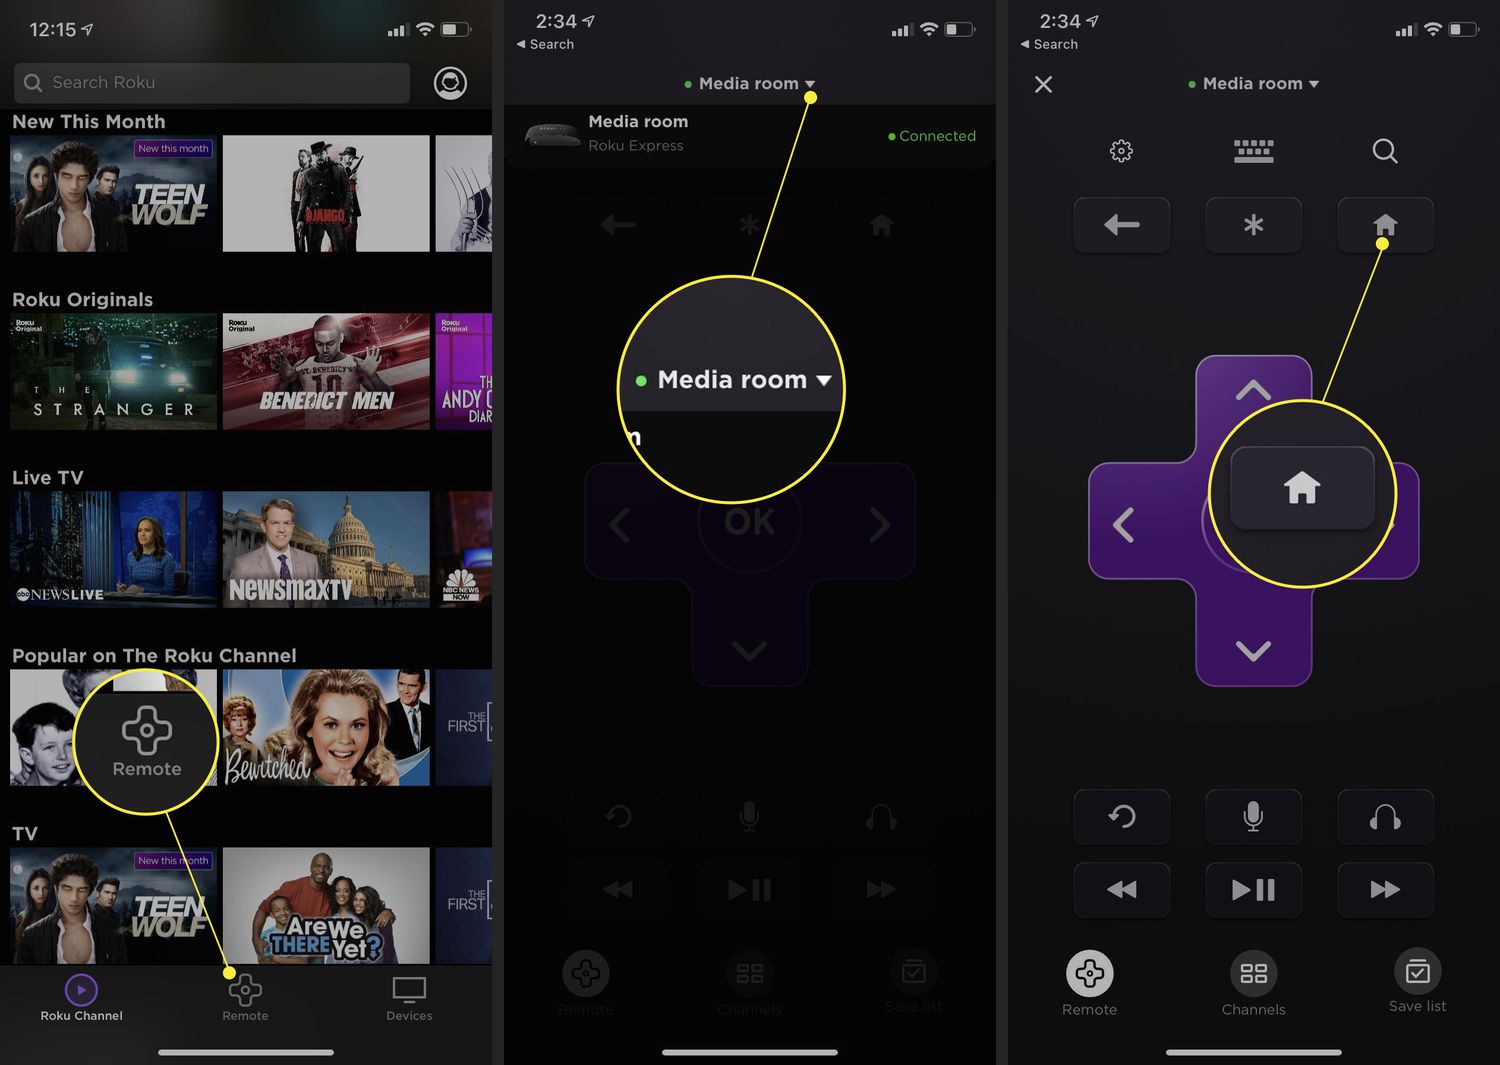
- Home Button: A prominent button with a house icon, the Home button takes you back to the Roku home screen, regardless of where you are in the interface.
- Back Button: The Back button, usually denoted by a leftward arrow, allows you to return to the previous screen or menu.
- Options Button: This button, often represented by three dots or lines, opens a context menu with additional options and settings for the selected content.
- Volume and Mute Buttons: Located on the side of the Roku remote, these buttons control the volume of your TV. In some models, you may also find a dedicated Mute button to quickly silence the audio.
- Power Button: The power button, frequently placed at the top or bottom of the remote, allows you to turn your TV on or off.
Additionally, some Roku remotes may have additional buttons, such as shortcut buttons for popular streaming services like Netflix or Hulu.
Understanding the functionality of the Roku remote is crucial in order to navigate the Roku interface seamlessly and access your desired content with ease. Now that we have a clear understanding of the Roku remote, let’s move on to the next step – powering on the remote.
Step 1: Powering On The Roku Remote
Before you can begin programming your Roku remote, you’ll need to make sure it is powered on and ready to use. Follow these simple steps to power on your Roku remote:
- Open the battery compartment on the back of the Roku remote. It can usually be accessed by sliding the cover or pressing a release button.
- Insert the batteries into the remote, making sure to match the positive (+) and negative (-) ends according to the markings inside the compartment.
- Once the batteries are properly inserted, close the battery compartment cover securely.
- Now, aim the Roku remote at your TV or Roku device, and press any button on the remote. This will power on the remote and establish a connection with your Roku device.
- If the remote does not power on or connect, try replacing the batteries with fresh ones. Sometimes, old or drained batteries can cause connectivity issues.
Once your Roku remote is powered on, you’re ready to move on to the next step – pairing the remote with your Roku device. Keep in mind that each Roku device can be paired with only one remote at a time, so make sure to pair the remote to the specific Roku device you want to control.
Now that your remote is powered on, let’s proceed to the next step and learn how to pair it with your Roku device.
Step 2: Pairing The Roku Remote With Your Roku Device
Once you have powered on your Roku remote, the next step is to pair it with your Roku device. To ensure that your remote can effectively control your Roku device, follow these instructions:
- Make sure your Roku device is turned on and connected to your TV. Ensure that it is connected to your Wi-Fi network as well.
- Locate the pairing button or reset button on your Roku device. The location of this button may vary depending on the model of your Roku device, but it is typically found on the back or bottom of the unit.
- Press and hold the pairing button on your Roku device until the pairing light starts flashing. This indicates that your Roku device is in pairing mode.
- On your Roku remote, press and hold the pairing button for a few seconds. The pairing button is usually located inside the battery compartment or on the bottom/side of the remote.
- After a few moments, the pairing light on both the Roku device and remote should stop flashing and remain solid, indicating that the pairing process is complete.
You have successfully paired your Roku remote with your Roku device! Now you can fully control your Roku device using the remote.
If the pairing process is not successful, try restarting both your Roku device and remote, and repeat the steps for pairing. It’s important to ensure that the remote and device are in close proximity during the pairing process for a more reliable connection.
With the remote successfully paired, you’re ready to move on to the next step and program your Roku remote to control your TV.
Step 3: Programming The Roku Remote to Control Your TV
One of the convenient features of the Roku remote is its ability to control your TV’s power and volume. By programming the remote to work with your TV, you can simplify your entertainment experience by using a single remote for both your Roku device and television. Follow these steps to program your Roku remote to control your TV:
- Ensure that your Roku device and TV are both powered on.
- Locate the TV input or source button on your Roku remote. This button allows you to switch the input source on your TV to the one connected to your Roku device.
- Press and hold the TV input or source button on your Roku remote until the TV input menu appears on your TV screen.
- Using the navigation buttons on your Roku remote, highlight and select the input source that corresponds to your Roku device. This will establish a connection between your Roku device and TV.
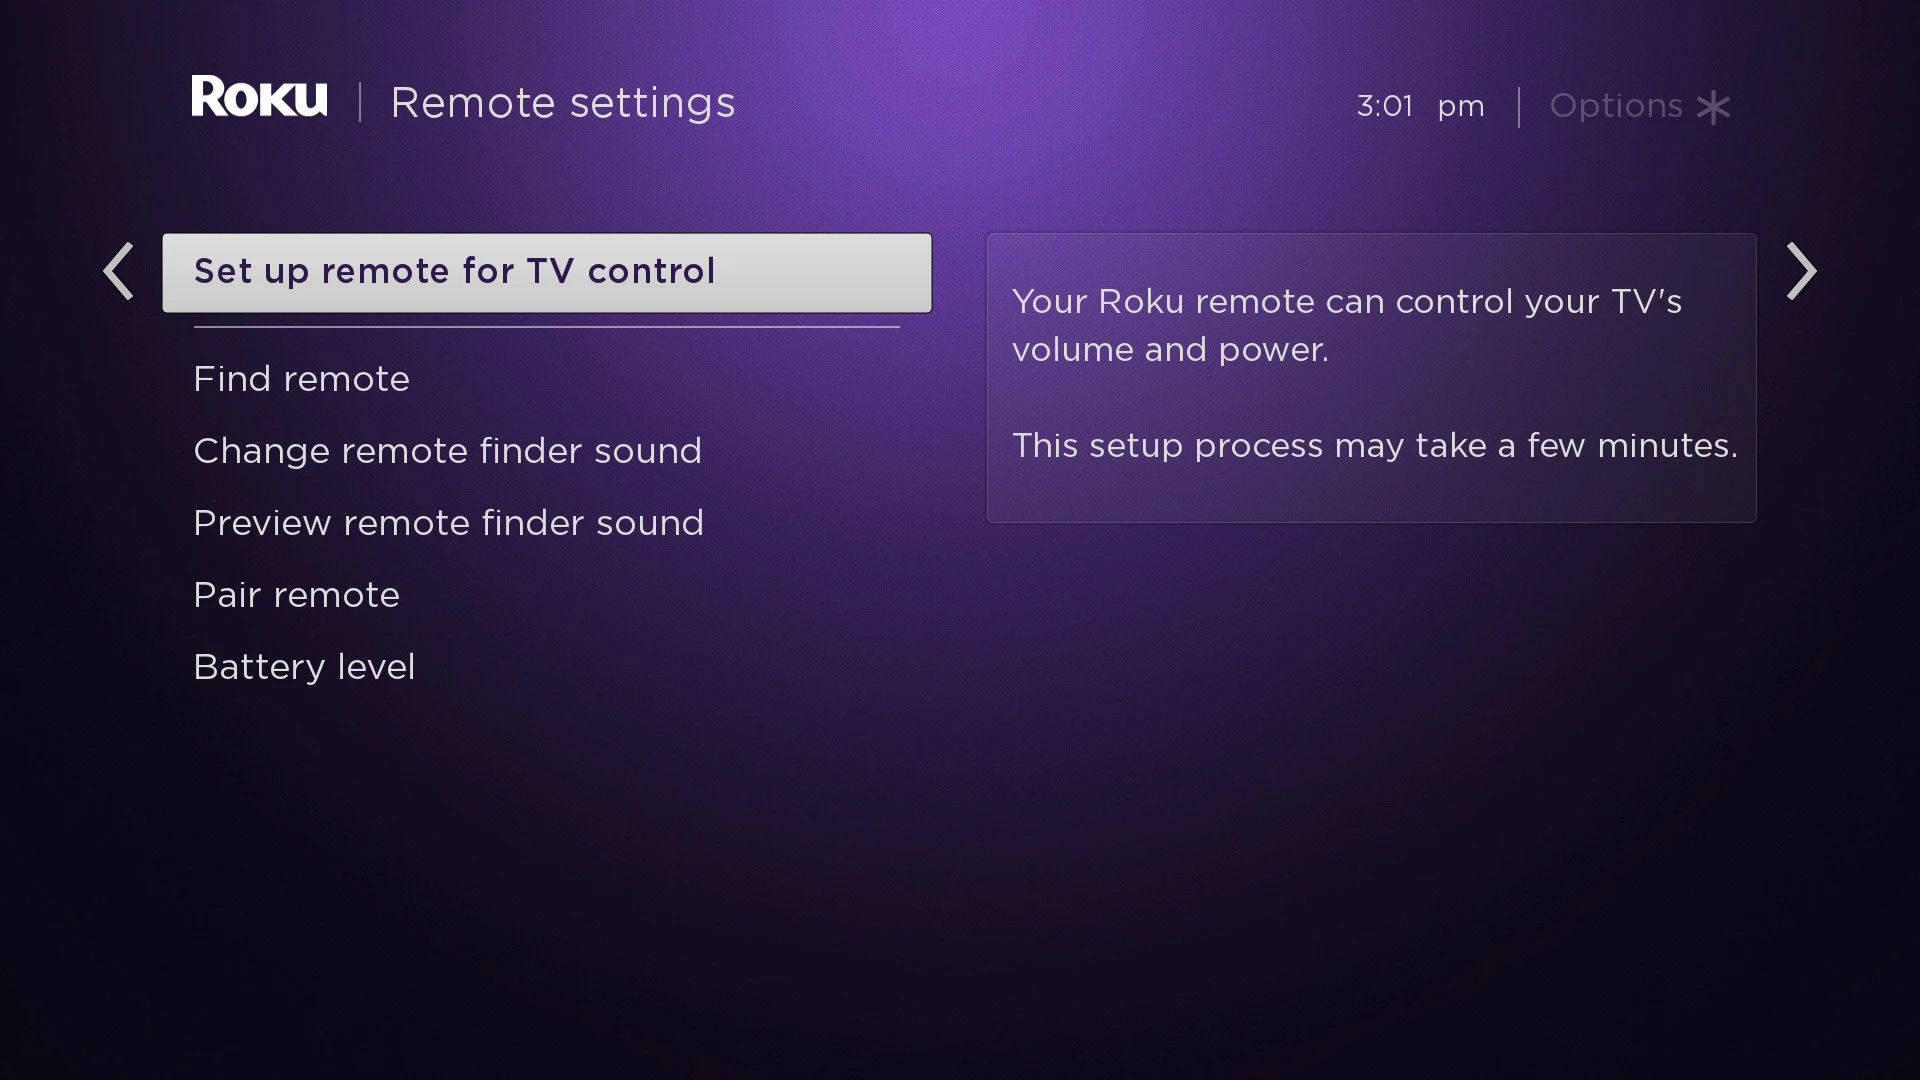
- Once the connection is established, you need to program the remote to control the volume and power of your TV. To do this, press the Home button on your Roku remote to navigate to the Roku home screen.
- Scroll up or down to select “Settings” and press the OK button to access the Roku settings menu.
- In the settings menu, select “Remote & devices” and then choose “Remote” to proceed.
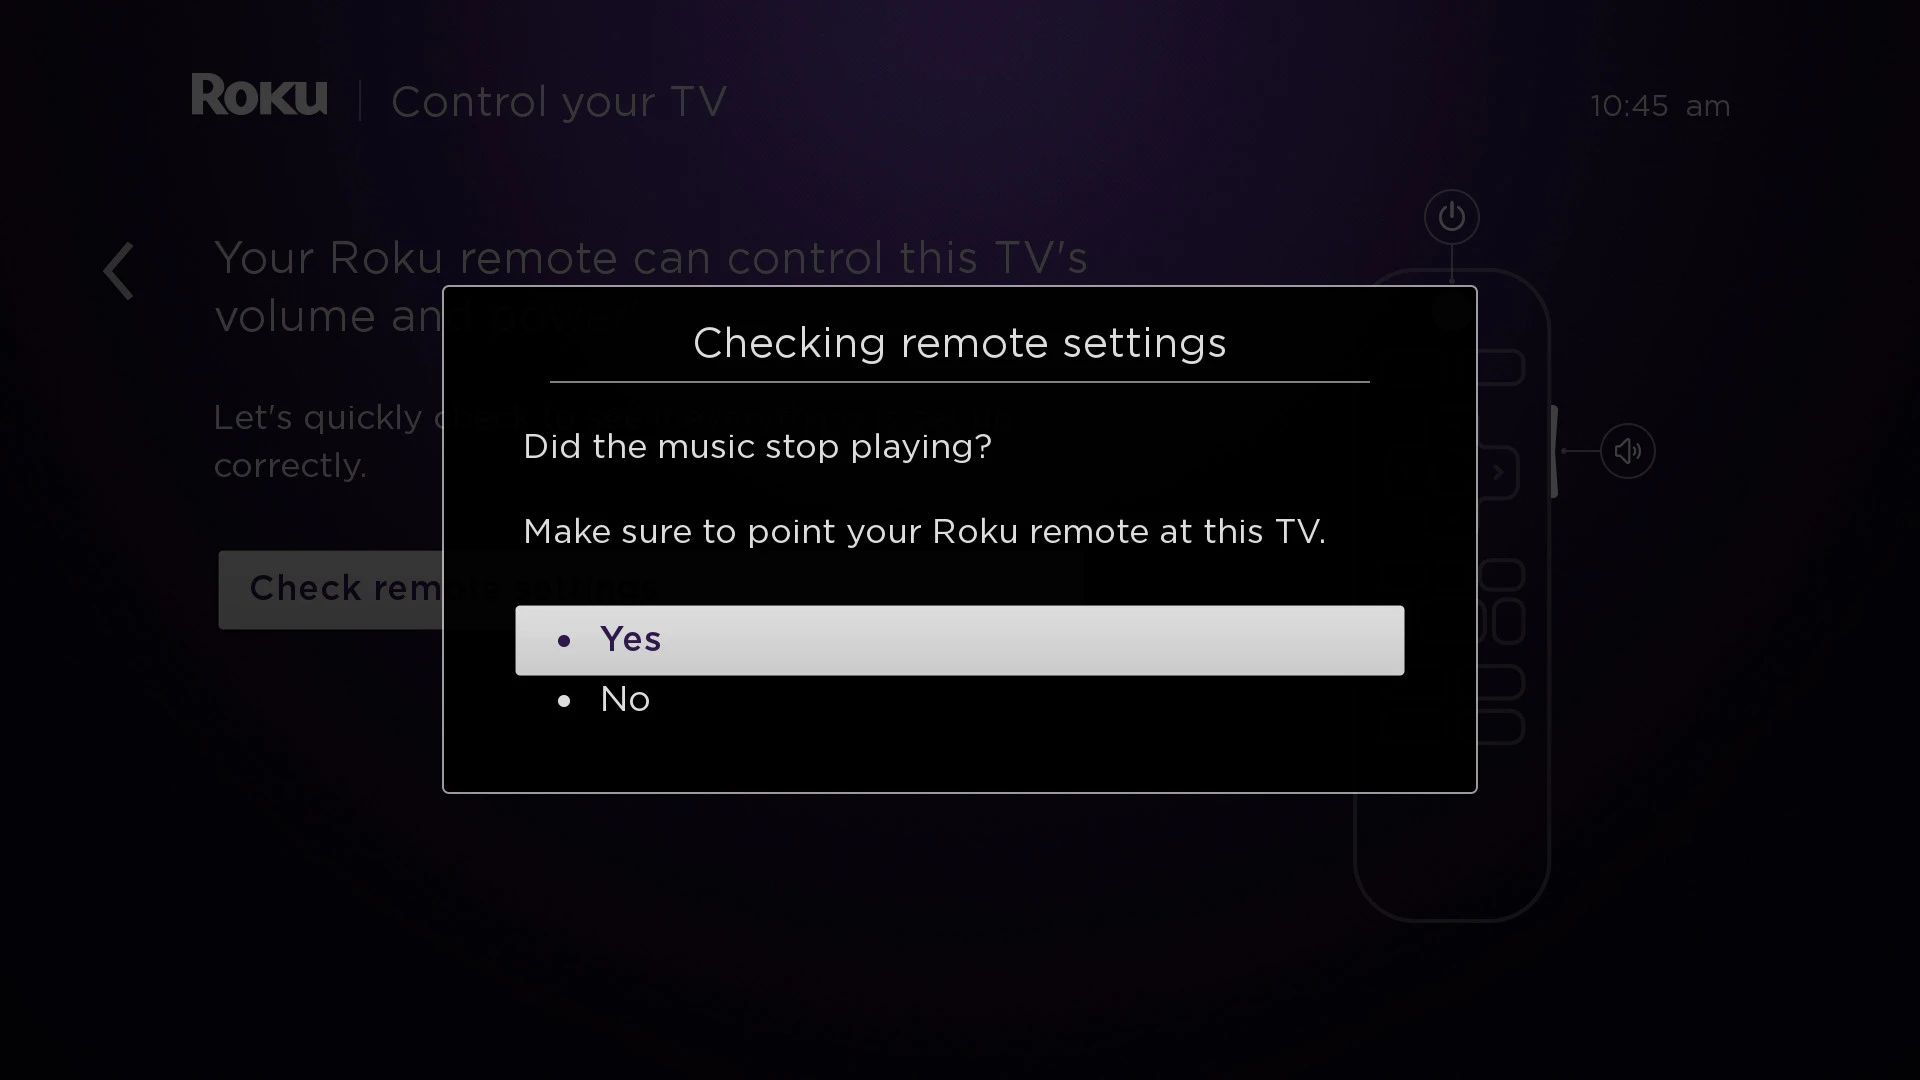
- Select “Set up remote for TV control” and follow the on-screen instructions to program your Roku remote to control the power and volume of your TV.
Once the programming process is complete, you can use the volume buttons on your Roku remote to adjust the volume of your TV, and the power button to turn your TV on or off.
Note that the programming options may vary depending on your Roku device model and the TV you own. If you encounter any difficulties during the programming process, refer to the Roku device’s user manual or visit the Roku support website for further assistance.
With your Roku remote successfully programmed to control your TV, you’re now ready to move on to the next step and program the remote for volume and mute control.
Step 4: Programming The Roku Remote for Volume and Mute Control
One of the convenient features of the Roku remote is its ability to control the volume and mute functions of your TV. By programming the remote for volume and mute control, you can easily adjust the audio without needing to grab another remote. Follow these steps to program your Roku remote for volume and mute control:
- Ensure that your Roku device and TV are both powered on.
- On your Roku remote, press the Home button to navigate to the Roku home screen.
- Scroll up or down to select “Settings” and press the OK button to access the Roku settings menu.
- In the settings menu, select “Remote & devices” and then choose “Remote” to proceed.
- Select “Volume control” and then follow the on-screen instructions to program your Roku remote for volume control.
- During the programming process, you will be prompted to test the volume control. Follow the instructions on the screen to ensure that the volume buttons on your Roku remote are working correctly.
- Once the volume control is successfully programmed, you can use the volume up and down buttons on your Roku remote to adjust the volume of your TV.
- To program the remote for mute control, return to the “Volume control” menu in the Roku settings.
- Select “Mute mode” and follow the on-screen instructions to program the remote for mute control.
After the programming process is complete, you can use the volume buttons on your Roku remote to adjust the volume of your TV, and the mute button to temporarily silence the audio. This eliminates the need for an additional remote or manually adjusting the TV’s volume.
Keep in mind that the programming options may vary depending on your Roku device model and the TV you own. If you encounter any difficulties during the programming process, refer to the Roku device’s user manual or visit the Roku support website for further assistance.
With your Roku remote successfully programmed for volume and mute control, you’re all set to enjoy a seamless and convenient streaming experience!
Troubleshooting Tips
While programming your Roku remote can usually be a smooth process, you may encounter some issues or difficulties along the way. Here are some troubleshooting tips to help you resolve common problems:
- No response from the remote: If your Roku remote is unresponsive, try removing the batteries and reinserting them. Ensure that the batteries are properly aligned and have enough power. You can also try performing a factory reset on the remote by pressing and holding the pairing button for 10 seconds, then releasing it. This will reset the remote and clear any conflicting settings.
- Remote not pairing with Roku device: If your remote is not pairing with your Roku device, make sure that both the remote and device are within close proximity of each other. Double-check that the batteries in the remote are fresh and correctly inserted. Restart both the Roku device and remote, then try the pairing process again.
- Volume control not working: If the volume control on your Roku remote is not functioning as expected, ensure that you have completed the programming process correctly. Double-check that your TV is compatible with Roku’s volume control feature. Try reprogramming the remote following the instructions provided in the “Step 4: Programming The Roku Remote for Volume and Mute Control” section. If the issue persists, consult your Roku device’s user manual or contact Roku support for further assistance.
- Interference with other devices: If you experience interference or conflicts with other devices (such as other remotes or wireless routers), try moving your Roku device and remote away from those sources. In some cases, changing the wireless channel or frequency of your router might help resolve the interference issue.
- Remote not controlling TV: If your Roku remote is successfully paired with your Roku device but is not able to control your TV, double-check that the TV input or source is correctly set to the input source connected to your Roku device. Make sure your TV is compatible with Roku’s TV control feature, and try reprogramming the remote for TV control. If the problem continues, consult your Roku device’s user manual or contact Roku support.
If none of the troubleshooting tips above solve the issue you’re facing with your Roku remote, it’s recommended to consult the Roku support website or contact their customer support for further assistance. They have a dedicated team that can provide additional guidance and help resolve any technical issues you may encounter.
By following these troubleshooting tips, you’ll be able to overcome common obstacles and ensure that your Roku remote is functioning optimally, allowing you to enjoy a seamless streaming experience.
Conclusion
Congratulations! You have successfully learned how to program your Roku remote to control your TV and enjoy a seamless streaming experience. By following the steps outlined in this guide, you can navigate through the Roku interface, power on your remote, pair it with your Roku device, and program it to control your TV’s volume and power.
Remember, the Roku remote is designed to simplify your streaming experience by providing easy navigation and control over your Roku device and TV. Understanding the different buttons and functions of the remote will enable you to fully enjoy the wide range of entertainment options available through Roku.
If you encounter any difficulties during the programming process or face issues with your remote, refer back to the troubleshooting tips provided in this guide. They will help you identify and resolve common problems.
Overall, the Roku remote is an essential tool that enhances your streaming experience, allowing you to effortlessly browse through your favorite movies, TV shows, music, and more. Take advantage of the convenient features and functionalities of your Roku remote to create a personalized and enjoyable entertainment experience.
Now that you are equipped with the knowledge to program your Roku remote, it’s time to sit back, relax, and indulge in endless entertainment possibilities.