Introduction
Welcome to this step-by-step guide on how to program a Roku remote to your TV. Roku remotes are designed to make your streaming experience more convenient by providing a dedicated controller for your Roku device. However, did you know that you can also program your Roku remote to control your TV? By doing so, you can eliminate the need for multiple remotes and simplify your TV watching experience.
Programming a Roku remote to your TV allows you to control essential functions such as power, volume, and input selection with a single remote. This means no more searching for the right remote or struggling to find the right buttons to adjust the volume. Whether you have a Roku Streaming Stick, Roku Ultra, or any other Roku device, the process of programming the remote to your TV remains the same.
In this guide, we will walk you through the step-by-step process of programming your Roku remote to your TV. Whether you have a Roku enhanced remote with voice control or a standard IR remote, this guide will help you easily set up the remote to work with your TV. So, let’s get started!
Step 1: Check Compatibility
Before proceeding with programming your Roku remote to your TV, it is important to ensure compatibility between the two devices. Not all TVs are supported by Roku remotes, so it is crucial to check if your TV is compatible.
The first thing you need to do is check if your TV has an HDMI input. The Roku remote uses HDMI-CEC technology to control the TV, which requires an HDMI connection. If your TV does not have an HDMI input, unfortunately, it may not be compatible with a Roku remote.
Next, determine if your TV supports HDMI-CEC. HDMI-CEC, also known as HDMI control or HDMI command, enables control of multiple devices through a single remote. It allows the Roku remote to control your TV’s power and volume functions. To check if your TV supports HDMI-CEC, consult your TV’s user manual or go to the manufacturer’s website.
If your TV has HDMI inputs and supports HDMI-CEC, you are ready to proceed with programming your Roku remote. However, if your TV does not meet these requirements, you may need to consider alternative options such as using a universal remote to control both your Roku and TV.
Now that you have confirmed compatibility between your TV and Roku remote, you can move on to the next step: preparing the Roku remote for programming.
Step 2: Prepare the Roku Remote
Before diving into programming your Roku remote, it is essential to prepare the remote for the setup process. Follow these simple steps to get your Roku remote ready:
- Remove any obstacles: Ensure that there are no objects blocking the path between the Roku remote and the TV. This will ensure a clear line of sight and improve the remote’s functionality.
- Insert batteries: Open the battery compartment on the back of the Roku remote and insert the required batteries. Make sure to follow the correct polarity (+/-) when inserting the batteries. Once inserted, close the battery compartment.
- Turn on your TV: Use your TV’s power button or remote to turn on your TV. This will allow the Roku remote to detect and pair with your TV.
- Pairing process: If your Roku remote is not already paired with your Roku device, you will need to follow the on-screen instructions to pair the remote. This may involve pressing and holding certain buttons on the remote or entering a pairing code provided by your Roku device.
- Test the basic functionality: Once the Roku remote is paired, test its basic functionality. Press the power button on the Roku remote to turn on and off your TV. Use the volume buttons to adjust the volume. If these basic functions work correctly, your Roku remote is ready for programming to your TV.
By preparing your Roku remote with fresh batteries and ensuring there are no obstacles obstructing its signal, you set the stage for a smooth and successful programming process. With your remote ready, it’s time to move on to the next step: finding the TV code.
Step 3: Find the TV Code
Now that your Roku remote is prepared, it’s time to find the TV code that will allow the remote to communicate with your specific TV model. The TV code is a unique numerical value assigned to each TV brand and model. Finding the correct TV code is crucial for programming the remote successfully.
Follow these steps to find the TV code:
- Check the Roku support website: Visit the official Roku support website and navigate to the “Remote Control Codes” section. Here, you can search for your TV brand and model to find the corresponding TV code. Note down the code for future reference.
- Use the Roku remote code search: If you couldn’t find the TV code on the Roku support website, don’t worry. Your Roku remote has a built-in code search feature that can help you discover the correct TV code. To initiate the code search, follow the instructions provided in your Roku remote’s user manual.
- Try common TV codes: If neither of the above methods yields the desired TV code, you can try using common TV codes that are known to work with many TV models. These codes are often pre-programmed in the Roku remote. Again, consult your Roku remote’s user manual for the list of common TV codes.
- Alternative methods: If you still cannot find the TV code using the above methods, you can try alternative methods such as searching online forums, reaching out to Roku support, or contacting the TV manufacturer’s support. These sources may provide additional TV codes or troubleshooting assistance.
Remember to be patient during the TV code search process, as finding the correct code may take some time and experimentation. Once you have obtained the TV code, you are ready to proceed to the next step: programming the Roku remote using the code.
Step 4: Program the Roku Remote using Code
With the TV code in hand, you are now ready to program your Roku remote to control your TV. Follow these steps to program the remote using the TV code:
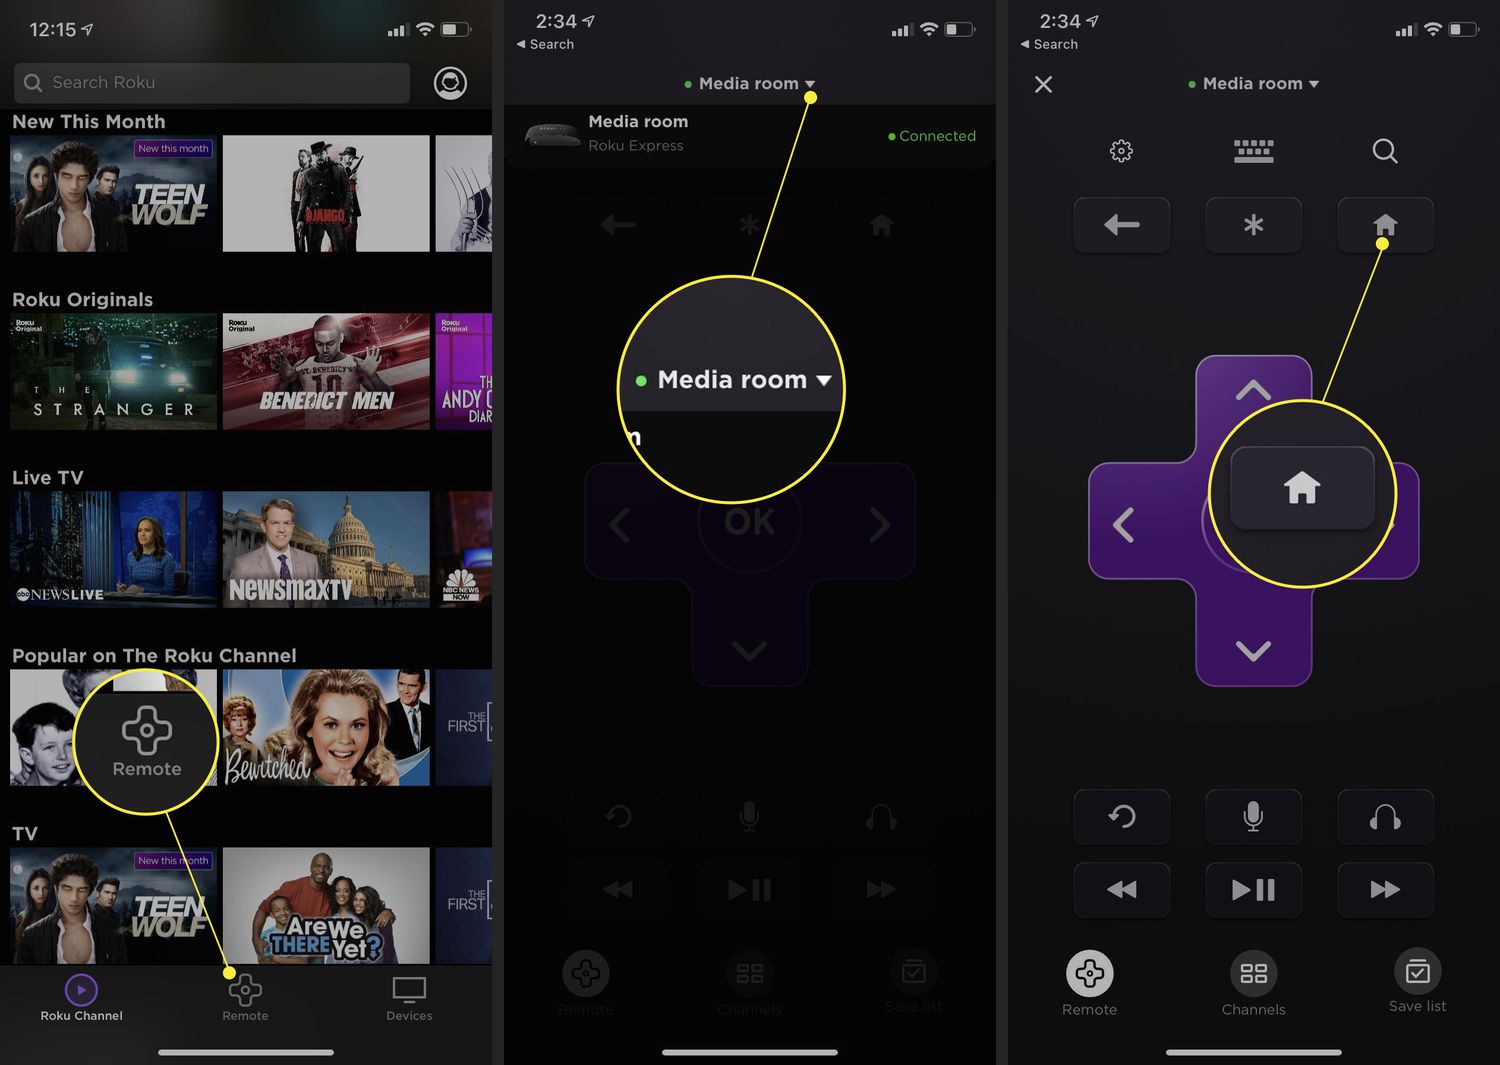
- Press the Home button: On your Roku remote, press the Home button to access the Roku home screen.
- Navigate to Settings: Using the arrow buttons on the remote, navigate to the Settings option on the home screen. Press the OK button to select it.
- Select Remote & Devices: In the Settings menu, select the Remote & Devices option.
- Select Remote: Within the Remote & Devices menu, choose the Remote option.
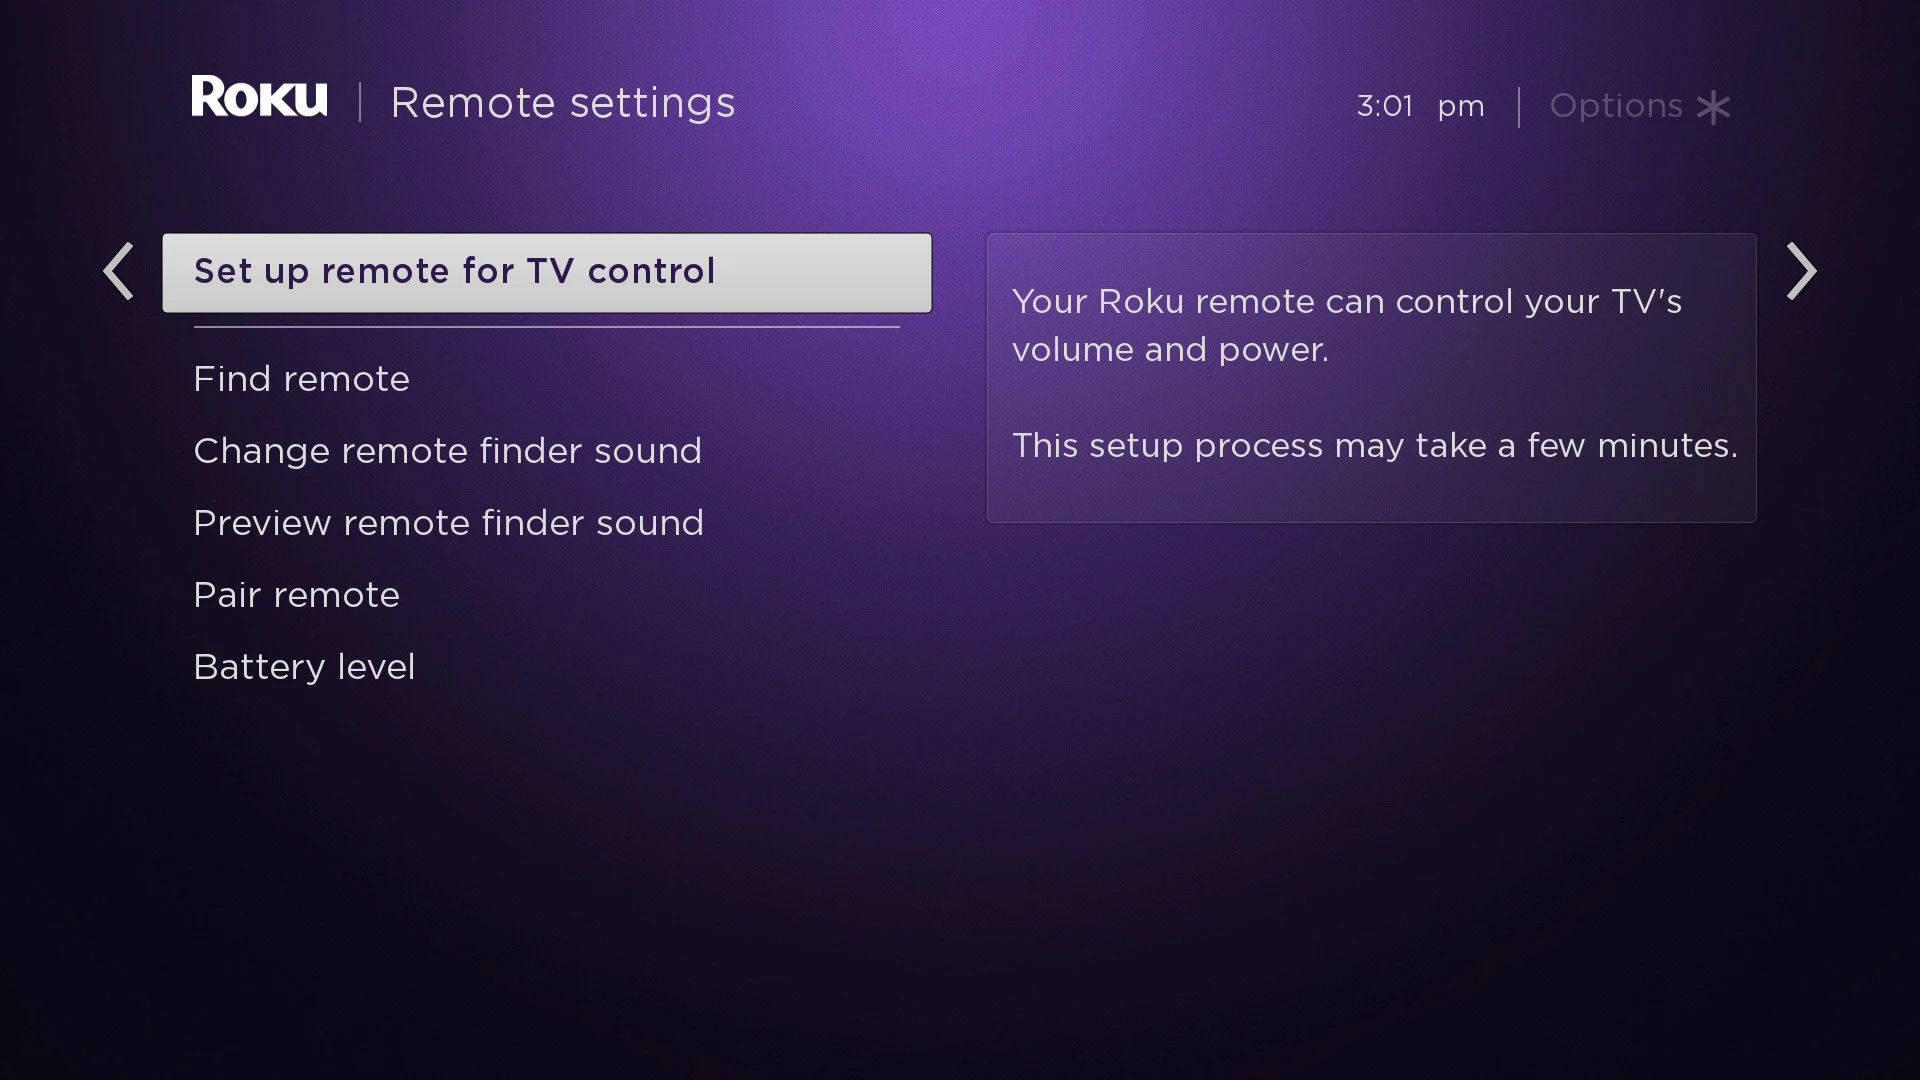
- Select Set up the remote for TV control: Look for the Set up the remote for TV control option and select it.
- Enter the TV code: On the TV Code screen, enter the TV code that you found earlier using the arrow buttons on the remote. As you enter the code, your TV may turn off and back on as the remote sends signals to find the correct code. Once entered, press the OK button to confirm.
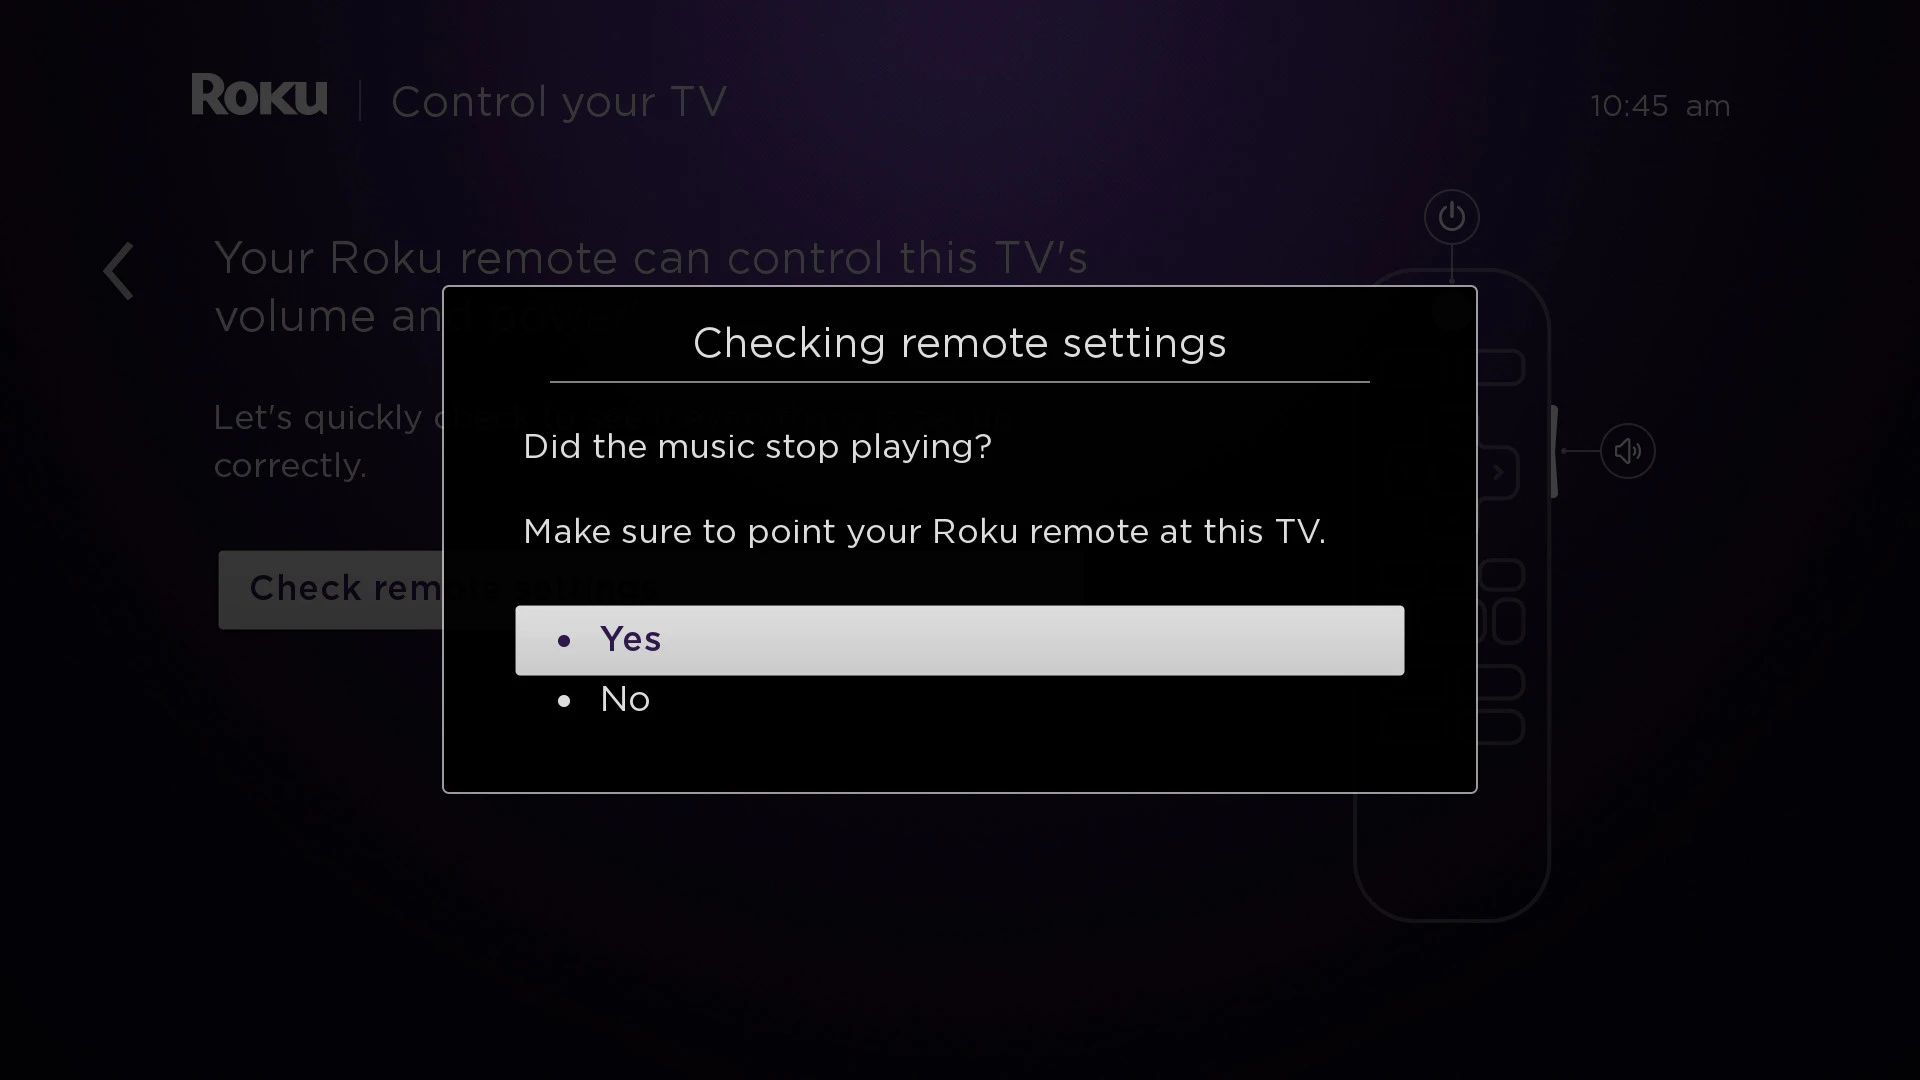
- Test the remote: After entering the TV code, the remote will attempt to pair with your TV. Test its functionality by using the power button to turn your TV on and off. Additionally, check if the volume buttons adjust the volume on your TV.
If the remote successfully controls your TV’s power and volume functions, congratulations! You have now programmed your Roku remote to your TV using the code. If the remote does not work as expected, try re-entering the TV code or repeat the process to ensure accuracy.
Please note that some Roku remotes also have additional features like voice control and shortcut buttons. These features may require separate setup procedures that are specific to your remote model. Consult your Roku remote’s user manual or the Roku support website for detailed instructions on utilizing these features.
Now that the remote is programmed and functional, it’s time to move on to the final step: testing the remote to ensure everything is working smoothly.
Step 5: Test the Remote
Once you have successfully programmed your Roku remote to your TV, it’s important to test its functionality to ensure that everything is working as intended. Follow these steps to test your remote:
- Power on your TV: Use the Roku remote to turn on your TV. If the TV turns on properly, this indicates that the power function of the remote is working correctly.
- Adjust the volume: Use the volume buttons on the Roku remote to adjust the volume on your TV. Make sure that the volume increases and decreases as expected. If there are any issues, double-check the TV code you entered during the programming process and repeat the steps if necessary.
- Change inputs: Test the input selection feature by using the Roku remote to change the input source on your TV. If your TV has multiple input options, navigate through them using the appropriate buttons on the remote. Confirm that your TV switches to the selected input.
- Additional features: If your Roku remote has additional features such as voice control or shortcut buttons, test them as well. Use the voice control feature to perform voice searches or execute specific commands. Explore the functionality of the shortcut buttons, if applicable.
- Repeat testing: It is advisable to repeat the testing process multiple times to ensure consistency and reliability. Be thorough and check all the key functions of the remote each time.
If the remote passes all the tests and functions correctly, congratulations! You have successfully programmed your Roku remote to your TV, and it is now ready for seamless operation. Enjoy the convenience of controlling your TV and streaming device with a single remote.
However, if you encounter any issues during the testing process, double-check the TV code, ensure proper battery installation, and make sure that there are no obstructions blocking the remote’s signal. If problems persist, consult the Roku support website or reach out to Roku customer support for further assistance.
With your Roku remote programmed and tested, you can now sit back, relax, and comfortably navigate through your favorite streaming content with ease.
Troubleshooting Tips
While programming your Roku remote to your TV is usually a smooth process, you may encounter some issues along the way. Here are some troubleshooting tips to help you overcome common challenges:
- Verify the TV code: If the remote is not functioning properly, double-check the TV code you entered during the programming process. Ensure that it matches the brand and model of your TV. Retrace your steps and re-enter the code if necessary.
- Check battery installation: Make sure the batteries in your Roku remote are inserted correctly. Check for any signs of corrosion or damage to the battery contacts. If needed, replace the batteries with fresh ones.
- Clear obstructions: Ensure that there are no physical obstructions blocking the signal between the Roku remote and your TV. Objects like furniture or other electronics can interfere with the remote’s functionality. Clear any obstacles and create a clear line of sight between the remote and the TV.
- Reset the remote: In some cases, resetting the Roku remote can resolve issues. To reset the remote, remove the batteries, wait for a few seconds, and then re-insert them. This may help restore the remote to its default settings and resolve any glitches.
- Restart your devices: If problems persist, try restarting both your Roku device and your TV. Unplug the power cables from both devices, wait for a few seconds, and then reconnect them. This simple reboot can often resolve connectivity issues.
- Perform a factory reset: As a last resort, you can perform a factory reset on your Roku device. However, keep in mind that this will remove all personalized settings and restore the device to its original state. Consult the Roku support website or user manual for instructions on how to perform a factory reset.
If the above troubleshooting tips do not resolve your issue, it is recommended to consult the Roku support website or contact their customer support for further assistance. They have dedicated professionals who can guide you through more advanced troubleshooting steps and provide personalized solutions based on your specific situation.
Remember, patience is key when troubleshooting, and don’t hesitate to reach out for help if needed. By following these tips, you can overcome common obstacles and ensure a smooth and successful programming process for your Roku remote.
Conclusion
Congratulations! You have successfully learned how to program your Roku remote to control your TV. By following the step-by-step guide outlined in this article, you can enjoy the convenience of a single remote for both your Roku device and your TV.
Throughout the process, you learned how to check compatibility between your Roku remote and your TV, prepare the remote for programming, find the TV code, program the remote using the code, and test its functionality. These steps ensure a seamless and efficient setup, eliminating the need for multiple remotes and enhancing your TV watching experience.
If you encounter any challenges during the programming process, remember to refer to the troubleshooting tips provided. They will help you overcome common issues and ensure that your Roku remote functions optimally.
Now that your Roku remote is programmed and working correctly with your TV, you can sit back, relax, and enjoy your favorite streaming content without the hassle of multiple remotes. Take advantage of the convenient features, such as controlling power, volume, and input selection, all from a single remote.
Should you encounter any further difficulties or have specific questions about your Roku remote or TV, do not hesitate to consult the Roku support website or contact their customer support. They are available to provide further assistance and troubleshooting guidance to ensure your satisfaction.
We hope this guide has been helpful in simplifying your TV viewing experience. Enjoy your Roku device and the enhanced convenience it brings to your entertainment setup!