Introduction
3D printing has revolutionized the world of manufacturing, allowing individuals to bring their ideas to life in a truly tangible way. Whether you’re a hobbyist or a professional, learning how to program a 3D printer opens up a world of possibilities. With the right guidance and knowledge, you can create intricate designs, prototypes, and functional objects using various materials.
However, for those new to the world of 3D printing, the process may seem daunting. Understanding the fundamentals and knowing how to navigate the intricacies of a 3D printer is crucial to achieving successful prints.
In this article, we will guide you through the essential steps of programming a 3D printer. We’ll provide you with detailed instructions on setting up your printer, preparing your 3D models, adjusting print settings, and troubleshooting common issues along the way.
By the end of this guide, you’ll have the knowledge and confidence to embark on your 3D printing journey and turn your ideas into reality.
So, let’s dive in and explore the world of programming a 3D printer!
Choosing the Right 3D Printer
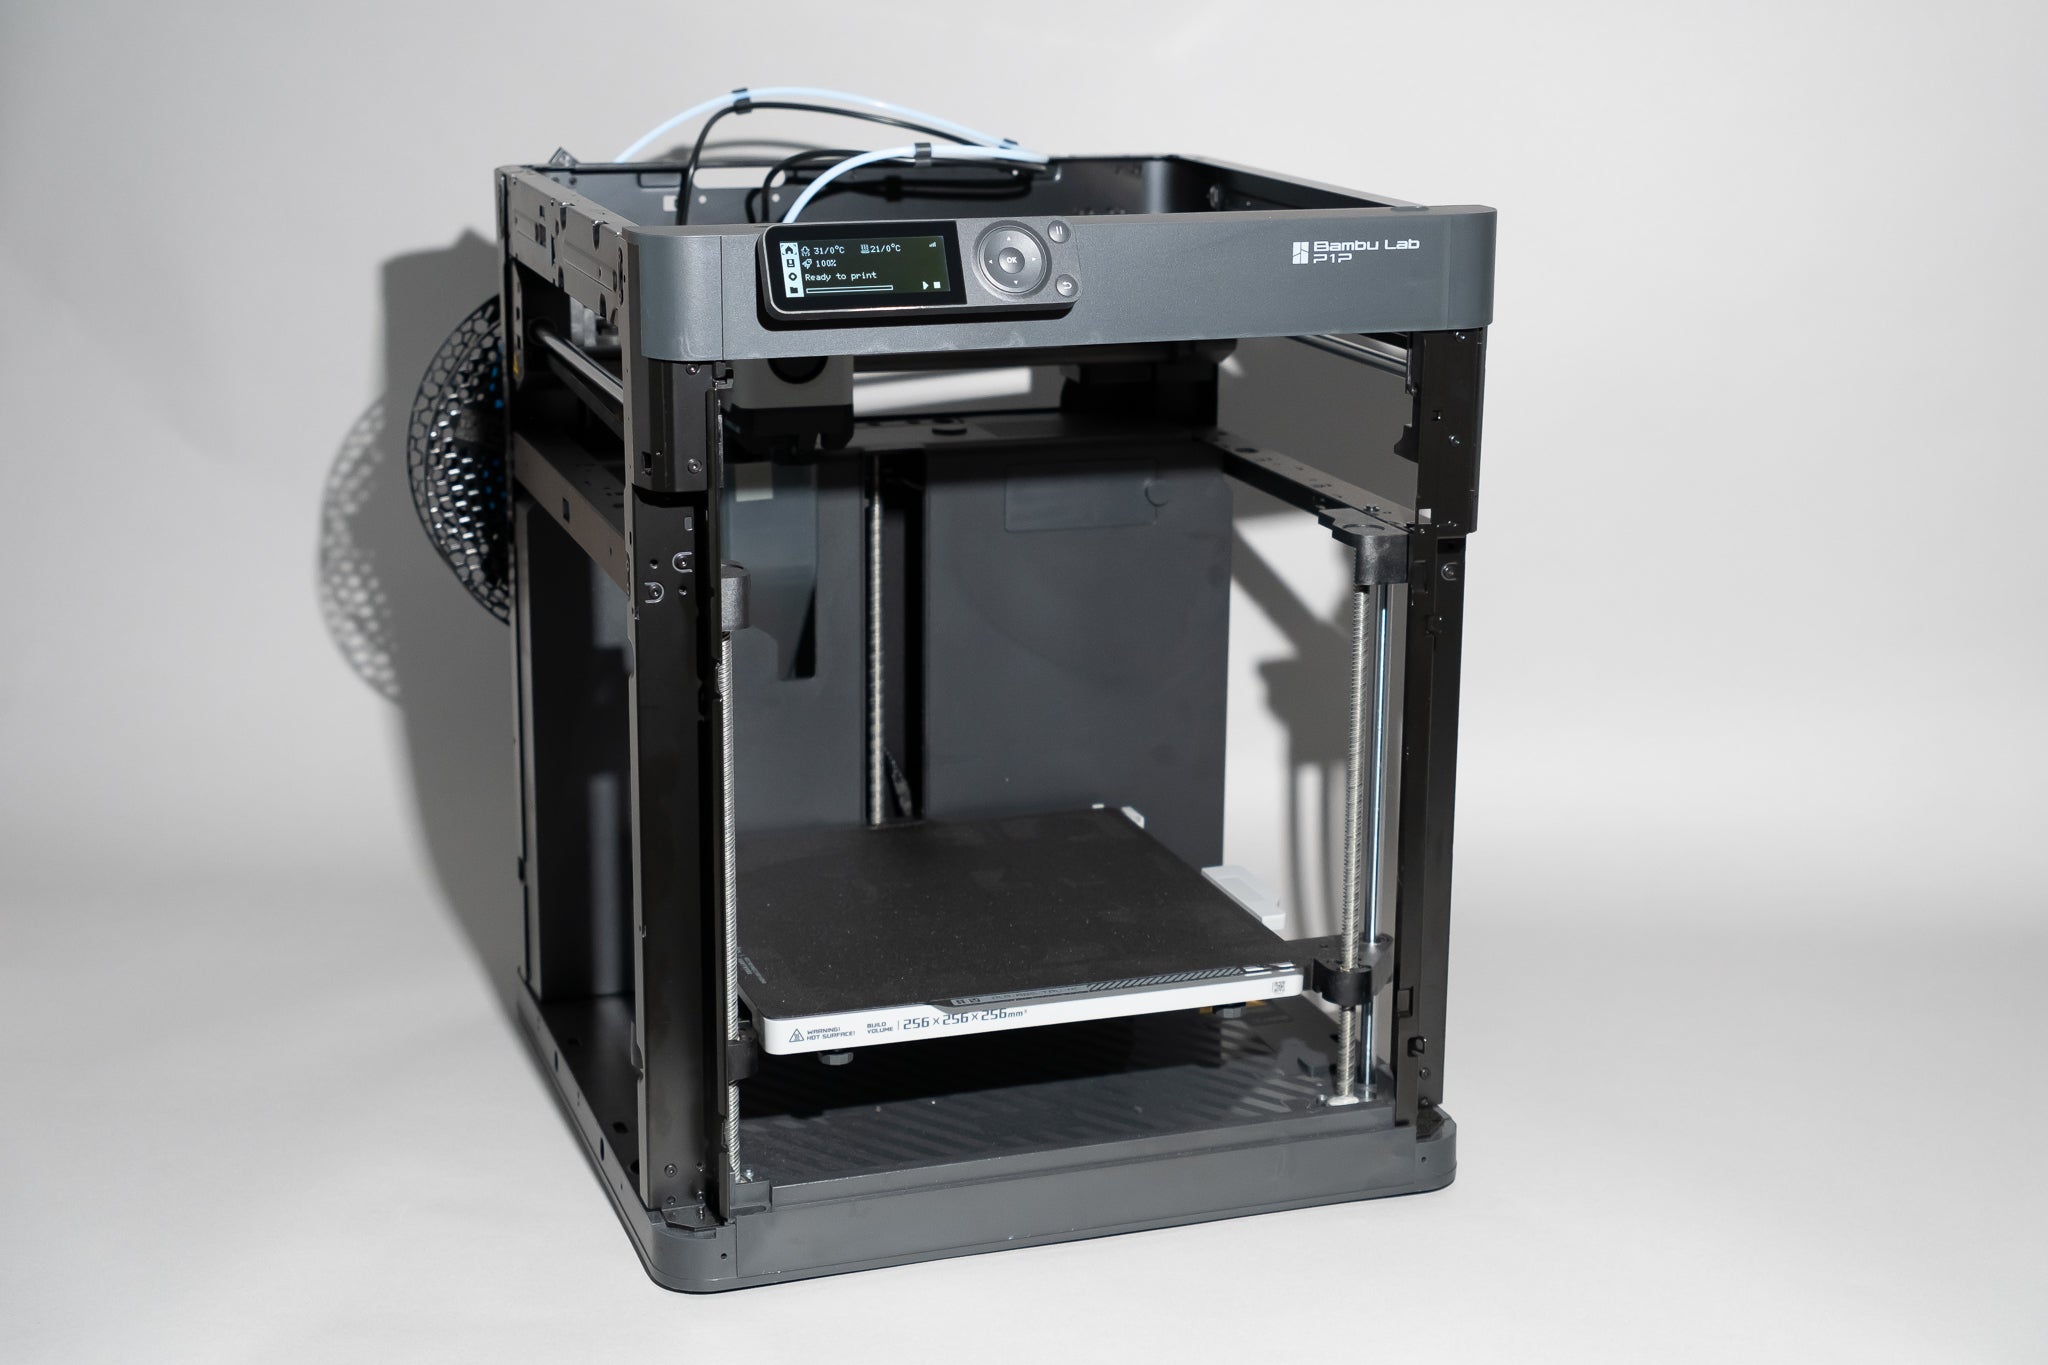
Before diving into the world of 3D printing, it’s important to choose the right 3D printer that suits your needs and budget. With an array of options available in the market, it can be overwhelming to make the right decision. Here are some factors to consider when selecting a 3D printer:
- Print Material: Different 3D printers support various types of materials, including PLA, ABS, resin, and more. Consider the type of projects you’ll be working on and choose a printer that can handle the materials you require.
- Print Size: The size of the objects you want to print is an essential factor to consider. Ensure that the printer’s build volume is large enough to accommodate your desired print size.
- Resolution: The resolution of a 3D printer determines the level of detail it can achieve. Higher resolution printers are ideal for intricate designs and small objects, while lower resolution may be suitable for larger prints.
- Ease of Use: Consider your level of experience with 3D printing. Some printers are more user-friendly and come with intuitive software, while others may require a steeper learning curve.
- Price: Set a budget for your 3D printer purchase. Prices vary significantly depending on the features, brand, and quality of the printer. It’s important to strike a balance between your budget and the printer’s capabilities.
Do thorough research, read reviews, and compare different models before making a decision. It’s also beneficial to join online forums and communities where you can seek advice and recommendations from experienced 3D printing enthusiasts.
Remember that choosing the right 3D printer is the foundation of a successful printing journey. Consider your specific needs, budget constraints, and long-term goals to make an informed decision.
Understanding the Basics of 3D Printing
Before you start programming your 3D printer, it’s crucial to have a solid understanding of the basic principles behind 3D printing. This knowledge will help you make informed decisions throughout the printing process. Here are the key components and concepts to grasp:
- Computer-Aided Design (CAD): CAD software is used to create three-dimensional models that serve as the blueprint for your 3D prints. Learning the basics of CAD is essential for designing and customizing your objects.
- Slicer Software: Slicer software converts your 3D models into a series of instructions that the printer can understand. It slices the model into thin layers and calculates the toolpaths for the printer to follow during the printing process.
- Printing Materials: 3D printers utilize a variety of materials, such as PLA, ABS, PETG, and more. Each material has its own unique properties, including strength, flexibility, and temperature resistance. Understanding the characteristics of different materials will help you choose the appropriate one for your project.
- Layer Height: The layer height refers to the thickness of each layer of the printed object. Smaller layer heights result in higher detail but longer print times, while larger layer heights are faster but may sacrifice some detail.
- Print Speed: The print speed determines how quickly the printer’s extruder moves during the printing process. Adjusting the print speed can impact the overall print quality and time required.
- Support Structures: For complex designs, support structures may be necessary to provide stability during printing. These structures are printed alongside the object and can be removed once the print is complete.
- Heated Bed: Some printers come with a heated bed that helps prevent warping of the print. The heated bed provides a stable and warm surface for the first layer to adhere to, ensuring a successful print.
By familiarizing yourself with these basic concepts, you’ll have a better understanding of the 3D printing process and be able to optimize your prints for the best results. Next, we’ll guide you through the setup process to get your 3D printer ready for printing.
Setting Up Your 3D Printer
Setting up your 3D printer correctly is essential for smooth and successful printing. While each printer model may have specific setup instructions, here are some general steps to follow:
- Unboxing and Assembly: Carefully unbox your printer and check that all the components are included. Follow the manufacturer’s instructions to assemble the printer, ensuring that all parts are securely connected.
- Leveling the Bed: A level bed is crucial for proper adhesion and layer accuracy during printing. Most printers come with an automatic leveling feature or a manual adjustment process. Consult your printer’s manual or follow the manufacturer’s instructions to level the bed properly.
- Updating Firmware: It’s important to ensure that your printer’s firmware is up to date to take advantage of any bug fixes or added features. Check the manufacturer’s website or user manual for instructions on how to update the firmware.
- Calibrating the Extruder: Proper extruder calibration ensures that the correct amount of filament is being extruded during printing. Follow the manufacturer’s guidelines to calibrate the extruder, taking into account factors such as filament diameter and temperature.
- Software Installation: Install the necessary software, such as the printer’s drivers and slicing software, on your computer. The manufacturer’s website or documentation will provide instructions on how to download and install the required software.
- Connecting to Your Computer: Connect your printer to your computer using the provided USB cable or through a wireless connection if available. This connection will allow you to send print files from your computer to the printer.
- Testing the Printer: Before diving into complex prints, it’s a good idea to run a test print to ensure that all components are functioning correctly. A simple calibration cube or benchy model can be used for initial testing.
Following these setup steps will help you start your 3D printing journey on the right note. Remember to consult your printer’s manual for specific setup instructions unique to your printer model. Once your printer is ready, we can move on to the next steps of preparing 3D models for printing.
Preparing 3D Models for Printing
Before you can start printing, you need to prepare your 3D models for the printing process. This involves several crucial steps:
- Obtaining or Creating 3D Models: You can either download pre-made 3D models from online repositories or create your own using computer-aided design (CAD) software. Consider the purpose of your print and choose a model that suits your needs.
- Inspecting and Repairing the Model: Use a 3D modeling software or an online file repair service to inspect and fix any issues with the model. This may include closing holes, removing overlapping geometry, or correcting non-manifold edges.
- Slicing the Model: Import the 3D model into the slicing software that corresponds to your 3D printer. Configure the slicing settings, such as layer height, print speed, and support structures, according to the requirements of your print.
- Orienting and Scaling the Model: Position the model in the slicing software to optimize printing. Consider factors like support structure placement, overhangs, and the orientation that will provide the best strength and visual appeal for your print. Adjust the scale of the model if necessary.
- Generating G-Code: Once you’re satisfied with the model’s orientation and scaling, generate the G-Code file. This file contains the instructions for the printer, including the toolpaths and parameters for the print.
- Transferring G-Code to the Printer: Transfer the generated G-Code file to your 3D printer. You can typically do this by saving the file to an SD card or transferring it directly through a USB connection.
Preparing 3D models for printing requires attention to detail and an understanding of the slicing software. Experiment with different settings to find the optimal configuration for your prints. Remember that each model may have unique requirements, so it’s important to tailor the settings accordingly.
By following these steps, you’ll be able to convert your 3D models into printable files and ensure a smooth and successful printing experience. Next, we’ll explore how to adjust print settings to achieve the desired results.
Adjusting Print Settings
Adjusting the print settings is a crucial step in achieving the desired results from your 3D printer. Fine-tuning these settings can significantly impact the print quality and overall success of your project. Here are some key factors to consider when adjusting the print settings:
- Layer Height: The layer height determines the thickness of each layer of the print. Smaller layer heights result in greater detail but longer print times, while larger layer heights are faster but may sacrifice precision. Select a layer height that balances these factors based on your project requirements.
- Print Speed: Print speed influences how quickly the printer moves during the printing process. Higher speeds may result in decreased print quality, especially for intricate designs. Experiment with different speeds to find the optimal balance between speed and quality.
- Temperature Settings: Adjusting the temperature of the extruder and the heated bed is essential for successful prints. Different materials have specific temperature requirements, so consult the filament guidelines and make adjustments accordingly.
- Infill Density: Infill refers to the internal structure of the print. Adjusting the infill density determines the amount of material used in the internal structure. Higher densities result in stronger prints but increase print time and material usage.
- Support Structures: For designs with overhangs or complex geometries, support structures may be necessary. Adjust the support settings in the slicing software to ensure proper support placement and ease of removal after printing.
- Brim or Raft: Brims or rafts provide additional adhesion between the print and the build plate, helping to prevent warping and improve stability. Adjust the brim or raft settings based on your print’s requirements.
- Retraction Settings: Retraction helps prevent stringing and oozing of filament during travel moves. Adjusting the retraction settings in the slicing software can minimize these issues and improve the overall print quality.
It’s important to note that the optimal settings can vary depending on the printer, filament, and the specific requirements of your print. Therefore, it’s recommended to experiment, make small adjustments, and run test prints to find the ideal configuration for each project.
By adjusting these print settings, you can maximize the print quality, minimize print time, and overcome any specific challenges associated with the design or material being used. In the next section, we’ll discuss the process of loading filament into your 3D printer.
Loading Filament
Before you can start printing, you need to load filament into your 3D printer. Loading filament ensures that there is a steady and consistent flow of material that the printer can use to create your desired objects. Here is a step-by-step guide on how to load filament:
- Preheat the Printer: Begin by preheating your 3D printer to the recommended temperature for the filament you are using. This can typically be found on the packaging or in the filament’s specifications.
- Trim the Filament End: Trim the end of the filament at a slight angle using a sharp pair of scissors or a filament cutter. This will help guide the filament into the printer’s extruder.
- Locate the Extruder: Locate the extruder assembly or filament entry point on your 3D printer. This is where you will insert the filament.
- Release the Tension: If your printer has a filament tensioner or release lever, gently release it to relieve the tension on the filament path. This will make it easier to insert the filament.
- Insert the Filament: Slowly and firmly insert the trimmed end of the filament into the filament entry point. Push it in until you feel some resistance, indicating that the filament has reached the extruder’s gears or feed mechanism.
- Feed the Filament: Use the printer’s controls or software to initiate the filament feed function. This will engage the gears or feed mechanism to pull the filament into the printer’s hot end.
- Monitor the Extrusion: Keep a close eye on the extrusion process as the filament begins to melt and flow. Ensure that it is extruding smoothly and consistently without any blockages or clogs.
- Purge the Nozzle: Once the filament is flowing smoothly, it’s a good practice to purge the nozzle by extruding a small amount of filament to remove any residual or old filament that may be present.
- Confirm Successful Loading: Verify that the filament is fully loaded and properly engaged with the extruder. Check that it is ready for printing by observing the printer’s display or software.
It’s important to note that different printers may have slight variations in the filament loading process. Always refer to your printer’s manual or manufacturer’s instructions for specific guidance.
By properly loading filament into your 3D printer, you ensure a consistent flow of material and set the stage for successful prints. Now that the filament is loaded, you’re ready to calibrate your 3D printer for optimal performance.
Calibrating Your 3D Printer
Calibrating your 3D printer is a crucial step to ensure accurate and reliable prints. By fine-tuning various settings and parameters, you can optimize the performance of your printer. Here are some key calibration steps to consider:
- Bed Leveling: Proper bed leveling is essential to achieving good adhesion and consistent layer height across the print bed. Follow your printer’s instructions to calibrate and level the bed accurately.
- Extruder Calibration: Ensure that the extruder is properly calibrated to extrude the right amount of filament. This calibration helps prevent under or over-extrusion, resulting in accurate prints. Refer to your printer’s documentation for specific instructions on extruder calibration.
- Z-Axis Offset: Adjusting the Z-axis offset helps to achieve the correct first layer height. The proper adhesion and print quality are impacted by this adjustment. Experiment with small adjustments until you achieve the desired results.
- Flow Rate Calibration: Flow rate calibration involves adjusting the extrusion multiplier to ensure that the printer is extruding the correct amount of filament. This adjustment accounts for variations in filament diameter and other factors that affect extrusion accuracy.
- Print Temperature Calibration: Fine-tune the print temperature of your 3D printer to achieve optimal results with different filaments. Refer to the manufacturer’s recommendations and run temperature calibration tests to find the suitable temperature range for each filament type.
- Print Speed Calibration: Adjusting the print speed can impact the print quality, especially in intricate designs. Experiment with different print speeds to find the optimal balance between speed and quality.
- Retract and Unretract Settings: Fine-tune the retract and unretract settings to minimize stringing and oozing during travel moves. This calibration helps improve the overall cleanliness of prints, especially when dealing with complex geometries.
- First Layer Calibration: Pay specific attention to calibrating your printer’s first layer. Achieving the right adhesion and level of squishiness is essential for successful prints. Make sure the first layer adheres well to the build plate without being too squished or too loose.
Calibrating your 3D printer may require some trial and error. Keep notes of the adjustments you make and the results you observe. This way, you can track your progress and have reference points for future prints.
A properly calibrated 3D printer will yield consistent and high-quality prints. With calibration complete, you’re now ready to initiate the printing process and bring your ideas to life. However, it’s important to familiarize yourself with common troubleshooting techniques to overcome any issues that may arise during printing.
Initiating the Printing Process
After preparing your 3D printer and calibrating the necessary settings, you’re ready to initiate the printing process. Follow these steps to start printing your 3D models:
- Prepare the Print Bed: Ensure that the print bed is clean and free from any dust or particles that could affect adhesion. If necessary, apply an appropriate adhesive, such as painter’s tape or a specialized 3D printing bed adhesive, to ensure proper adherence of the print.
- Import the G-Code File: Using the printer’s software or controls, import the G-Code file that you generated during the slicing process. Make sure the correct file is selected for the print you want to initiate.
- Configure Printing Settings: Before starting the print, review the printing settings on your printer’s display or software. Double-check parameters such as print speed, layer height, and temperature to ensure they match your desired specifications.
- Position and Anchor the Print: If necessary, use the controls or software options to adjust the position of the print on the print bed. Make sure it fits within the designated print area and is properly anchored to the bed to prevent shifting during the print.
- Start the Print: Once you’ve confirmed all settings and verified the print position, initiate the printing process. Depending on your printer, this can be done by pressing a “Start” button, selecting a print option, or sending the print command through the connected computer.
- Monitor the Print: Keep a watchful eye on the initial layers of the print to ensure proper bed adhesion and filament flow. It’s also essential to periodically check on the progress of the print to catch any potential issues or errors.
- Addressing Issues: If any issues arise during the print, such as improper adhesion, stringing, or shifting, refer to the printer’s manual or troubleshooting resources to identify and address the problem. Make any necessary adjustments or corrections to improve the print quality.
- Allow the Print to Complete: Once the print has progressed smoothly without any significant issues, allow it to run its course until completion. Avoid interrupting the print process unless absolutely necessary.
- Remove the Print: Once the print is finished, carefully remove it from the print bed. Take caution not to damage the print or the printer during the removal process. Use appropriate tools, such as a spatula or scraper, if needed.
Initiating the printing process requires patience and vigilance. Regular monitoring and addressing issues promptly will help you achieve successful prints. Remember to refer to your printer’s manual or online resources for specific instructions related to your model.
With the printing process complete, you’re now ready to move on to the next steps of post-processing and adding finishing touches to your 3D prints.
Troubleshooting Common Issues
While 3D printing can be a rewarding process, it’s not uncommon to encounter some common issues during your printing journey. Here are some troubleshooting tips for addressing common problems:
- Poor Bed Adhesion: If your print is not sticking properly to the print bed, ensure that the bed is clean and level. Consider using adhesive aids like painter’s tape or a specialized 3D printing bed adhesive. Adjusting the initial layer height or increasing the bed temperature can also help improve bed adhesion.
- Stringing and Oozing: Excessive stringing between printed parts or layers can be minimized by adjusting retraction settings. Increasing the retraction distance and speed can help reduce these issues. Ensuring the print temperature is appropriate for the filament can also help control stringing and oozing.
- Warping and Cracking: Warping and cracking often occur when there is uneven cooling or insufficient bed temperature. Ensure that the print bed is properly heated and consider using an enclosure to maintain consistent temperature throughout the print. Applying a brim or raft can also help minimize warping.
- Layer Shifting: Layer shifting can happen if the print head collides with an object, if the belts are loose, or if the stepper motor drivers are not properly calibrated. Check for any obstructions and make sure all belts are tight and motors are calibrated correctly.
- Print Inconsistencies: If you notice inconsistent extrusion, uneven layers, or gaps in your print, it could indicate a partial clog. Check the extruder for any debris or filament blockage. Clear any obstructions and ensure the filament is feeding smoothly into the extruder.
- Overheating or Cooling Issues: If your print is suffering from overhang issues or excessive cooling, adjusting the print temperature, increasing cooling fan speed, or using support structures can help mitigate these problems. Experiment with temperature and cooling settings to find the optimal balance for your print.
- Print Layer Lines: If you are seeing noticeable layer lines on your print, adjust the layer height to a smaller value for finer resolution. You can also experiment with print speed, as slower speeds can help minimize visible layer lines.
- Printer Error Messages: If your printer displays error messages or stops mid-print, consult the printer’s manual or manufacturer’s resources to troubleshoot specific error codes. Check for loose connections, filament jams, or any other issues indicated by the error message.
Remember, troubleshooting 3D printing issues can require some trial and error. Keep notes of the adjustments you make and the results you observe. This way, you can learn from each troubleshooting process and improve your printing skills over time.
With these troubleshooting tips in mind, you are well-equipped to handle common issues that may arise during the 3D printing process. After resolving any problems, you can move on to the post-processing and finishing touches to enhance the appearance and functionality of your prints.
Post-processing and Finishing Touches
Once your 3D print is complete, there are additional post-processing steps you can take to enhance the appearance and functionality of your prints. Here are some common post-processing techniques and finishing touches:
- Removing Support Structures: If your print required support structures, carefully remove them. Use pliers, cutters, or other appropriate tools to remove the supports without damaging the print.
- Sanding and Smoothing: Use sandpaper or sanding tools to smooth out rough surfaces or remove any visible layer lines. Start with a coarse grit sandpaper and gradually move to finer grits for a polished finish.
- Filling and Repairing: If there are imperfections or small holes in your print, you can use fillers or epoxy resin to fill and repair those areas. Sand the filled areas to ensure a smooth finish.
- Painting and Coloring: Add color and personalization to your prints by painting them with acrylic paints or using other coloring techniques. This can bring out details and make your prints more visually appealing.
- Surface Treatment: Consider applying various surface treatments like primer, clear coat, or varnish to protect the print and give it a professional finish. These treatments can also add durability and resistance to wear and tear.
- Assembly and Joining: If your print consists of multiple parts, use appropriate adhesives or fasteners to assemble and join the components. Ensure a secure and functional fit.
- Fine Detailing and Finishing: Take your prints to the next level with additional detailing, such as adding decals, stickers, or other embellishments. This can enhance the overall look and add a personal touch to your prints.
- Post-printing Modifications: Consider making post-print modifications, like drilling holes or adding inserts, to enhance the functionality or adapt your prints for specific purposes.
The specific post-processing techniques and finishing touches you choose will depend on the desired outcome for your print. Experiment with different methods to achieve the desired look and functionality. Remember to take safety precautions when working with tools, chemicals, or paints.
Post-processing and adding finishing touches to your 3D prints can elevate them to the next level. Whether you strive for a polished appearance, improved functionality, or a unique aesthetic, these steps allow you to customize and refine your prints to your liking.
With post-processing complete, you can proudly display or utilize your finished prints. However, it’s important to continue learning and refining your 3D printing skills to take on new and exciting projects in the future.
Conclusion
Congratulations on learning the ins and outs of programming a 3D printer! By following the steps outlined in this guide, you have gained the knowledge and skills needed to set up and operate your 3D printer efficiently. Understanding the basics of 3D printing, adjusting print settings, and troubleshooting common issues are key elements that contribute to successful prints.
Remember to select the right 3D printer that suits your needs, taking into consideration factors such as print material, size, resolution, and ease of use. Once you have chosen your printer, ensure you have a solid understanding of the fundamentals of 3D printing, including computer-aided design (CAD), slicer software, and the different printing materials available.
Setting up your 3D printer correctly, calibrating its settings, and loading filament are essential steps to ensure successful printing. Additionally, learning how to troubleshoot common issues can help you overcome any challenges that may arise during the printing process.
Post-processing and applying finishing touches to your prints allow you to take your creations to the next level. Through techniques such as sanding, painting, and assembly, you can improve the aesthetics and functionality of your prints, making them truly unique.
As you continue your 3D printing journey, don’t be afraid to experiment, learn, and refine your skills. Embrace the endless possibilities that 3D printing offers and explore new projects and designs. Engage with online communities, forums, and resources to expand your knowledge and stay up to date with the latest techniques and advancements in the field.
With dedication and practice, you will become a more skilled 3D printer programmer, unlocking the ability to bring your ideas to life with precision and creativity. So, what are you waiting for? Step into the fascinating world of 3D printing and let your imagination soar!