Introduction
Welcome to the world of pressure cooking! If you’re looking for a quick and convenient way to prepare green beans, an electric pressure cooker is your best friend in the kitchen. Gone are the days of waiting for a pot of water to boil or steaming vegetables for what feels like an eternity. With an electric pressure cooker, you can whip up deliciously tender and flavorful green beans in a fraction of the time.
So how does a pressure cooker work its magic? Essentially, it uses steam and increased pressure to cook food faster. The elevated pressure inside the cooker raises the boiling point of water, allowing food to cook at higher temperatures. This means that green beans, which usually take 15-20 minutes to cook, can be ready in just a few minutes in a pressure cooker.
There are many benefits to pressure cooking green beans. Firstly, it preserves more nutrients compared to other cooking methods. The shorter cooking time helps retain the natural colors, flavors, and textures of the beans. Additionally, pressure cooking requires less water, which means fewer nutrients are lost through water-soluble vitamins being leached into the cooking liquid.
Another advantage of using an electric pressure cooker is convenience. It’s a set-it-and-forget-it cooking method that requires minimal supervision. Once you’ve prepared and seasoned the green beans, you can simply set the timer and let the pressure cooker do its job. No more hovering over the stove, being cautious of boiling over or undercooked beans.
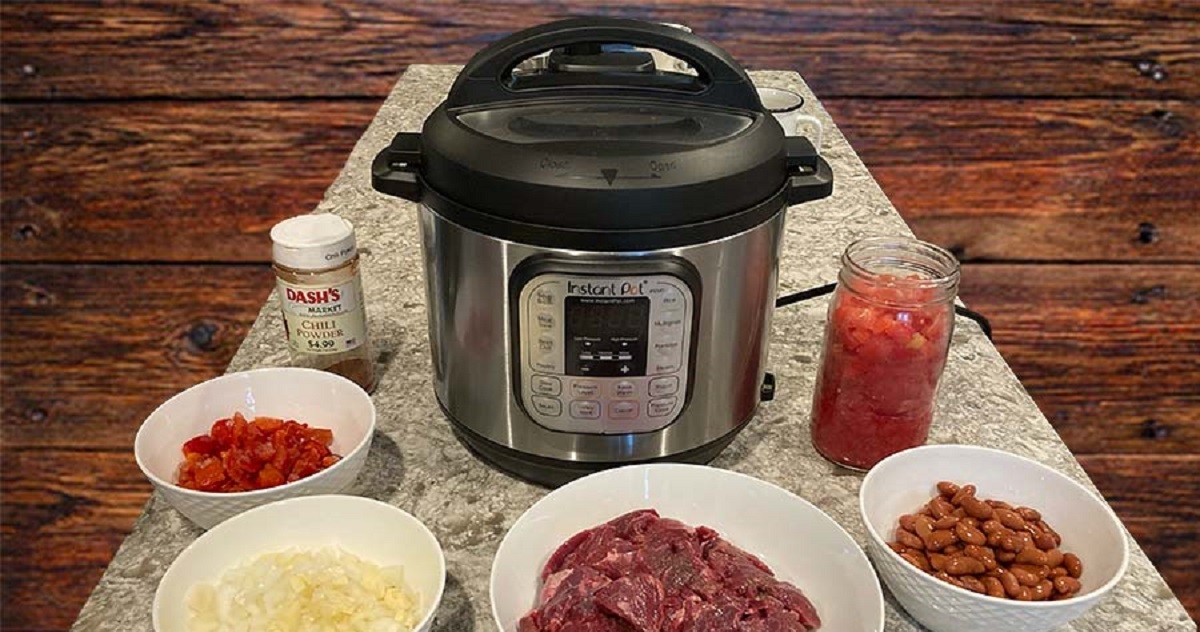
Before we dive into the details of pressure cooking green beans, it’s essential to choose the right electric pressure cooker. There are various models available on the market, so consider factors like size, functionality, and safety features. Investing in a reliable and reputable brand will ensure a pleasant and efficient cooking experience.
Now that you’re familiar with the basics of pressure cooking and the benefits it offers, let’s move on to preparing the green beans. Get ready to unleash the full potential of your electric pressure cooker and create mouthwatering green bean dishes that will impress your family and friends.
How Does a Pressure Cooker Work?
A pressure cooker is a sealed cooking pot that uses steam and increased pressure to cook food quickly. It consists of a pot with a locking lid and a pressure release valve. The key to its efficiency is the pressure build-up that occurs when the pot is sealed and heated.
When you place ingredients, such as green beans, and a small amount of liquid inside the pressure cooker, the heat from the stove or electric heating element begins to create steam. As the liquid turns into steam, the pressure inside the sealed pot increases, raising the boiling point of water. This elevated temperature cooks the food faster than conventional cooking methods.
The increased pressure in the cooker not only raises the boiling point but also increases the temperature inside the pot. This higher temperature breaks down the fibers in the green beans more quickly, resulting in a tender, flavorful outcome.
The pressure inside the cooker is regulated by a pressure release valve. It automatically releases excess pressure to maintain a safe cooking environment. Once the food is cooked, you can release the pressure manually or allow it to release naturally.
Pressure cooking offers several advantages over traditional cooking methods. First and foremost, it saves time. Green beans that usually take 15 to 20 minutes to cook can be done in just a few minutes in a pressure cooker. This speed is particularly beneficial when you’re short on time or preparing large quantities of food.
Furthermore, pressure cooking retains more nutrients than boiling or steaming. The shortened cooking time preserves the color, flavor, and texture of the green beans while keeping essential vitamins and minerals intact. The sealed environment also prevents the leaching of nutrients into the cooking liquid, ensuring that you get the most out of your ingredients.
In addition to time and nutritional benefits, pressure cooking is energy-efficient. The high-pressure environment reduces cooking time, which in turn reduces the amount of energy required to cook the food. This makes it an eco-friendly cooking option that helps save on utility bills.
Now that you understand the mechanics behind a pressure cooker, let’s explore the specific benefits of using this cooking method for green beans and uncover the secrets to perfectly pressure-cooked green beans.
Benefits of Pressure Cooking Green Beans
Pressure cooking green beans offers a plethora of benefits that make it a fantastic cooking method. Here are some of the advantages:
- Preserves Nutrients: Pressure cooking is known for its ability to retain more nutrients compared to other cooking methods. The shorter cooking time helps to preserve the natural colors, flavors, and textures of the green beans. Additionally, the sealed environment prevents the loss of water-soluble vitamins and minerals, ensuring that your green beans are both delicious and nutritious.
- Time-Efficient: One of the main perks of pressure cooking is its speed. Green beans that would typically take 15-20 minutes to cook can be ready in just a few minutes in a pressure cooker. This time-saving benefit is especially valuable when you have a busy schedule or when you’re trying to get dinner on the table quickly.
- Energy-Efficient: Pressure cooking is an energy-efficient cooking method. The shorter cooking time drastically reduces the amount of energy consumed compared to traditional cooking methods like boiling or steaming. By saving energy, you not only reduce your carbon footprint but also cut down on your utility bills.
- Enhanced Flavor and Texture: Pressure cooking brings out the natural flavors of green beans while ensuring they retain their crispness. The higher temperatures inside the pressure cooker quickly break down the fibers, resulting in tender and perfectly cooked green beans. The sealed environment also helps trap and intensify the flavors, making each bite more delicious.
- Convenient and Versatile: Pressure cookers are incredibly convenient kitchen tools. Once you’ve prepared the green beans and set up the pressure cooker, you can simply set the timer and let it do the work. There’s no need to constantly monitor the cooking process, and you can focus on other tasks. Additionally, pressure cookers are versatile appliances that can be used for a variety of cooking tasks, from preparing soups and stews to cooking rice and beans.
These benefits make pressure cooking an attractive option for cooking green beans, especially if you’re looking for a fast, efficient, and nutritious meal. Now that you know the advantages, let’s move on to choosing the right electric pressure cooker for your cooking needs.
Choosing the Right Electric Pressure Cooker
When it comes to pressure cooking green beans, selecting the right electric pressure cooker can greatly enhance your cooking experience. Here are some important factors to consider when choosing an electric pressure cooker:
- Size and Capacity: Consider the size and capacity of the pressure cooker based on your cooking needs. If you usually cook for a small family or yourself, a smaller 3-5 quart pressure cooker may suffice. However, if you frequently cook for larger gatherings or want to prepare larger batches of green beans, opt for a larger 6-8 quart cooker.
- Functions and Features: Look for an electric pressure cooker with a variety of functions and features. Some models offer multiple cooking modes, such as pressure cooking, slow cooking, rice cooking, and steaming. Additionally, features like programmable timers, delay start, and keep warm functions can add convenience to your cooking process.
- Safety Features: Safety is a critical aspect to consider when choosing an electric pressure cooker. Look for models with safety features like pressure release valves, locking lids, and lid safety locks. These features help prevent accidents and ensure a secure cooking experience.
- Brand and Reputation: Opt for a reliable and reputable brand when purchasing an electric pressure cooker. Trusted brands often offer better quality products, excellent customer service, and reliable warranties. Reading reviews and seeking recommendations can help you make an informed decision.
- Price: Set a budget for your electric pressure cooker purchase. While there are budget-friendly options available, it’s important to balance price with quality and features. Investing in a slightly more expensive model may provide durability and additional functionality in the long run.
Take your time to research and compare different electric pressure cooker models before making a decision. Consider your specific cooking needs and preferences to find a pressure cooker that will best suit your requirements. Once you’ve chosen the right electric pressure cooker, you’ll be ready to embark on your green bean cooking adventures.
Preparing the Green Beans
Before you can start pressure cooking your green beans, it’s important to properly prepare them. Here’s a step-by-step guide to preparing your green beans for pressure cooking:
- Wash the Green Beans: Start by washing the green beans under cool water to remove any dirt or debris. Gently rub the beans with your fingers to ensure they are thoroughly clean. Pat them dry with a paper towel or let them air dry.
- Trim the Ends: Trim off the ends of the green beans using a sharp knife or your fingers. Remove any tough or stringy bits from the sides as well. This step ensures that your green beans cook evenly and have a pleasant texture.
- Cut (Optional): Depending on your preference, you can leave the green beans whole or cut them into bite-sized pieces. Cutting them helps reduce the cooking time and makes it easier to serve, but it’s entirely up to you.
- Season (Optional): Green beans have a mild and versatile flavor that can be enhanced with seasonings. Consider adding herbs like garlic, thyme, or rosemary, or spices like black pepper or red pepper flakes. Toss the green beans with the seasonings, ensuring they are evenly coated.
- Prepare the Liquid: While pressure cooking, it’s essential to include a small amount of liquid to generate steam. Most recipes call for about 1/2 to 1 cup of liquid, such as water, vegetable broth, or chicken broth. Make sure the liquid covers the bottom of the pressure cooker to avoid burning.
Once you’ve prepared the green beans, you’re ready to move on to the next steps of adding flavors and seasonings, setting up your electric pressure cooker, and cooking the green beans. Stay tuned for the upcoming sections to discover the secrets to perfectly pressure-cooked green beans!
Adding Flavors and Seasonings
Green beans have a deliciously mild flavor that pairs well with a variety of seasonings. Adding flavors and seasonings to your green beans can elevate their taste and make them even more enjoyable. Here are some ideas for enhancing the flavor of your pressure-cooked green beans:
- Garlic: Garlic adds a savory and aromatic taste to green beans. You can sauté minced garlic in a little olive oil before adding the green beans to the pressure cooker, or simply sprinkle garlic powder over the beans for a quick and convenient option.
- Herbs: Fresh or dried herbs bring freshness and depth to green beans. Popular herb choices include thyme, rosemary, basil, and parsley. You can add whole sprigs of herbs while pressure cooking and remove them before serving, or sprinkle dried herbs over the beans for added flavor.
- Lemon Juice: A squeeze of fresh lemon juice can brighten the flavor of green beans and add a touch of acidity. Simply drizzle some lemon juice over the cooked green beans before serving, or zest the lemon and sprinkle the zest over the beans for a citrusy pop of flavor.
- Butter or Olive Oil: Adding a small pat of butter or drizzling some olive oil over the green beans before pressure cooking can enhance their richness and provide a velvety mouthfeel. This option is especially appealing if you prefer a slightly indulgent touch to your green beans.
- Spices: Spices like black pepper, red pepper flakes, paprika, or cumin can add a nice kick and depth of flavor to your green beans. Sprinkle a pinch or two of your favorite spices over the beans for a delightful twist.
Remember to consider your personal taste preferences when deciding on the flavors and seasonings to add to your green beans. You can experiment with different combinations to find the perfect balance of flavors that you enjoy.
Once you’ve seasoned your green beans, it’s time to move on to setting up your electric pressure cooker and cooking the green beans to perfection. Stay tuned for the next section, where we’ll guide you through the steps of setting up your pressure cooker and achieving deliciously tender, flavorful green beans with ease!
Setting Up Your Electric Pressure Cooker
Setting up your electric pressure cooker properly is essential to ensure a successful and hassle-free cooking experience. Here are the steps to follow when preparing your pressure cooker:
- Read the Manual: Start by reading the instruction manual that came with your specific electric pressure cooker. Every model may have slightly different features and functions, so familiarizing yourself with the instructions will ensure you understand how your cooker operates.
- Assemble the Pressure Cooker: If your electric pressure cooker has removable parts, make sure to assemble them correctly according to the manufacturer’s instructions. This includes inserting the inner pot, placing the sealing ring on the lid, and ensuring the lid is securely locked in place.
- Add Liquid: Before adding the green beans, it’s important to include the required amount of liquid in the pressure cooker. Refer to the recipe or your pressure cooker’s manual for the recommended liquid measurement. Adding enough liquid, such as water or broth, is crucial to generate steam and create the necessary pressure to cook the green beans.
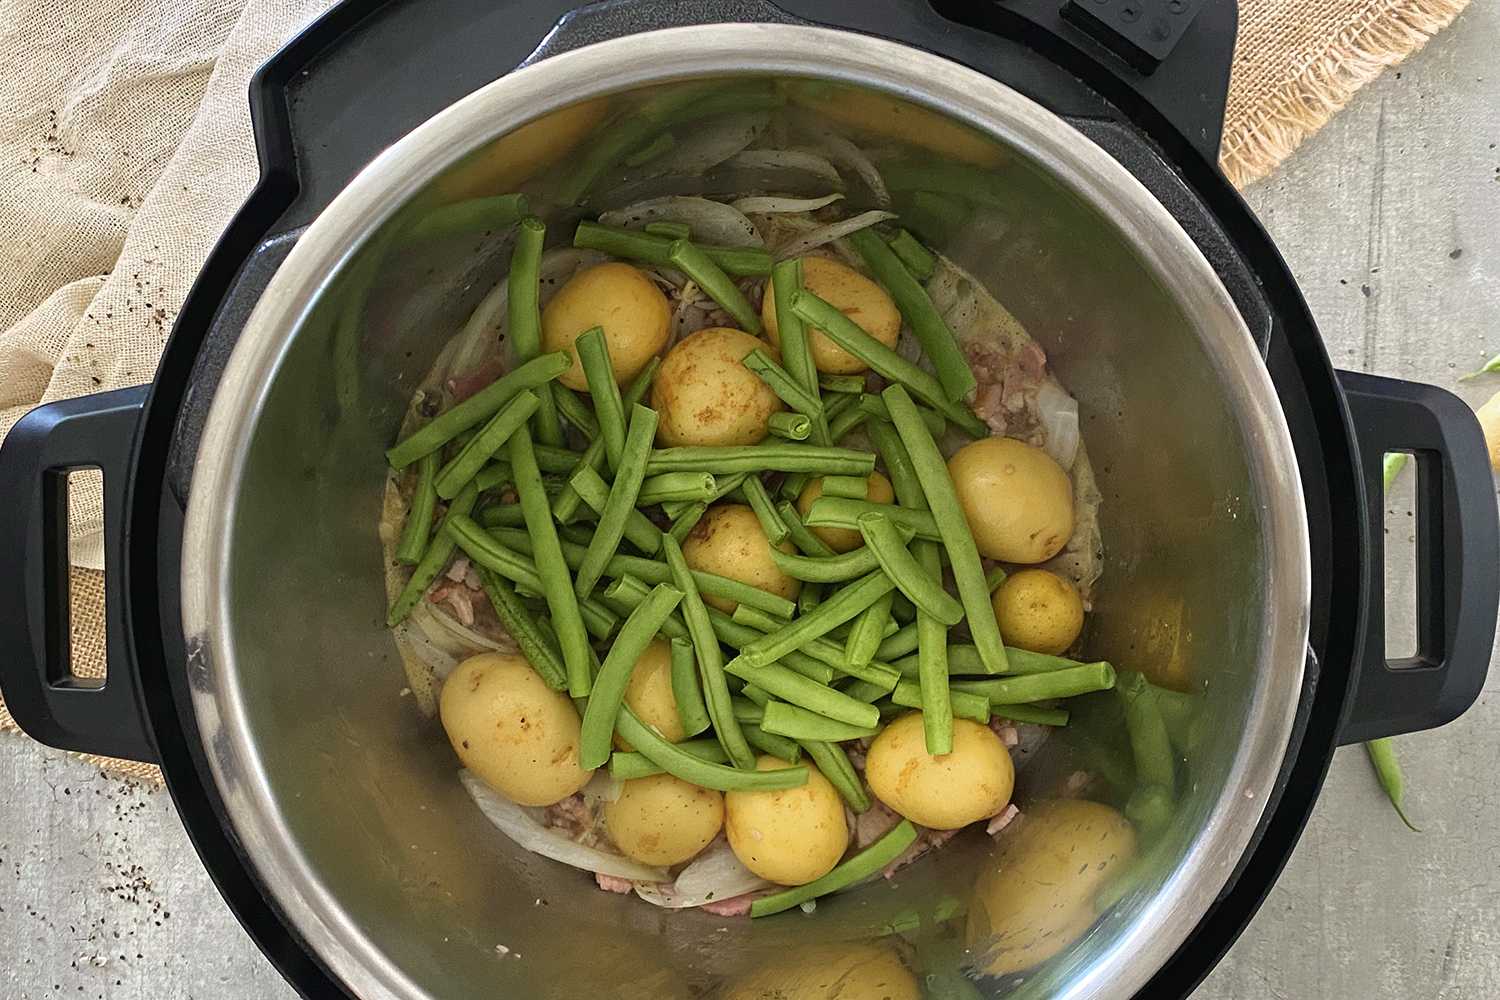
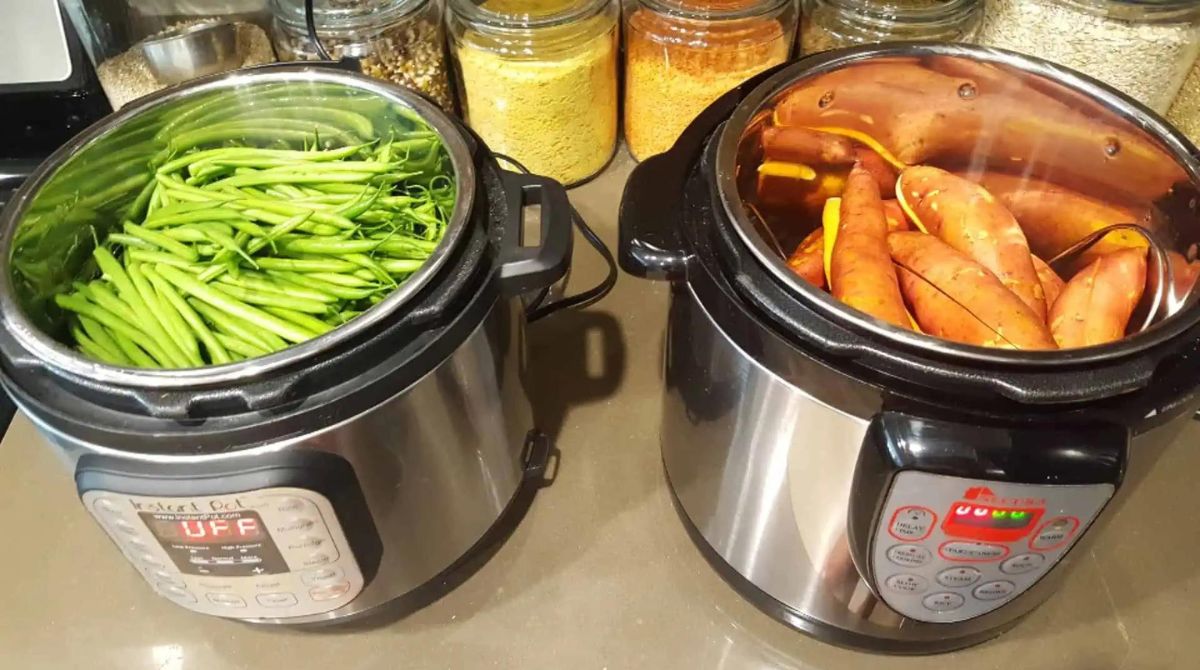
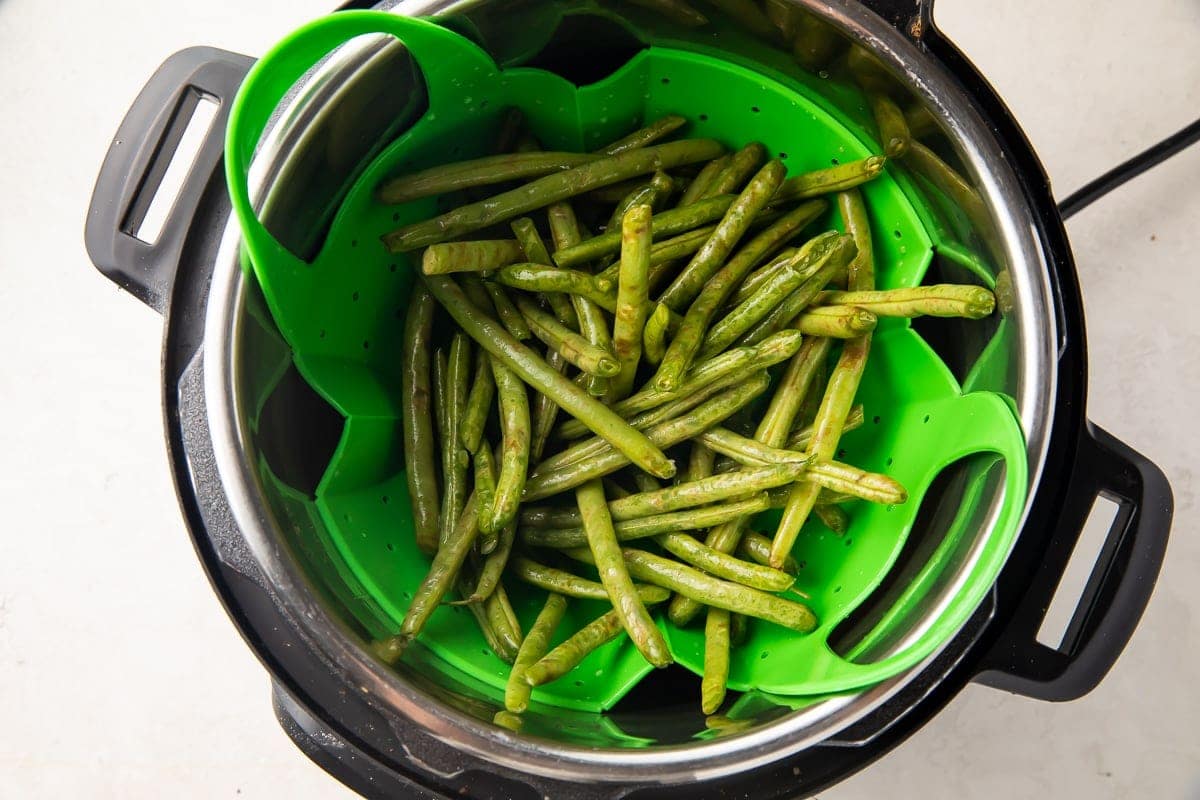
- Place the Green Beans: Gently place the prepared green beans into the pressure cooker, ensuring they are evenly distributed. Avoid overcrowding the pressure cooker to allow proper circulation of steam and even cooking.
- Secure the Lid: Double-check that the sealing ring is properly positioned on the lid and ensure that the lid is securely locked in place on the pressure cooker. This will create a tight seal and prevent any steam from escaping during the cooking process.
- Set the Cooking Time and Pressure: Refer to the recipe or the cooking time guidelines provided in your electric pressure cooker’s manual to determine the appropriate cooking time and pressure setting for green beans. Most electric pressure cookers have pre-set buttons for common dishes, including vegetables, which can simplify the process.
- Start the Cooking Process: Once you have set the cooking time and pressure, press the appropriate buttons on your pressure cooker to start the cooking process. The cooker will begin to heat up, and the pressure will gradually build up inside.
It’s important to note that the exact steps may vary depending on the model and brand of your electric pressure cooker. Always refer to the manufacturer’s instructions for guidelines specific to your cooker.
Now that your pressure cooker is properly set up, it’s time to move on to cooking the green beans. In the next section, we’ll guide you through the cooking process and explain the different release methods to ensure perfectly pressure-cooked green beans.
Cooking the Green Beans
Now that your electric pressure cooker is set up and ready, it’s time to start cooking the green beans. Follow these steps to achieve perfectly pressure-cooked green beans:
- Start the Pressure Cooking Process: Once you’ve set the cooking time and pressure on your electric pressure cooker, press the start button to begin the cooking process. The cooker will start heating up, and the pressure will gradually build inside the pot.
- Wait for Pressure to Build: It will take some time for the pressure cooker to reach the desired pressure. The indicator on your cooker will let you know when it has reached the appropriate pressure level. This preheating process ensures that the green beans cook evenly and thoroughly.
- Cooking Time: The cooking time for green beans in a pressure cooker typically ranges from 1 to 4 minutes, depending on your desired level of tenderness. Keep in mind that the cooking time starts once the pressure is reached, not from the beginning of the preheating process.
- Quick Release vs. Natural Release: When the cooking time is complete, you have the option of releasing the pressure manually using the quick release method or allowing the pressure to release naturally. Quick release involves carefully moving the pressure release valve to the venting position, which will quickly release the steam and pressure. Natural release means letting the pressure drop naturally over time, without manually releasing any steam. The best method for green beans is usually quick release since it helps retain the bright green color and prevents overcooking.
- Remove the Lid: Once you’ve released the pressure, it’s safe to remove the lid of the pressure cooker. Be cautious of any remaining steam, and use oven mitts or a kitchen towel to handle the hot lid.
- Check for Doneness: Check the green beans for doneness by piercing them with a fork. They should be tender but still have a slight crunch. If they’re undercooked, you can return them to the pressure cooker and cook for an additional minute or two.
Once the green beans are cooked to your desired level of tenderness, they’re ready to be served and enjoyed. Be mindful not to overcook them, as they can turn mushy and lose their vibrant color. Experiment with different cooking times to find the perfect texture for your taste.
In the next section, we’ll discuss some tips and tricks for achieving perfect green beans every time you use your electric pressure cooker.
Quick Release vs. Natural Release
When pressure cooking green beans in an electric pressure cooker, you have two options for releasing the pressure: quick release and natural release. Each method has its advantages and is suited for different cooking situations. Let’s explore the differences between quick release and natural release:
Quick Release:
In quick release, you manually move the pressure release valve from the sealing position to the venting position as soon as the cooking time is complete. This releases the steam and pressure from the pressure cooker rapidly. Quick release is ideal for green beans as it helps prevent overcooking and preserves their vibrant color and crispiness.
To perform a quick release, make sure to follow these steps:
- Use a long spoon or tongs to move the pressure release valve from the sealing position to the venting position.
- Be cautious of the hot steam and keep your hands and face away from the venting steam to prevent any burns.
- Allow all the steam to escape, indicated by the pressure valve dropping down.
Natural Release:
In natural release, you allow the pressure cooker to naturally release the pressure over time without manually moving the pressure release valve. This method is suitable when you want the food to continue cooking in the residual heat of the pressure cooker or when cooking more delicate ingredients that can be sensitive to rapid pressure changes.
To perform a natural release, follow these steps:
- Once the cooking time is complete, turn off the heat and leave the pressure cooker undisturbed.
- Allow the pressure to release naturally, which can take anywhere from 10 to 20 minutes or even longer, depending on the recipe and the amount of food in the cooker.
- After the pressure has released completely, indicated by the pressure valve dropping down, it is safe to open the lid.
Since green beans are delicate and can easily overcook, quick release is generally the preferred method for achieving perfect results. However, there may be certain recipes or situations where natural release is recommended. Always refer to the recipe or your pressure cooker’s manual for specific guidance.
Now that you understand the difference between quick release and natural release, let’s move on to the next section, where we’ll share tips and tricks to ensure your green beans turn out delicious and perfectly cooked every time you use your electric pressure cooker.
Checking for Doneness
Checking for doneness is a crucial step when pressure cooking green beans to ensure they are perfectly cooked and retain their desired texture. Here are some tips for checking the doneness of your pressure-cooked green beans:
Visual Inspection:
Firstly, visually inspect the green beans. They should have a vibrant green color and appear tender but still retain some crispness. If the beans are dull in color or appear mushy, they may be overcooked. Keep in mind that the cooking time may vary depending on the specific recipe or your preferred texture, so adjust accordingly.
Piercing with a Fork:
Use a fork to gently pierce one of the green beans. It should easily go through the bean with minimal resistance. If it feels too firm or crunchy, the beans may need more cooking time. On the other hand, if the beans feel too soft and mushy, they may be overcooked. Ideally, green beans should be tender yet still have a slight bite to them.
Taste Test:
The most effective way to determine if the green beans are done to your liking is by taking a taste test. Select a green bean from the cooker and try it. It should be tender, flavorful, and have a pleasant texture. Adjust the cooking time if necessary to achieve the desired level of tenderness.
Recipe Guidelines:
If you are following a specific recipe for pressure-cooked green beans, refer to the recommended cooking times and instructions in the recipe. These guidelines have been tested and proven and can provide reliable guidance for achieving the desired doneness.
Remember, it’s better to slightly undercook the green beans than to overcook them, as they can quickly turn mushy and lose their vibrant color. You can always return undercooked beans to the pressure cooker for a few more minutes of cooking if needed.
With these tips in mind, you can confidently check for the doneness of your pressure-cooked green beans and serve them at their peak deliciousness. In the next section, we’ll share some helpful tips and tricks to ensure your green beans turn out perfect every time you use your electric pressure cooker.
Serving and Enjoying Your Pressure Cooked Green Beans
Now that your green beans are perfectly pressure cooked, it’s time to serve and savor their delicious flavors. Here are some tips for serving and enjoying your pressure-cooked green beans:
Plating Options:
You can serve your pressure-cooked green beans as a side dish or incorporate them into other recipes. For a simple presentation, transfer the green beans to a serving dish, ensuring to drain any excess liquid. Alternatively, you can use tongs to plate the green beans alongside your main course.
Garnishing:
To enhance the visual appeal and add extra flavor, consider garnishing your pressure-cooked green beans. Sprinkle some freshly chopped herbs like parsley or dill over the top. A squeeze of lemon juice or a drizzle of olive oil can also provide a fresh finishing touch.
Pairing Suggestions:
Green beans are versatile and pair well with a wide range of flavors. Serve them alongside roasted chicken, grilled steak, or baked fish for a nutritious side dish. You can also toss them with cooked pasta, cherry tomatoes, and feta cheese for a vibrant and flavorful pasta salad. The possibilities are endless, so get creative with your pairings.
Serving Temperature:
Your pressure-cooked green beans can be served warm, at room temperature, or even chilled, depending on your preference and the accompanying dish. Consider the overall meal and the flavors you want to highlight when deciding on the serving temperature.
Leftover Ideas:
If you have any leftover pressure-cooked green beans, store them in an airtight container in the refrigerator. You can use them as a filling for wraps or sandwiches, toss them into salads or grain bowls, or incorporate them into stir-fries or pasta dishes. Don’t let those delicious green beans go to waste!
Enjoying the Delicious Results:
Sit down, take a bite, and enjoy the tender, flavorful green beans that you’ve prepared with your electric pressure cooker. Appreciate the vibrant colors and the retained nutrients that make each bite so satisfying. Share the dish with family and friends, and savor the joy of a well-executed meal.
Now that you’ve mastered the art of pressure cooking green beans, you can confidently incorporate them into your culinary repertoire. Use these serving suggestions and get creative in how you enjoy your pressure-cooked green beans. With your electric pressure cooker by your side, you can savor the ease and deliciousness that pressure cooking brings to your kitchen.
Tips and Tricks for Perfect Green Beans
To ensure that your pressure-cooked green beans turn out absolutely perfect every time, here are some helpful tips and tricks to keep in mind:
- Don’t Overcook: Green beans can quickly become overcooked and lose their vibrant color and crisp texture. It’s better to slightly undercook them, as you can always return them to the pressure cooker for a few more minutes if needed.
- Adjust Cooking Time: The cooking time for green beans in a pressure cooker can vary depending on personal preference and the desired level of tenderness. Experiment with different cooking times to find the texture that you enjoy the most.
- Use High-Quality Green Beans: Start with fresh, high-quality green beans for the best results. Look for beans that are crisp, bright green, and without any blemishes or signs of wilting.
- Properly Season: Season your green beans to enhance their flavor. Consider adding minced garlic, herbs, or spices for an extra boost of taste. Experiment with different seasonings to find your favorite combination.
- Avoid Overcrowding: When placing the green beans in the pressure cooker, make sure not to overcrowd the pot. Overcrowding can result in uneven cooking and may prevent the beans from reaching the desired tenderness.
- Quick Release for Bright Color: To preserve the bright green color of the green beans, opt for the quick release method when releasing the pressure. Quick release helps maintain color and prevents overcooking.
- Add Acidic Ingredients at the End: If you want to incorporate acidic ingredients like lemon juice or vinegar into your green beans, add them after the pressure cooking process. Adding acidic ingredients earlier might cause the beans to become mushy.
- Experiment with Flavors: Green beans are versatile and can adapt to various flavors. Try adding different herbs, spices, or seasonings to create unique and delicious combinations that suit your taste.
- Preserve Cooking Liquid: The cooking liquid used in pressure cooking green beans contains flavor and nutrients. Consider using it as a base for stocks, soups, or gravies to make the most of it.
- Store Properly: If you have any leftover pressure-cooked green beans, store them in an airtight container in the refrigerator for up to 3-4 days. Reheat gently when ready to enjoy again.
By keeping these tips and tricks in mind, you’ll be better equipped to prepare perfect green beans that are flavorful, tender, and vibrant. Let your creativity shine through by experimenting with different techniques and flavor combinations, and soon enough, you’ll become a master of pressure cooking green beans.
Now that you have all the knowledge and guidance to create fantastic green beans with your electric pressure cooker, it’s time to start cooking and enjoy the delicious results!
Conclusion
Congratulations! You’ve learned all about pressure cooking green beans with an electric pressure cooker. This versatile and efficient cooking method allows you to enjoy tender, flavorful green beans in a fraction of the time compared to traditional cooking methods. By following the steps outlined in this guide, you can confidently prepare perfectly pressure-cooked green beans with ease.
Pressure cooking not only saves time but also preserves more nutrients and flavors in the green beans. Additionally, the convenience of an electric pressure cooker makes it a fantastic addition to any kitchen. Just remember to choose the right size and model, properly prepare the green beans, and apply the recommended cooking times and techniques for optimal results.
Throughout this guide, we’ve covered important topics such as the benefits of pressure cooking green beans, selecting the right electric pressure cooker, preparing the green beans, adding flavors and seasonings, setting up the pressure cooker, cooking the green beans, and checking for doneness. We’ve also provided tips and tricks to ensure your green beans turn out perfectly every time.
Now it’s time to unleash your creativity and experiment with different variations and flavor combinations. Whether you enjoy them as a side dish or incorporate them into other recipes, pressure-cooked green beans offer a nutritious and delicious addition to your meals.
So grab your electric pressure cooker, some fresh green beans, and get ready to experience the convenience and amazing results of pressure cooking. With the knowledge and skills you’ve gained, you’re well-equipped to embark on your green bean cooking adventures. Enjoy the process, savor the flavors, and discover the joy of perfectly pressure-cooked green beans!