Introduction
Welcome to the world of cooking with an electric pressure cooker! If you’re looking for a simple and convenient way to cook delicious meals, an electric pressure cooker can be your new best friend. In this article, we will focus on one of the most popular and versatile dishes – green beans and potatoes.
Green beans and potatoes are a classic combination that pairs well with a variety of main courses. Whether you’re serving them alongside roasted chicken, grilled steak, or even vegetarian dishes, this side dish never fails to impress.
Using an electric pressure cooker to prepare green beans and potatoes offers a range of benefits. Firstly, the pressure cooker cooks food faster than traditional methods, saving you valuable time in the kitchen. In a matter of minutes, you can have tender green beans and perfectly cooked potatoes ready to serve.
Additionally, electric pressure cookers retain more nutrients in the food compared to boiling or steaming. The sealed environment of the pressure cooker helps to preserve the natural flavors and textures of the ingredients.
Another advantage of using an electric pressure cooker is its versatility. Most electric pressure cookers come with various cooking modes, allowing you to adjust the settings according to your recipe. Whether you prefer your green beans and potatoes tender and slightly crunchy or soft and melt-in-your-mouth, an electric pressure cooker can cater to your desired texture.
In the following sections, we will guide you through the process of preparing and cooking green beans and potatoes in an electric pressure cooker. We’ll also provide tips on adjusting cooking times, releasing pressure, and ensuring safety while using the appliance.
So, let’s dive into the world of electric pressure cooking and discover how to create a delicious and nutritious side dish of green beans and potatoes in no time!
Benefits of Using an Electric Pressure Cooker
Using an electric pressure cooker has become increasingly popular in recent years, and for good reason. This versatile kitchen appliance offers a wide range of benefits that make it a must-have for any home cook. Here are the key advantages of using an electric pressure cooker:
- Time-saving: One of the biggest advantages of using an electric pressure cooker is its ability to significantly reduce cooking time. The high-pressure environment created by the appliance allows food to cook much faster than traditional methods. Green beans and potatoes that would usually take 20-30 minutes to cook on the stovetop can be ready in just 5-10 minutes in an electric pressure cooker.
- Nutrient retention: Pressure cooking is known for preserving more nutrients in food compared to other cooking methods. The sealed environment in the pressure cooker helps to trap steam, preventing the loss of vitamins and minerals. With an electric pressure cooker, you can ensure that your green beans and potatoes retain their nutritional value while still being delicious.
- Enhanced flavors: The intense pressure and heat generated in an electric pressure cooker help to infuse flavors into the ingredients. This means that your green beans and potatoes will be packed with delicious flavors that permeate every bite. The result is a side dish that is bursting with taste and satisfaction.
- Convenience: Electric pressure cookers are designed to make your cooking experience as convenient as possible. Most models feature pre-set cooking programs for a variety of dishes, including vegetables. Simply select the appropriate program, set the cooking time, and let the pressure cooker do its magic. You can even set a delay timer to have your green beans and potatoes ready at a specific time.
- Energy-efficient: Despite their quick cooking times, electric pressure cookers are surprisingly energy-efficient. They use less water and require less stove or oven time, helping to reduce overall energy consumption. This makes them a greener and more sustainable cooking option.
- Versatility: Electric pressure cookers are incredibly versatile appliances. Besides cooking green beans and potatoes, they can be used for a wide range of recipes, from soups and stews to rice and even desserts. Investing in an electric pressure cooker opens up a world of culinary possibilities.
With all these benefits, it’s no wonder that electric pressure cookers have become a popular choice among home cooks. From saving time to enhancing flavors and retaining nutrients, this kitchen appliance can truly revolutionize the way you cook. So, get ready to enjoy tender, flavorful, and nutrient-packed green beans and potatoes with the help of an electric pressure cooker.
How to Prepare Green Beans and Potatoes for Cooking
Before you start cooking your green beans and potatoes in an electric pressure cooker, it’s important to properly prepare the ingredients. Follow these simple steps to ensure that your green beans and potatoes are ready for cooking:
- Wash the green beans: Start by thoroughly washing the green beans under running water. Remove any dirt or debris and pat them dry with a kitchen towel. If desired, trim the ends of the green beans, although this step is optional.
- Trim and chop the potatoes: Next, peel the potatoes and cut them into bite-sized pieces. Try to make the potato pieces roughly the same size to ensure even cooking. If you prefer a rustic look, you can leave the skin on the potatoes for added texture and flavor.
- Optional: Blanch the green beans: Blanching the green beans before pressure cooking is an optional step that can help to maintain their vibrant color. To blanch the green beans, bring a pot of salted water to a boil. Add the green beans and cook for 2-3 minutes until they turn bright green. Immediately transfer the green beans to a bowl of ice water to stop the cooking process. Drain well and set aside.
- Prepare other ingredients: If you plan to add other ingredients or seasonings to your green beans and potatoes, make sure to prepare them ahead of time. This can include garlic, onions, herbs, spices, or even a splash of lemon juice to brighten the flavors.
- Measure the liquid: It’s important to measure the appropriate amount of liquid for cooking the green beans and potatoes in the electric pressure cooker. Most recipes call for about one cup of liquid, such as vegetable or chicken broth, water, or a combination of both. Adjust the amount of liquid based on the recipe you’re using.
Once you’ve prepared the green beans, potatoes, and any additional ingredients, you’re ready to move on to the next step – cooking your delicious green beans and potatoes in the electric pressure cooker. Follow the instructions in the subsequent section to achieve perfectly cooked and flavorful results.
Setting the Cooking Time for Green Beans and Potatoes
When cooking green beans and potatoes in an electric pressure cooker, setting the right cooking time is crucial to achieve the desired texture. The cooking time will depend on the size of your potato pieces and your preference for the tenderness of the green beans. Here are some general guidelines to help you determine the ideal cooking time:
- Small potato pieces: If you have cut your potatoes into small, bite-sized pieces, a cooking time of around 4-6 minutes on high pressure should be sufficient.
- Large potato pieces: For larger potato pieces, such as quartered potatoes, you may need to increase the cooking time to around 6-8 minutes on high pressure.
- Tender green beans: If you prefer your green beans to have a slight crunch, a cooking time of 3-4 minutes on high pressure is recommended.
- Softer green beans: If you prefer your green beans to be softer and more tender, increase the cooking time to around 5-6 minutes on high pressure.
- Blanched green beans: If you have blanched the green beans before pressure cooking, you can reduce the cooking time slightly, as they will already be partially cooked. Aim for a cooking time of around 2-3 minutes on high pressure.
It’s important to note that these cooking times are general guidelines and may vary depending on your specific electric pressure cooker. It’s always recommended to consult the instructions provided by the manufacturer for cooking times and settings.
Once you’ve determined the appropriate cooking time, you can move on to the next section to learn the step-by-step instructions for cooking green beans and potatoes in an electric pressure cooker.
Step-by-Step Instructions for Cooking Green Beans and Potatoes in an Electric Pressure Cooker
Now that you’ve prepared your green beans and potatoes and set the cooking time, it’s time to get cooking! Follow these step-by-step instructions to cook green beans and potatoes in an electric pressure cooker:
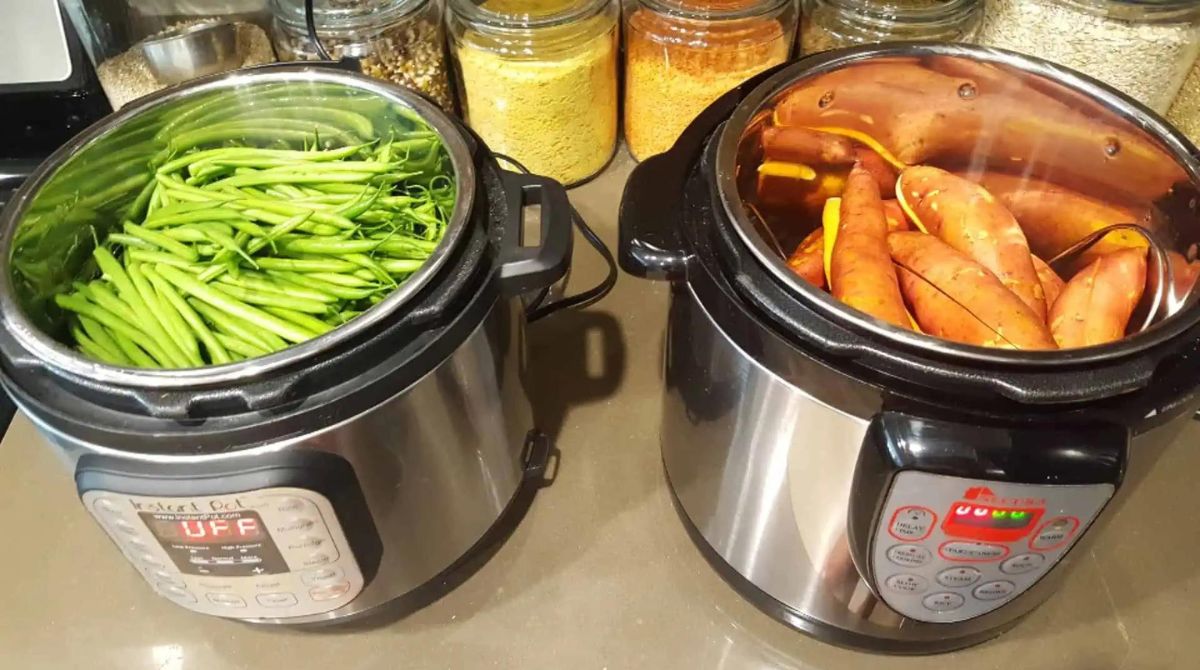
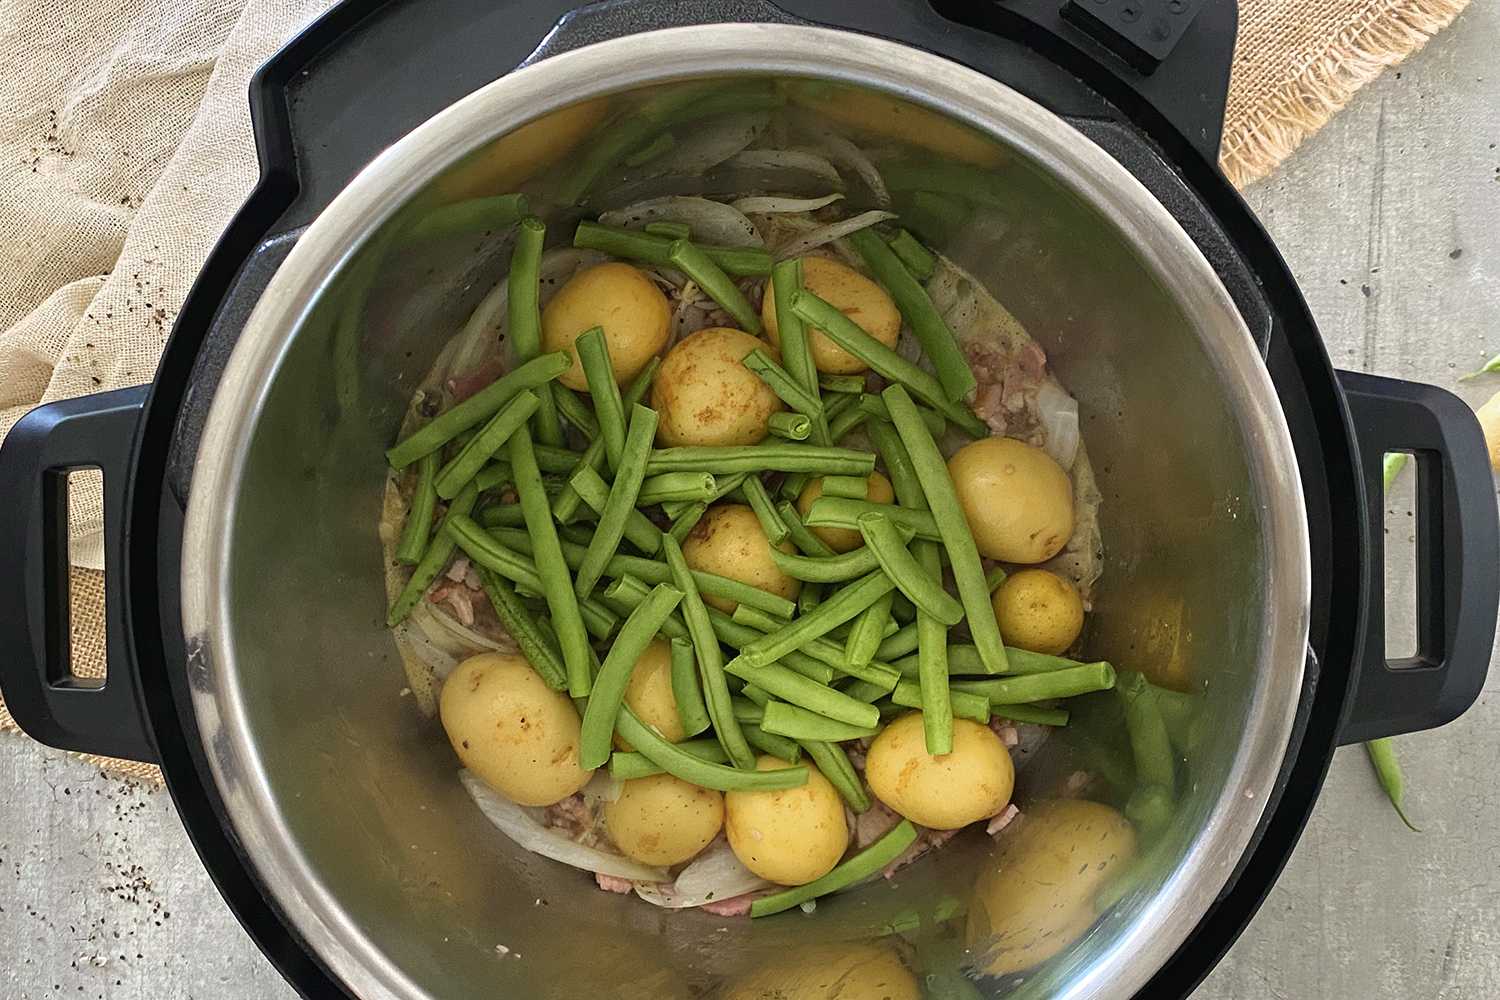
- Add the ingredients: Start by adding the prepared green beans and potatoes to the inner pot of your electric pressure cooker. If you’re using any additional ingredients, such as garlic or onions, add them at this stage as well.
- Add the liquid: Pour the measured liquid, such as vegetable or chicken broth, over the green beans and potatoes. The liquid should come to about halfway up the ingredients in the pot.
- Secure the lid: Ensure that the lid of your electric pressure cooker is properly sealed and locked into place. Different models have different mechanisms for securing the lid, so consult the manufacturer’s instructions for your specific cooker.
- Select the cooking program: Choose the appropriate cooking program or mode for vegetables on your electric pressure cooker. If there isn’t a specific program for vegetables, you can use the manual or pressure cook function and adjust the time accordingly.
- Set the cooking time: Set the cooking time based on the guidelines mentioned earlier or the instructions provided by your electric pressure cooker. Use the “+” and “-” buttons to adjust the cooking time until it matches your desired time.
- Start the cooking process: Once you’ve set the cooking time, press the start button on your electric pressure cooker to begin the cooking process. The cooker will take a few minutes to reach the desired pressure before the cooking time starts to count down.
- Cook under pressure: Once the cooking time begins, the electric pressure cooker will start building pressure and cooking the green beans and potatoes. You’ll notice that the cooker will make some noise and release steam throughout the cooking process, which is normal.
- Release the pressure: After the cooking time is complete, you have two options for releasing the pressure. You can either perform a quick release by carefully venting the steam using the quick release valve, or you can let the pressure release naturally by allowing the cooker to sit for a few minutes. Consult your cooker’s instructions for the appropriate method.
- Open the lid: Once all the pressure has been released, it is safe to open the cooker’s lid. Carefully remove the lid, making sure to avoid any remaining steam. Your delicious green beans and potatoes should be perfectly cooked and ready to serve!
With these simple steps, you can easily whip up a mouthwatering side dish of green beans and potatoes using your electric pressure cooker. Enjoy the convenience and speed of pressure cooking while savoring the natural flavors and textures of these classic ingredients.
Quick Release vs. Natural Release: Which is Best for Green Beans and Potatoes?
When it comes to releasing the pressure from your electric pressure cooker after cooking green beans and potatoes, you have two options: quick release and natural release. Understanding the difference between the two and choosing the appropriate method is essential for achieving the desired texture in your dish.
Quick Release: Quick release involves manually venting the steam from the pressure cooker using the quick release valve. This method rapidly lowers the pressure inside the cooker, allowing you to open the lid sooner. It is typically used when you want to stop the cooking process immediately or when you have vegetables, like green beans, that you want to remain crisp and retain their vibrant color.
To perform a quick release, ensure that your pressure cooker is positioned away from you and others, then carefully turn the quick release valve to release the steam. Be cautious when doing this as the steam will escape forcefully. Once all the steam has released, the float valve will drop, indicating that it is safe to open the lid.
Natural Release: Natural release involves letting the pressure inside the cooker decrease naturally over time without manually releasing the steam. This method is recommended for foods that benefit from additional cooking time or when you want to avoid overcooking delicate vegetables, such as green beans.
After the cooking time is complete, simply turn off the pressure cooker and allow it to sit undisturbed. The pressure will gradually subside, and the float valve will drop on its own, indicating that it is safe to open the lid. Natural release times can vary depending on the recipe and the amount of food in the pressure cooker, ranging from a few minutes to 20 minutes or more.
When it comes to green beans and potatoes, both quick release and natural release can yield good results, but the choice depends on your preference for texture. If you prefer your green beans to be more on the crisp side, opt for a quick release. On the other hand, if you prefer your green beans to be softer and more tender, a natural release is a better choice as it allows them to continue cooking slightly while the pressure naturally releases.
Experimentation with both methods can help you determine which release method works best for your personal taste preferences and the specific recipe you’re using. Just remember to factor in the cooking time and the desired texture of your green beans and potatoes when deciding between quick release and natural release.
By understanding the differences between quick release and natural release, you can control the cooking process and achieve the ideal texture for your green beans and potatoes in an electric pressure cooker.
Tips for Perfectly Cooked Green Beans and Potatoes
To ensure that your green beans and potatoes are perfectly cooked and bursting with flavor, here are some helpful tips to keep in mind:
- Don’t overcook: Green beans and potatoes can easily become mushy if overcooked. Keep a close eye on the cooking time and adjust according to your desired texture. Remember that the cooking time may vary depending on the size of your potato pieces and the tenderness of your green beans.
- Balance the flavors: Green beans and potatoes benefit from additional seasonings to enhance their taste. Consider adding herbs like thyme or rosemary, a squeeze of lemon juice, or a sprinkle of Parmesan cheese to take the dish to the next level.
- Choose the right variety: When selecting green beans, choose fresh, vibrant beans that are firm and free from blemishes. For potatoes, go for a waxy variety such as Yukon Gold or red potatoes as they hold their shape well during pressure cooking.
- Avoid overcrowding: Overcrowding the pressure cooker can result in uneven cooking. Make sure to leave enough space for the steam to circulate between the green beans and potatoes for even cooking. If necessary, cook in batches to ensure each ingredient cooks properly.
- Season after cooking: While it’s common to add salt and other seasonings before cooking, it’s best to season your green beans and potatoes after they are cooked. This prevents the salt from drawing out excess moisture during cooking, which can lead to a mushy texture.
- Experiment with different seasonings: Don’t be afraid to get creative with your seasonings! Add a dash of paprika, cumin, or chili powder for a hint of spice, or try sprinkling grated Parmesan or breadcrumbs on top for a crispy finish.
- Add variety: Green beans and potatoes are versatile ingredients that pair well with a variety of flavors. Consider adding other vegetables like carrots, bell peppers, or cherry tomatoes to add color and nutritional value to your dish.
- Adjust liquid levels: If you prefer your green beans and potatoes to have a little sauce or broth, increase the amount of liquid you add to the pressure cooker. This will create a flavorful base that can be soaked up by the vegetables.
- Garnish with fresh herbs: Just before serving, sprinkle some fresh herbs like parsley or chives over the green beans and potatoes to add a burst of freshness and visual appeal.
- Let flavors meld: For even more depth of flavor, allow the cooked green beans and potatoes to sit for a few minutes after cooking. This will give the flavors a chance to meld together, resulting in a more delicious and satisfying dish.
By following these tips, you can achieve perfectly cooked green beans and potatoes in your electric pressure cooker. Feel free to customize the recipe with your favorite herbs, spices, and additional vegetables to make it your own signature side dish. Enjoy the simplicity, convenience, and delicious flavors that come with pressure cooking!
Safety Precautions When Using an Electric Pressure Cooker
While electric pressure cookers are generally safe to use, it’s important to keep a few safety precautions in mind to ensure a worry-free cooking experience. Here are some essential safety tips when using an electric pressure cooker:
- Read the manual: Before using your electric pressure cooker for the first time, thoroughly read the instruction manual provided by the manufacturer. Familiarize yourself with the specific features, functions, and safety guidelines of your model.
- Check the seal: Always ensure that the rubber sealing ring is properly in place and intact before using your electric pressure cooker. A damaged or cracked sealing ring can cause leakage and compromise the effectiveness of the pressure cooker.
- Never overfill: To avoid potential safety hazards, never overfill your pressure cooker. Be sure to follow the manufacturer’s guidelines on the maximum fill level to prevent blockage of the vent and potential pressure build-up.
- Use enough liquid: Properly measure and add the required amount of liquid to your pressure cooker before cooking. Sufficient liquid is needed to create the steam that builds and maintains pressure inside the cooker.
- Keep the steam release away: When operating the pressure cooker, ensure that the steam release valve is positioned away from yourself and others. The steam released during cooking is extremely hot and can cause burns.
- Stay present: Never leave your pressure cooker unattended while it is in operation, especially during the initial build-up of pressure and the cooking process. Being present allows you to monitor the cooker and address any issues that may arise.
- Follow the recommended cooking time: Stick to the recommended cooking time mentioned in your recipe and adjust according to your specific pressure cooker instructions. Overcooking can lead to the risk of over-pressurization and may compromise the safety features of the appliance.
- Properly release pressure: When releasing the pressure after cooking, carefully follow the instructions for quick release or natural release as provided by your pressure cooker’s manufacturer. Mishandling the release process can lead to burns from escaping steam.
- Clean and maintain: Regularly clean your electric pressure cooker after each use, ensuring that all parts are free from food residue and debris. This includes the inner pot, lid, sealing ring, and steam release valve. Refer to the manufacturer’s instructions for specific cleaning guidelines.
- Keep away from children: Keep the electric pressure cooker out of children’s reach to prevent accidents or injuries. The appliance’s hot surfaces and pressurized content can pose a risk to curious young ones.
By following these safety precautions, you can enjoy the convenience and efficiency of cooking with an electric pressure cooker while prioritizing the well-being of yourself and others in the kitchen. Remember, always prioritize safety and remain vigilant throughout the cooking process.
Conclusion
Using an electric pressure cooker to cook green beans and potatoes is a game-changer in the kitchen. It offers numerous benefits in terms of convenience, time-saving, nutrient retention, and flavor enhancement. By following the step-by-step instructions outlined in this article, you can achieve perfectly cooked green beans and potatoes in a fraction of the time compared to traditional cooking methods.
Remember to properly prepare your ingredients, set the appropriate cooking time, and choose between quick release and natural release to achieve your desired texture. Additionally, the provided tips will help you customize and enhance the flavors of your green beans and potatoes, making them a standout side dish for any meal.
As you embark on your culinary journey with an electric pressure cooker, always prioritize safety by following the recommended precautions. Review the manual, check the sealing ring, and be mindful of the steam release during operation. These precautions will ensure a safe cooking experience and provide peace of mind in the kitchen.
With the versatility of an electric pressure cooker, you can expand your culinary repertoire and experiment with various ingredients and flavors. Whether you’re cooking for yourself, your family, or entertaining guests, green beans and potatoes can be transformed into a delightful and nutritious side dish that complements a wide range of main courses.
So, don’t hesitate to explore the world of pressure cooking and embark on the journey of creating delicious, wholesome meals with the help of your electric pressure cooker. Enjoy the convenience, the flavors, and the time-saving benefits as you cook up a storm in your kitchen.