Introduction
Instagram has become a popular platform for sharing moments and connecting with friends, family, and even businesses. While you can easily share photos and videos on your Instagram feed, you might be wondering how to post a link on your Instagram Story. Whether you want to promote a blog post, share a product, or direct followers to a specific website, adding a link to your Instagram Story can give your content more reach and engagement.
With the ability to add links, Instagram Stories offer a valuable opportunity for creators, businesses, and influencers to drive traffic and increase conversions. By incorporating clickable links into your stories, you can direct your followers to external websites or landing pages, making it easier to share relevant content and drive engagement beyond the platform.
In this article, we will guide you through the simple steps to post a link on your Instagram Story. We’ll show you how to add a link to your story, customize it with text and stickers, and share it with your followers. Whether you’re looking to promote your own content or share something valuable with your audience, this step-by-step guide will help you make the most out of your Instagram Stories.
Ready to learn how to post a link on your Instagram Story? Let’s dive in!
Step 1: Open Instagram and tap on your profile picture
The first step to post a link on your Instagram Story is to open the Instagram app on your mobile device. Once you’re on the home screen, locate and tap on your profile picture icon in the bottom right corner. This will take you to your profile page.
By tapping on your profile picture, you will access your Story creation options. Instagram allows you to share temporary photos and videos on your profile in the form of Stories. These Stories last for 24 hours and provide a great opportunity to engage with your followers in a more casual and temporary setting.
Once you’re on your profile page, you’ll notice a camera icon in the top left corner of your screen. This is the button that you’ll use to start creating your Instagram Story. Tap on the camera icon to access the Story creation interface.
The Story creation interface will provide you with various options, such as taking a photo or video using your device’s camera, choosing an existing photo or video from your gallery, or creating a text-based Story. For now, let’s focus on the first two options: taking a photo or choosing an existing photo.
If you want to capture a new moment in real-time, tap on the capture button (usually a white circle at the bottom center of the screen) to take a photo or hold it down to record a video. Alternatively, you can swipe up on the screen to access your gallery and select a photo or video from your device’s library.
Once you’ve chosen or taken the desired photo or video for your Instagram Story, tap on the blue “Next” button in the bottom right corner of your screen to proceed to the next step of adding a link to your Story.
Step 2: Take a photo or choose an existing photo
After opening the Instagram app and tapping on your profile picture to access the Story creation options, the next step is to take a photo or choose an existing photo for your Instagram Story. This step allows you to personalize your Story and make it visually appealing to your followers.
If you want to capture a new photo or video in real-time, tap on the capture button at the bottom center of the screen. The button is usually represented by a white circle. This will activate your device’s camera, allowing you to capture the desired moment. You can tap once to take a photo or hold down the button to record a video.
On the other hand, if you prefer to choose an existing photo or video from your device’s gallery, simply swipe up on the screen. This will open your photo library, where you can browse through your saved images and videos. You can choose any media file that you’ve previously captured or saved on your device.
When selecting a photo or video, consider choosing content that is relevant to the link you plan to share. For example, if you’re promoting a new blog post, you might want to use an image that represents the topic or theme of the article. Alternatively, you can use an eye-catching image or an attention-grabbing visual to capture your followers’ interest.
Instagram offers a range of creative tools and editing options to enhance your photo or video. You can apply filters, adjust brightness and contrast, add text or stickers, and even draw on your media. These tools allow you to add your personal touch and make your Story standout.
Once you’re satisfied with your chosen or captured photo or video, tap on the blue “Next” button in the bottom right corner of the screen. This will take you to the next step of adding a link to your Instagram Story.
Step 3: Tap on the link icon at the top of the screen
Now that you have selected or taken a photo or video for your Instagram Story, it’s time to add a link. Adding a link allows your followers to easily access external websites or resources related to your Story. To do this, you’ll need to tap on the link icon located at the top of the screen.
Once you tap on the link icon, a screen will appear with various options for adding a link. Depending on your account settings and eligibility, you may have different choices available. If you’re a verified user or have a business account with over 10,000 followers, you’ll have the option to add a swipe-up link directly in your Story.
If you have the option available, tap on the “URL” or “Swipe-up” option to proceed. This will open a new screen where you can input the desired link. It’s important to note that the link should be a valid URL starting with “http://” or “https://”.
Simply paste the link into the provided field or type it manually. Make sure to double-check the URL for accuracy, as any mistakes can lead to broken links or redirects to the wrong page. It’s always a good idea to click on the link yourself to verify that it is properly working and directs users to the intended destination.
Once you have entered the URL, tap on the “Done” or “Submit” button, depending on your device and Instagram version. This will save the link and take you back to the Story creation interface.
If you don’t have the option to add a swipe-up link, don’t worry! You can still add a link by using the creative tools available on Instagram. For example, you can add text to your Story, and within that text, include a shortened hyperlink. While this may not provide the same ease of access as a swipe-up link, it still allows your followers to manually type in the URL and visit the desired webpage.
With the URL added, you’re one step closer to sharing your link on your Instagram Story. In the next step, we’ll explore how you can customize your Story with text, stickers, or other elements to make it more engaging and visually appealing.
Step 4: Paste or type the desired link
Now that you have tapped on the link icon and entered the link screen, it’s time to paste or type in the desired link for your Instagram Story. This step is crucial as it allows your followers to easily access the external website or resource you want to share.
If you have the option to add a swipe-up link directly in your Story, you will see a field where you can paste or type in the desired URL. Make sure to copy the link from the source you want to share, such as a blog post, a product page, or any other relevant website. Once you’ve copied the link, go back to the Instagram app and paste it in the provided field.
If you don’t have the swipe-up link option, you can still add a link by using creative workarounds. In this case, you can use the text tool, stickers, or other creative elements to incorporate the link in your Story. Type or paste the desired URL within the text or sticker fields, ensuring it is visible and easily clickable by your followers.
Regardless of the method you choose, it’s essential to ensure the accuracy of the link. Double-check the URL to make sure there are no typos or errors that might lead to broken links. A broken link can frustrate your audience and hinder the success of your Instagram Story.
To verify that the link is working correctly, you can click on it within the app. This will open the link in a built-in web viewer, allowing you to confirm that it directs users to the intended webpage or resource. It is important to test the link before sharing your Story to ensure a seamless experience for your followers.
Once you have entered the desired link and confirmed its accuracy, click on the “Done” or “Submit” button (depending on your device and Instagram version) to save the link. This will take you back to the Story creation interface, where you can continue customizing your Story with text, stickers, and other engaging elements.
Remember, adding a link to your Instagram Story gives you an opportunity to share valuable resources, promote your content, or drive traffic to specific websites. By pasting or typing the correct link, you’re one step closer to making your Story more interactive and engaging for your audience.
Step 5: Add text, stickers, or other elements to your story
Once you have entered the desired link for your Instagram Story, it’s time to make it visually appealing and engaging by adding text, stickers, or other elements. These creative features allow you to customize your Story and make it stand out to your followers.
When you’re back in the Story creation interface, you’ll notice a variety of options at the top of the screen. These options include text, stickers, drawings, and more. Let’s explore how you can use these tools to enhance your Instagram Story:
Text: Tap on the “Aa” icon to add text to your Story. You can choose from different font styles, sizes, and color options. Use text to provide context, captions, or even to highlight specific details related to your Story. You can also position the text anywhere on the screen by dragging it with your finger.
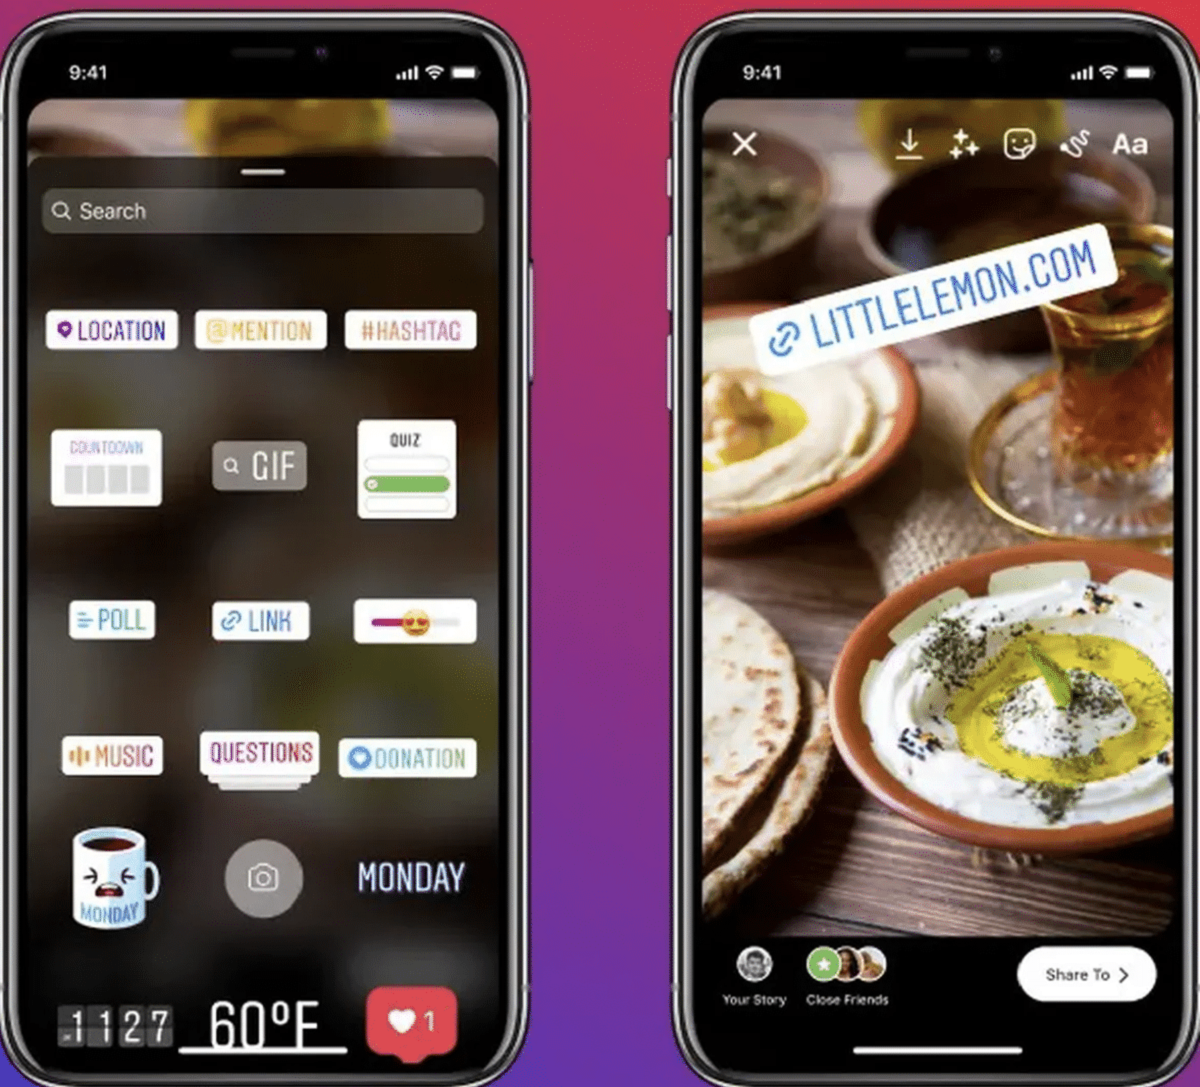
Stickers: Tapping on the smiley face icon will open a range of stickers that you can add to your Story. These stickers include emojis, GIFs, location tags, poll stickers, countdowns, and more. Stickers can add personality and engage your audience in interactive ways. For example, you can use poll stickers to gather opinions or use the question sticker to encourage viewers to ask you questions.
Drawings: The pen icon allows you to draw on your Story using various brush sizes and colors. Drawing on your Story can be a fun and creative way to highlight specific elements, create doodles, or emphasize important points. Get creative and let your imagination run wild!
Other Elements: Instagram also offers a range of interactive elements such as music, filters, effects, and face filters that you can add to your Story. These features can enhance the mood or theme of your Story, making it more engaging and captivating for your viewers.
Take your time to experiment and play around with the different options available. Mix and match text, stickers, drawings, and other elements to create a visually appealing and engaging Instagram Story. Remember to keep your design cohesive and aligned with your brand or the message you want to convey.
While customizing your Story, ensure that your link is still visible and easy to access. You can position the link strategically by placing text or stickers around it, drawing attention to it without overwhelming the overall aesthetic of your Story.
Once you’re satisfied with the design of your Story, you’re ready for the final step: sharing it with your followers.
Step 6: Share your story with your followers
After you have added all the desired elements to your Instagram Story and customized it to your liking, it’s time to share your creation with your followers. Sharing your Story allows them to view and interact with the content you’ve created, including the link you’ve added.
To share your Story, simply tap on the “Your Story” button at the bottom of the screen. This will publish your Story to your profile, where all your followers can see it. In addition to appearing on your profile, your Story will also be visible at the top of your followers’ feeds for 24 hours.
When your followers view your Story, they will have the option to swipe up on the screen (if the swipe-up link feature is available) or manually enter the URL you’ve included in the text or sticker. This allows them to visit the external website or resource you’ve shared, providing them with a seamless transition from your Story to the linked page.
Keep in mind that the visibility of your Story depends on your privacy settings and the size of your audience. If you have a private account, only approved followers will be able to view your Story. If you have a public account, any Instagram user can see your Story as long as they follow you.
It’s also important to note that Instagram provides insights and analytics for your Stories. You can access these by swiping up from the main Instagram screen and tapping on the “Insights” option. The analytics will show you the number of views, interactions, and clicks on your Story link, allowing you to track the performance and effectiveness of your shared content.
To enhance the visibility of your Story, you can also consider using relevant hashtags, geotags, and tagging other users or brands within your Story. This can help you reach a wider audience and increase engagement.
Lastly, don’t forget to engage with your followers once your Story is live. Respond to comments, answer questions, and encourage further interaction. This will not only strengthen your connection with your audience but also increase the chances of users clicking on the link and exploring the external content you’ve shared.
Now that you’ve successfully shared your Story with your followers, you can sit back and monitor the engagement, reach, and impact of your content. Remember to regularly experiment, analyze, and optimize your Instagram Story approach to continually improve your connection with your followers and achieve your desired goals.
Conclusion
Posting a link on your Instagram Story is a powerful tool for driving traffic, promoting content, and engaging with your audience. By following the simple steps outlined in this guide, you can effortlessly add links to your Stories and provide your followers with a seamless way to access external websites or resources.
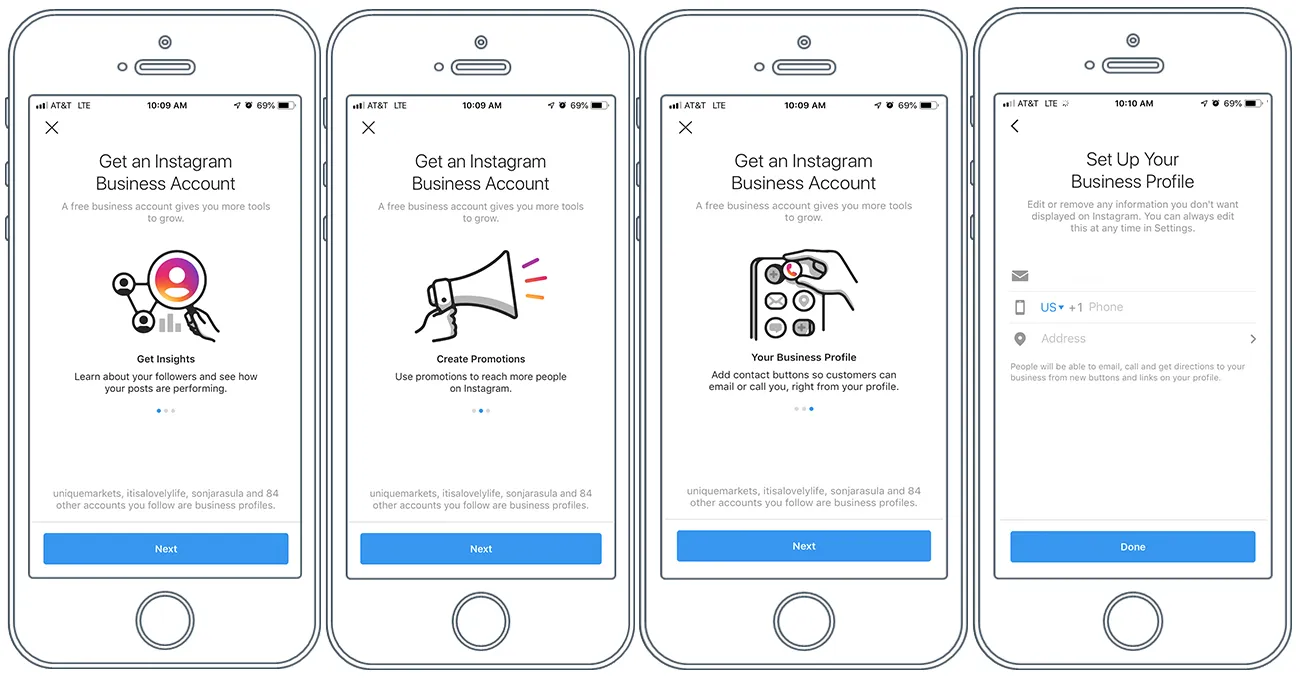
Keep in mind that the ability to add swipe-up links directly in your Story depends on your account status, such as being a verified user or having a business account with over 10,000 followers. However, even if you don’t have access to swipe-up links, you can still incorporate URLs in your Stories by using text, stickers, and other creative elements.
Remember to choose or capture visually appealing photos or videos for your Stories to capture the attention of your followers. Enhance your Stories with text, stickers, drawings, and other elements to make them engaging and interactive. Balancing aesthetics with the visibility of your link will ensure a cohesive and impactful presentation.
Once your Story is ready, share it with your followers by tapping the “Your Story” button. Monitor the engagement and performance of your Stories using Instagram’s Insights tools. Take advantage of hashtags, geotags, and mentions to reach a wider audience and encourage interaction.
Engaging with your followers by responding to comments and questions will strengthen your connection and encourage further exploration of the link you’ve shared. Keep experimenting, analyzing, and optimizing your Instagram Story strategy to continuously improve your reach and engagement.
Now it’s time to unleash your creativity and make the most out of your Instagram Stories. Start sharing compelling content, leveraging the power of links, and watch as your audience connects with your brand, products, and ideas in an exciting and interactive way.