Introduction
Welcome to the world of Instagram! With over a billion active users worldwide, Instagram has become one of the most popular social media platforms for sharing photos and videos. Whether you’re an aspiring photographer, a business owner, or just someone who loves capturing moments, Instagram provides a platform to showcase your creativity and engage with a global community.
In this guide, we will walk you through the process of posting on Instagram, from creating your account to exploring its various features and interacting with other users. By the end of this guide, you’ll have a solid understanding of how to navigate the app and make the most of your Instagram experience.
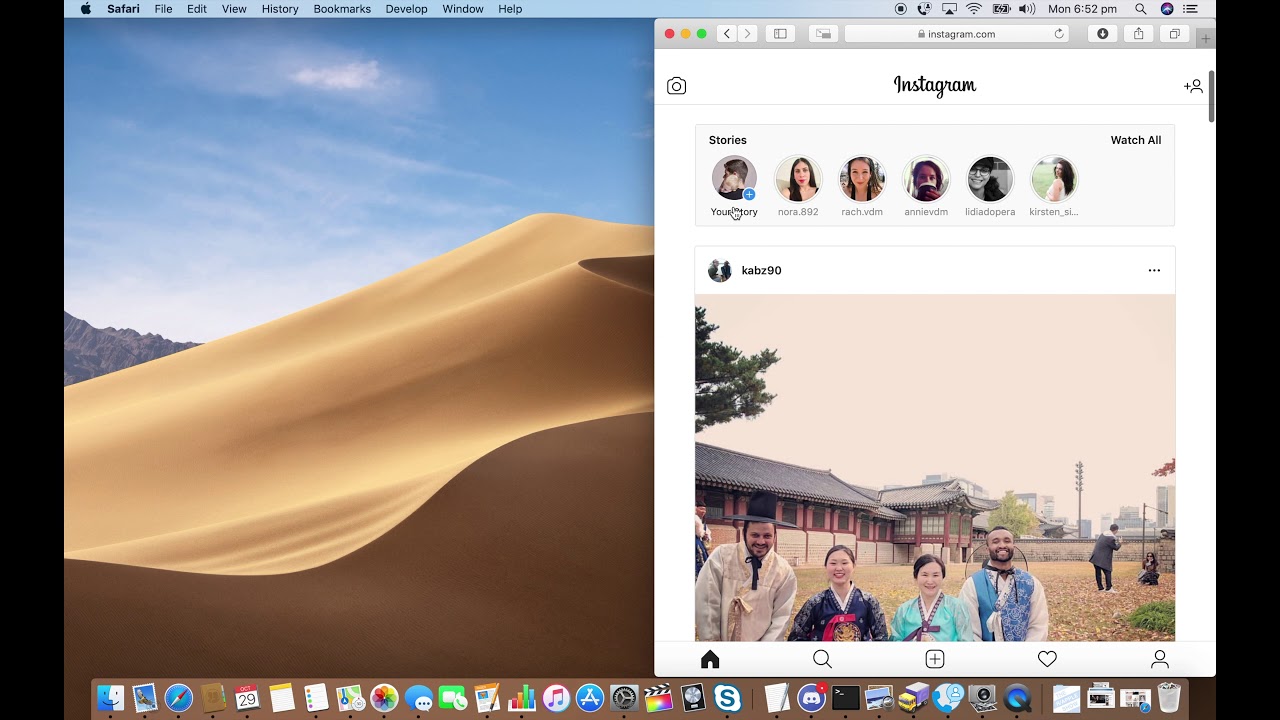
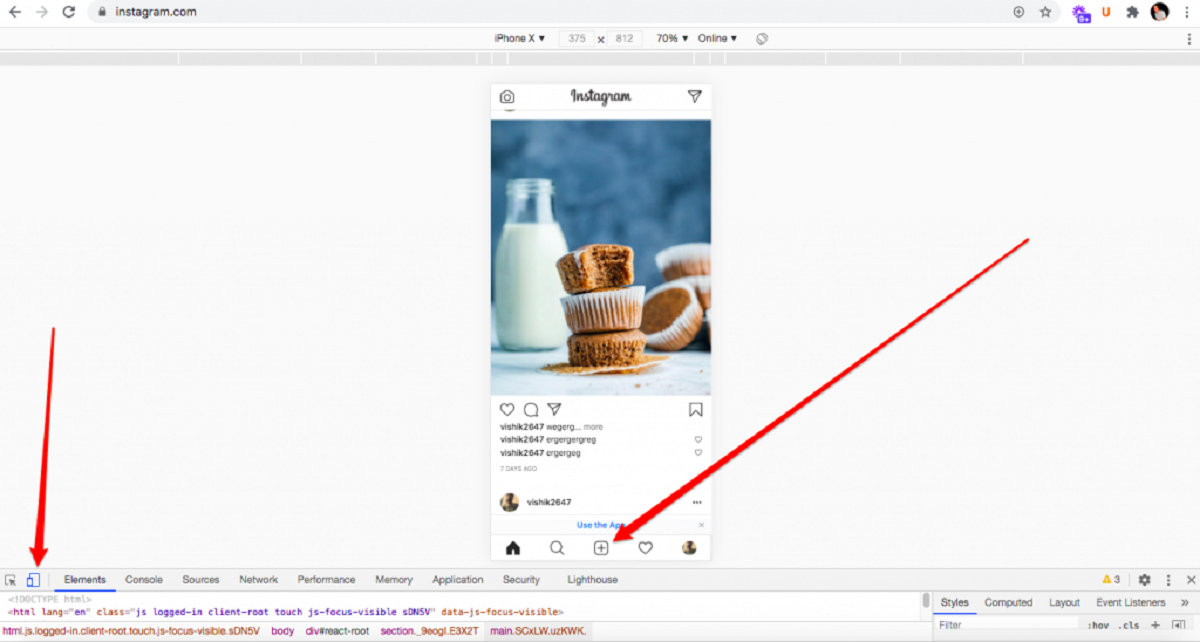
Before we dive into the specifics, it’s important to note that Instagram is primarily a mobile app. While you can access some features on the desktop version, the full functionality is best experienced through the mobile app. So make sure you have the Instagram app downloaded on your device to follow along with the steps outlined in this guide.
Whether you’re looking to share your travel adventures, promote your business, or connect with friends and family, Instagram offers a range of features to help you achieve your goals. From posting photos and videos to engaging with other users through likes, comments, and direct messages, you’ll soon discover that Instagram is much more than just a photo-sharing platform.
So, if you’re ready to embark on your Instagram journey, let’s get started by creating your Instagram account. Remember, the possibilities are endless, and your creativity is the key to making your Instagram presence truly unique. Let’s dive in and unlock the potential of this exciting social media platform!
Creating an Instagram Account
To begin using Instagram, you’ll need to create an account. Follow these steps to get started:
- Download the Instagram app: Go to your device’s app store and search for “Instagram”. Tap on the app and click on “Install” to download it.
- Sign up: Once the app is installed, open it and tap on “Sign Up”. You have the option to sign up using your email address or phone number. Alternatively, you can sign up with your Facebook account by tapping on “Log in with Facebook”. If you choose to sign up with your email address or phone number, you’ll need to create a username and password for your Instagram account.
- Customize your profile: After signing up, you’ll be prompted to customize your profile. Add a profile photo and a brief bio to let people know who you are. You can also add a website link if you have one.
- Connect with friends: Instagram will give you the option to find friends from your contact list or connect with friends on Facebook. You can also skip this step and do it later.
- Explore your interests: Instagram will suggest accounts for you to follow based on your interests. You can choose to follow these accounts or skip this step and explore on your own later.
Once you’ve completed these steps, you’re all set to start using Instagram. The app will take you to your home feed, where you’ll see photos and videos from the accounts you’re following. From here, you can start exploring and interacting with the Instagram community.
It’s important to note that Instagram has certain community guidelines and terms of service that you need to adhere to while using the platform. Ensure that you familiarize yourself with these guidelines to maintain a positive and respectful presence on Instagram.
Now that you have your Instagram account ready, let’s dive into understanding the Instagram app and how to navigate its various features.
Understanding the Instagram App
Once you’ve created your Instagram account, it’s important to familiarize yourself with the layout and key features of the app. Let’s explore what each section of the app does:
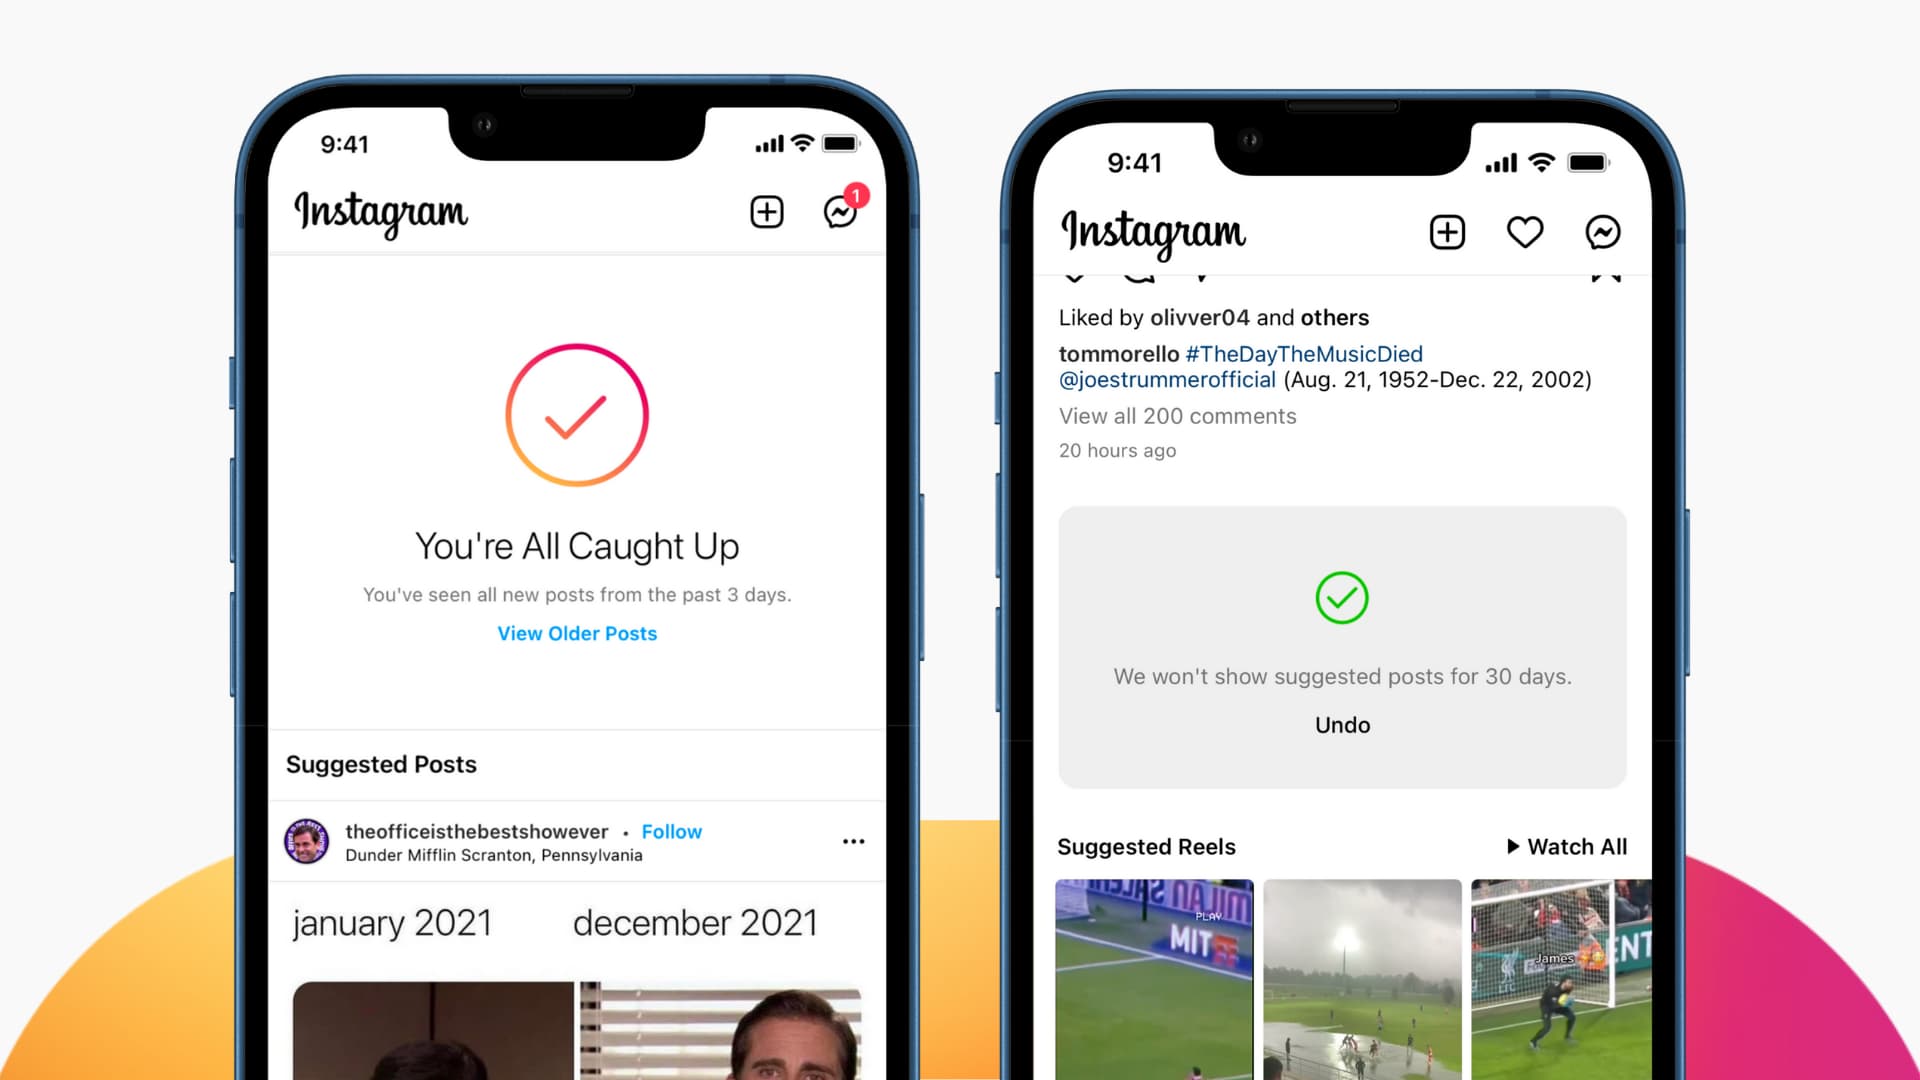
- Home Feed: This is the first screen you’ll see when you open the Instagram app. It displays a chronological feed of photos and videos from the accounts you follow.
- Explore: The Explore tab allows you to discover new content, accounts, and trends on Instagram. It is tailored to your interests and shows you posts from accounts you may not be following yet.
- Notifications: The Notifications tab alerts you to activity on your account, such as likes, comments, and followers. It also shows you activity from accounts you follow.
- Profile: This is your personal profile, where you can see and edit your posts, bio, followers, and following. You can also access your settings and privacy options from here.
- Direct Messages: The Direct Messages section allows you to have private conversations with other users on Instagram. You can send text messages, photos, videos, or even create group chats.
In addition to these main sections, you’ll also find buttons for posting content, searching for specific accounts or hashtags, and accessing additional features like Instagram Stories and IGTV. Understanding the layout of the app will help you navigate it more effectively and make the most of your Instagram experience.
Instagram’s visual-based platform is designed to inspire creativity and self-expression. As you explore the app, you’ll notice that many users focus on sharing high-quality photos and videos. From stunning landscapes to delicious food shots, Instagram is a hub for visual inspiration.
It’s worth mentioning that Instagram has a strong focus on engagement and community. Users can like and comment on posts, share posts to their own stories, and even save posts for later. Engaging with other users by leaving thoughtful comments and liking their content can help you build connections and grow your own following on the platform.
Now that you have a better understanding of the Instagram app’s layout and key features, let’s move on to the next section and discover how to navigate and interact with your Home Feed.
Navigating the Instagram Home Feed
The home feed is the first screen you’ll see when you open the Instagram app. It’s where you’ll find a stream of photos and videos from the accounts you follow. Here’s how to navigate your home feed:
Scrolling: To view more posts, simply swipe up or scroll down on your screen. Instagram uses an algorithm to show you content that it thinks you’ll find interesting, so the posts you see may not be in chronological order.
Double-Tap to Like: When you come across a post that you enjoy, you can double-tap on the photo or tap on the heart-shaped icon below it to like it. The user who posted the content will be notified of your like.
Viewing Captions and Comments: To read the caption and comments on a post, simply tap on the content itself. You can swipe left or right on the photo to view multiple photos in a post, if applicable.
Interacting with Posts: Below each post, you’ll find icons that allow you to interact with the content. The icons include a heart for liking, a speech bubble for commenting, and a paper airplane for sharing via direct message or to your story.
Following Hashtags: Instagram allows you to follow hashtags that interest you. By following a hashtag, you’ll see posts related to that hashtag in your home feed, even if you don’t follow the accounts that posted them. To follow a hashtag, simply search for the hashtag in the search bar and tap on “Follow”.
Exploring Posts: If you come across a post from an account that catches your attention, you can tap on the account’s username or profile photo to visit their profile and explore more of their content. From there, you can follow the account to see their future posts in your home feed.
Muting Accounts: If you find that a particular account’s posts are clogging up your home feed or you no longer wish to see their content, you have the option to mute them. To do this, go to the account’s profile, tap on the three dots in the top right corner, and select “Mute”. You can choose to mute their posts, stories, or both.
Instagram’s home feed is designed to be a personalized and engaging experience. As you interact with posts, like and comment on content, and discover new accounts to follow, your home feed will become more tailored to your preferences.
Now that you know how to navigate your home feed, let’s move on to the next section and explore how to post your own photos on Instagram.
Posting Photos on Instagram
One of the main features of Instagram is the ability to share your own photos with your followers. Here’s how to post photos on Instagram:
- Tap on the plus icon at the bottom center of your screen. This will open your photo gallery on your device.
- Select the photo you want to post. You can choose from your camera roll or take a new photo using the Instagram camera.
- Once you’ve selected the photo, you can apply filters to enhance its appearance. Swipe left or right to choose from a range of filters, or tap on “Edit” to manually adjust the brightness, contrast, and other settings.
- Caption your photo: Tap on the “Write a caption…” field and add a caption to your photo. You can also mention other Instagram users by typing “@” followed by their username.
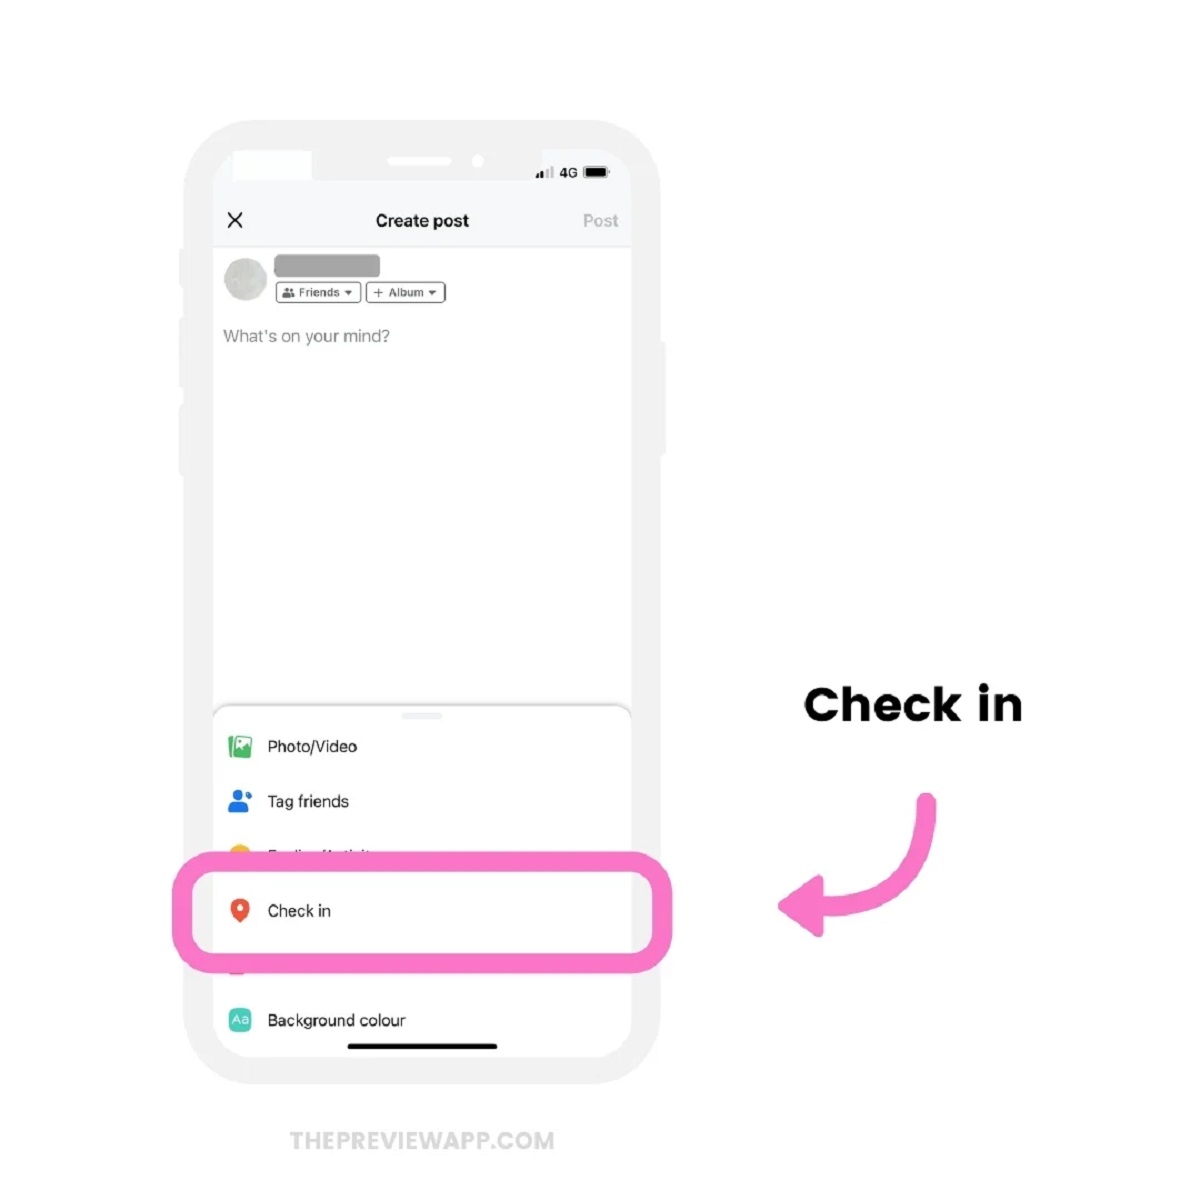
- Add location: If your photo was taken at a specific location, you can add it by tapping “Add location” and searching for the place. This can help your photo be discovered by others who are interested in that location.
- Tag people: If there are people in your photo, you can tag them by tapping “Tag people” and searching for their Instagram username. This will notify them that they have been tagged in your photo.
- Add alt text: Instagram provides the option to add alternative text for visually impaired users. This helps make your content more accessible. Tap on “Advanced Settings” and then “Write Alt Text” to add a description of your photo.
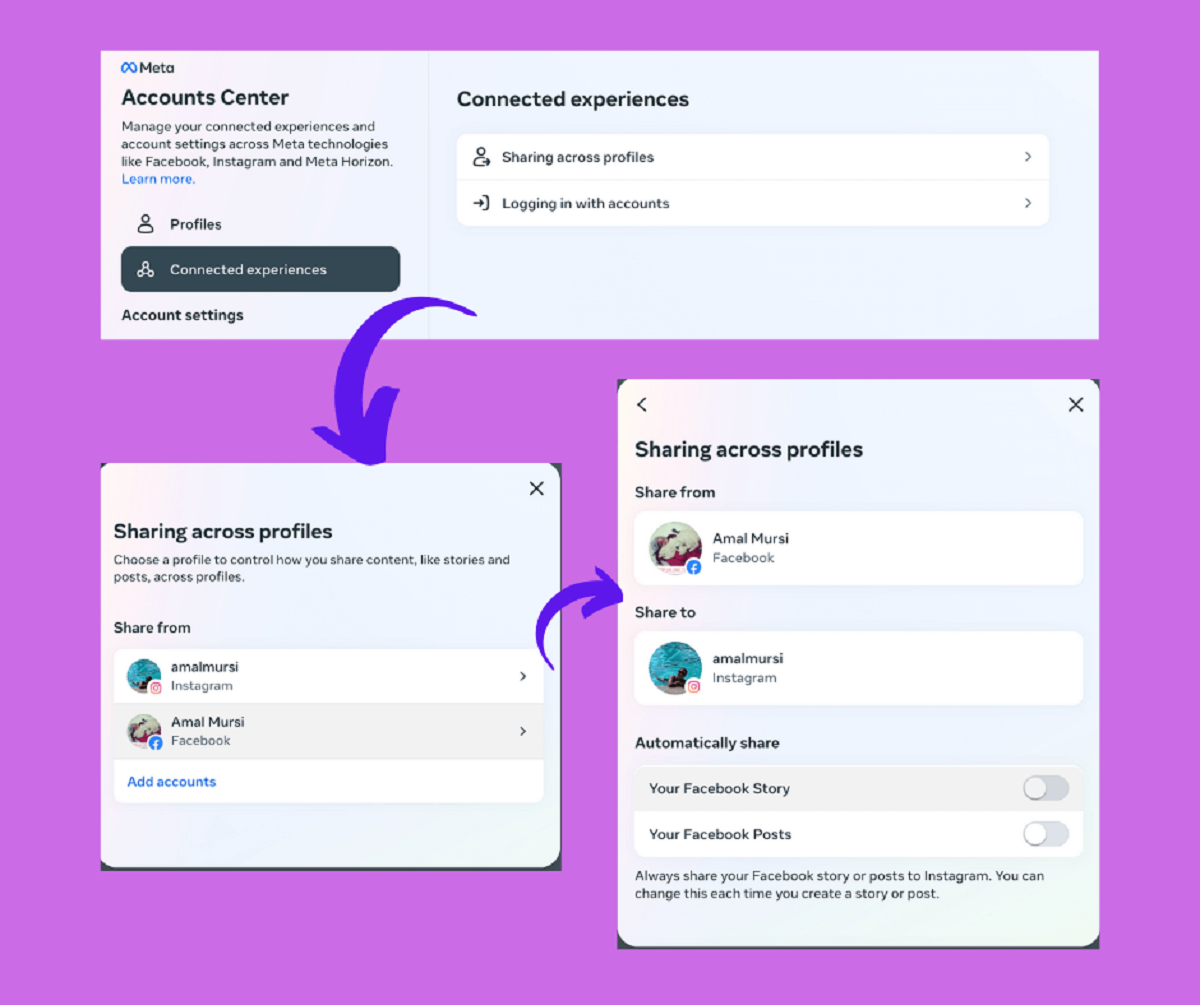
- Choose additional settings: You can select whether to share your photo to other social media platforms connected to your Instagram account, such as Facebook or Twitter. You can also choose to enable or disable comments on your post.
- When you’re ready, tap on “Share” to publish your photo. It will be visible to your followers in their home feed.
Once you’ve posted your photo, it’s a good practice to engage with your followers by responding to comments and engaging in conversations. This helps build a sense of community and strengthens your connection with your audience.
Keep in mind that while Instagram is primarily a visual platform, captions play an important role in providing context and telling a story about your photo. Take the time to craft thoughtful captions that complement your visuals.
Now that you know how to post photos on Instagram, let’s explore how you can enhance your photos using filters and editing tools in the next section.
Enhancing Your Instagram Photos with Filters and Editing Tools
One of the key elements that makes Instagram so popular is its range of filters and editing tools that allow you to enhance the appearance of your photos. Here’s how you can make your Instagram photos stand out:
Filters: Instagram offers a wide selection of filters that can dramatically change the look and feel of your photo. After selecting a photo to post, swipe left or right to cycle through the various filters. Each filter has a different effect, from boosting colors to adding vintage or black and white tones. Experiment with different filters to find one that enhances your photo’s aesthetic.
Manual Editing Tools: If you prefer more control over the editing process, you can tap on the “Edit” button to access Instagram’s manual editing tools. Here, you can adjust various aspects of your photo, such as brightness, contrast, saturation, and more. Use these tools to fine-tune the details of your photo and achieve the desired look.
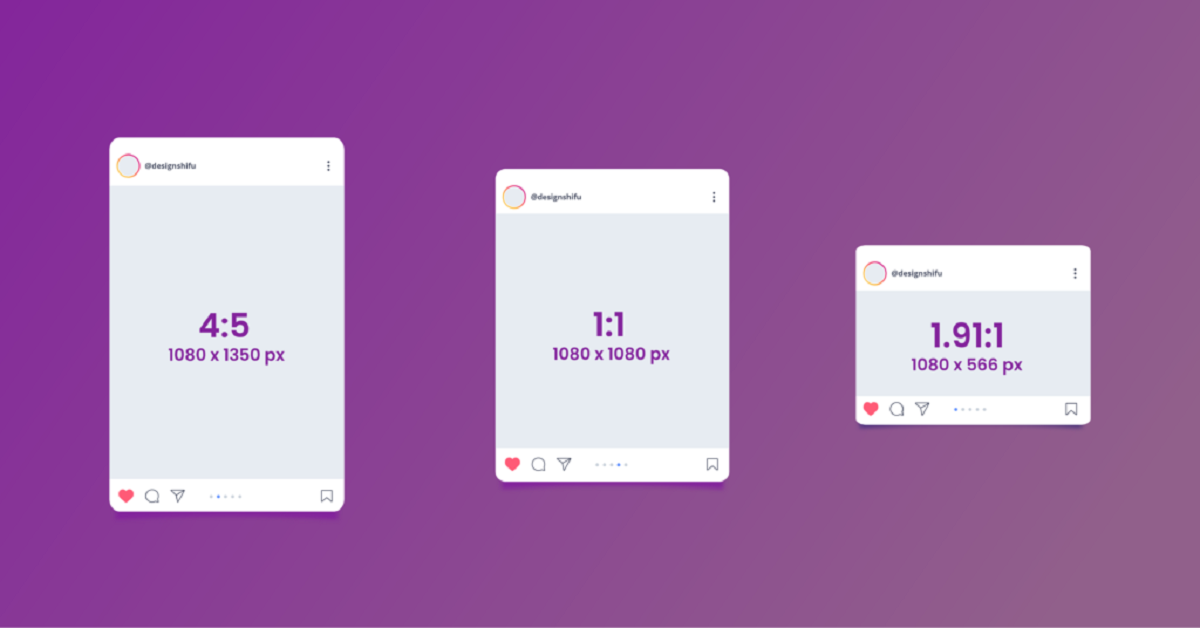
Crop and Rotate: Instagram also allows you to crop and rotate your photos to achieve the desired composition. Additionally, you can adjust the aspect ratio of your photo to better fit Instagram’s square format or use the original aspect ratio for a more cinematic look.
Vignette and Tilt-Shift: For a creative touch, Instagram offers the option to add a vignette effect or apply a tilt-shift effect to your photos. The vignette effect darkens the edges of the photo, drawing attention to the central subject. The tilt-shift effect blurs specific areas of the photo, creating a shallow depth of field effect.
Lux: Instagram’s Lux feature allows you to enhance the exposure and contrast of your photo with a single tap. It can help bring out details in dark or low-contrast images, instantly making your photo more visually appealing.
Experiment with these filters and editing tools to create a unique visual style for your Instagram feed. Remember to maintain consistency in your editing choices to create a cohesive aesthetic.
In addition to Instagram’s built-in editing tools, there are also third-party photo editing apps available that can further enhance your photos. These apps offer a wider range of editing options, including advanced adjustments, filters, and effects. Some popular third-party photo editing apps include VSCO, Snapseed, and Lightroom Mobile.
Now that you’ve learned how to enhance your Instagram photos with filters and editing tools, let’s move on to the next section and discover how to add captivating captions and tag other users in your posts.
Adding Captions and Tagging Users in Instagram Posts
In addition to visually captivating photos, Instagram allows you to add captions and tag other users in your posts. These features help you provide context to your photos and engage with other Instagram users. Here’s how to add captions and tags:
Adding Captions: After selecting or editing your photo, you’ll have the option to add a caption. Captions can be up to 2,200 characters long, providing you with ample space to share your thoughts, tell stories, or provide additional information about the photo. Take this opportunity to be creative, informative, or even add some humor to your captions.
Using Hashtags: Hashtags play a significant role in increasing the visibility of your posts on Instagram. They allow users to search and discover content related to specific topics or themes. To add hashtags to your caption, simply use the “#” symbol followed by relevant keywords or phrases (e.g., #travel, #foodie, #sunsets). Including popular and relevant hashtags can help your post reach a wider audience and potentially gain more engagement.
Mentioning Users: If your photo features other Instagram users or if you simply want to bring someone’s attention to your post, you can tag them by mentioning their username in your caption. To mention a user, use the “@” symbol followed by their username (e.g., @username). This will notify the user that they have been mentioned in your post and increase the chances of them engaging with it.
Tagging Locations: If your photo was taken at a specific location, you can also tag that location in your post. Instagram has a database of various places, including restaurants, landmarks, and cities. To tag a location, tap on “Add location” and search for the desired place. This can help your post to be discovered by people who are interested in that location or searching for posts from that area.
When adding captions and tags to your posts, try to keep them relevant, concise, and engaging. Captions that tell a story, ask questions, or inspire conversation are more likely to grab your audience’s attention and encourage them to interact with your content.
It’s worth noting that you can also add captions and tags to your Instagram Stories, allowing you to provide context and engage with your audience in a more ephemeral format.
Now that you know how to add captions and tags to your Instagram posts, let’s explore the next section and discover how to use Instagram’s story feature to share your day-to-day moments.
Using Instagram’s Story Feature
Instagram’s Story feature allows you to share moments from your day in a more ephemeral and interactive format. Stories are temporary posts that appear at the top of your followers’ feeds for 24 hours. Here’s how you can use Instagram’s Story feature:
Creating a Story: To create a new story, tap on the camera icon in the top left corner of your home feed or swipe right from the home feed. You can capture photos or record videos directly from the Instagram app, or you can choose an existing photo or video from your device’s gallery.
Adding Text and Drawing: Once you’ve captured or selected a photo or video, you can add text, stickers, emojis, and drawings to your Story. Tap on the screen to access the text and drawing tools. You can even change the font style, color, and size of the text to personalize your Story further.
Adding Interactive Stickers: Instagram offers a range of interactive stickers that you can add to your stories. These stickers allow you to poll your audience, conduct Q&A sessions, add location tags, and more. Explore the sticker options to engage with your followers and make your stories more interactive.
Adding Filters and Effects: Similar to photo posts, you can apply filters and effects to your Story by swiping left or right on the screen. Instagram offers a variety of filters and effects that can add a creative touch or enhance the mood of your story.
Sharing Your Story: Once you’re satisfied with your Story, you can share it with your followers by tapping on “Your Story” at the bottom left corner of the screen. Alternatively, you can choose to send your story as a direct message to specific users or add it to your highlights, which are saved Stories that can be displayed on your profile.
Instagram Stories offer a more informal and casual way of sharing your daily moments with your audience. With features like polls and Q&A sessions, you can foster engagement and interaction with your followers. Don’t forget to utilize the swipe-up feature (if available to your account) to direct your audience to external links or content you want to share.
Furthermore, Instagram allows you to save your Stories to your device or archive them privately on the app. This way, you can revisit or repurpose your Stories for future use.
Now that you know how to use Instagram’s Story feature, let’s move on to the next section and explore how you can share multiple photos and videos in a single post using Instagram’s album feature.
Sharing Multiple Photos and Videos in a Single Post
Instagram’s album feature allows you to share multiple photos and videos in a single post, creating a cohesive storytelling experience for your audience. Here’s how you can use this feature:
- Tap on the plus icon at the bottom center of your screen to create a new post.
- Select the first photo or video you want to include in your post from your gallery.
- Tap on the icon that looks like stacked squares at the bottom right corner of the selected photo or video. This will add it to your album post.
- Continue selecting and adding more photos or videos to your album post by tapping on the stacked squares icon for each one.
- You can rearrange the order of your photos or videos by tapping and holding on a photo or video, then dragging it to the desired position.
- Apply filters and edit each photo or video individually by tapping on them and using the available editing tools.
- Add captions, tags, and other desired elements to your album post.
- Tap on “Share” to publish your post. It will appear in your followers’ home feed as a swipeable album.
Sharing multiple photos and videos in a single post allows you to highlight a series of moments, an event, a step-by-step tutorial, or simply tell a visual story with more impact. Each photo or video in the album can be interacted with individually, allowing your audience to engage with specific content within the post.
When posting an album, it’s important to choose photos or videos that work well together and have a cohesive theme. Consider the order and flow of the content to create a seamless storytelling experience for your audience.
This feature is especially useful when you have a collection of related visuals that you want to share without overwhelming your followers with multiple individual posts. It saves space on your profile and provides a neat and organized way to share multiple visuals in one go.
Now that you know how to share multiple photos and videos in a single post, let’s move on to the next section and explore Instagram’s IGTV feature, which allows you to share long-form videos with your audience.
Exploring Instagram’s IGTV
Instagram’s IGTV feature is a platform within the app that allows you to share and watch long-form videos. It is designed to provide a space for creators, businesses, and influencers to engage with their audience in a more immersive way. Here’s how you can explore IGTV:
Accessing IGTV: To access IGTV, open the Instagram app and tap on the IGTV icon located at the top right corner of your home feed. Alternatively, you can download the separate IGTV app from your device’s app store.
Browsing IGTV Content: Once you’re in the IGTV section, you can browse through a range of videos from a variety of creators. The content is personalized based on your interests, who you follow, and what you engage with on Instagram.
Discovering New Channels: IGTV allows you to discover new channels and content creators based on your interests. You can explore content by browsing through different categories or by watching videos recommended to you.
Watching IGTV Videos: To watch a video on IGTV, simply tap on the thumbnail of the video you’re interested in. The video will start playing in full-screen mode, providing a seamless and immersive viewing experience.
Interacting with IGTV Videos: While watching an IGTV video, you have the option to like, comment, and share the video with others. You can also follow the creator’s channel to stay updated with their latest content.
Creating Your Own IGTV Channel: If you’re interested in creating your own IGTV channel, you can do so by tapping on the settings icon in the top right corner of the IGTV section and selecting “Create Channel”. This allows you to upload and share your long-form videos with your followers and IGTV viewers.
IGTV provides an opportunity for you to share more in-depth content, such as tutorials, behind-the-scenes footage, interviews, and vlogs. It gives you the flexibility to connect and engage with your audience in a longer format, catering to those who prefer more extensive video content.
As a viewer, IGTV allows you to consume content from your favorite creators in a more dedicated and immersive setting. You can discover new channels, find content that aligns with your interests, and engage with the videos through likes and comments.
Now that you’re familiar with Instagram’s IGTV feature, let’s move on to the next section and explore how you can tag locations in your Instagram posts.
Tagging Locations in Instagram Posts
Tagging a location in your Instagram posts can be a powerful way to connect with a wider audience and increase the visibility of your content. It allows users to explore posts from the same location and discover new places, experiences, and recommendations. Here’s how you can tag locations in your Instagram posts:
- While creating a new post, tap on “Add location” below the caption field.
- Start typing the name of the location or select it from the list of suggestions that appear as you type.
- Choose the correct location from the list that appears. It may include specific addresses, landmarks, or establishments.
- Once you’ve selected the location, it will appear below your caption and other details in your post.
- You can also search for a specific location by tapping on the search icon next to “Add location” and entering the name of the place you want to tag.
Tagging a location in your posts can provide context and relevance to your content. It can help your post reach a larger audience, particularly those who are interested in or searching for content related to that specific location.
Tagging locations is especially beneficial for businesses, travel influencers, and anyone promoting local activities or events. It helps users discover your content when they are looking for recommendations or information about a particular place.
Additionally, if your post features a business or establishment, tagging the location can increase the chances of your post being seen by people who are interested in that specific venue or in the same area.
While tagging locations can boost the visibility of your posts, it is important to remember to respect privacy and adhere to guidelines. Be mindful of posting sensitive or private locations, and always follow any legal restrictions or permissions required for sharing certain places.
Now that you know how to tag locations in your Instagram posts, let’s move to the next section and explore another crucial aspect of Instagram’s algorithm – using hashtags to increase your post’s visibility.
Using Hashtags to Increase Visibility
Hashtags play a vital role in increasing the visibility of your Instagram posts and reaching a wider audience. By using relevant and popular hashtags, you can increase the likelihood of your posts being discovered by users who are interested in the content you are sharing. Here’s how you can effectively use hashtags on Instagram:
- Research Popular Hashtags: Take the time to research and understand which hashtags are popular within your niche or industry. Explore what hashtags influencers and competitors in your field are using to gain insights and identify the ones that are most relevant to your content.
- Mix Popular and Niche Hashtags: It’s beneficial to use a combination of popular hashtags and niche-specific hashtags. Popular hashtags have a higher search volume, which can increase your post’s visibility, but it also means high competition. Niche-specific hashtags are more targeted and can help your post reach a more relevant audience.
- Be Specific and Relevant: Use hashtags that accurately describe the content of your post and are relevant to your target audience. Generic or overly broad hashtags may attract a large number of unrelated users, resulting in lower engagement. Be specific to attract users who are genuinely interested in your content.
- Create Branded Hashtags: Consider creating a unique hashtag for your brand or campaign. Branded hashtags can help you build a community around your content and make it easier for users to discover and engage with posts related to your brand.
- Mix Industry Hashtags with Trending Hashtags: Stay up-to-date with trending topics and events to take advantage of relevant hashtags. By combining industry-specific hashtags with trending hashtags, you can increase the chances of your posts appearing in popular search results.
- Use Hashtags in Stories: You can also use hashtags in your Instagram Stories to increase their discoverability. Simply type the hashtag using the text tool or use the hashtag sticker feature to add relevant hashtags to your story.
- Engage with Hashtags: Hashtags are not only for discoverability but also for engaging with others. Explore posts under specific hashtags and engage by liking, commenting, and following accounts that share similar content. This can help you build relationships and expand your reach.
Remember, it’s important to strike a balance with the number of hashtags you use. While Instagram allows up to 30 hashtags per post, it’s recommended to use a mix of popular and niche-specific hashtags that are relevant to your content and audience. Using too many hashtags may come across as spammy and dilute the quality of your post.
Monitoring the performance of your hashtags can help you identify which ones are generating the most engagement. Keep track of which hashtags are driving the most visibility and adjust your hashtag strategy accordingly.
Now that you have a better understanding of using hashtags to increase visibility on Instagram, let’s explore how you can manage and edit your posts in the next section.
Managing and Editing Instagram Posts
Instagram provides various tools and features to help you manage and edit your posts. Whether you want to edit the content, delete a post, or make adjustments to the caption, Instagram offers flexibility and control over your published content. Here’s how you can manage and edit your Instagram posts:
- Viewing Your Posts: To see all your published posts, go to your profile by tapping on your profile picture in the bottom right corner of the screen. All your posts will be displayed in a grid format.
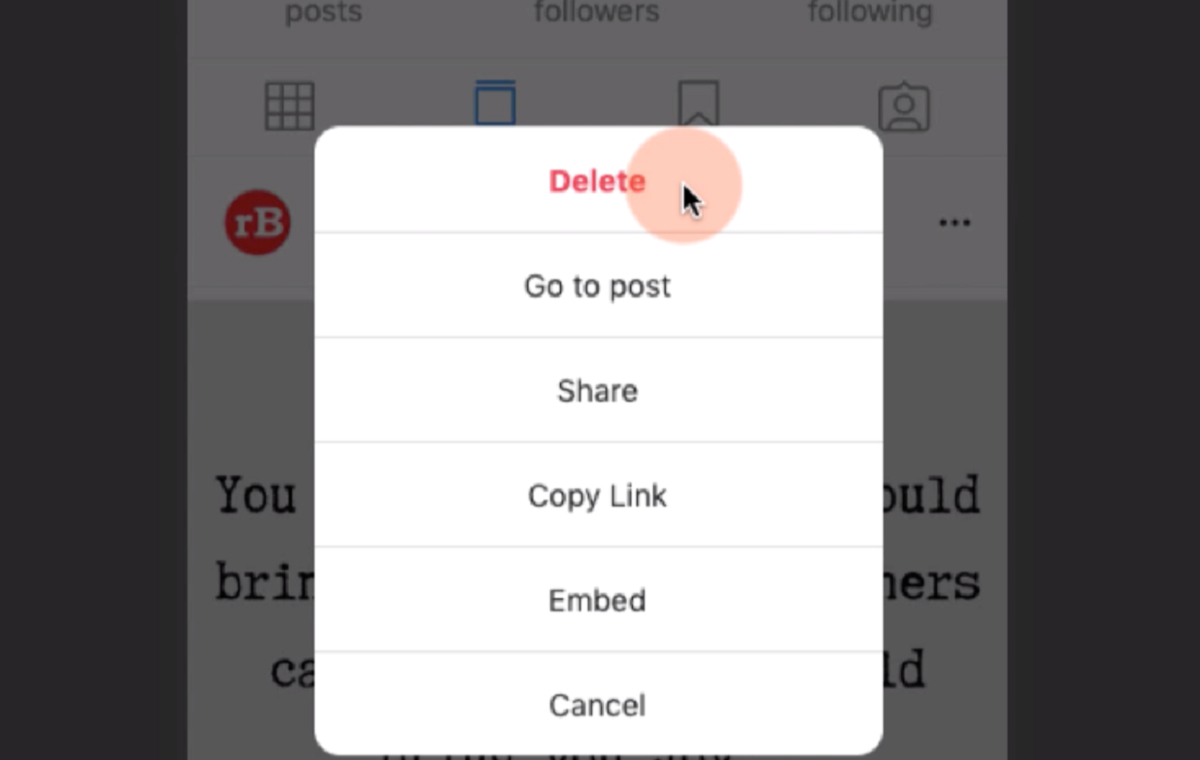
- Editing a Post: To edit a post, go to the specific post on your profile, tap on the three dots in the top right corner, and select “Edit”. You can make changes to the caption, add or remove tags, or adjust the location.
- Deleting a Post: If you want to remove a post from your profile, go to the specific post, tap on the three dots in the top right corner, and select “Delete”. Confirm the deletion when prompted. Please note that once a post is deleted, it cannot be recovered.
- Archiving Posts: If you want to hide a post from your profile without permanently deleting it, you can archive it. Go to the specific post, tap on the three dots, and select “Archive”. The post will be moved to your personal archive, which can be accessed by tapping on the clock icon at the top right corner of your profile.
- Unarchiving Posts: If you decide to bring your archived posts back to your profile, go to your archive by tapping on the clock icon on your profile, select the post you want to unarchive, tap on the three dots, and choose “Show on Profile”. The post will reappear in its original location.
Managing and editing your Instagram posts allows you to maintain the quality and relevance of your profile. It gives you the opportunity to refine captions, update tags, or adjust the location to provide accurate information to your audience.
Regularly reviewing your posts also allows you to curate and improve the overall aesthetic and consistency of your profile. You can make adjustments to create a visually appealing and cohesive feed that aligns with your brand or personal style.
Remember to take a thoughtful and strategic approach when editing or deleting your posts. Consider the impact it may have on the overall structure of your content and the message you want to convey to your followers.
Now that you know how to manage and edit your Instagram posts, let’s move on to the next section and explore how you can interact with other users on the platform.
Interacting with Other Users on Instagram
Instagram is a social platform that thrives on engagement and interaction with other users. By actively engaging with your followers and other Instagram accounts, you can grow your network, build relationships, and expand your reach. Here are some ways to interact with other users on Instagram:
- Liking and Commenting: When you come across a post that resonates with you, show your appreciation by liking it. You can double-tap on the photo or click on the heart-shaped icon below the post. Additionally, leaving thoughtful and genuine comments can spark conversations and help you connect with other users. Engage with the content by asking questions or sharing your insights.
- Following and Unfollowing: Hitting the “Follow” button allows you to stay updated with the content posted by an account. If you find an account that aligns with your interests or provides valuable information, follow them. Similarly, if an account no longer adds value to your feed or is not relevant, feel free to unfollow them. It’s important to curate your feed with content that interests and inspires you.
- Direct Messaging: Instagram’s direct messaging feature allows you to have private conversations with other users. You can initiate a conversation by tapping on the paper airplane icon and selecting the user you want to message. This feature is particularly useful for networking, discussing collaborations, or engaging in more personal conversations.
- Collaborating: Instagram provides a platform for collaboration with other users, such as influencers, brands, or fellow creators. By reaching out to potential collaborators or responding to collaboration requests, you can create mutually beneficial partnerships. Collaborations can include content exchanges, co-hosting Instagram Live sessions, or participating in joint promotional activities.
- Engaging in Story Responses: Instagram Stories often include interactive features, such as polls, questions, or quizzes. Take advantage of these features to encourage your followers to engage with your content. Respond to their answers, comments, or questions to foster a sense of community and make them feel valued.
- Tagging and Mentioning: When appropriate, tag other users or accounts in your posts to give them credit for their content or involve them in the conversation. Tagging accounts can also increase your post’s visibility for their followers. Additionally, mention other users in your captions or comments by using the “@” symbol followed by their username to get their attention.
Remember, genuine engagement is key for meaningful interactions on Instagram. Take the time to discover new accounts, engage with their content, and respond to comments or messages in a timely manner. Building strong relationships with your followers and other users can lead to increased engagement, support, and potential collaborations.
Now that you know how to interact with other users on Instagram, let’s move on to the next section and explore how to adjust your Instagram privacy settings.
Adjusting Your Instagram Privacy Settings
Privacy settings on Instagram allow you to control who can see your content, interact with you, and access your personal information. Taking the time to adjust these settings can help you maintain a safe and secure online presence. Here’s how you can adjust your Instagram privacy settings:
Private Account: By default, Instagram accounts are public, meaning anyone can see your posts and profile. However, you have the option to make your account private. With a private account, only approved followers will be able to see your posts, stories, and other content. To switch to a private account, go to your profile, tap on the three lines in the top right corner, select “Settings”, then “Privacy”, and toggle the “Private Account” switch.
Manage Interactions: Instagram allows you to control who can comment on your posts, mention you in their comments or captions, and send you direct messages. From the “Privacy” section in the settings, you can manage these interactions by adjusting settings such as “Comments”, “Tags”, and “Direct Messages”. You can choose to restrict comments from certain accounts or only receive messages from people you follow.
Blocking Accounts: If you encounter unwanted interactions, harassment, or spam on Instagram, you have the option to block accounts. Blocking prevents the blocked user from seeing your profile, posts, and stories, and it also prevents them from contacting you via direct message. You can block an account by going to their profile, tapping on the three dots in the top right corner, and selecting “Block”.
Location and Photo Map: Instagram allows you to add or remove location tags on your posts. To control your location settings, go to “Settings”, then “Privacy”, and select “Location”. From here, you can enable or disable location services and control how your location information is shared. Additionally, you can remove photos from your photo map which shows the locations where your posts were taken.
Limiting Accessibility: Instagram also provides options to limit the accessibility of your account beyond privacy settings. In the “Settings” menu, you can control who can see your activity status, limit the data Instagram collects about you, and manage third-party apps connected to your Instagram account.
Regularly reviewing and adjusting your privacy settings on Instagram can help protect your personal information, minimize unwanted interactions, and create a safer online experience. It’s important to reassess these settings periodically to ensure they align with your comfort level and desired level of privacy.
Now that you understand how to adjust your Instagram privacy settings, you can browse, post, and engage with confidence, knowing that you have control over who can access your content and interact with you on the platform.
Conclusion
Congratulations! You have now gained a comprehensive understanding of how to navigate and make the most of Instagram’s features. From creating an account and understanding the app’s layout to posting photos, using filters, and interacting with other users, you are well-equipped to enhance your Instagram experience.
Remember to employ creativity and human-like touches in your captions and engagement to captivate your audience. Utilize hashtags strategically to increase the visibility of your posts and explore IGTV to share long-form videos. Additionally, don’t forget to adjust your privacy settings to maintain control over your content and protect your personal information.
As you continue to explore and engage on Instagram, keep in mind that building a successful presence on the platform is a journey. It requires consistent effort, high-quality content, and genuine interactions. Stay true to your unique voice and style, while also adapting to emerging trends and user preferences.
Instagram offers a powerful platform for self-expression, connection, and storytelling. Whether you’re a business owner looking to grow your brand or an individual sharing your passions and experiences, Instagram provides a global community of engaged users to connect with and inspire.
With these skills and knowledge, you are ready to take on the world of Instagram and make your mark. So, what are you waiting for? Start capturing moments, sharing stories, and building connections on Instagram today!