Introduction
Welcome to the world of hassle-free music playback on your Apple Watch! Whether you’re hitting the gym, going for a run, or simply taking a stroll, being able to listen to your favorite tunes without having to carry your iPhone is a game-changer. With the right setup, your Apple Watch can become your personal music player, allowing you to enjoy your favorite songs anytime, anywhere.
In this guide, we’ll walk you through the process of playing music on your Apple Watch without the need for your iPhone. We’ll cover the essential steps, from setting up your Apple Watch, syncing music, and pairing Bluetooth headphones, to controlling playback and managing your music library directly on your wrist.
Now you can leave your phone behind and experience the freedom of streaming music directly from your Apple Watch.
Before we dive into the steps, let’s make sure you have everything you need:
- An Apple Watch Series 3 or later
- An iPhone with iOS 14.5 or later (for initial setup)
- Bluetooth headphones or earbuds (for wireless audio)
- An Apple Music subscription (for streaming music)
- An active Wi-Fi or cellular connection (for streaming or downloading music)
If you have all the requirements covered, let’s get started on setting up your Apple Watch for standalone music playback!
Step 1: Setting up your Apple Watch
Before you can start enjoying music on your Apple Watch, you’ll need to set it up properly. Here’s a simple guide to help you through the process:
- Ensure that your Apple Watch is charged or connected to a power source. This will prevent any interruptions during the setup process.
- On your iPhone, make sure you have the latest version of iOS installed, as well as the latest version of the Apple Watch app.
- Open the Apple Watch app on your iPhone and follow the on-screen instructions to pair your Apple Watch with your iPhone. Make sure to grant any necessary permissions when prompted.
- If prompted, choose to set up your Apple Watch as a new device. If you’ve already set up your Apple Watch and want to use it independently from your iPhone, you’ll need to unpair and erase it first.
- After pairing, you’ll have the option to restore your Apple Watch from a backup or set it up as a new watch. Choose the option that suits your preferences.
- Follow the remaining on-screen instructions to set up features like Apple Pay, Siri, and activity tracking. You can customize these settings later if you prefer.
- Once the setup process is complete, your Apple Watch is ready to be connected to your iPhone and enjoy the benefits of standalone music playback.
Setting up your Apple Watch properly is essential for a smooth music playback experience. Take your time to follow these steps carefully to ensure a seamless connection between your watch and iPhone.
Now that your Apple Watch is set up, let’s move on to the next step: syncing music to your watch!
Step 2: Syncing Music to your Apple Watch
Now that your Apple Watch is ready to go, it’s time to sync your favorite music to your watch, so you can listen to it even when your iPhone is out of reach. Follow these simple steps:
- Ensure that your Apple Watch is connected to Wi-Fi or has a cellular connection. This is necessary for downloading music directly to your watch.
- On your iPhone, open the Apple Watch app and tap on the “My Watch” tab at the bottom of the screen.
- Scroll down and tap on the “Music” option.
- Choose the method you want to use to sync music to your watch:
- Synced Playlist: Select a playlist from your iPhone’s Apple Music library that you want to sync to your Apple Watch. Tap on the “+” icon next to the playlist name to start the syncing process.
- Albums or Songs: If you prefer to sync specific albums or songs, tap on the “Add Music” button and browse your iPhone’s music library. Select the albums or songs you want, and then tap on “Done” to initiate the sync.
- Automatic Sync: You can also enable the “Automatically Add” option, which will automatically sync music based on your listening preferences and available storage on your watch.
- Once you’ve selected the music you want to sync, tap on the “Add Music” button. The syncing process will begin, and you can track the progress on the Apple Watch app.
- Make sure your Apple Watch is connected to its charger during the syncing process to ensure a smooth transfer of music.
- Once the sync is complete, you can disconnect your Apple Watch from its charger, and the synced music will be available for offline playback.
Congratulations! You’ve successfully synced music to your Apple Watch. Now, let’s move on to the next step: pairing Bluetooth headphones with your watch.
Step 3: Pairing Bluetooth Headphones with your Apple Watch
To enjoy your favorite music on your Apple Watch, you’ll need to pair Bluetooth headphones or earbuds. Here’s how you can do it:
- On your Apple Watch, open the Control Center by swiping up from the bottom of the screen.
- Tap on the Bluetooth icon to enter the Bluetooth settings.
- Ensure that your Bluetooth headphones are in pairing mode. Refer to the manufacturer’s instructions to activate pairing mode on your specific headphones.
- In the Bluetooth settings on your Apple Watch, you should see your headphones listed under “Devices”. Tap on your headphones’ name to start the pairing process.
- Follow any on-screen prompts or enter the passcode if required by your headphones.
- Once the pairing is successful, you’ll see a “Connected” status next to your headphones’ name in the Bluetooth settings.
- Now that your headphones are paired with your Apple Watch, you can start enjoying your synced music without the need for your iPhone.
It’s important to note that your Apple Watch can be paired with multiple Bluetooth headphones, allowing you to easily switch between different pairs depending on your preference or activity. However, only one pair of headphones can be connected at a time.
Now that your Apple Watch is connected to your Bluetooth headphones, it’s time to move on to the next step: playing music on your watch!
Step 4: Playing Music on your Apple Watch
With your Apple Watch set up, music synced, and Bluetooth headphones paired, you’re now ready to play your favorite tunes directly from your watch. Here’s how:
- On your Apple Watch, press the digital crown to access the home screen.
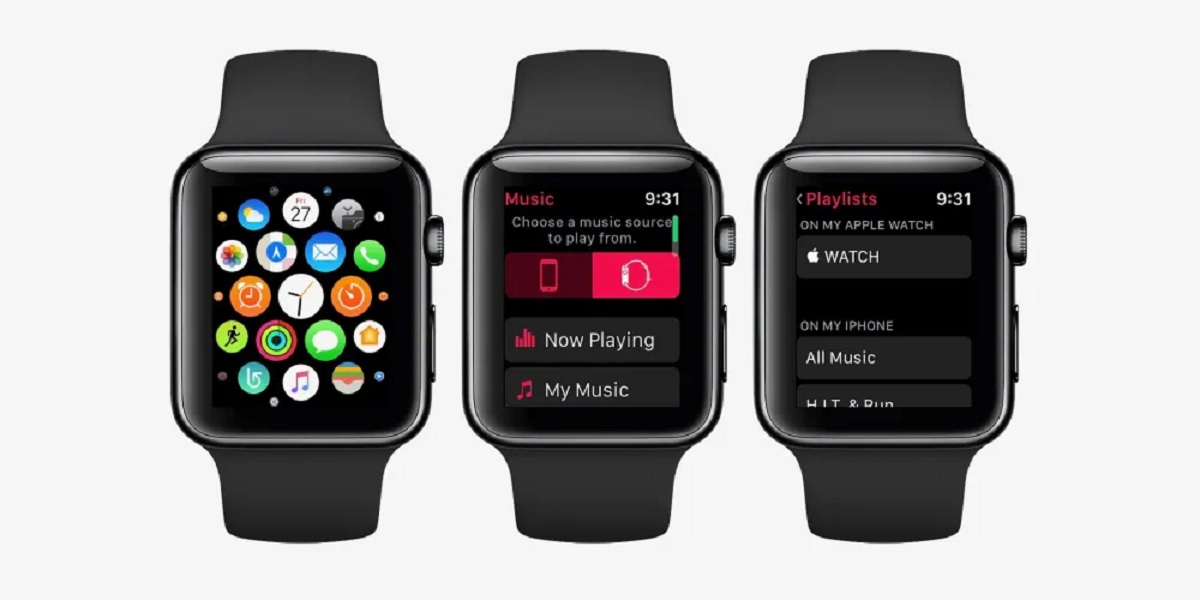
- Tap on the Music app icon to open it.
- You’ll see a list of available music options, including playlists, albums, and songs that you’ve synced to your Apple Watch. You can use the digital crown or swipe on the screen to browse through your music.
- When you find the song or playlist you want to listen to, tap on it to start playback.
- Your Bluetooth headphones should automatically connect to your Apple Watch and play the selected music.
- Use the controls on your Apple Watch’s screen to pause, play, skip tracks, adjust volume, and control other playback settings.
- If you prefer to control playback from your Bluetooth headphones, use the buttons or controls provided by your specific headphones.
- Enjoy your music directly from your Apple Watch, without the hassle of carrying your iPhone!
Keep in mind that since the Apple Watch has limited storage capacity, it’s recommended to regularly manage your synced music and remove any songs or playlists you no longer need to free up space for new additions.
Now that you know how to play music on your Apple Watch, let’s move on to the next step: controlling music playback on your watch!
Step 5: Controlling Music Playback on your Apple Watch
Controlling the playback of your favorite music directly from your Apple Watch is a breeze. Here’s how you can easily manage your music while on the go:
- While playing a song, swipe up on the watch face to access the Control Center.
- Scroll down to locate the Music controls.
- Tap on the play/pause button to start or pause the music playback.
- To skip to the next track, tap on the forward button.
- If you want to go back to the previous track, tap on the backward button.
- Adjust the volume by turning the digital crown up or down.
- In addition to the Control Center, you can also control the playback from the Now Playing app. Open the app and use the controls on the screen or the digital crown to manage the playback.
- If you prefer to navigate through your music library, use the Music app to browse and select songs or playlists to play.
- Switch between different synced playlists or albums by swiping left or right on the Now Playing screen or the Music app.
- Enjoy the convenience of controlling your music playback directly from your Apple Watch!
Remember to stay aware of your surroundings and follow any local laws or regulations regarding the use of headphones while engaging in activities such as running or cycling.
Now that you know how to control music playback on your Apple Watch, let’s move on to the next step: managing and adding music to your Apple Watch library.
Step 6: Managing and Adding Music to your Apple Watch Library
Managing and adding music to your Apple Watch library is essential for keeping your music collection up to date and ensuring you have the songs you love ready to go. Follow these steps to manage and add music to your Apple Watch library:
- Open the Apple Watch app on your iPhone.
- Scroll down and tap on the “Music” option.
- To remove music from your Apple Watch, tap on “On My Apple Watch” and select the playlist or album you want to remove. Then, swipe left on the playlist or album and tap on the “Delete” button.
- If you want to add more music to your Apple Watch, go back to the “Music” screen and tap on “Add Music.”
- You can choose to add music either by selecting specific playlists or albums from your iPhone’s Apple Music library, or by enabling the “Automatically Add” option to sync music based on your listening preferences and available storage on your watch.
- Tap on the “+” icon next to the playlist or album name to add it to your Apple Watch library.
- Once you’ve added or removed the desired music, the changes will automatically sync to your Apple Watch the next time you connect it to its charger or when it’s connected to Wi-Fi or has a cellular connection.
- Keep in mind that managing your music library on your Apple Watch helps optimize storage space and ensures you have the songs you want readily available for offline playback.
Regularly review and update your Apple Watch music library to keep it fresh with your favorite songs and playlists. This way, you’ll always have the perfect soundtrack for any activity or mood.
Congratulations! You’ve now mastered the process of managing and adding music to your Apple Watch library. You’re all set to enjoy your favorite tunes whenever and wherever you go!
Conclusion
Congratulations! You have successfully learned how to play music on your Apple Watch without the need for your iPhone. With the ability to sync music, pair Bluetooth headphones, control playback, and manage your music library right from your wrist, you can enjoy your favorite tunes wherever you go.
Remember to set up your Apple Watch correctly, ensuring it is paired with your iPhone and charged. Syncing your preferred playlists, albums, or songs to your Apple Watch will allow for offline listening and an uninterrupted music experience.
Pairing Bluetooth headphones or earbuds with your Apple Watch offers wireless and convenient audio playback. Whether you’re going for a run, working out at the gym, or simply enjoying a relaxing walk, you can immerse yourself in music without the hassle of wires or carrying your iPhone.
Controlling music playback on your Apple Watch is a breeze, with easy-to-access controls through the Control Center and the Music app. You can adjust the volume, skip tracks, and browse your library directly from your wrist. Take advantage of these features to curate the perfect soundtrack for any moment.
Lastly, remember to manage and add music to your Apple Watch library regularly. This ensures that you have the latest and favorite tunes readily available for offline playback. Remove unwanted songs or playlists to optimize storage space and keep your music collection organized.
Now, go ahead and elevate your music experience with your Apple Watch. Enjoy the freedom of streaming music without the need for your iPhone and embrace the convenience of portable, wrist-mounted entertainment. Whether you’re out for a jog, commuting, or simply relaxing, your Apple Watch will be your trusted companion for an immersive and enjoyable music journey.