Introduction
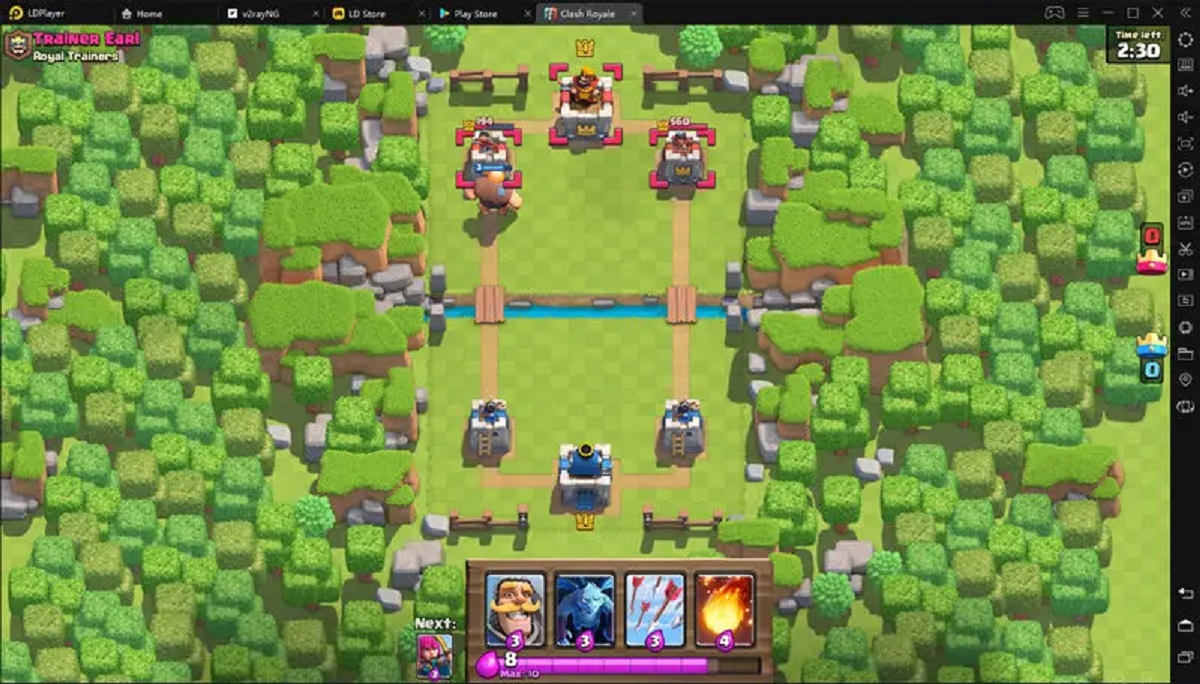
Welcome to the exciting world of Clash Royale! This popular mobile game developed by Supercell combines elements of strategy, card collection, and real-time battles. Whether you’re a seasoned player or new to the game, Clash Royale offers a fun and addictive experience that can be enjoyed on your PC.
In this article, we will guide you through the steps to play Clash Royale on your computer. While the game is primarily designed for mobile devices, using an Android emulator allows you to enjoy Clash Royale on a larger screen with the comfort of a keyboard and mouse.
Playing Clash Royale on PC not only enhances your gaming experience but also offers several advantages. The larger screen allows for better visibility and easier control of your troops. Additionally, using a keyboard and mouse can provide more precise inputs and quicker reactions, giving you an edge over your opponents. Furthermore, playing on a PC eliminates battery concerns, as you can enjoy extended gameplay sessions without worrying about draining your mobile device’s battery.
Without further ado, let’s dive into the step-by-step process of playing Clash Royale on your PC. These instructions are applicable to both Windows and Mac operating systems, allowing anyone to enjoy the game on their computer.
What is Clash Royale?
Clash Royale is a highly popular mobile game developed by Supercell, the creators of Clash of Clans. It is a real-time multiplayer game where players collect and upgrade cards featuring various characters, spells, and defenses from the Clash of Clans universe. These cards are then used to build a powerful deck and engage in intense one-on-one battles with players from around the world.
The gameplay of Clash Royale combines strategy, card collection, and fast-paced battles. Each player has three towers: a King Tower and two Crown Towers. The objective is to destroy more towers than your opponent within the time limit of three minutes. If both players have an equal number of towers destroyed, the game goes into overtime, where the first player to destroy a tower wins.
To launch your attacks, you deploy cards from your deck onto the battlefield. There is a resource known as Elixir that regenerates over time and is used to deploy cards. Each card has a specific cost in Elixir, and you must carefully manage your resources to counter your opponent’s attacks while launching your own offensive maneuvers.
As you progress through the game and win battles, you earn chests that contain new cards, gold, and other valuable rewards. These chests are crucial for upgrading your existing cards and unlocking new ones, allowing you to build more powerful and diverse decks.
Part of the appeal of Clash Royale lies in its competitive nature. Players can join clans, participate in clan wars, and compete in tournaments to showcase their skills and climb the global rankings. The game constantly introduces new features, cards, and balance updates, ensuring an ever-evolving and engaging experience for players.
With its addictive gameplay, stunning visuals, and a thriving community of players, Clash Royale has become one of the most successful mobile games to date. Its fast-paced battles, strategic depth, and collectible card mechanics make it a must-play for both casual and hardcore gamers.
Why Play Clash Royale on PC?
While Clash Royale is primarily designed for mobile devices, playing the game on your PC offers numerous advantages and enhancements to your gaming experience. Here’s why you should consider playing Clash Royale on your computer:
1. Larger Screen: One of the primary benefits of playing on PC is the larger screen size. This allows for better visibility of the battlefield, making it easier to track troop movements, identify enemy placements, and strategize your attacks. The increased screen real estate provides a more immersive experience and allows for a greater level of detail.
2. Precise Controls: Playing Clash Royale on a PC gives you the advantage of using a keyboard and mouse. This provides more precise controls compared to touchscreens, allowing for quicker and more accurate deployment of troops and spell cards. With the keyboard shortcuts, you can react faster and execute your strategies more efficiently.
3. Extended Gameplay: Mobile devices may have limitations when it comes to battery life and storage capacity. Playing Clash Royale on your PC eliminates these concerns. You can enjoy extended gameplay sessions without worrying about your device running out of power or storage space. This allows for uninterrupted gaming sessions, giving you more time to strategize, battle, and climb the ranks.
4. Seamless Multitasking: PCs provide the advantage of multitasking. While playing Clash Royale on your computer, you can easily switch between the game and other applications without interruptions. This means you can chat with friends, browse the web for strategies or watch Clash Royale content while still staying engaged in the game.
5. Better Performance: PC gaming generally offers better performance than mobile devices. With a powerful computer, you can experience smoother gameplay, faster loading times, and higher graphics settings. This enhanced performance allows you to fully enjoy the vibrant animations, intricate details, and stunning visual effects that Clash Royale has to offer.
6. Enhanced Social Features: Playing Clash Royale on your PC allows for easier social interaction. You can easily communicate with clan members, coordinate strategies, and exchange tips and tricks. The larger screen and keyboard make it more convenient to engage in conversations, ensuring a richer social experience within the game.
Playing Clash Royale on your PC offers a whole new level of immersion, precision, and convenience. Whether you’re a casual player looking for a better gaming experience or a competitive player aiming to boost your performance, playing on a PC can help you achieve your goals and take your Clash Royale skills to the next level.
Step 1: Download an Android Emulator
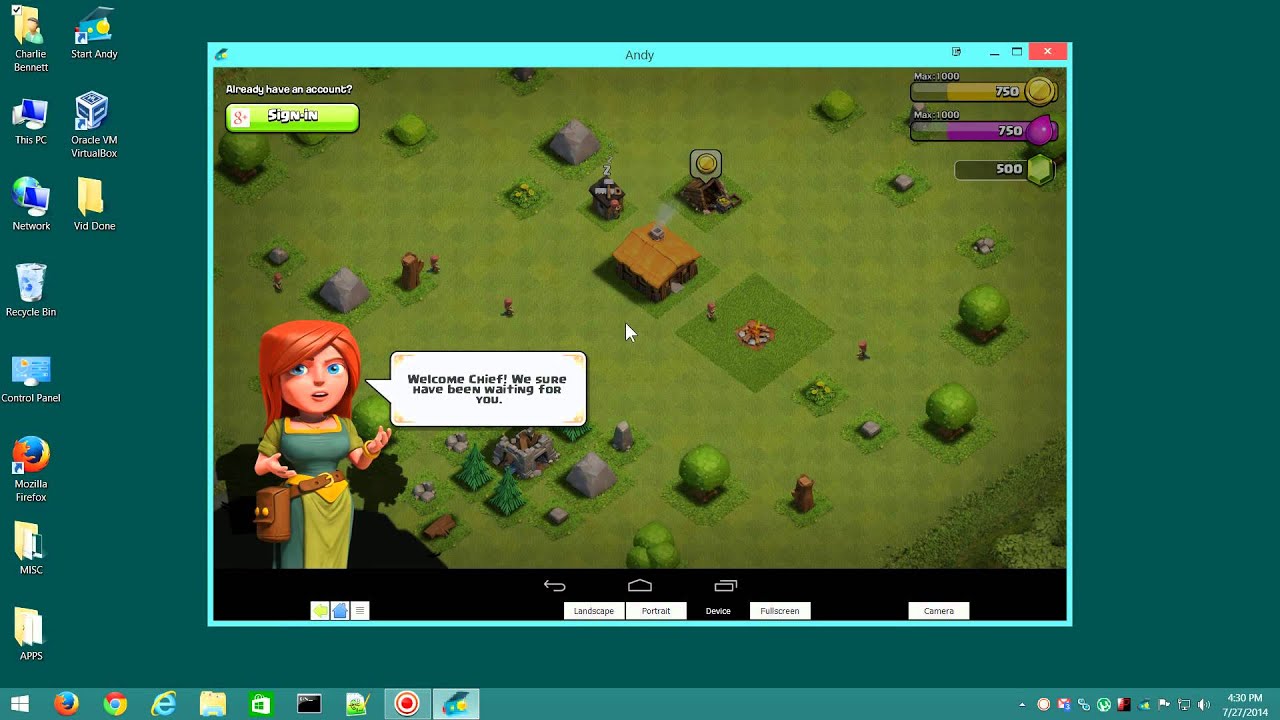
The first step to playing Clash Royale on your PC is to download an Android emulator. An emulator is a software that creates a virtual Android device on your computer, allowing you to run Android applications and games.
There are several Android emulators available, but one of the most popular and reliable choices is BlueStacks. To download BlueStacks, follow these steps:
- Visit the official BlueStacks website at https://www.bluestacks.com in your web browser.
- Click on the “Download BlueStacks” button.
- The download will begin automatically, and the setup file will be saved to your computer.
- Locate the setup file you downloaded from the BlueStacks website. It is usually named “BlueStacksInstaller.exe”.
- Double-click on the setup file to run the installer.
- A pop-up window will appear asking for permission to make changes to your device. Click on “Yes” to proceed with the installation.
- The installer will now extract the necessary files and prepare the installation.
- Once the extraction is complete, the BlueStacks installation wizard will launch.
- Follow the on-screen instructions to choose the installation location, select any additional options, and agree to the terms of service.
- Click on the “Install” button to start the installation process.
- The installation may take a few minutes to complete, depending on your PC’s performance.
- Once the installation is finished, click on the “Finish” button.
- Open the BlueStacks emulator by double-clicking on its icon on your desktop or searching for it in your PC’s application menu.
- Wait for the emulator to launch. This might take a moment as it initializes the virtual Android device.
- On the BlueStacks home screen, you will find a series of pre-installed apps. Look for the “Google Play Store” app icon and click on it.
- A sign-in window will appear, asking you to sign in with your Google account. If you have an existing Google account, enter your email address and password and click “Next”. If you don’t have a Google account, click on the “Create account” option to set up a new one.
- Once you have signed in or created a new account, you will be prompted to set up payment information. You can choose to set up payment methods or click on “Skip” if you prefer not to add payment details at this time.
- Agree to the terms and conditions and follow any additional on-screen prompts to complete the setup process.
- Open the Google Play Store app on the BlueStacks emulator.
- In the search bar at the top of the Play Store, type “Clash Royale” and hit Enter or click on the magnifying glass icon.
- A list of search results will appear. Look for the official Clash Royale app, developed by Supercell, and click on it.
- On the Clash Royale app page, click on the “Install” button.
- The installation process will begin, and the Clash Royale app will be downloaded onto the Android emulator.
- Once the installation is complete, you will see the “Open” button. Click on it to launch Clash Royale on your PC.
- Graphics Settings: Clash Royale offers different graphics quality options. If you have a high-performance PC, you can set the graphics to “High” for the best visual experience. However, if your PC has limited resources, you may want to choose a lower graphics quality to ensure smooth gameplay.
- Sound Settings: Adjust the sound settings according to your preference. You can choose to enable or disable in-game sound effects and music. Customizing the sound settings allows you to create a more immersive gaming environment.
- Controls: Clash Royale on PC is played using a keyboard and mouse. Take some time to familiarize yourself with the default key bindings for various actions, such as deploying cards or activating special abilities. If desired, you can customize the controls to suit your preferences in the game settings.
- Notifications: Clash Royale offers various notifications, such as in-game events, chest unlock alerts, and clan activity updates. Adjust the notification settings based on your preference, ensuring that you receive important updates without being overwhelmed by excessive notifications.
- Connect to Supercell ID: To secure your progress and easily switch between devices, consider connecting Clash Royale to a Supercell ID. This allows you to save your game progress and play seamlessly across multiple devices.
- Launch the BlueStacks emulator on your PC if it’s not already open.
- Click on the Clash Royale icon on the BlueStacks home screen or in the app drawer to start the game.
- The game will load, and you will be greeted with the Clash Royale welcome screen.
- At this point, you may be asked to sign in with your Supercell ID if you have one. Enter your credentials to access your saved progress and continue where you left off.
- After signing in or choosing to play as a guest, you will enter the main Clash Royale screen.
- Explore the various menus and options in the game like the “Battle” mode, “Deck”, “Shop”, “Clan”, and more.
- Take some time to familiarize yourself with the game’s mechanics, upgrade your cards, and build powerful decks.
- Once you’re ready, join battles against real players from around the world and test your skills in intense PvP battles.
- Strategize, deploy your troops, cast spells, and unleash your best tactics to defeat opponents and climb the ranks.
Once the download is complete, you’re ready to move on to the next step: installing the Android emulator on your PC.
Step 2: Install the Android Emulator
After downloading the Android emulator, the next step is to install it on your PC. Follow these instructions to install BlueStacks, one of the most popular Android emulators:
At this point, the Android emulator, in this case, BlueStacks, is successfully installed on your PC. Now it’s time to proceed to the next step: setting up the Google Play Store on the emulator.
Step 3: Set Up Google Play Store on the Emulator
Once you have installed the Android emulator on your PC, the next step is to set up the Google Play Store. Accessing the Play Store on the emulator will allow you to download and install Clash Royale, as well as other Android apps and games. Follow these steps to set up the Google Play Store:
After successfully setting up the Google Play Store on the emulator, you now have access to the vast library of Android apps and games. It’s time to move on to the next step: installing Clash Royale.
Step 4: Install Clash Royale
Now that you have set up the Google Play Store on the Android emulator, you can easily install Clash Royale on your PC. Follow these steps to install the game:
Now that Clash Royale is installed on your PC, you can start playing and enjoying the game’s thrilling battles and strategic gameplay. However, before you jump into the action, there are a few game settings you may want to configure to optimize your gaming experience.
Note: It’s important to keep in mind that Clash Royale requires an internet connection to play. Make sure you have a stable and reliable internet connection before launching the game.
Step 5: Configure Game Settings
After installing Clash Royale on your PC, it’s a good idea to configure the game settings to enhance your gaming experience. Here are some key settings you may want to consider:
Configuring these game settings will help optimize your Clash Royale experience and ensure that you have full control over the game’s visuals, audio, and notifications.
With the game settings customized to your liking, you’re now ready to enjoy Clash Royale on your PC. Let the battles begin!
Step 6: Start Playing Clash Royale on PC
Now that you have set up the Android emulator, installed Clash Royale, and configured the game settings, it’s time to dive into the world of Clash Royale on your PC. Follow these steps to start playing:
Remember, Clash Royale is a game that rewards both skill and strategy. Take the time to learn the strengths and weaknesses of different cards, test different deck combinations, and adapt your tactics as you progress through the game.
With Clash Royale now running smoothly on your PC, you can enjoy the game’s vibrant graphics, immersive sound effects, and exciting gameplay on a larger screen with the precision of keyboard and mouse controls.
Now it’s time to showcase your skills, climb the global leaderboards, and dominate the world of Clash Royale!
Conclusion
Congratulations! You have successfully learned how to play Clash Royale on your PC. By following the steps outlined in this guide, you have gained access to an enhanced gaming experience, thanks to the larger screen, precise controls, and extended gameplay sessions.
Clash Royale, with its combination of strategy, card collection, and real-time battles, offers an addictive and competitive game environment. Playing it on your PC not only provides visual benefits but also enhances your overall performance with the use of a keyboard and mouse. You can now enjoy the game with better visibility, improved control, and seamless multitasking capabilities.
Throughout this guide, you have learned how to download and install an Android emulator, set up the Google Play Store, install Clash Royale, configure game settings, and finally launch the game on your PC. It’s important to note that staying connected to a stable internet connection will ensure uninterrupted gameplay.
Now that you are familiar with the process, feel free to explore the diverse game modes, build powerful decks, and engage in thrilling battles against players from all over the world. Continuously refining your strategies, learning from each battle, and adapting to your opponents’ tactics will surely help you climb the ranks and become a formidable Clash Royale player.
So, what are you waiting for? Start your Clash Royale adventure on your PC today and experience the excitement and competitiveness that the game has to offer. Good luck and enjoy your journey in the Clash Royale arena!


