Introduction
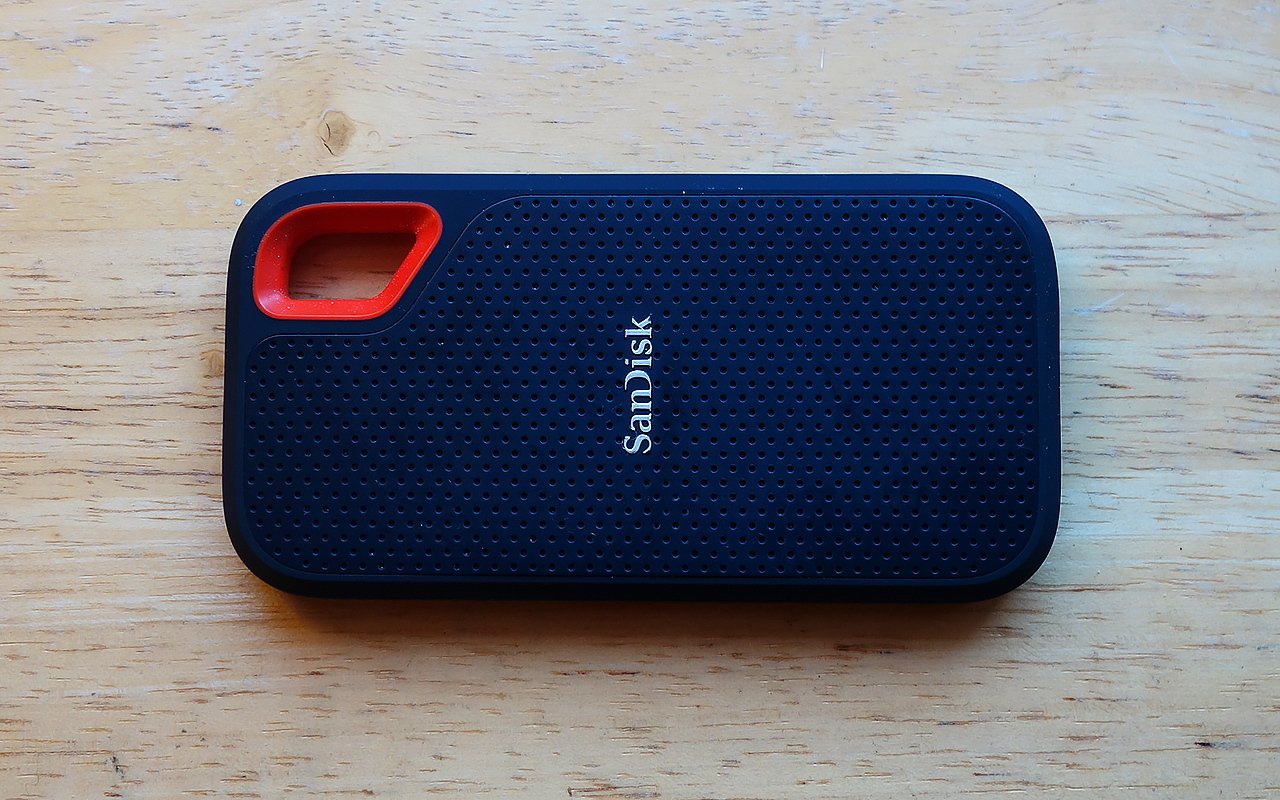
Are you looking to optimize your SanDisk external solid-state drive (SSD) for better performance and organization? Partitioning your SanDisk SSD can be a useful solution. By dividing the drive into multiple partitions, you can separate your data based on different criteria and achieve better overall efficiency.
In this article, we will guide you through the process of partitioning a SanDisk external SSD while providing valuable tips to optimize the performance of your newly divided drive.
Partitioning a SanDisk external SSD involves dividing the drive into separate sections, similar to creating different storage compartments. Each partition acts as an independent unit with its own file system, allowing you to store and organize specific types of data separately.
This process can be particularly helpful if you need to keep personal and work-related files separate, or if you want to create a dedicated partition for storing media files, such as photos, videos, or music.
While partitioning an external SSD can be beneficial, it’s important to approach the process with caution. Any changes made to the drive’s partition structure can lead to data loss if not done correctly. Therefore, it’s crucial to follow the necessary precautions and use the right tools.
In the following sections, we will discuss the precautions you should take before partitioning and the tools you will need to successfully create partitions on your SanDisk external SSD. We will then provide you with a step-by-step guide on how to partition your drive, as well as tips for optimizing your partitioned SanDisk SSD.
Before we dive into the details, make sure to back up any important data stored on your SanDisk external SSD. This precautionary step will safeguard your files in case of any unforeseen issues during the partitioning process.
Why Partition a SanDisk External Solid State Drive?
Partitioning a SanDisk external solid-state drive (SSD) offers several benefits, making it a practical solution for users looking to optimize their storage and improve overall efficiency. Here are some compelling reasons to consider partitioning your SanDisk SSD:
Organize Your Data: Partitioning allows you to divide your SanDisk SSD into separate sections, enabling you to organize your data more effectively. You can create dedicated partitions for different types of files, such as documents, photos, videos, or applications. This way, you can easily locate and access your files without having to search through a cluttered storage space.
Enhanced File Management: Separate partitions make it easier to manage and maintain your files. By allocating specific partitions for different purposes, you can implement customized file organization systems. For instance, you can create a partition exclusively for work-related files, allowing you to keep personal and professional data separate, facilitating faster and more efficient file management.
Better Performance: Partitioning your SanDisk SSD can improve its overall performance. By dividing your drive into smaller partitions, you can reduce file fragmentation, ensuring smoother data access. This can lead to faster file transfers, quicker application loading times, and improved system responsiveness.
Enhanced Data Security: Partitioning can also contribute to data security. By creating separate partitions for sensitive files, you can apply different levels of encryption or access restrictions to each partition. This adds an extra layer of protection to your confidential data, making it more difficult for unauthorized users to access or tamper with your files.
Operating System Flexibility: Partitioning allows you to install multiple operating systems on the same SanDisk SSD. This can be beneficial for users who need to run different operating systems on their computer, whether for experimentation, development, or other purposes. Each operating system can reside in a separate partition, ensuring compatibility and segregation of resources.
By partitioning your SanDisk external SSD, you can effectively optimize your storage space, improve file management, enhance performance, and strengthen data security. In the next section, we will discuss the precautions you should take before proceeding with the partitioning process.
Precautions to Take Before Partitioning
Before you proceed with partitioning your SanDisk external solid-state drive (SSD), it’s essential to take certain precautions to ensure a smooth and safe process. Here are some important steps to follow:
Backup Your Data: Prior to partitioning, it is crucial to back up all the data stored on your SanDisk SSD. Partitioning involves partition table modifications, which can potentially lead to data loss or corruption. By creating a backup, you can protect your files and easily recover them if anything goes wrong during the partitioning process.
Verify Drive Health: It’s important to ensure that your SanDisk SSD is in good health before attempting to partition it. Check for any signs of drive failure or errors by using disk diagnostic tools provided by SanDisk or third-party software. If you detect any issues, it is advisable to resolve them before proceeding with the partitioning process.
Disconnect Other Drives: To avoid accidental data loss or unwanted changes, it’s recommended to disconnect any other external or internal drives connected to your computer before partitioning your SanDisk SSD. This prevents the risk of accidentally selecting the wrong drive or partition during the process.
Have Sufficient Free Space: Ensure that your SanDisk SSD has enough free space to accommodate the new partitions you plan to create. Each partition requires a certain amount of disk space, so it’s necessary to calculate the space required based on your intended usage. If your SSD is running low on space, consider deleting unnecessary files or transferring data to another storage medium.
Understand the Partitioning Process: Familiarize yourself with the partitioning process and the implications it may have on your SanDisk SSD. Understand that creating partitions involves modifying the drive’s partition table, which can affect the existing data stored on the drive. Make sure to gather sufficient knowledge and research the partitioning process to minimize the risk of errors or data loss.
Use Reliable Partitioning Software: To partition your SanDisk SSD, it’s advisable to use reputable and reliable partitioning software. Several software options are available, both free and paid, that provide user-friendly interfaces and comprehensive partitioning features. These tools can guide you through the process and help you create partitions efficiently and safely.
By taking these precautions, you can significantly reduce the risk of data loss and ensure a smooth partitioning process for your SanDisk external SSD. In the next section, we will discuss the tools you will need to successfully partition your drive.
Tools Needed for Partitioning
To successfully partition your SanDisk external solid-state drive (SSD), you will need a few essential tools. These tools will help you efficiently create partitions on your drive and manage them effectively. Here are the key tools you will need for the partitioning process:
Partitioning Software: You will need reliable partitioning software to create and manage partitions on your SanDisk SSD. There are several options available, such as EaseUS Partition Master, MiniTool Partition Wizard, or Paragon Partition Manager, each offering a user-friendly interface and a range of features to facilitate the partitioning process.
Computer with USB or Thunderbolt Ports: A computer with USB or Thunderbolt ports is necessary to connect your SanDisk SSD and perform the partitioning process. Ensure that your computer has one of these ports available and functioning properly to establish a stable connection with your external drive.
Data Backup Device: As mentioned in the previous section, it is crucial to back up all the data stored on your SanDisk SSD before partitioning. You will need a separate storage device, such as an external hard drive or cloud storage service, to create a backup of your important files. Make sure you have enough space on the backup device to store all the necessary data.
Internet Access: Although not mandatory, having internet access can be beneficial during the partitioning process. It allows you to download the latest version of the partitioning software and access online resources, tutorials, and support forums for guidance or troubleshooting.
Knowledge Resources: While not a physical tool, having access to knowledge resources such as online tutorials, user manuals, and forums can greatly assist you in the partitioning process. Familiarize yourself with the specific features and functions of the partitioning software you choose to ensure you can utilize it effectively.
Patience and Caution: Although not tangible tools, patience and caution are crucial when partitioning your SanDisk SSD. Take your time to read through the instructions provided by the partitioning software and double-check each step before proceeding. Pay attention to warnings or prompts that may notify you of potential data loss or other risks.
By having the necessary tools and taking the required precautions, you can ensure a successful partitioning process for your SanDisk external SSD. In the next section, we will provide you with a step-by-step guide on how to partition your drive effectively.
Step-by-Step Guide to Partitioning a SanDisk External Solid State Drive
Partitioning your SanDisk external solid-state drive (SSD) is a straightforward process when using partitioning software. Follow the step-by-step guide below to partition your SanDisk SSD effectively:
- First, ensure that you have backed up all important data stored on your SanDisk SSD. This step is essential to protect your files from any potential data loss during the partitioning process.
- Connect your SanDisk SSD to your computer using the USB or Thunderbolt port. Ensure that the connection is stable and the drive is recognized by your computer’s operating system.
- Launch the partitioning software of your choice. If you haven’t installed any partitioning software, download and install a reliable one.
- Once the software is launched, it will detect and display all the connected drives. Identify your SanDisk SSD from the list of available drives.
- Select your SanDisk SSD and choose the option to create partitions. This option may be labeled as “Create Partition,” “New Partition,” or something similar, depending on the software you are using.
- Specify the size and file system for each partition you want to create on your SanDisk SSD. Allocate the desired amount of disk space to each partition based on your requirements. The file system format options usually include NTFS, FAT32, and exFAT. Select the appropriate file system for each partition.
- Assign a unique label or name to each partition for easy identification. This step is optional but can be helpful for organizing and managing your data efficiently.
- Review the changes you have made, ensuring the partition sizes, file systems, and labels are correct. Double-check that you have selected the correct drive for partitioning to avoid any accidental changes to other drives.
- Once you are satisfied with the partition settings, click on the “Apply” or “Proceed” button in the partitioning software. This will initiate the actual partitioning process.
- Wait for the partitioning process to complete. The duration may vary depending on the size of your SanDisk SSD and the number of partitions you are creating.
- Once the partitioning process is finished, you will see the newly created partitions listed in the partitioning software’s interface. You can now close the software and safely disconnect your SanDisk SSD from your computer.
By following these steps, you can successfully partition your SanDisk external SSD and organize your data efficiently. Remember to handle your newly partitioned drive with care and wisely manage the data stored in each partition to maintain optimal performance. In the next section, we will provide you with important tips for optimizing your partitioned SanDisk SSD.
Tips for Optimizing Partitioned SanDisk External Solid State Drives
After partitioning your SanDisk external solid-state drive (SSD), there are several ways to optimize the performance and organization of your newly divided drive. Here are some valuable tips to help you get the most out of your partitioned SanDisk SSD:
- Label and Name Your Partitions: Give each partition a descriptive label or name that clearly identifies its contents. This will make it easier for you to navigate and locate specific files or folders within each partition.
- Organize Your Data: Establish a logical and consistent organization system for each partition. Create folders and subfolders within each partition to further categorize and sort your files. This will make it easier to locate and access specific data when needed.
- Allocate Proper Space: Consider the data storage needs of each partition and allocate the appropriate amount of disk space accordingly. Be mindful not to allocate too little or too much space, as it can impact the overall efficiency and performance of your SanDisk SSD.
- Regularly Clean Up Unnecessary Files: Perform regular maintenance and delete unnecessary files from each partition. This will free up disk space and improve the overall performance of your drive. Consider using disk cleanup tools or manually deleting files that are no longer needed.
- Monitor Fragmentation: Keep an eye on the level of fragmentation within each partition. Fragmentation occurs when files are scattered across different areas of the disk, resulting in slower data access. Address fragmentation by using disk optimization tools or defragmenting individual partitions when necessary.
- Ensure Regular Backups: Maintain a consistent backup routine for each partition to protect your valuable data. Regularly back up the contents of each partition to an external storage device or a cloud-based backup service. This step is crucial for safeguarding your files in case of any unforeseen issues.
- Secure Your Partitions: Implement appropriate security measures for sensitive partitions that contain confidential data. Utilize encryption tools or password protection features provided by your operating system or third-party software to safeguard your files from unauthorized access.
- Regularly Update Your Partitioning Software: Keep your partitioning software up to date to take advantage of the latest features, bug fixes, and security enhancements. Updated software ensures optimal performance and compatibility with newer systems and drives.
- Maintain Good Drive Health: Regularly monitor the health of your SanDisk SSD by checking for firmware updates and running diagnostic tests. Monitoring the drive’s health helps identify potential issues early on and allows for timely maintenance or necessary actions.
- Be Mindful of Reserved Space: Some operating systems and file systems reserve a small amount of disk space for specific purposes. Understand the reserved space requirements of your operating system and file system when allocating disk space to partitions.
Implementing these tips will help you optimize the performance, organization, and security of your partitioned SanDisk external SSD. By taking the necessary precautions and utilizing the right tools, you can effectively manage your data and ensure a smooth experience with your partitioned SanDisk SSD.
Conclusion
Partitioning your SanDisk external solid-state drive (SSD) can greatly enhance the organization, performance, and security of your storage solution. By creating separate partitions on your SanDisk SSD, you can efficiently manage your files, improve file access speeds, and safeguard sensitive data.
In this article, we discussed the importance of partitioning and the benefits it offers. We highlighted the precautions to take before partitioning, such as backing up your data and verifying drive health, to minimize the risk of data loss. Additionally, we outlined the tools you will need, including reliable partitioning software, to successfully partition your SanDisk SSD.
We provided a step-by-step guide to help you through the partitioning process, emphasizing the need for careful consideration of partition sizes, file systems, and labels. Following these steps will ensure a smooth and efficient partitioning experience.
Furthermore, we shared valuable tips for optimizing your partitioned SanDisk SSD. By employing good file organization practices, regularly cleaning up unnecessary files, and monitoring fragmentation, you can maintain optimal performance and organization within each partition.
It’s important to remember to regularly back up your data, secure your partitions, and maintain the health of your SanDisk SSD to safeguard your files and prolong the lifespan of your drive.
In conclusion, partitioning your SanDisk external SSD is a worthwhile endeavor that offers numerous benefits. By organizing your data, improving performance, and ensuring data security, you can maximize the utility and efficiency of your SanDisk SSD. Follow the guidelines and tips provided in this article for a successful partitioning experience and to optimize the performance of your partitioned SanDisk external SSD.