Introduction
Welcome to the world of wireless audio! If you’re a proud owner of Skullcandy wireless earbuds and an iPad, you’re in for a treat. Pairing your Skullcandy earbuds to your iPad opens up a world of convenience and freedom, allowing you to listen to your favorite music, podcasts, or videos without the hassle of tangled wires.
In this guide, we’ll walk you through the step-by-step process of pairing your Skullcandy wireless earbuds to your iPad. Whether you’re a tech-savvy individual or a beginner, don’t worry. We’ve got you covered with easy-to-follow instructions.
Before we dive into the steps, make sure your Skullcandy earbuds are charged and ready to go. A fully charged pair of earbuds ensures uninterrupted audio enjoyment for hours on end.
Now, let’s get ready to experience the seamless connection between your Skullcandy wireless earbuds and your iPad. Get ready to enjoy high-quality audio, freedom of movement, and a tangle-free experience like never before!
Step 1: Turn on your Skullcandy wireless earbuds
The first step towards pairing your Skullcandy wireless earbuds with your iPad is to ensure that the earbuds are turned on. This may sound like a simple task, but it’s crucial to establish a connection between the earbuds and your device.
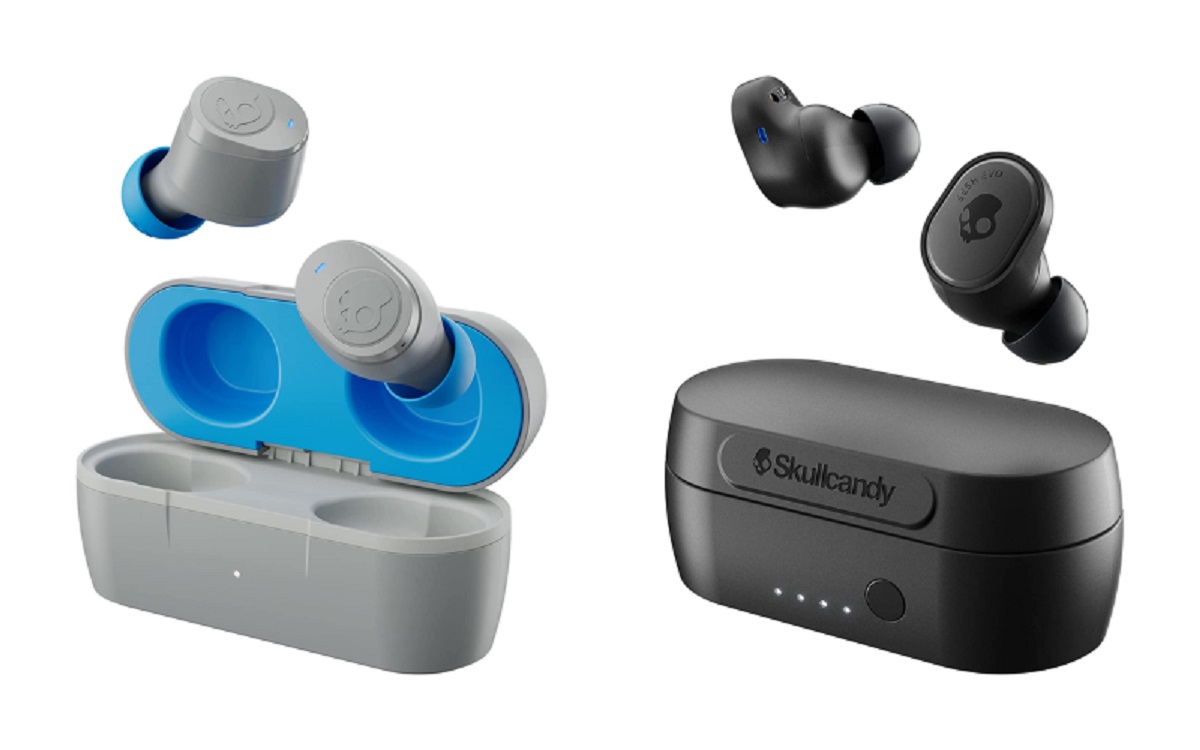
To turn on your Skullcandy earbuds, locate the power button on the earbuds themselves. It is usually positioned either on the side or at the base of the earbuds. Press and hold the power button until you see the LED light indicator blinking, indicating that the earbuds are now turned on.
It’s worth noting that different models of Skullcandy earbuds may have slightly different power buttons and indicators. Refer to the user manual that came with your specific model for detailed instructions on how to turn them on.
Once the earbuds are powered on, you’re one step closer to enjoying the wireless audio experience on your iPad. Now, let’s move on to the next step: enabling Bluetooth on your iPad.
Step 2: Enable Bluetooth on your iPad
In order to pair your Skullcandy wireless earbuds with your iPad, you need to ensure that Bluetooth is enabled on your device. Bluetooth is the wireless technology that allows devices to communicate and establish a connection without the need for cables.
To enable Bluetooth on your iPad, follow these simple steps:
- Open the Settings app on your iPad. You can usually find it on the home screen.
- Scroll down and tap on “Bluetooth”.
- Toggle the switch to turn on Bluetooth. The switch will turn green, indicating that Bluetooth is now enabled.
Once Bluetooth is enabled on your iPad, it will start scanning for nearby devices that are discoverable. This is the crucial step that allows your Skullcandy earbuds to be detected and paired with your iPad.
Keep in mind that different versions of iOS may have slightly different interfaces or steps, but the overall process remains similar. Refer to your iPad’s user manual or the Apple support website for specific instructions if needed.
Now that Bluetooth is enabled on your iPad, it’s time to move on to the next step: putting your Skullcandy earbuds into pairing mode.
Step 3: Put your Skullcandy earbuds into pairing mode
Before you can connect your Skullcandy earbuds to your iPad, you need to put them into pairing mode. Pairing mode allows your earbuds to be discovered by your iPad’s Bluetooth settings, enabling them to establish a connection.
The process of entering pairing mode may vary depending on the model of your Skullcandy earbuds. However, the general steps are as follows:
- Make sure your Skullcandy earbuds are turned off. If they are turned on, turn them off by pressing and holding the power button.
- With your earbuds turned off, press and hold the power button. You will typically need to hold it for a few seconds until the LED light on the earbuds starts flashing or changes color.
- The flashing LED light or color change indicates that your Skullcandy earbuds are now in pairing mode and ready to be discovered by your iPad.
It’s important to note that some Skullcandy earbuds may have a dedicated pairing button instead of using the power button. Refer to your specific model’s user manual for precise instructions on how to enter pairing mode.
With your Skullcandy earbuds in pairing mode, it’s time to move on to the next step: connecting them to your iPad.
Step 4: Connect your Skullcandy earbuds to your iPad
With your Skullcandy earbuds in pairing mode, it’s time to connect them to your iPad. This step will establish a wireless connection between the two devices, allowing you to enjoy your audio without the hassle of wires.
To connect your Skullcandy earbuds to your iPad, follow these steps:
- Open the Settings app on your iPad and navigate to the Bluetooth settings.
- Your iPad will start scanning for nearby devices. After a few moments, you should see your Skullcandy earbuds listed under the “Devices” section.
- Tap on your Skullcandy earbuds in the list to initiate the pairing process.
- Your iPad will now attempt to establish a connection with your earbuds. You may be asked to confirm a pairing code or PIN on both devices. Follow the on-screen prompts to complete the pairing process.
- Once the connection is successfully established, you will see a confirmation message on your iPad, indicating that your Skullcandy earbuds are now connected and ready to use.
It’s important to note that the pairing process may take a few seconds or minutes, depending on your devices and the strength of the Bluetooth signal. Be patient and wait for the successful connection confirmation before proceeding.
Once your Skullcandy earbuds are connected to your iPad, you can start enjoying your favorite audio content wirelessly. Play your music, podcasts, or videos and experience the freedom of movement that wireless audio provides.
Congratulations! You have successfully connected your Skullcandy earbuds to your iPad. Now, it’s time to sit back, relax, and enjoy your wireless audio experience.
Step 5: Enjoy wireless audio on your iPad with Skullcandy earbuds
Now that you have successfully connected your Skullcandy earbuds to your iPad, it’s time to make the most of this wireless audio experience. Whether you’re jamming to your favorite music, immersing yourself in a podcast, or watching videos, you can now enjoy crystal-clear sound without the hassle of tangled wires.
Here are a few tips to enhance your wireless audio experience with Skullcandy earbuds and your iPad:
- Adjust the earbud fit: Skullcandy earbuds come with different ear tip sizes to ensure a comfortable fit. Experiment with different sizes to find the one that provides the best seal and prevents sound leakage, giving you optimal sound quality.
- Explore EQ settings: Some Skullcandy earbuds offer customizable equalizer (EQ) settings that allow you to adjust the sound according to your preferences. Try experimenting with different EQ presets or create your own to enhance the audio experience.
- Use playback controls: Most Skullcandy earbuds come with built-in playback controls that allow you to easily pause, play, skip tracks, and adjust volume directly from the earbuds. Familiarize yourself with these controls to have full control over your audio playback without needing to touch your iPad.
- Manage battery life: Keep an eye on the battery level of both your Skullcandy earbuds and your iPad. Regularly charge your earbuds to ensure uninterrupted wireless audio, and consider enabling the low-power mode on your iPad to conserve battery life.
- Take advantage of the range: With your Skullcandy earbuds connected to your iPad, enjoy the freedom to move around without being tied to your device. The Bluetooth range may vary depending on the model, but you can typically expect a range of up to 30 feet.
Remember to clean and maintain your Skullcandy earbuds regularly to ensure optimal performance and longevity. Refer to the user manual or the Skullcandy website for specific instructions on cleaning and maintenance.
With these tips in mind, you are now ready to fully immerse yourself in the world of wireless audio on your iPad using your Skullcandy earbuds. So go ahead, put on your favorite songs, podcasts, or videos, and enjoy the freedom and convenience that wireless technology brings.
Conclusion
Congratulations! You have successfully paired your Skullcandy wireless earbuds to your iPad, allowing you to enjoy the convenience and freedom of wireless audio. By following the simple steps outlined in this guide, you have unlocked a world of endless possibilities for enjoying your favorite music, podcasts, and videos without the hassle of tangled wires.
Remember, always ensure that your Skullcandy earbuds are turned on and in pairing mode before attempting to connect them to your iPad. Enable Bluetooth on your iPad and patiently wait for the devices to discover each other. Once connected, you can start enjoying high-quality sound with the added benefit of unrestricted movement.
Whether you’re working out, commuting, or simply relaxing at home, your Skullcandy earbuds and iPad combination will provide you with an immersive audio experience. Explore the various features, such as adjustable sound settings and playback controls, to personalize your audio journey and make the most of your wireless setup.
Don’t forget to take care of your Skullcandy earbuds by regularly cleaning them and keeping them charged. This will ensure that they continue to deliver exceptional audio quality and longevity.
Thank you for choosing Skullcandy and joining the world of wireless audio on your iPad. Now, go ahead and enjoy the freedom of wireless audio with your Skullcandy earbuds and immerse yourself in a world of captivating sound.