Introduction
RAM sticks, also known as memory modules, are essential components in any computer system. They help in storing and retrieving data quickly, ensuring smooth and efficient performance. While RAM sticks come in various designs and colors, sometimes you may want to personalize them to match your computer setup or add a touch of creativity to your workstation.
Painting RAM sticks is a popular DIY project among computer enthusiasts and custom builders. It allows you to customize the look of your RAM sticks to complement your overall computer aesthetics. Whether you want to create a sleek and clean appearance or go for a bold and vibrant design, painting your RAM sticks can provide a unique and personalized touch to your computer setup.
This guide will take you through the step-by-step process of painting RAM sticks. We will explore the supplies you’ll need, how to prepare the RAM sticks for painting, choosing the right paint and design, applying the paint, and properly sealing the finished product. By following these steps, you can transform the appearance of your RAM sticks and make them stand out in your computer case.
Before we dive into the details, it is important to note that painting RAM sticks may void their warranty. However, if you are willing to take the risk and embrace the creative possibilities, let’s get started on this fun and rewarding project!
Supplies Needed
Before you begin painting your RAM sticks, it’s important to gather all the necessary supplies. Having everything prepared in advance will make the process much smoother and prevent interruptions. Here are the supplies you’ll need:
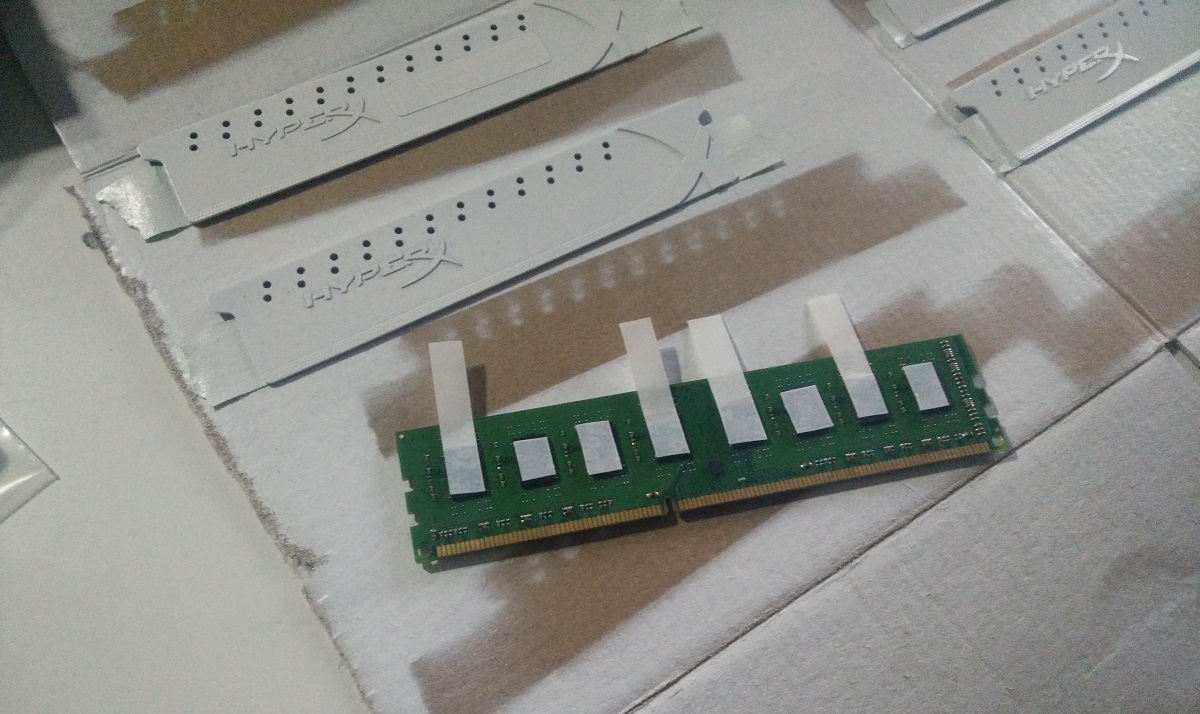
- RAM sticks: Ensure that you have the RAM sticks you want to paint. Remember, painting RAM sticks may void their warranty, so choose sticks that you’re willing to personalize.
- Paint: Acrylic paint is a popular choice for painting RAM sticks due to its vibrant colors, versatility, and quick drying time. Pick colors that match your aesthetic or go for bold and contrasting shades for a more eye-catching design.
- Paintbrushes: Different sizes of paintbrushes will allow you to easily apply paint on various areas of the RAM sticks. A small detail brush is helpful for intricate designs and fine details.
- Primer: Using a primer before painting is crucial for ensuring that the paint adheres well to the surface of the RAM sticks. Look for a primer that is suitable for the material of your RAM sticks.
- Clean cloth or microfiber cloth: You’ll need a soft cloth to clean the RAM sticks before painting. Ensure that it is lint-free to avoid any fibers sticking to the sticks.
- Masking tape: Masking tape will help you create clean and precise lines or protect areas that you don’t want to be painted. It’s essential for achieving sharp edges and avoiding smudges.
- Protective gloves: Wearing gloves will prevent oils and dirt from your hands transferring onto the RAM sticks while handling them. It will also protect your hands from any chemicals used during the painting process.
- Plastic sheet or newspaper: To protect your working surface from paint splatters and spills, lay down a plastic sheet or newspaper before you start painting.
- Sealant or clear coat: Applying a sealant or clear coat after painting is vital for protecting the paint and providing a smooth and durable finish. Look for a sealant that is compatible with the type of paint you’re using.
Having these supplies readily available will make the painting process more organized and enjoyable. Once you’ve gathered everything, you’re ready to move on to the next step: preparing the RAM sticks for painting.
Step 1: Prepare the RAM Sticks
Before you start painting your RAM sticks, it’s important to properly prepare them to ensure that the paint adheres well and the finished result is smooth and durable. Follow these steps to prepare the RAM sticks:
- Disconnect the RAM sticks: If your computer is powered on, shut it down and disconnect the RAM sticks from the motherboard. Handle the RAM sticks with care to avoid any accidental damage.
- Clean the RAM sticks: Use a clean cloth or microfiber cloth to gently wipe down the surfaces of the RAM sticks. Remove any dust, dirt, or fingerprints that may interfere with the adhesion of the paint. Ensure that the cloth is lint-free to avoid leaving behind any fibers.
- Remove labels and stickers (optional): If your RAM sticks have any labels, stickers, or branding that you want to remove, carefully peel them off. Use a mild adhesive remover if necessary, but be cautious not to damage the RAM sticks’ surface.
- Sand the surface (optional): If your RAM sticks have a glossy or smooth surface, you may want to lightly sand them to create a more textured surface for better paint adhesion. Use fine-grit sandpaper and gently sand in a circular motion. Wipe away any residue with a clean cloth.
- Mask off connectors and contacts: To protect the connectors and contacts on the RAM sticks, use masking tape to cover them. This will ensure that they remain unpainted and maintain their functionality.
By following these initial steps, you’ll be ready to move on to the exciting part of choosing the paint and design for your RAM sticks. Properly preparing the RAM sticks sets a solid foundation for a successful painting process and ensures a professional-looking finish.
Step 2: Choose Your Paint and Design
Choosing the right paint and design for your RAM sticks is where your creativity comes into play. Consider these steps to select the perfect paint and design:
- Research paint types: Look into different types of paint suitable for painting on the surface of your RAM sticks. Acrylic paint is a popular choice due to its versatility, vibrant colors, and quick drying time. Make sure the paint you choose is compatible with the material of your RAM sticks.
- Select your color palette: Decide on the color palette that matches your aesthetic or the theme of your computer setup. You can go for a monochromatic look, complementary colors, or even experiment with bold and contrasting shades. Consider the overall color scheme of your workstation when making your selection.
- Plan your design: Visualize the design you want to create on your RAM sticks. It can be a simple pattern, a specific motif, or even a detailed artwork. You can sketch it out on paper or use design software to get a better idea of how it will look on the RAM sticks.
- Consider your skill level: Take into account your painting skills and experience when choosing a design. If you’re a beginner, starting with simpler patterns or geometric shapes can make the process more manageable. As you gain confidence, you can explore more intricate designs.
- Gather inspiration: Look for inspiration online, in art books, or through other creative mediums. Explore different styles, techniques, and designs that resonate with you. This will help you refine your vision and create a design that truly reflects your personal style.
Remember, the beauty of painting your RAM sticks lies in the freedom to express your creativity. Choose a paint type and color palette that you’re comfortable working with, and select a design that sparks joy and matches your desired aesthetic. With these decisions made, you’re ready to move on to the next step: cleaning the RAM sticks in preparation for painting.
Step 3: Clean the RAM Sticks
Before applying any paint to your RAM sticks, it’s crucial to ensure that they are clean and free from any contaminants. Follow these steps to clean the RAM sticks:
- Prepare a cleaning solution: Mix a small amount of mild dish soap with warm water in a bowl. The solution should be gentle enough to clean the RAM sticks without causing any damage.
- Dampen a cloth: Dip a clean cloth or microfiber cloth into the cleaning solution, making sure it is not dripping wet. Wring out any excess liquid to prevent it from seeping into the RAM sticks or connectors.
- Gently clean the RAM sticks: Using the damp cloth, wipe down the surfaces of the RAM sticks. Pay special attention to any areas that may have accumulated dirt, fingerprints, or oils. Be careful not to apply excessive pressure or get any cleaning solution on the connectors or contacts.
- Rinse the RAM sticks: Once you have cleaned the RAM sticks thoroughly, rinse them under running water to remove any remaining soap residue. Make sure the water is lukewarm and not too hot as excessive heat can be damaging to the RAM sticks.
- Dry the RAM sticks: Pat the RAM sticks dry with a clean, lint-free cloth or allow them to air dry completely. Make sure there is no moisture left on the RAM sticks before moving on to the next steps.
By cleaning the RAM sticks before painting, you remove any dirt or oils that could prevent the paint from adhering properly. This step ensures a smooth and flawless finish for your painted RAM sticks. With the RAM sticks now clean, it’s time to move on to the next step: applying primer to the surfaces.
Step 4: Apply Primer
Applying primer to the RAM sticks is an essential step in the painting process. Primer helps create a smooth surface, enhances paint adhesion, and provides a solid base for the paint to adhere to. Follow these steps to apply primer to your RAM sticks:
- Choose a suitable primer: Look for a primer that is specifically designed for the material of your RAM sticks. The primer should be compatible with acrylic paint if that’s what you’ll be using.
- Prepare your workspace: Lay down a plastic sheet or newspaper to protect your working surface. Ensure good ventilation in the area to prevent inhaling fumes or particles.
- Shake the primer can: Shake the primer can vigorously for a few minutes to ensure that the primer is well-mixed and ready for application. Follow the instructions on the can for any specific shaking requirements.
- Hold the spray can at a distance: Holding the spray can about 8-12 inches away from the RAM sticks, start spraying the primer in a smooth and even back-and-forth motion. Keep the can moving to avoid any buildup of primer in one spot.
- Apply light and even coats: Apply a thin and even coat of primer to the entire surface of the RAM sticks. Avoid applying too much primer at once, as it can lead to drips or a textured finish. If needed, wait for the first coat to dry and then apply a second coat for better coverage.
- Allow the primer to dry: Follow the drying time mentioned on the primer can. It usually takes around 15-30 minutes for the primer to dry, but the drying time may vary depending on the brand.
- Sand the primer (optional): If you notice any imperfections or roughness on the dried primer, you can lightly sand it with fine-grit sandpaper to achieve a smoother surface. Wipe away any sanding residue with a clean cloth.
Applying primer creates a solid foundation for the paint and ensures better adhesion. It also helps in achieving a smoother and more professional-looking finish. With the primer applied and dried, you’re ready to move on to the next step: applying the base coat of paint to the RAM sticks.
Step 5: Apply Base Coat
Applying a base coat of paint to your RAM sticks is the next step in the painting process. The base coat provides the foundation for the design and helps achieve the desired color and coverage. Follow these steps to apply the base coat:
- Choose your base coat paint: Select the color of paint that will serve as the base for your design. Consider the overall design and color scheme you envisioned during the planning stage.
- Prepare your workspace: Ensure that your working surface is protected with a plastic sheet or newspaper. Adequate ventilation is important for the fumes to dissipate and to ensure a smooth painting process.
- Stir the paint: Give the paint a thorough stir using a paint stirrer or a similar tool. This will help to ensure that the color is evenly mixed and ready for application.
- Apply the base coat: Using a clean paintbrush or a spray can, apply the base coat paint to the RAM sticks. Start from one end and work your way to the other, making sure to cover the entire surface evenly. Apply thin and even coats, allowing each coat to dry before applying the next one.
- Check for coverage: After each coat, inspect the RAM sticks for any areas that may need additional coverage. Apply additional coats as needed until you achieve the desired color and coverage. Remember to allow each coat to dry before applying the next one.
- Smooth out any imperfections: As you apply the base coat, keep an eye out for any drips or brush strokes that may leave a textured finish. Smooth out any imperfections by lightly sanding them with fine-grit sandpaper. Wipe away any sanding residue with a clean cloth.
Applying a base coat sets the tone for your design and provides a solid background for any additional patterns or details. Take your time to ensure smooth, even coats during this step. With the base coat applied, you’re now ready to move on to the next step: adding your chosen design and details to the RAM sticks.
Step 6: Add Design and Details
Adding your chosen design and details is where the creative part of painting your RAM sticks really shines. This step allows you to put your personal touch on the RAM sticks and make them truly unique. Follow these steps to add your design and details:
- Refer to your design plan: Take out your design plan or reference images for guidance. This will help you stay focused and ensure that you achieve the desired design on your RAM sticks.
- Choose your paint colors: Select the colors that you will be using to create your design. Consider the overall color palette you decided on earlier and choose colors that complement each other.
- Start with the base design: Begin by painting the main elements of your design. This could be geometric shapes, lines, or any specific motifs that you planned. Use a steady hand and take your time to ensure clean and precise lines.
- Add details and accents: Once the base design is complete, move on to adding smaller details and accents. These can include intricate patterns, textures, or highlights to make your design more interesting and visually appealing.
- Experiment and be creative: Don’t be afraid to experiment and let your creativity flow. You can incorporate different techniques such as stenciling, splattering, or blending colors to add depth and dimension to your design.
- Allow each layer to dry: If you are applying multiple layers of paint, make sure to allow each layer to dry completely before moving on to the next one. This will prevent smudging or mixing of colors.
- Step back and evaluate: Take breaks during the painting process to step back and evaluate your progress. This will help you identify any areas that may need adjustments or additional detailing.
Remember, adding your design and details is where you can truly showcase your creativity. Take your time and enjoy the process of transforming your RAM sticks into personalized works of art. With your design and details complete, you’re almost done! The next step is to seal the paint to protect and preserve your hard work.
Step 7: Seal the Paint
Sealing the paint on your RAM sticks is an important step to protect your design and ensure its longevity. A proper sealant will help preserve the paint and provide a durable finish. Follow these steps to seal the paint:
- Select a suitable sealant: Choose a sealant specifically designed for use with the type of paint you used on your RAM sticks. Look for a sealant that provides protection against UV rays, moisture, and scratches.
- Prepare your workspace: Ensure that your working surface is clean and properly protected with a plastic sheet or newspaper. Adequate ventilation is necessary for the fumes to disperse.
- Read the instructions: Carefully read the instructions on the sealant can to familiarize yourself with the application process and any safety precautions.
- Apply the sealant: Holding the can at a distance, spray an even and light coat of sealant onto the painted surface of the RAM sticks. Be sure to cover all areas that were painted.
- Allow the sealant to dry: Follow the drying time mentioned on the sealant can. It usually takes several hours or overnight for the sealant to fully cure. Avoid handling the RAM sticks during this time to prevent any smudges or damage to the sealant.
- Apply additional coats (optional): If desired, you can apply additional coats of sealant for added protection. Make sure to let each coat dry completely before applying the next one.
Sealing the paint on your RAM sticks provides a protective barrier against external elements, ensuring that your design remains vibrant and intact over time. With the paint sealed, your RAM sticks are nearly complete! The final step is to allow them to dry thoroughly before reinstalling them in your computer.
Step 8: Let the RAM Sticks Dry
After completing the painting and sealing process, it’s crucial to allow sufficient drying time for the paint and sealant to fully cure. Proper drying ensures that the paint adheres well and that the RAM sticks are ready to be installed back into your computer. Follow these steps to let the RAM sticks dry:
- Find a well-ventilated area: Choose a clean and well-ventilated space where the RAM sticks can dry undisturbed. Avoid areas with excessive humidity or dust, as these can affect the drying process.
- Place the RAM sticks on a flat surface: Lay the RAM sticks on a clean and dry surface, ensuring that they are level and not touching each other. This allows for even drying and prevents any smudging or damage to the painted surfaces.
- Avoid handling the RAM sticks: During the drying period, refrain from handling the RAM sticks as much as possible. Touching or moving them prematurely can disrupt the drying process and may leave fingerprints or smudges on the painted surfaces.
- Follow the recommended drying time: Refer to the instruction labels on the paint and sealant cans for their specific drying times. It typically takes a few hours to overnight for the paint and sealant to fully dry and cure, but drying times may vary depending on the products used.
- Perform a touch test: Once the recommended drying time has elapsed, lightly touch a small inconspicuous area of the RAM sticks to ensure that the paint is dry and no longer tacky. If the surface feels dry and smooth to the touch, the RAM sticks are ready for the final step.
Properly drying the RAM sticks is crucial to avoid any smudges, damage, or imperfections. It ensures that the paint and sealant have fully cured, allowing you to safely reinstall the RAM sticks back into your computer without any risk of transferring wet paint. Once the RAM sticks are dry, you’re ready for the exciting final step: reinstallation!
Step 9: Reinstall the RAM Sticks
Now that your painted RAM sticks are dry and fully cured, it’s time to reinstall them back into your computer. Follow these steps to safely and properly reinstall the RAM sticks:
- Power off your computer: Before working on any internal components, ensure that your computer is powered off and unplugged. This prevents any accidental damage or electrical hazards.
- Locate the RAM slots: Identify the RAM slots on your motherboard. These slots are typically long and have clips or latches on either side.
- Open the clips/latches: Gently push down or outwards on the clips or latches to open them. This will provide access to the RAM slots for installation.
- Align the RAM stick: Hold the RAM stick by its edges and align the gold contacts on the bottom of the stick with the corresponding slots on the motherboard.
- Insert the RAM stick: With the RAM stick aligned correctly, insert it into the slot at a slight angle. Apply gentle and even pressure until the RAM stick is firmly seated in the slot. You should hear a click when it locks into place.
- Close the clips/latches: Once the RAM stick is properly inserted, push the clips or latches back into their closed position. They should snap and securely hold the RAM stick in place.
- Repeat for additional RAM sticks (if applicable): If you have multiple RAM sticks, repeat the above steps for each additional stick, inserting them into the available RAM slots one at a time.
- Double-check the connections: Ensure that all the RAM sticks are securely installed by gently pressing down on each one. They should not move or feel loose.
- Plug in and power on your computer: After confirming that the RAM sticks are properly installed, plug in your computer and power it on. The system should recognize the newly installed RAM sticks and adjust the memory accordingly.
With the RAM sticks securely reinstalled, you can now enjoy the personalized and visually appealing touch they bring to your computer setup. The effort and creativity you put into painting your RAM sticks have resulted in a unique and customized computer component. Lastly, remember to double-check that your system recognizes the new RAM capacity and enjoy the enhanced performance!
Conclusion
Painting your RAM sticks is a fun and creative way to personalize your computer setup and add a unique touch to your workstation. By following the step-by-step process outlined in this guide, you can transform your RAM sticks into customized works of art that reflect your personal style and aesthetic.
Throughout this process, we discussed the necessary supplies, the importance of preparing the RAM sticks for painting, choosing the right paint and design, applying primer and the base coat, adding your chosen design and details, sealing the paint, allowing the RAM sticks to dry, and finally, reinstalling them into your computer.
Remember to always exercise caution and follow safety precautions when working with computer components and painting materials. Voiding the warranty of your RAM sticks is a possibility when painting them, so ensure you are comfortable with the risks involved.
Take your time, be creative, and allow your personality to shine through in your design. Experiment with different colors, patterns, and techniques to make your RAM sticks truly unique. The end result will not only enhance the aesthetics of your computer setup but also provide a sense of accomplishment and satisfaction.
Now that you have the knowledge and skills to paint your RAM sticks, it’s time to unleash your creativity and give your computer a personalized touch. Enjoy the process and let your imagination guide you on this rewarding DIY project. Happy painting!