Introduction
Welcome to the world of Minecraft, where creativity and adventure await at every turn. Whether you’re building towering structures, exploring vast landscapes, or battling fierce creatures, Minecraft offers endless possibilities for entertainment and self-expression. As a player, you want to ensure that your gaming experience is smooth and visually stunning. One way to achieve this is by making Minecraft utilize the power of your graphics processing unit (GPU) instead of relying solely on your central processing unit (CPU).
But what exactly is the difference between a GPU and a CPU? Well, both are vital components of your computer, but they serve different purposes. The CPU primarily handles general-purpose tasks, such as running applications and managing system resources. On the other hand, the GPU is specifically designed to handle complex graphical computations. By offloading some of the graphics processing to the GPU, you can free up your CPU to focus on other tasks, leading to improved performance and smoother gameplay.
In this guide, we’ll explore why it is beneficial to make Minecraft use your GPU instead of your CPU. We’ll also walk you through step-by-step instructions on how to optimize Minecraft’s settings to achieve this. So, without further ado, let’s dive into the exciting world of GPU-driven Minecraft and unlock a whole new level of performance and visual fidelity.
Understanding the Difference between GPU and CPU
Before we delve into the benefits of making Minecraft utilize your GPU, let’s take a moment to understand the fundamental differences between a GPU and a CPU.
The CPU, or central processing unit, is often referred to as the brain of your computer. It handles tasks such as running applications, managing system resources, and executing instructions. It is optimized for handling a wide range of tasks, making it a versatile component of your system.
On the other hand, the GPU, or graphics processing unit, is specifically designed to handle graphics-intensive tasks. It excels at performing repetitive calculations necessary for rendering images, videos, and 3D graphics. GPUs are built with hundreds or even thousands of cores, allowing them to perform parallel processing and handle complex calculations more efficiently.
In the context of Minecraft, which heavily relies on rendering 3D graphics, utilizing the GPU can significantly enhance the game’s performance and visuals. By offloading graphics processing to the GPU, the CPU can focus on other tasks, such as managing game logic and handling input, resulting in smoother gameplay and improved frame rates.
Additionally, GPUs are built with dedicated hardware to accelerate certain tasks, such as texture mapping, lighting effects, and shading. This means that when Minecraft takes advantage of the GPU’s capabilities, it can deliver stunning visuals with realistic lighting, shadows, and intricate details.
It’s important to note that while both the CPU and GPU are crucial for optimal gaming performance, they work together in tandem to ensure a smooth experience. Minecraft, like many other games, relies on the collaboration between these components to deliver the best possible results.
Now that we have a better understanding of the differences between the GPU and CPU, let’s explore the benefits of making Minecraft use your GPU in the next section.
Why You Should Make Minecraft Use GPU Instead of CPU
When it comes to playing Minecraft, leveraging the power of your GPU can offer numerous advantages over relying primarily on your CPU. Let’s take a closer look at why you should make Minecraft utilize your GPU for optimal performance.
1. Improved Graphics and Visuals: By offloading graphics processing to the GPU, Minecraft can take full advantage of its capabilities. This means you’ll experience enhanced graphics with smoother framerates, realistic lighting effects, and more detailed textures. From vibrant landscapes to intricately designed structures, Minecraft will come to life like never before.
2. Enhanced Performance: One of the key benefits of using your GPU for graphics processing is that it frees up your CPU’s resources. Since the CPU doesn’t have to handle the majority of graphical calculations, it can focus on other tasks necessary for smooth gameplay. This can result in improved performance, reduced lag, and faster load times.
3. Higher Frame Rates: The GPU’s ability to handle parallel processing and perform high-speed calculations allows Minecraft to achieve higher frame rates. This translates to smoother and more fluid gameplay, especially during intense action sequences or when exploring complex environments. Higher frame rates not only enhance the visual experience but also improve the overall responsiveness of the game.
4. Optimal Resource Management: Minecraft is known for its resource-intensive nature, particularly when using mods or shaders. By utilizing your GPU, Minecraft can efficiently allocate system resources, including your computer’s RAM, ensuring that the game runs smoothly without overburdening the CPU. This can result in a more stable and enjoyable gaming experience.
5. Future-Proofing: As technology advances, the demand for more advanced graphics and immersive gameplay experiences will only increase. By making Minecraft use your GPU, you future-proof your gaming setup. You’ll be able to adapt to new updates, mods, and resource packs that require more graphical horsepower, ensuring that you can enjoy Minecraft to its fullest potential.
By leveraging the power of your GPU, you can unlock a whole new level of performance and visual fidelity in Minecraft. Now that we understand the benefits of utilizing the GPU, let’s delve into the step-by-step process of making Minecraft use your GPU instead of your CPU.
Step 1: Checking Your Computer Specifications
Before optimizing Minecraft to use your GPU, it’s important to ensure that your computer meets the necessary requirements. Here’s how to check your computer specifications:
1. Operating System: Make sure you are running a compatible operating system, such as Windows, macOS, or Linux. Check the system requirements for the version of Minecraft you are using to ensure compatibility.
2. Graphics Card: Verify that your computer has a dedicated graphics card (GPU) installed. This is crucial for Minecraft to utilize the GPU. You can check your graphics card by opening the “Device Manager” on Windows or “About This Mac” on macOS.
3. GPU Model: Identify the model of your graphics card, as Minecraft may have specific requirements or recommendations for optimal performance. This information can be found in the “Device Manager” on Windows or “About This Mac” on macOS.
4. Driver Update: Ensure that you have the latest drivers for your graphics card installed. Graphics driver updates often include optimizations for gaming performance and compatibility with newer games. Visit the manufacturer’s website to download and install the latest drivers for your GPU.
5. System RAM: Minecraft benefits from having an ample amount of system RAM to run smoothly. Check your computer’s RAM capacity and verify it meets the recommended requirements for Minecraft.
6. Storage Space: Minecraft requires disk space to run and store game files. Check the available storage space on your computer and ensure you have enough free space for Minecraft and any additional mods or resource packs you plan to use.
By checking your computer specifications, you can ensure that your system meets the recommended requirements for Minecraft. This will lay the foundation for optimizing Minecraft’s settings to utilize your GPU effectively. Once you have confirmed that your computer meets the necessary specifications, you can proceed to the next steps to enhance Minecraft’s performance and visuals.
Step 2: Updating Your Graphics Drivers
An essential step in making Minecraft use your GPU effectively is to ensure that you have the latest graphics drivers installed. Updated drivers often include performance improvements and bug fixes that can enhance your gaming experience. Here’s how to update your graphics drivers:
1. Identify Your Graphics Card: First, you need to determine the model of your graphics card. This information can usually be found in the “Device Manager” on Windows or “About This Mac” on macOS. Note down the make and model of your graphics card to proceed with the driver update.
2. Visit the Manufacturer’s Website: Once you have identified your graphics card, visit the website of the manufacturer, such as Nvidia, AMD, or Intel. Look for the “Support” or “Drivers” section of the website.
3. Download the Latest Drivers: Find the appropriate drivers for your graphics card model and operating system. Download the latest version of the drivers onto your computer.
4. Install the Drivers: After downloading the drivers, locate the file and run the installer. Follow the on-screen instructions to complete the installation process. During the installation, make sure to choose the option for a clean installation if available, as this will remove any previous driver files and configurations.
5. Restart Your Computer: Once the installation is complete, restart your computer to apply the changes and ensure that the new drivers are properly loaded.
6. Verify Driver Installation: After restarting your computer, confirm that the new drivers have been successfully installed. You can do this by navigating to the “Device Manager” on Windows or “About This Mac” on macOS and checking the driver version and date for your graphics card.
Updating your graphics drivers is crucial for Minecraft to tap into the full potential of your GPU. It ensures compatibility, improves performance, and can address any issues or bugs with the previous driver version. By keeping your drivers up to date, you are taking an important step towards optimizing Minecraft’s graphics performance.
Step 3: Enabling GPU Rendering in Minecraft Settings
Now that you have updated your graphics drivers, it’s time to configure Minecraft to utilize your GPU for rendering. By enabling GPU rendering, Minecraft will leverage the graphical capabilities of your graphics card for enhanced performance and visuals. Follow these steps to enable GPU rendering:
1. Launch Minecraft: Start by launching the Minecraft game on your computer.
2. Open Video Settings: Once inside Minecraft, navigate to the “Options” menu. From there, select the “Video Settings” option.
3. Adjust Graphics Settings: In the “Video Settings” menu, you will find various options related to graphics and rendering. Here are a few key settings to consider:
- Graphics: Set the graphics option to “Fancy” for the best visual experience. This will enable advanced graphical effects and features in Minecraft.
- Render Distance: Increase the render distance to see a larger portion of the game world. However, keep in mind that higher values may require more GPU power and system resources.
- Particles: Select “All” under particles for a more immersive gameplay experience. This will enhance visual effects, such as smoke, water splashes, and more.
4. Enable Advanced OpenGL: Scroll down to the “Performance” section in the “Video Settings” menu. Enable “Advanced OpenGL” if it’s available. This option allows Minecraft to offload certain rendering tasks to the GPU for improved performance.
5. Apply Changes: After adjusting the relevant settings, click on the “Done” button to save and apply the changes. Minecraft will now utilize your GPU for rendering, enhancing the overall performance and visual quality of the game.
By enabling GPU rendering in Minecraft settings, you are maximizing the potential of your graphics card and optimizing the game’s performance. However, keep in mind that the availability and impact of certain settings may vary depending on your computer’s hardware capabilities. It’s important to find the balance that works best for your system to achieve the desired performance and visual quality in Minecraft.
Step 4: Adjusting Minecraft’s Advanced Video Settings
After enabling GPU rendering in Minecraft settings, you can further optimize the game’s performance and visuals by adjusting the advanced video settings. These settings allow you to fine-tune various graphical options to ensure the best experience based on your computer’s capabilities. Follow these steps to adjust Minecraft’s advanced video settings:
1. Open Video Settings: Start by launching Minecraft and navigating to the “Options” menu. From there, select “Video Settings” as you did in the previous step.
2. Advanced Video Settings: In the “Video Settings” menu, find and click on the “Advanced” button. This will unlock additional video settings for more control over the game’s graphics.
3. Advanced Graphics Options: Within the advanced video settings menu, you will find various options that can be adjusted to optimize performance and visuals. Here are a few key settings to consider:
- Smooth Lighting: Adjust the smooth lighting option to your preference. Higher values will result in more realistic lighting effects but may impact performance.
- Biome Blend: Enable biome blend if available. This will seamlessly blend different biomes together, enhancing the visual transition between different areas of the game world.
- Render Regions: Enable render regions if available. This setting divides the game world into regions and allows Minecraft to efficiently render only the visible regions, improving performance.
- Entity Shadows: Enable entity shadows for more realistic shadow effects on in-game entities. However, keep in mind that this may impact performance, so adjust accordingly.
4. Quality and Performance Settings: In addition to the advanced graphics options, you will also find settings related to quality and performance. These settings can be adjusted based on your computer’s capabilities and the desired balance between visuals and performance.
- Max Framerate: Set the maximum framerate based on your monitor’s refresh rate. For most monitors, a value of 60 or 120 is sufficient.
- Use VSync: Enable VSync to synchronize the game’s frame rate with your monitor’s refresh rate. This can reduce screen tearing but may introduce some input lag.
- Mipmap Levels: Adjust the mipmap levels to control the level of detail on textures. Higher values will provide sharper textures, but they may impact performance.
5. Apply Changes: After adjusting the advanced video settings to your preference, click on the “Done” button to save and apply the changes. Minecraft will now utilize the optimized settings, enhancing both performance and visual quality.
By adjusting Minecraft’s advanced video settings, you can fine-tune the game’s graphics to achieve the best balance between performance and visual quality. Remember to consider your computer’s capabilities and test different settings to find the optimal configuration for your gaming experience.
Step 5: Optimizing Your GPU Settings
To further enhance Minecraft’s performance and maximize the potential of your GPU, it’s important to optimize your GPU settings. These settings can help ensure that your graphics card is operating at its best. Here’s how you can optimize your GPU settings:
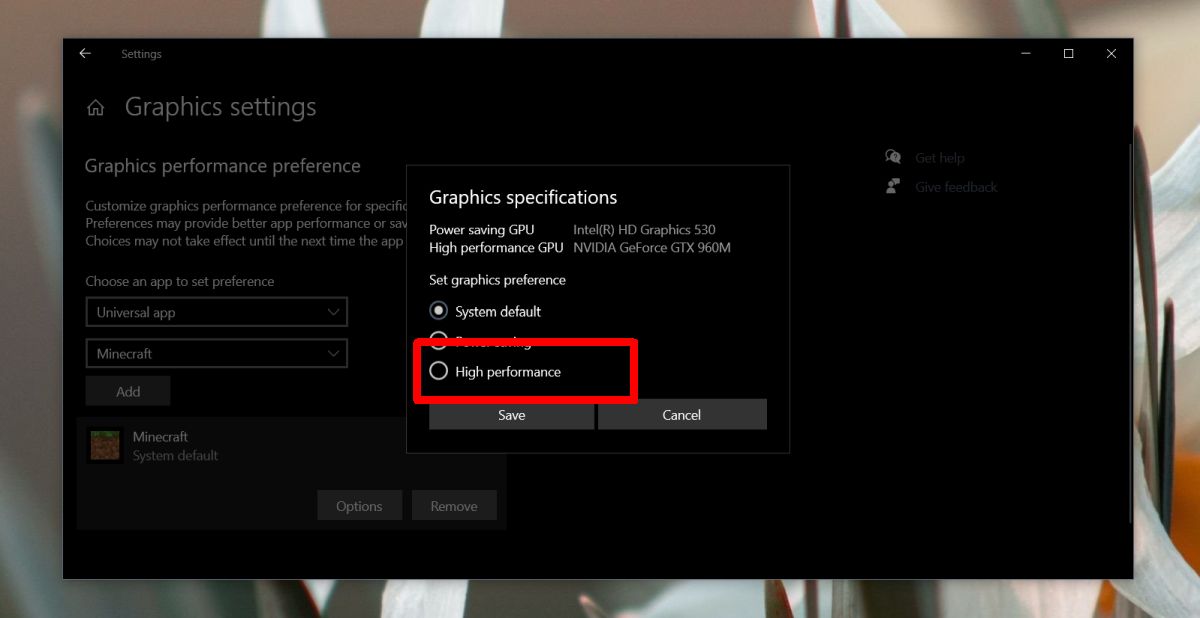
1. Graphics Card Control Panel: Most major graphics card manufacturers, such as Nvidia or AMD, provide control panels that allow you to fine-tune your GPU settings. Locate and open the control panel for your graphics card.
2. Performance Mode: In the graphics card control panel, look for a performance mode or power mode setting. Ensure that it is set to high-performance or maximum performance to optimize your GPU for gaming.
3. GPU Clock Speed: Within the control panel, you may have the ability to adjust the clock speed of your GPU. Increasing the clock speed can provide a performance boost, but be cautious not to exceed safe limits or cause stability issues.
4. Fan Speed: A well-cooled GPU can maintain optimal performance during intense gaming sessions. Adjust the fan speed settings in the control panel to ensure adequate cooling and prevent overheating.
5. Graphics Quality: Some graphics card control panels offer options to configure the level of graphics quality. Check for settings related to textures, anti-aliasing, or anisotropic filtering and choose higher quality settings for improved visuals.
6. Update GPU Firmware: Occasionally, graphics card manufacturers release firmware updates that can improve performance and address compatibility issues. Check for firmware updates within the control panel and install any available updates for your specific GPU model.
7. Monitor Refresh Rate: Ensure that your monitor is set to the appropriate refresh rate within the GPU control panel. A higher refresh rate, such as 144 Hz, can make the gameplay smoother and more responsive.
8. Apply Changes: After adjusting the GPU settings, apply the changes and exit the control panel. Your GPU is now optimized for Minecraft and ready to deliver the best possible performance.
By optimizing your GPU settings, you can unleash the full power of your graphics card and further enhance Minecraft’s performance and visual quality. However, be cautious when adjusting settings, as improper changes can lead to instability or other issues. It’s always recommended to refer to the documentation provided by your graphics card manufacturer for specific instructions on optimizing your GPU settings.
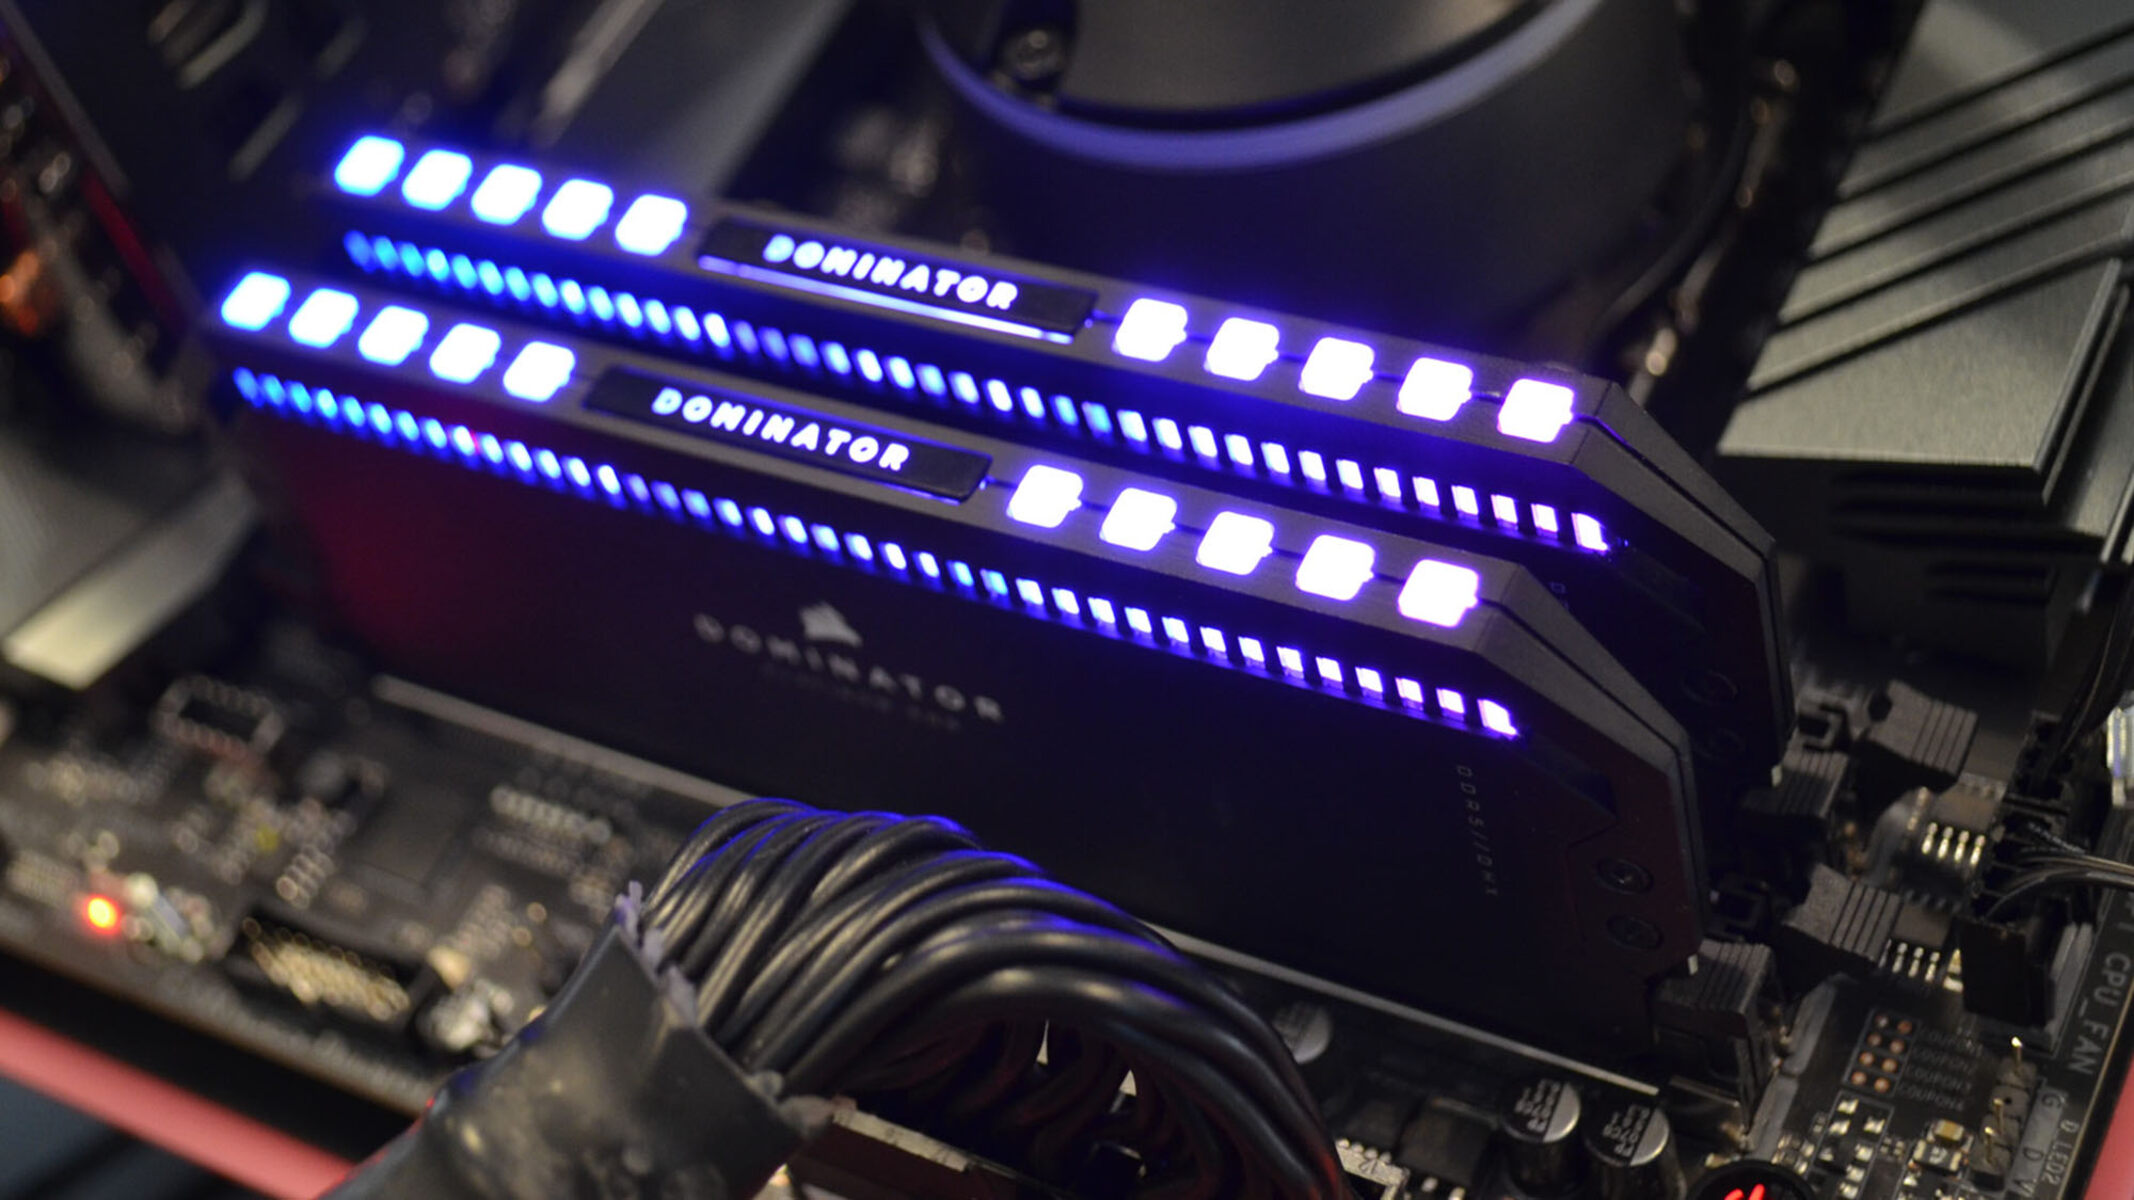
Step 6: Allocating More RAM to Minecraft
Minecraft is known for its resource-intensive nature, and allocating more RAM to the game can significantly improve its performance. By increasing the amount of available memory, Minecraft can load and process data more efficiently, resulting in smoother gameplay and reduced lag. Follow these steps to allocate more RAM to Minecraft:
1. Determine Available RAM: First, check how much RAM is currently installed on your computer. This information can be found in the system settings or by using a system monitoring tool.
2. Edit Minecraft Launcher Profile: Launch the Minecraft launcher and click on the “Installations” tab. Now, find the profile you’re using and click on the “…” button next to it.
3. Open Profile Settings: From the drop-down menu, select “Edit” to open the Profile Settings.
4. Adjust JVM Arguments: In the Profile Settings, locate the “JVM Arguments” section. JVM (Java Virtual Machine) arguments determine how much RAM is allocated to Minecraft. By default, Minecraft is typically set to use a small amount of RAM.
5. Allocate More RAM: To allocate more RAM to Minecraft, add the following line to the JVM Arguments field:
-Xmxamount_of_RAMG
Replace amount_of_RAM with the desired amount of RAM you want to allocate. For example, to allocate 4 GB of RAM, you would use:
-Xmx4G
Note that you should not allocate all of your available RAM to Minecraft, as your computer needs some memory to run other processes. It’s recommended to leave at least 2-4 GB of RAM for the operating system and other applications.
6. Save Changes and Launch Minecraft: After adjusting the JVM Arguments, click “Save” to apply the changes. Now, launch Minecraft using the modified profile, and it will run with the new allocated RAM.
By allocating more RAM to Minecraft, you can provide the game with the necessary resources to handle complex worlds, mods, and resource packs. This can result in smoother gameplay, reduced stuttering, and faster loading times, especially in large or modified Minecraft environments.
Keep in mind that allocating too much RAM to Minecraft can lead to performance issues or even crashes if your system does not have enough available memory. It’s important to find the right balance based on your computer’s specifications and the amount of RAM required by other running processes.
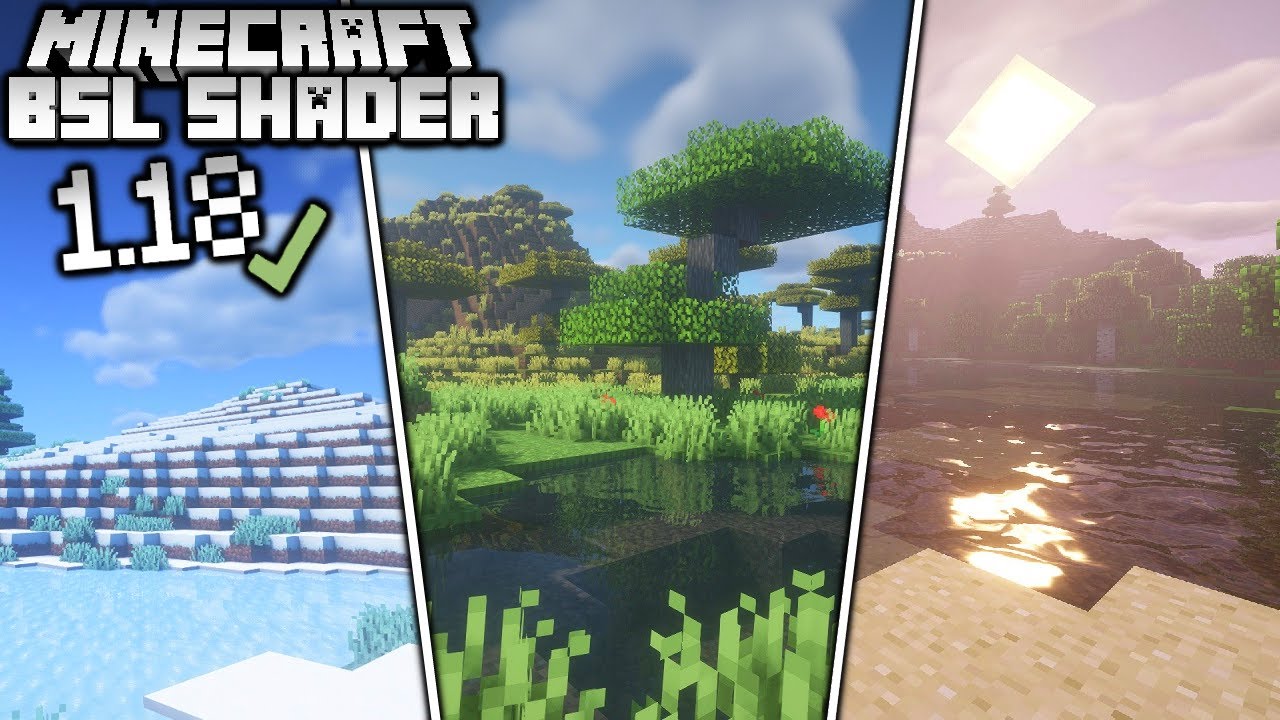
Step 7: Using Mods or Shaders to Enhance GPU Performance in Minecraft
If you’re looking to further enhance the performance and visuals of Minecraft using your GPU, you can consider using mods or shaders. Mods and shaders are extensions that modify aspects of the game, allowing for improved graphics, lighting, and overall visual effects. Here’s how you can utilize mods or shaders to optimize GPU performance in Minecraft:
1. Research Mods or Shaders: Start by researching and selecting mods or shaders that are known for their optimization and compatibility with GPU rendering. Look for popular options that have been tested and reviewed positively by the Minecraft community.
2. Download and Install Mods: Once you have decided on a specific mod, download it from a reliable source. Follow the mod’s installation instructions, which typically involve placing the mod files in the appropriate folder within the Minecraft game directory.
3. Configure Mods: Some mods may offer configuration options that allow you to adjust specific settings to optimize performance. Explore the mod’s configuration files or settings within Minecraft to make any necessary adjustments to suit your preferences and hardware capabilities.
4. Install Shaders: If you prefer to enhance Minecraft’s visuals with shaders, download shader packs curated for performance and compatibility. Install the shader packs by placing the files in the appropriate folder within the Minecraft game directory.
5. Configure Shaders: Shaders often come with customization options that allow you to fine-tune the visual effects and performance. Launch Minecraft and access the shader options within the game settings to adjust the parameters according to your preference and GPU capabilities.
6. Test Performance: Once you have installed and configured the mods or shaders, launch Minecraft and test the performance and visuals. Take note of any performance improvements or issues you may encounter. Adjust the settings or try different mods or shaders if necessary to find the optimum configuration for your system.
7. Monitor Resource Usage: Keep an eye on your computer’s resource usage while running Minecraft with mods or shaders enabled. Use system monitoring tools to ensure that the GPU, CPU, and RAM are not being overloaded, as this can impact the gaming experience.
By using mods or shaders optimized for GPU rendering, you can further enhance Minecraft’s visuals and performance. Modifying the game with these extensions allows for more efficient use of your GPU’s capabilities, resulting in improved graphics rendering and smoother gameplay. However, be mindful of the potential impact on system resources and compatibility with other mods or shaders, as some combinations may not work well together or may require additional tweaking.
Conclusion
Congratulations! You have successfully optimized Minecraft to utilize your GPU instead of relying solely on your CPU. By following the steps outlined in this guide, you have taken important measures to enhance performance and improve the visuals of the game. Let’s recap what we covered:
We first explored the difference between a GPU and a CPU, understanding their respective roles in graphics processing and general-purpose computing. We then highlighted the benefits of making Minecraft use your GPU, including improved graphics, enhanced performance, higher frame rates, and optimal resource management.
Next, we walked through the step-by-step process, starting with checking your computer specifications, updating your graphics drivers, enabling GPU rendering in Minecraft settings, adjusting advanced video settings, optimizing your GPU settings, allocating more RAM to Minecraft, and using mods or shaders to further enhance GPU performance.
It’s worth noting that the optimizations mentioned in this guide are not exclusive to Minecraft. They can be applied to other games and applications to improve performance and visuals by leveraging the power of your GPU.
Remember to regularly check for driver updates, as new versions may include further optimizations and bug fixes. Additionally, experiment with different settings and configurations to find the best balance between performance and visual quality based on your computer’s capabilities.
Now that you have optimized Minecraft for GPU usage, get ready to embark on exciting adventures, build awe-inspiring structures, and immerse yourself in the captivating world of Minecraft with enhanced performance and stunning visuals.