Introduction
Welcome to the world of digital photo albums! In this age of smartphones and digital cameras, capturing precious moments has never been easier. But what do we do with all these digital photos? Well, why not create a stunning digital photo album to showcase your memories?
A digital photo album is a modern and convenient way to organize and display your photos. With the right software, you can easily create a personalized album that reflects your style and captures the essence of your memories. Whether you want to create a keepsake for yourself or share your photos with others, a digital photo album is the perfect solution.
In this article, we will guide you through the process of creating a digital photo album from start to finish. We will explore the different steps involved in selecting the right software, organizing your photos, choosing a theme and layout, adding and editing photos, customizing with text and graphics, enhancing with effects and filters, arranging the photo order, and finally sharing and printing your digital album.
Creating a digital photo album is not only a fun and creative project but also a great way to preserve your memories in a visually appealing format. Whether it’s a wedding, a vacation, or a family gathering, a digital album allows you to relive those special moments and share them with others.
So, let’s dive into the world of digital photo albums and learn how to create a stunning keepsake that will be cherished for years to come. Get ready to unleash your creativity and showcase your photos like never before!
Choosing the Right Software
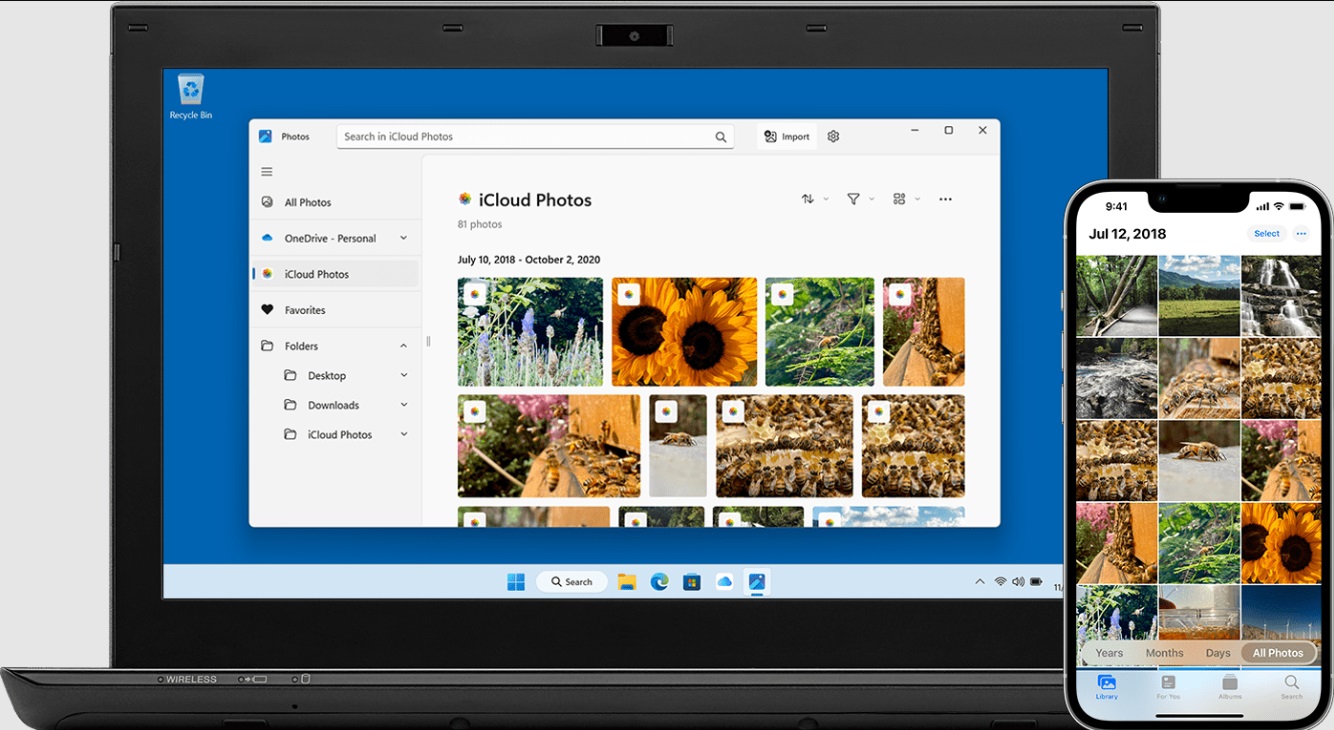
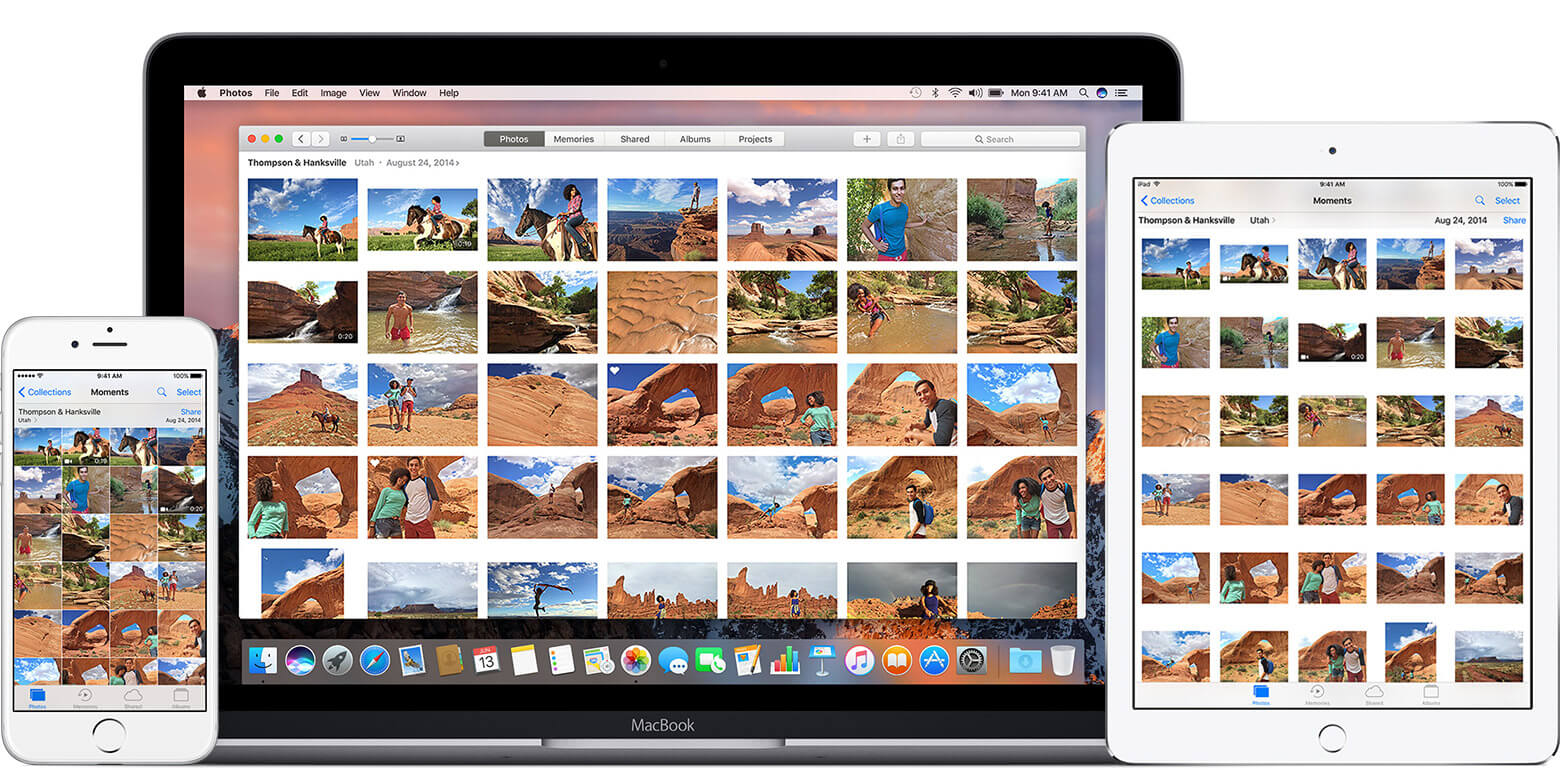
When it comes to creating a digital photo album, choosing the right software is crucial. The software you choose will determine the overall look and feel of your album, as well as the features and functionalities available to you.
There are a plethora of software options available, both free and paid, each with its own set of benefits and limitations. Here are some considerations to keep in mind when selecting the right software for your digital photo album:
- User-Friendly Interface: Look for software that has a user-friendly interface, with intuitive controls and a straightforward layout. This will make the album creation process much easier and more enjoyable.
- Layout Templates: Check if the software offers a variety of pre-designed layout templates. These templates can save you time and effort by providing ready-made designs that you can customize with your own photos and text.
- Editing Tools: Ensure that the software provides a range of editing tools to enhance and adjust your photos. Look for features like cropping, resizing, filters, and color correction to truly bring out the best in your images.
- Themes and Effects: Consider software that offers a wide range of themes and effects to add visual interest to your album. From vintage styles to modern designs, having options to match your personal preferences will help you create a unique and visually stunning album.
- Compatibility: Make sure that the software is compatible with your operating system and the file formats of your photos. This will prevent any compatibility issues and ensure a smooth workflow.
- Flexibility: Look for software that offers flexibility in terms of customization options. Being able to adjust page layouts, add text and graphics, and personalize the album to your liking will make it truly unique and reflective of your style.
- Sharing Options: Consider software that offers various sharing options, such as the ability to export the album as a digital file, share it on social media, or even create a web gallery. This will allow you to easily share your creation with friends and family.
Take your time to research and explore different software options before making a decision. Consider reading reviews, trying out free trial versions, and checking out online tutorials to get a feel for the software’s capabilities. Remember, choosing the right software will lay the foundation for creating a stunning digital photo album that you’ll be proud to share and cherish.
Organizing Your Photos
Before you start creating your digital photo album, it’s important to organize your photos. This step will not only make the album creation process smoother but also ensure that you can easily locate and select the photos you want to include in your album.
Here are some tips to help you effectively organize your photos:
- Create Folders: Start by creating folders on your computer or storage device to categorize your photos. You can use broad categories like “Family,” “Vacation,” or “Special Events,” and then create sub-folders within each category to further organize your pictures.
- Date and Location: Consider organizing your photos by date and location. This will help you easily locate and reminisce about specific events or trips. You can create sub-folders with the year, month, and location of the photos.
- Tagging and Labeling: Take advantage of tagging and labeling features available in some photo management software. This allows you to add relevant keywords or descriptions to your photos, making it easier to search for specific images later.
- Delete Unwanted Photos: Take the time to go through your photos and delete any duplicates, blurry images, or shots that didn’t turn out well. This will save space and ensure that your digital photo album only includes your best and most memorable moments.
- Sort and Arrange: Once your photos are organized into folders, you can further sort them by events, people, or themes. This will give you a clear overview of your photo collection and make it easier to select the ones you want to include in your album.
- Backup Your Photos: It’s essential to regularly backup your photos to prevent the loss of valuable memories. Consider using external hard drives, cloud storage, or online backup services to ensure the safety and accessibility of your photo collection.
By taking the time to organize your photos, you’ll have a well-structured collection that makes it easy to select the perfect images for your digital photo album. Not only will this streamline the album creation process, but it will also make it more enjoyable as you revisit and reminisce about your cherished memories.
Selecting the Theme and Layout
Once you have organized your photos, it’s time to move on to the exciting step of selecting the theme and layout for your digital photo album. The theme and layout will set the tone and visual style of your album, enhancing the overall look and feel.
Here are some factors to consider when selecting the theme and layout:
- Theme Selection: Think about the mood and theme you want to convey through your album. Do you prefer a classic, elegant look or a more playful and colorful design? Consider the subject of your photos and the emotions you want to evoke.
- Coherence: Ensure that the theme and layout you choose are consistent throughout the album. Consistency in color schemes, fonts, and overall design elements will create a cohesive and visually appealing album.
- Personalization: Look for themes and layouts that allow for personalization. The ability to customize colors, fonts, and backgrounds will make your album truly unique and reflective of your style.
- Photo Display: Consider the number of photos you want to display per page and how they will be arranged. Some layouts may showcase a single photo per page, while others may feature collages or grids. Decide on the style that suits your preferences and the photos you want to include.
- Captions and Text: Some layouts provide space for captions or text descriptions. If you want to add context or tell a story with your photos, choose a layout that accommodates text elements.
- Flexibility: Look for software that offers a variety of layout options to choose from. This will allow you to experiment with different styles and find the one that best complements your photos.
When selecting the theme and layout, take your time to explore different options. Consider creating a sample page with a few photos to see how they look within various layouts. This will help you visualize the end result and make an informed decision.
Remember, the theme and layout of your digital photo album should enhance the overall aesthetic and storytelling aspect of your album. By carefully selecting the right theme and layout, you’ll create a visually stunning album that captures the essence of your memories in an engaging and captivating way.
Adding and Editing Photos
Now that you have chosen the theme and layout for your digital photo album, it’s time to start adding and editing the photos. This step allows you to bring your album to life by carefully curating and enhancing your images.
Here’s how you can add and edit photos to create a visually appealing album:
- Importing Photos: Begin by importing your selected photos into the software you are using to create the album. Most software allows you to import photos from your computer or directly from your camera or smartphone.
- Selecting Photos: Review your organized photo collection and choose the ones that best represent the moments you want to include in your album. Select a variety of images to add visual interest and tell a story.
- Arranging Photos: Drag and drop the selected photos into the album layout you have chosen. Experiment with different arrangements to find the best composition and flow for your album.
- Cropping and Resizing: Use the editing tools available in the software to crop and resize your photos, if necessary. Crop out any unwanted elements or adjust the dimensions to fit the layout and highlight the key subjects of each photo.
- Enhancing Colors and Exposure: Adjust the colors and exposure of your photos to enhance their visual impact. Most software offers tools for adjusting brightness, contrast, saturation, and other color properties to make your photos look their best.
- Applying Filters and Effects: Experiment with different filters and effects to add artistic touches and create a specific mood for your album. Options may include black and white, vintage, sepia, or various artistic filters that can transform the look of your photos.
- Removing Imperfections: Remove any blemishes, red-eye, or other imperfections in your photos using the software’s retouching tools. This will ensure that your photos look flawless and professional.
- Adding Captions and Text: If desired, include captions or text descriptions to provide additional context or storytelling elements to your album. Choose fonts and formatting that complement the overall design and enhance the narrative.
By adding and editing your photos, you can enhance their visual appeal and create a cohesive and engaging album. Take your time to fine-tune each photo, ensuring that they fit seamlessly into the layout and express the emotions and messages you wish to convey.
Remember, the goal is to create a visually stunning album that not only showcases your photos but also tells a story and evokes emotions. So, unleash your creativity and bring your photos to life through careful editing and enhancements.
Customizing with Text and Graphics
To truly personalize your digital photo album, you can add text and graphics to enhance the storytelling and visual appeal. Customizing with text and graphics allows you to add context, captions, or decorative elements to make your album unique and captivating.
Here’s how you can customize your album with text and graphics:
- Add Text: Choose meaningful quotes, captions, or descriptions that complement your photos. Use the software’s text tool to add text boxes, select fonts, adjust sizes, and choose colors that resonate with the theme and overall design of your album.
- Tell a Story: Use text to tell the story behind each photograph or to provide additional details about the moment captured. This adds depth and context to your album, making it more engaging and memorable.
- Decorative Elements: Incorporate graphics, icons, or embellishments that enhance the visual appeal of your album. These can include doodles, borders, frames, or other creative elements that align with the theme and evoke the desired emotions.
- Graphic Overlays: Consider using graphic overlays, such as arrows, speech bubbles, or thought bubbles to guide the viewer’s attention or add a whimsical touch to your photos. These graphical elements can add visual interest and spark curiosity.
- Collages and Montages: Create collages or montages using multiple photos and graphical elements. This can be an effective way to showcase a series of related images or to present different aspects of a single event or theme.
- Text and Photo Integration: Experiment with creative ways to integrate text within or around your photos. You can overlay text onto the image itself or position it adjacent to the photo, forming a seamless connection between the text and the visual elements.
- Consistency: Maintain consistency in font choices, colors, and graphic styles throughout your album. This will ensure a cohesive and visually pleasing result.
- Balancing Act: Strike a balance between text and photos. Avoid overwhelming the album with too much text or cluttering the images with excessive graphics. Let the photos take center stage while using text and graphics to enhance and complement them.
Customizing your digital photo album with text and graphics adds a personal touch and allows you to express your creativity. Use these elements thoughtfully to create a visually stunning and engaging album that captivates the viewer’s attention and conveys your unique story.
Enhancing the Album with Effects and Filters
One way to elevate the visual appeal of your digital photo album is by enhancing it with effects and filters. These creative tools can transform your photos, adding a touch of artistry and uniqueness to your album’s overall aesthetic.
Here are some ways to enhance your album with effects and filters:
- Black and White: Convert selected photos or entire pages to black and white to create a classic and timeless look. This effect can evoke emotions, add a sense of nostalgia, or emphasize specific details in your images.
- Vintage: Apply vintage filters or effects to give your album a nostalgic and old-fashioned vibe. This can include adding a sepia tone, applying texture overlays, or mimicking the look of old film photographs.
- Artistic Filters: Experiment with artistic filters to add a unique and creative touch to your photos. These filters can transform your images into paintings, sketches, or other artistic styles, bringing a new dimension to your album.
- Color Enhancement: Enhance the colors in your photos by adjusting saturation, contrast, or vibrancy. This can make your images more vibrant and visually striking, creating a captivating and eye-catching album.
- Special Effects: Explore special effects such as blurs, vignettes, or light leaks to add a dreamy or ethereal atmosphere to your album. These effects can help create a specific mood or draw attention to the focal points of your photos.
- Texture Overlays: Overlay textures like grunge, bokeh, or film grain to add depth and visual interest to your album. These textures can create a unique and tactile look, giving your album a distinctive and artistic feel.
- Mood Filters: Use mood-specific filters, such as warm tones for a cozy feeling or cool tones for a serene atmosphere. These filters can enhance the emotional impact of your photos, aligning them with the overall theme and message of your album.
- Consistency: Maintain consistency in the application of effects and filters throughout your album. This will create a cohesive and visually pleasing experience for the viewer.
- Subtle Enhancements: Remember to apply effects and filters subtly, ensuring that they enhance rather than overpower your photos. The goal is to enhance the visual appeal of your album while still letting your memorable moments take center stage.
By enhancing your album with effects and filters, you can add a touch of creativity and artistry. Experiment with different effects and filters to find the ones that best complement your photos and convey the desired atmosphere and emotions. Let these enhancements elevate your digital photo album into a visually stunning and captivating masterpiece.
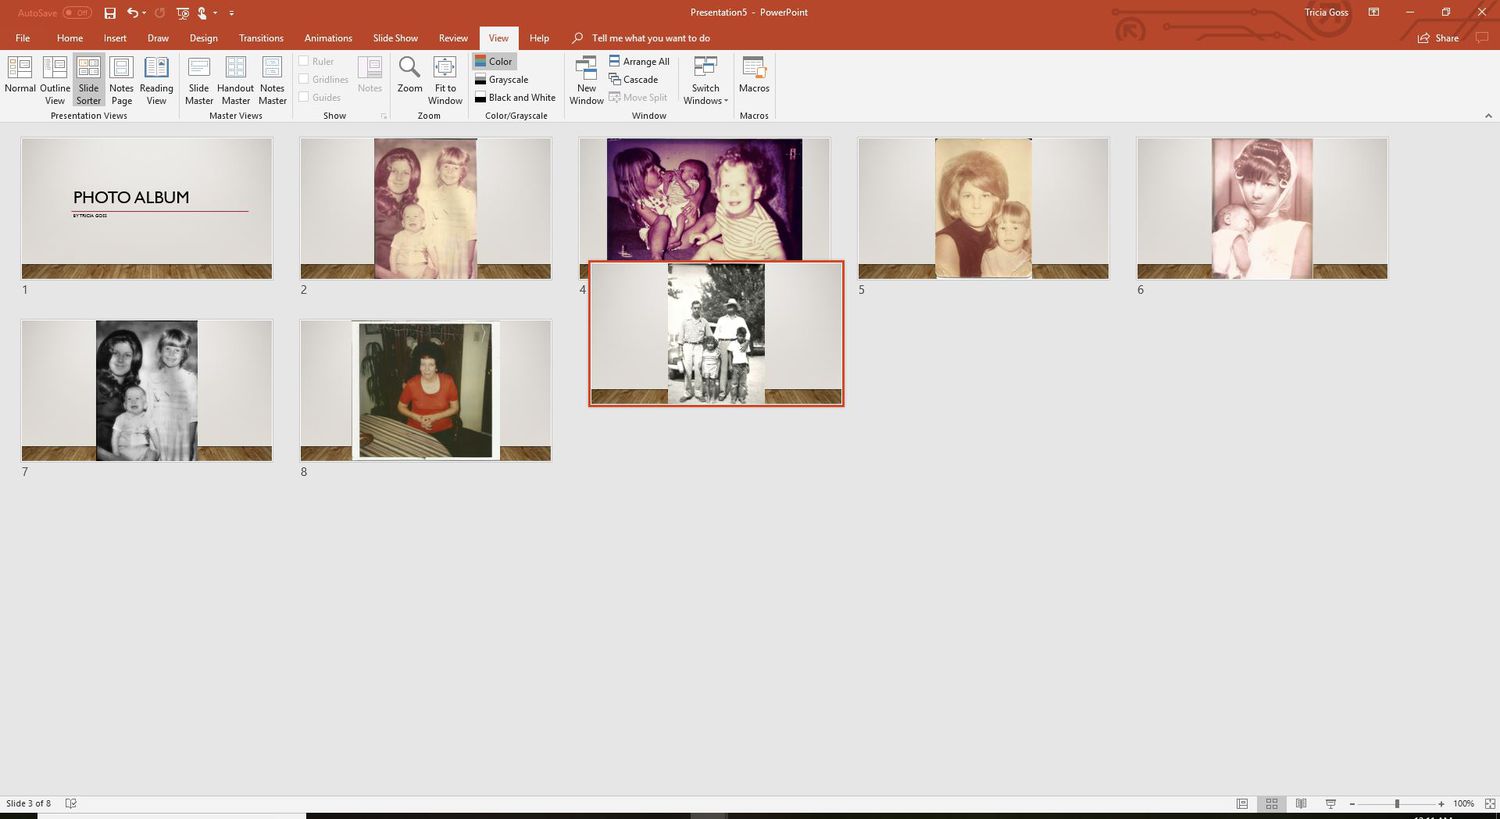
Arranging the Photo Order
Arranging the photo order is an important step in creating a cohesive and visually pleasing digital photo album. The sequence in which you present your photos can influence the storytelling aspect and overall flow of your album.
Here are some tips for arranging the photo order in your album:
- Chronological Order: Arrange your photos in chronological order to tell a story that unfolds over time. This is particularly effective when capturing events like vacations, weddings, or the growth of a child. It allows the viewer to experience the progression of moments as they unfolded.
- Theme-based Order: Group your photos based on a specific theme or subject. This arrangement can be useful if you’re creating an album around a particular topic, such as a holiday celebration, a hobby, or a series of portraits.
- Contrast and Variety: Create visual interest by alternating between different types of shots. Mix close-ups with wide-angle shots, portraits with landscapes, and color photos with black and white images. This contrast adds depth and variety to your album.
- Story Arc: Consider the narrative flow as you arrange your photos. Begin with an attention-grabbing photo, build up the story, create highs and lows, and end with a memorable or impactful image. Think of it as crafting a visual story to engage the viewer.
- Color Palette: Pay attention to the colors in your photos and try arranging them in a way that creates a pleasing color palette throughout the album. This can create a cohesive and visually harmonious experience for the viewer.
- Emotional Journey: Arrange the photos to evoke a specific emotional journey for the viewer. Start with photos that elicit happiness or excitement, then move through a range of emotions, and end on a positive or reflective note.
- Consider Page Layouts: Take into account the design and layout of your album’s pages when arranging the photos. Ensure that the photos flow naturally with the layout and that the sizes and orientations complement each other.
- Experiment and Reorder: Don’t be afraid to experiment and reorder your photos to find the most impactful sequence. You may find that rearranging a few photos completely changes the feel and narrative of your album.
- Preview and Review: Before finalizing the arrangement, preview the album as a whole and review the flow and story it portrays. Make sure it feels cohesive and engaging, adjusting any photos or page layouts as needed.
Remember, arranging the photo order is a creative process. There are no strict rules, and the best sequence will depend on your specific album and the story you want to tell. Trust your instincts and let your photos guide you as you arrange them into a well-crafted visual narrative.
Reviewing and Previewing the Album
Once you have organized and arranged your photos, it’s time to step back and review your digital photo album as a whole. Taking the time to review and preview your album ensures that it meets your expectations and presents your photos in the best possible way.
Here are some steps to help you review and preview your album:
- Check for Consistency: Review the album for consistency in theme, layout, and design. Ensure that the colors, fonts, and overall style align with the vision you had when you started creating the album.
- Ensure a Cohesive Flow: Go through the album page by page and consider the flow and narrative it presents. Make sure that the photos transition smoothly from one to another and that the overall story or theme is apparent.
- Edit and Refine: Look closely at each page and photo to check for any imperfections or areas that could be improved. Consider making adjustments, such as cropping, resizing, or editing the photos further to enhance their visual impact.
- Verify Text and Captions: Double-check all the text and captions in your album for accuracy, spelling, and grammar. Ensure that the text complements the photos and adds to the storytelling aspect without being distracting.
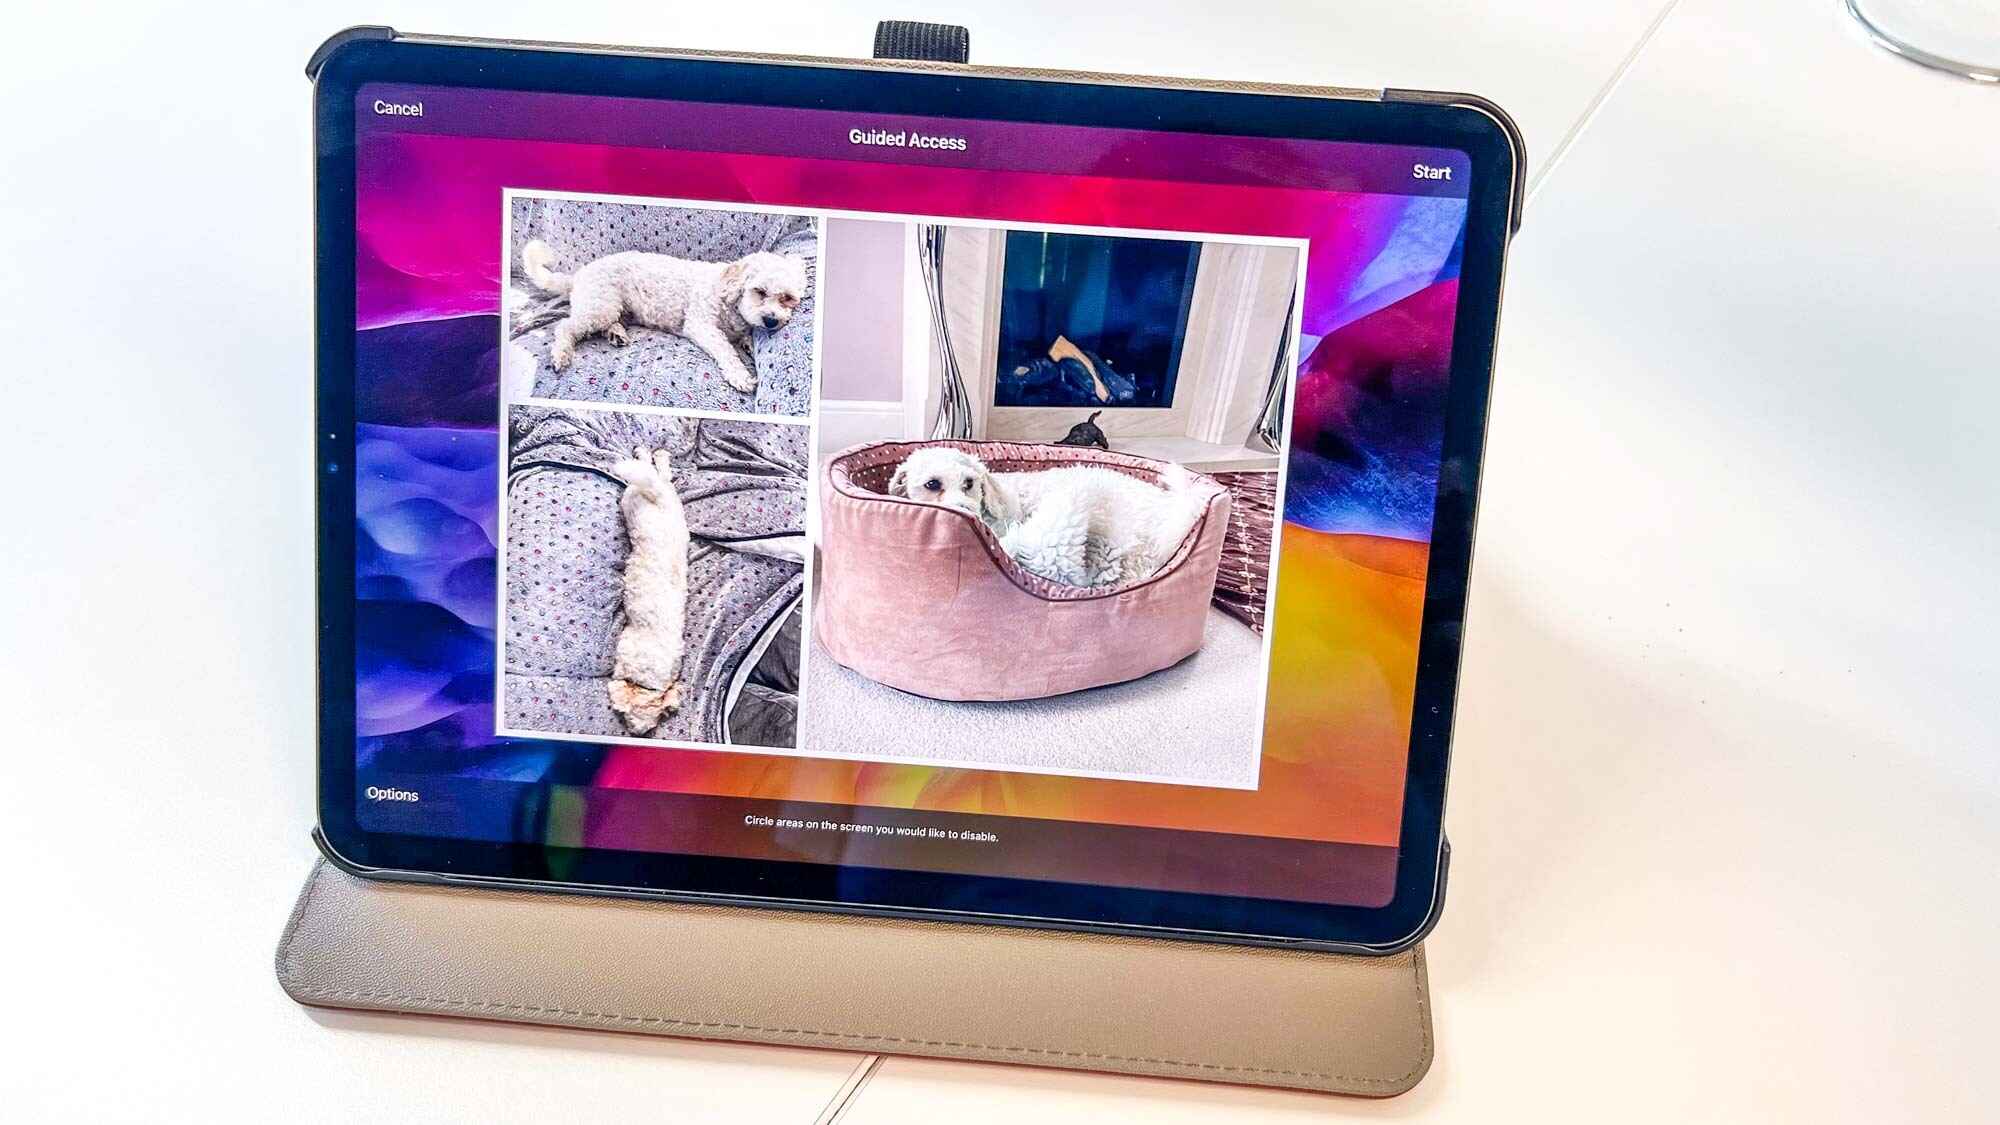
- Preview Different Formats: Take advantage of the preview function in your software to see how your album looks in different formats, such as on a computer screen, tablet, or smartphone. This allows you to ensure that the album’s layout and design are optimized for various viewing platforms.
- Share with Others: Show your album to a trusted friend or family member and invite their feedback. They may notice details or provide perspectives that can help you further refine and improve your creation.
- Make Necessary Adjustments: Based on your review and feedback, make any necessary adjustments or revisions to your album. This may include rearranging photos, refining layouts, or tweaking text and captions.
- Perform a Final Review: Once you’ve made the adjustments, perform a final review to ensure everything is in place and meets your satisfaction. Take your time to go through each page carefully, checking for any last-minute changes or improvements.
By thoroughly reviewing and previewing your album, you can ensure that it showcases your photos in the best possible way. This process allows you to identify areas for improvement, make necessary adjustments, and create a final product that you can be proud of.
Remember, a well-reviewed and previewed album reflects your attention to detail and commitment to presenting your photos in the most captivating and engaging manner.
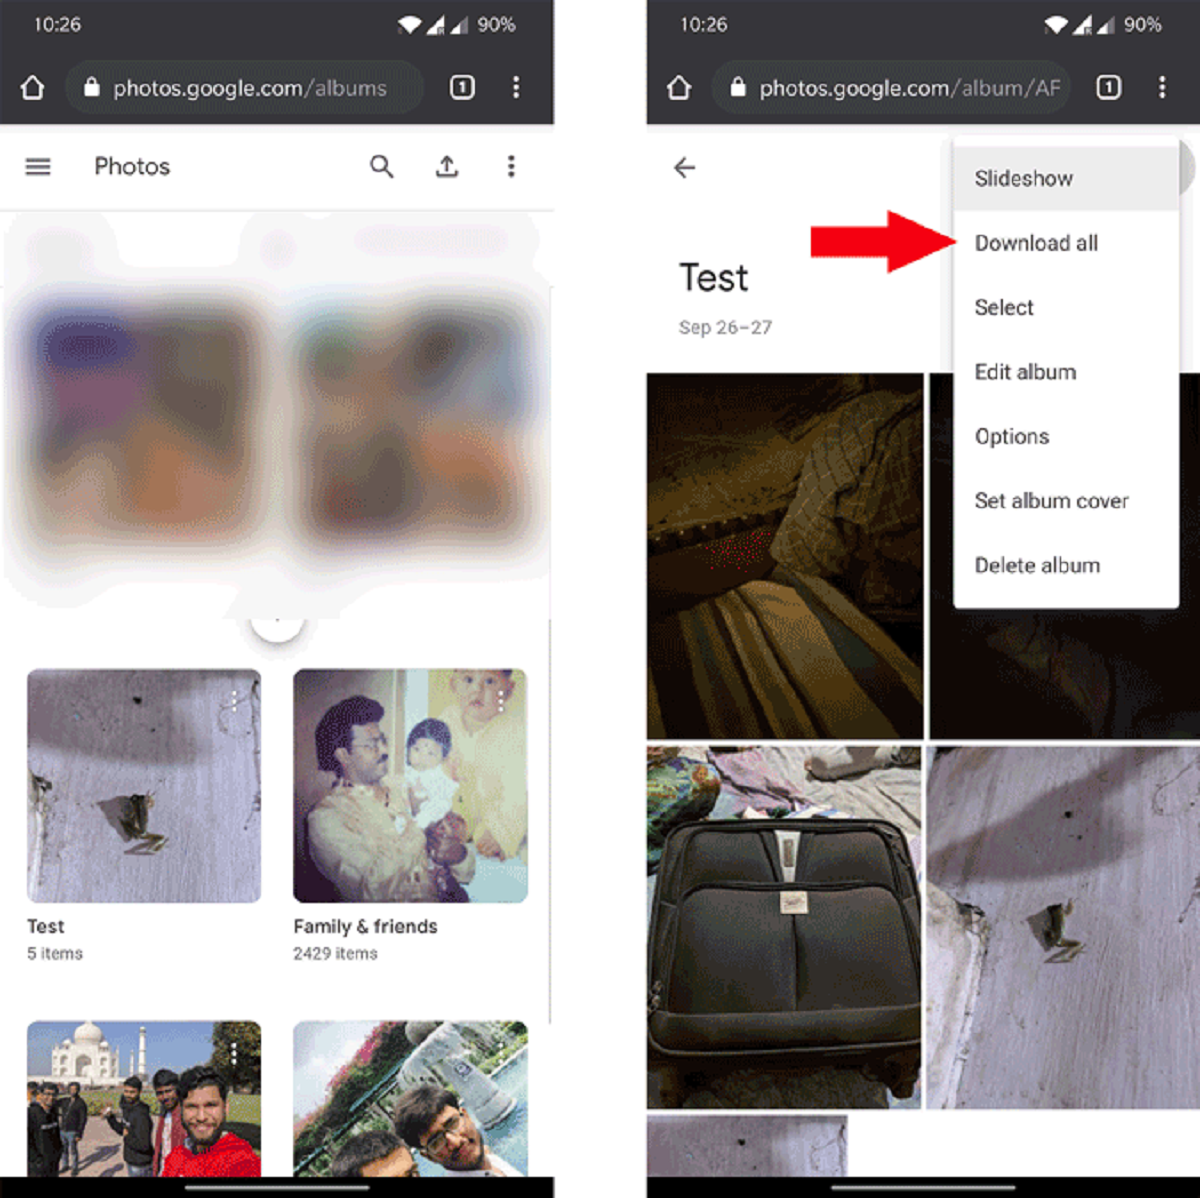
Sharing and Printing the Digital Photo Album
Once you’ve created your digital photo album, it’s time to share and showcase your masterpiece with others. Whether you want to share it online or print a physical copy, there are various ways to get your album out into the world.
Here are some options for sharing and printing your digital photo album:
- Online Sharing: Share your album electronically by uploading it to a photo-sharing website or social media platforms. You can create a web gallery or share individual pages or photos with friends and family.
- Album Sharing Software: Consider using album-sharing software that allows you to create interactive and shareable albums. These platforms provide a unique viewing experience, often with features like page flips, zooming in on photos, and commenting.
- Email or Messaging: Share your album directly with specific individuals by sending it via email or messaging apps. This allows for a more personal and targeted way of sharing your memories.
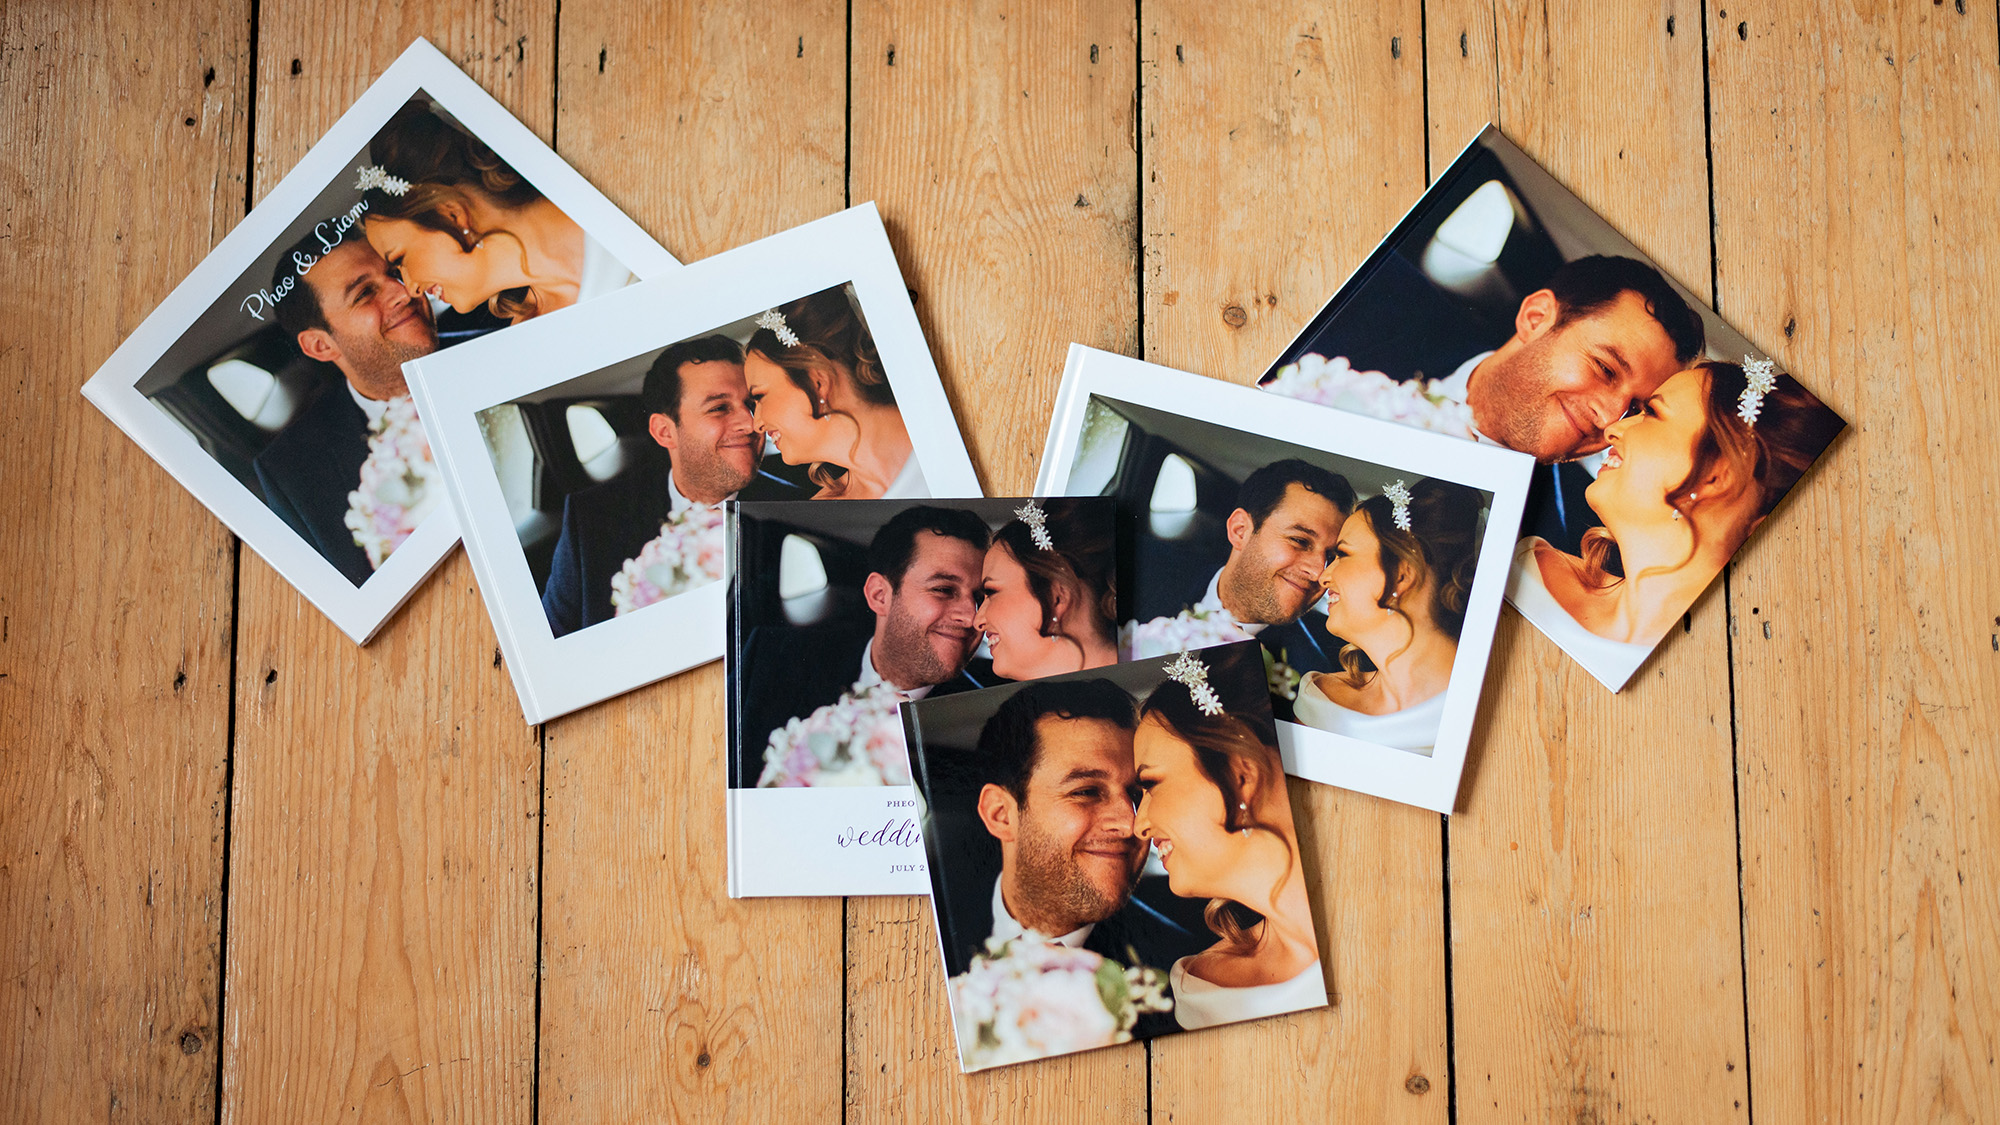
- Printed Albums: If you prefer a tangible copy of your album, you can opt to print it. There are various online printing services that offer high-quality photo album printing. Select the desired size, paper type, and cover materials to create a physical memento.
- Wall Art and Décor: Transform selected photos from your album into wall art or home décor items. Consider printing your favorite photos as canvases, framed prints, or other creative formats to display in your home or gift to loved ones.
- Gifts and Keepsakes: Create personalized photo gifts using your album, such as calendars, mugs, or photo books. These make great presents for special occasions and allow you to share your memories in a unique and thoughtful way.
- Backup and Storage: Make sure to create a backup of your digital photo album and store it in a safe location. This ensures that your precious memories are protected and can be accessed even if the original files are lost or damaged.
- Social Media Sharing: Share individual photos or selected pages from your album on social media platforms. This allows you to showcase your creativity and memories to a wider audience and invites engagement and comments from friends and followers.
Choose the sharing option that best suits your preferences and the audience you want to reach. Whether it’s through online sharing, printing physical copies, or creating personalized gifts, sharing your digital photo album allows you to celebrate and relive your memories with others.
Remember to consider privacy settings and copyright protection when sharing your album online. Only share with those you trust, and ensure that you have the appropriate permissions for any copyrighted content included in your album.
By sharing and printing your digital photo album, you give your memories a tangible and shareable form that can be enjoyed by yourself and loved ones for years to come.
Conclusion
Congratulations! You’ve now learned the steps to create a stunning digital photo album from start to finish. By following the process of choosing the right software, organizing your photos, selecting a theme and layout, adding and editing photos, customizing with text and graphics, enhancing with effects and filters, arranging the photo order, and reviewing and previewing your album, you’ve created a beautiful keepsake that showcases your cherished memories.
Creating a digital photo album allows you to bring your photos to life, tell a story, and share your experiences with others. Whether you choose to share your album online or print a physical copy, the options to showcase and preserve your memories are endless.
Remember, the key to a successful digital photo album rests in your creativity and attention to detail. Take your time to select the right software, curate your photos thoughtfully, and apply editing techniques that enhance their visual appeal.
Customize your album with personalized touches such as text, graphics, and effects to create a truly unique and captivating experience. Arrange your photos in a way that tells a story or creates a specific mood, and review and preview your album to ensure it meets your vision.
Whether you create an album to preserve moments from a special event, document a trip, or simply celebrate the everyday moments that matter, embracing the art of digital photo albums allows you to create lasting memories that can be shared and cherished for years to come.
So, unleash your creativity, capture your precious memories, and let your digital photo album become a treasured keepsake that brings joy, nostalgia, and a sense of pride every time you revisit it.