Introduction
Are you tired of your old laptop struggling to run the latest games? Are you dreaming of joining the world of PC gaming but don’t have the budget for a new gaming laptop? Well, fear not! With a few upgrades and tweaks, you can transform your old laptop into a gaming powerhouse.
Many people think that gaming is only reserved for expensive gaming rigs, but the truth is, you can achieve a decent gaming experience on a budget. By optimizing your old laptop’s hardware and software, you can unlock its untapped potential and enjoy a smooth and immersive gaming experience.
In this guide, we will take you through the step-by-step process of turning your old laptop into a gaming laptop. Whether you’re a casual gamer or a hardcore enthusiast, these tips and tricks will help you get the most out of your aging machine.
Before we dive into the details, it’s important to note that the success of transforming your old laptop into a gaming laptop depends on its specifications. While these upgrades can significantly improve performance, they may not be able to match the capabilities of a high-end gaming laptop. Nonetheless, you’ll be surprised at the level of gaming performance you can achieve with a few clever optimizations.
So, if you’re ready to give your old laptop a new lease on life and enjoy some gaming action, let’s get started with the first step: assessing the old laptop’s capabilities.
Step 1: Assessing the Old Laptop’s Capabilities
Before diving into any upgrades or modifications, it’s crucial to assess your old laptop’s current capabilities. Knowing its limitations will help you determine the best course of action for maximizing its gaming potential.
The first thing to consider is the laptop’s processor. Gaming requires a processor that can handle the demands of modern games. Check the specifications of your laptop’s processor, including the clock speed and number of cores. If your processor is outdated or underpowered, you may need to consider upgrading to a more capable one.
Next, take a look at the amount of RAM your laptop has. The more RAM you have, the smoother the gaming experience will be. If your laptop has less than 8GB of RAM, consider upgrading to at least 16GB. This upgrade will provide a noticeable boost in performance, especially when running demanding games.
Another critical component to evaluate is the graphics capabilities of your laptop. Most older laptops rely on integrated graphics, which often struggle to handle modern games. Look up the model of your integrated graphics chip and compare it to the minimum requirements of the games you want to play. If the integrated graphics fall short, consider upgrading to a dedicated graphics card.
Storage is another aspect to consider. Older laptops typically come with mechanical hard drives, which have slower read and write speeds compared to solid-state drives (SSDs). Upgrading to an SSD will significantly improve loading times and overall system responsiveness, giving you an edge in gaming where speed is essential.
Lastly, assess the laptop’s cooling system. Gaming can put a strain on the laptop’s internal components, leading to overheating. Check for any signs of overheating or poor ventilation. If necessary, clean the cooling fans and consider investing in a cooling pad to ensure optimal thermal management.
By thoroughly assessing your old laptop’s capabilities, you will have a clear understanding of its strengths and limitations. With this knowledge in hand, you can move forward with the appropriate upgrades and modifications to turn your old laptop into a gaming powerhouse.
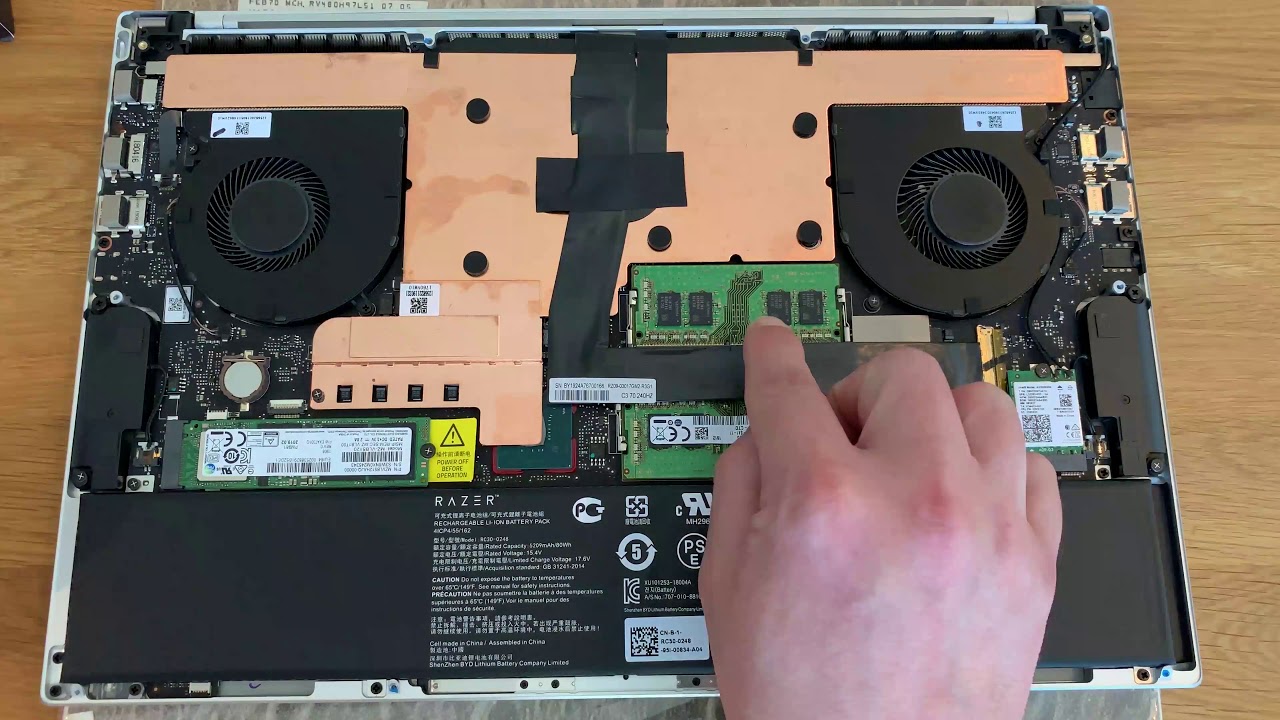
Step 2: Upgrading the RAM for Better Performance
One of the most impactful upgrades you can make to your old laptop to enhance its gaming performance is to upgrade its RAM. RAM, or random access memory, plays a crucial role in storing and accessing data for running applications, including games.
Start by checking the current amount of RAM installed on your laptop. If it has 4GB or less, it’s highly recommended to upgrade to at least 8GB, or even better, 16GB, depending on your budget and the requirements of the games you intend to play.
The process of upgrading RAM is relatively straightforward. Start by referring to your laptop’s user manual to determine the type and speed of RAM compatible with your system. Additionally, check if there are any restrictions on the maximum RAM capacity your laptop can support.
Once you’ve gathered the necessary information, purchase the appropriate RAM modules from a reputable manufacturer or retailer. Make sure to match the type, speed, and capacity of the existing RAM as closely as possible to ensure compatibility.
Before proceeding with the RAM upgrade, it’s crucial to power off your laptop and disconnect it from any power sources. Also, take the necessary precautions to prevent static electricity discharge, such as wearing an anti-static wristband or touching a grounded metal object before handling the RAM modules.
Locate the RAM slots on your laptop, which are usually accessible by removing a panel on the bottom. Gently insert the new RAM modules into the empty slots, making sure they are firmly seated and properly aligned with the notches on the module and the slot.
After installing the new RAM, replace the panel and reconnect the power source. Power on your laptop, and it should automatically recognize the increased RAM capacity. To verify the successful installation, you can check the system information or use software utilities to confirm the new RAM size.
Upgrading the RAM on your old laptop will significantly improve its multitasking abilities and provide a smoother gaming experience. The increased RAM capacity allows for better game performance by providing more room for data storage and faster access to frequently used game files.
By upgrading your laptop’s RAM, you’ll notice faster load times, reduced lag, and improved overall system responsiveness, making your gaming sessions more enjoyable and immersive.
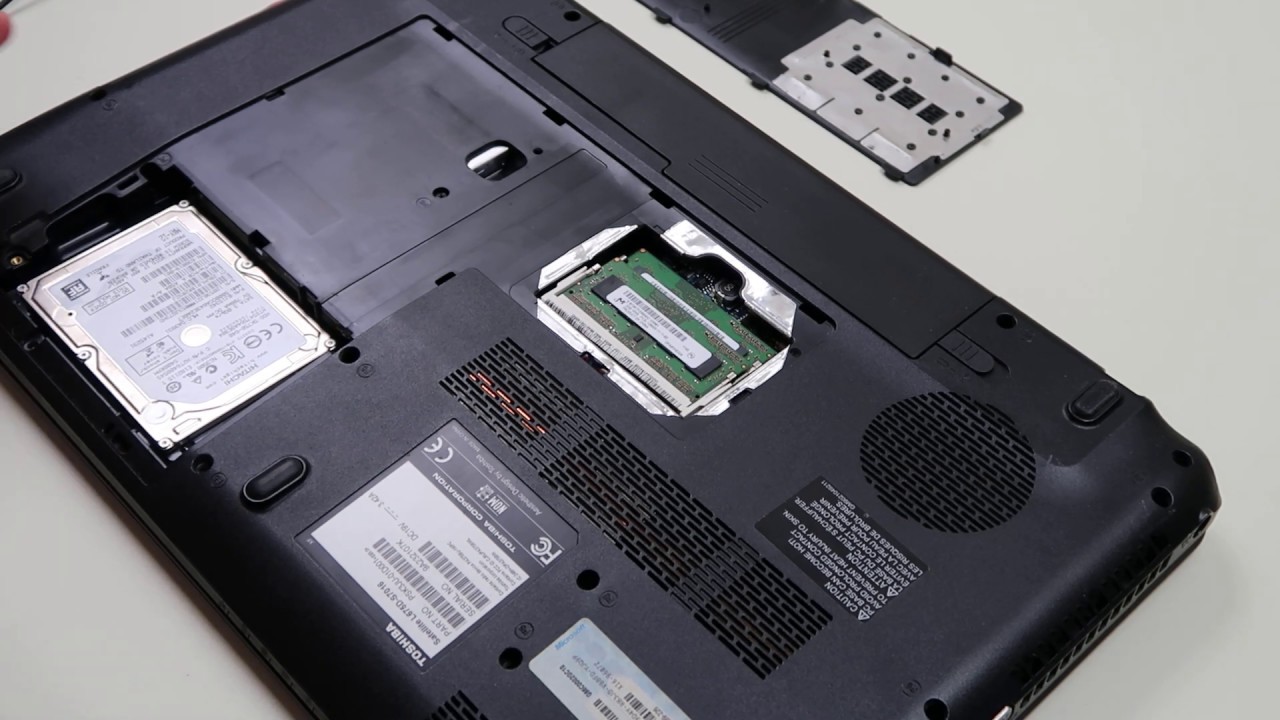
Step 3: Upgrading the Storage for Improved Loading Times
Upgrading the storage of your old laptop is another crucial step in optimizing its gaming performance. Traditional mechanical hard drives can be a significant bottleneck when it comes to loading times and overall system responsiveness. By upgrading to a solid-state drive (SSD), you can enjoy faster boot times, quicker game loading, and improved overall performance.
Before proceeding with the upgrade, it’s important to consider the storage needs of your gaming library. Games are increasingly becoming larger in size, so it’s advisable to choose an SSD with ample capacity to accommodate your favorite games. A 500GB or 1TB SSD should provide enough space for a decent collection of games.
Start by researching and selecting a high-quality SSD that suits your requirements. Look for models with good read and write speeds to ensure optimal performance. Additionally, consider whether you want to replace your existing hard drive completely or add the SSD as a secondary drive alongside it.
Before physically installing the SSD, make sure to back up your important data and files. Once you’ve done that, shut down your laptop and disconnect any power sources. Locate the existing hard drive and carefully remove it from its slot. If you’re replacing it completely, remove all cables and screws keeping it in place.
Next, insert the SSD into the appropriate slot, ensuring a secure connection. Secure it using the necessary screws or clips. If you’re adding it as a secondary drive, you’ll need to find an available slot to install it and connect the necessary cables.
After physically installing the SSD, you’ll need to reinstall the operating system to fully utilize its benefits. This can be done by creating a bootable USB drive with the operating system installation files and following the on-screen instructions. Make sure to have your product key handy.
Once the operating system is installed on the SSD, you can start transferring your games and files to the new drive. This can be done manually by copying and pasting or by using migration software that simplifies the process.
With the SSD installed and your games moved over, you’ll immediately notice significantly faster loading times. Games will launch more quickly, and levels will load in a fraction of the time it took with the traditional hard drive.
Upgrading your laptop’s storage to an SSD not only improves gaming performance but also enhances overall system responsiveness. Your laptop will feel snappier, and tasks such as file transfers, application launches, and system booting will be much quicker.
So, take the leap and upgrade your laptop’s storage to an SSD. You’ll enjoy improved loading times, faster performance, and an enhanced gaming experience.
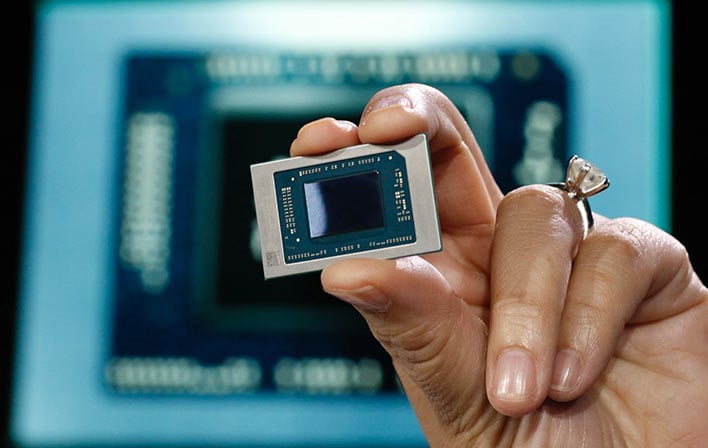
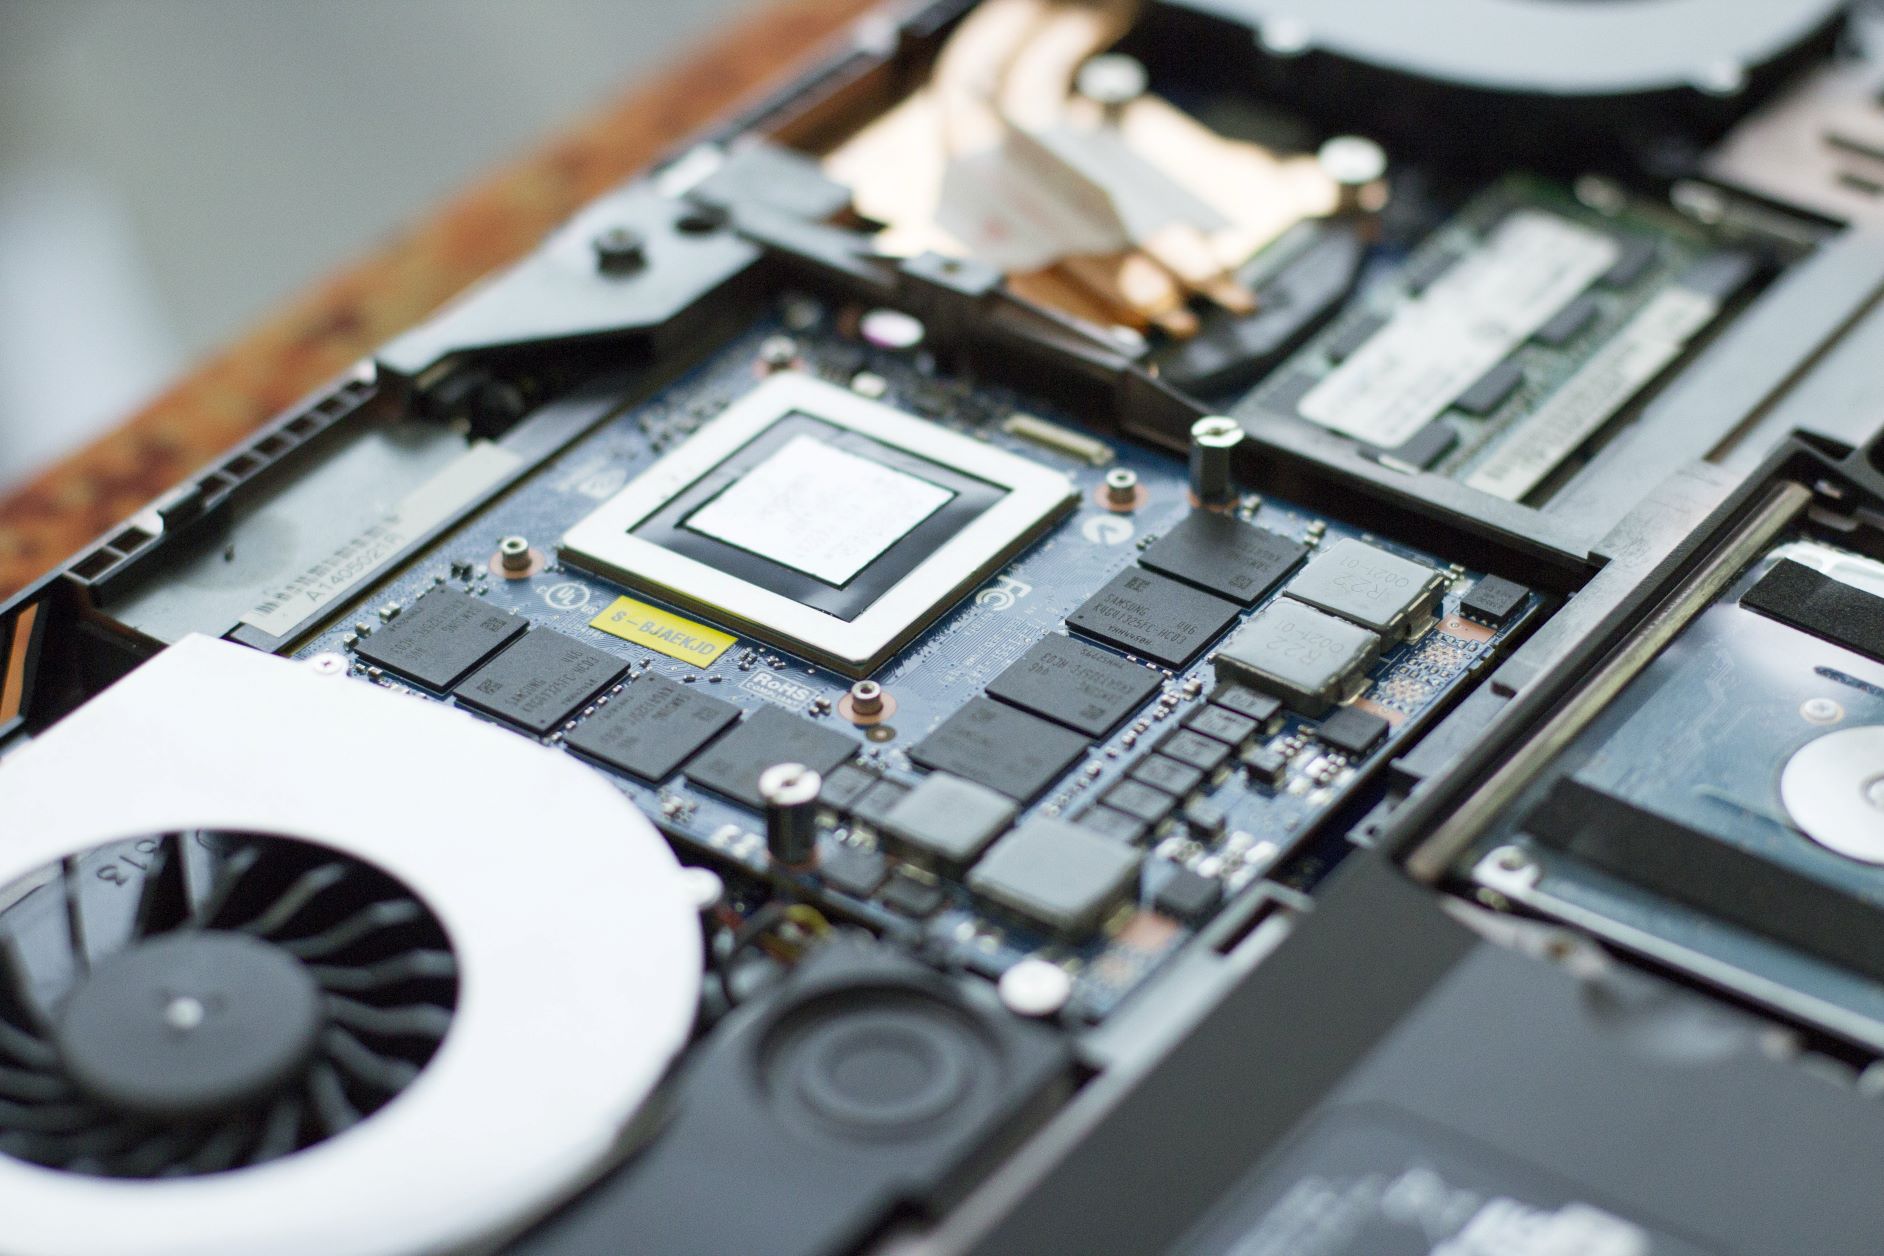
Step 4: Installing a Dedicated Graphics Card for Enhanced Gaming Experience
If your old laptop relies on integrated graphics, you may experience limitations when it comes to running demanding games. To overcome this, installing a dedicated graphics card can significantly enhance your gaming experience and allow you to play the latest titles with smoother graphics and improved performance.
Before proceeding with the installation, it’s vital to check the compatibility of your laptop with dedicated graphics cards. Not all laptops are upgradeable in this aspect, as some have integrated graphics chips soldered directly onto the motherboard. Research your laptop model and specifications to determine whether it can accommodate a dedicated graphics card.
Once you’ve confirmed that your laptop can support a dedicated graphics card, you’ll need to choose the appropriate one for your needs. Look for a graphics card that fits within your budget and offers a good balance between power and performance. Consider the requirements of the games you intend to play and choose a card that meets or exceeds those specifications.
Installation of a dedicated graphics card involves opening up your laptop and connecting it to the motherboard. However, it is a complex and delicate process that requires technical expertise. It is recommended to have a professional technician perform the installation to ensure it is done safely and correctly.
When installing a dedicated graphics card, considerations must be made for power consumption and cooling. Many laptops may not have the necessary power supply or cooling capabilities to support a high-end graphics card. Upgrading the power supply and ensuring proper cooling is essential to avoid overheating and other issues.
Once the graphics card is successfully installed, you’ll need to install the appropriate drivers and software to ensure optimal performance and compatibility. Visit the manufacturer’s website or use automatic driver installation software to find and install the latest drivers for your graphics card.
With the dedicated graphics card in place, you’ll notice a significant improvement in your gaming experience. Graphics will be rendered more smoothly, and you’ll be able to enjoy high-quality visuals and advanced effects in your favorite games. The added power and performance of the graphics card will also allow you to play newer games that were previously out of reach.
Be sure to periodically update the graphics card drivers to take advantage of performance enhancements and bug fixes released by the manufacturer. Regular updates will ensure that your gaming experience remains optimized and that you can enjoy the latest advancements in graphics technology.
By installing a dedicated graphics card in your old laptop, you can breathe new life into your gaming experience. Enjoy smoother gameplay, improved graphics, and the ability to play a wider range of games, all thanks to the enhanced power and performance of your dedicated graphics card.
Step 5: Optimizing the Cooling System to Prevent Overheating
Overheating is a common issue when it comes to gaming on laptops, especially during intense gaming sessions. Excessive heat can cause performance throttling, system instability, and potentially even permanent damage to your laptop’s components. To ensure smooth and uninterrupted gameplay, it’s crucial to optimize the cooling system of your old laptop.
The first step in optimizing the cooling system is to clean out any dust and debris that may have accumulated over time. Dust clogs up the cooling vents and obstructs airflow, leading to increased temperatures. Use compressed air or a soft brush to gently remove dust from the vents, fans, and heat sinks.
In addition to regular cleaning, you can also invest in a cooling pad specifically designed to keep laptops cool. These cooling pads come with built-in fans that provide additional airflow to the underside of the laptop. They help dissipate heat more effectively, thereby reducing the temperature of internal components.
Another effective way to optimize cooling is to adjust the power settings of your laptop. Setting the power mode to “High Performance” can increase fan speed and cooling performance. However, keep in mind that this may affect battery life, so it’s recommended to plug in your laptop while gaming to maintain optimal performance.
Monitoring software can be a valuable tool in keeping an eye on temperatures and fan speeds. Install a reliable monitoring program that displays real-time information about your laptop’s thermal status. This will allow you to take necessary actions if temperatures rise to critical levels, such as reducing the game settings or taking a break to let the laptop cool down.
If your laptop still experiences overheating issues even after cleaning, using a cooling pad, and adjusting power settings, you may need to consider more advanced cooling solutions. Options include applying high-quality thermal paste to the CPU and GPU, replacing the existing thermal pads or thermal paste with better ones, or even upgrading the cooling system with aftermarket cooling solutions.
Remember that proper ventilation is crucial for optimal cooling. Ensure that the laptop is placed on a flat surface with sufficient airflow around the vents. Avoid using the laptop on soft surfaces like beds or sofas, as they can block ventilation and lead to overheating.
By optimizing the cooling system of your old laptop, you can effectively prevent overheating and maintain optimal performance while gaming. With cooler temperatures, your laptop’s components will be able to operate more efficiently, providing you with a smoother and more enjoyable gaming experience.
Step 6: Updating Drivers and Software for Maximum Compatibility
Updating drivers and software is an essential step in maximizing the compatibility and performance of your old laptop when gaming. Outdated drivers and software can lead to compatibility issues, poor performance, and potential crashes. By keeping everything up to date, you can ensure that your laptop is ready to handle the demands of modern games.
The first thing you should do is update the graphics drivers. Graphics drivers are regularly updated by manufacturers to optimize performance and address compatibility issues. Visit the website of your laptop’s graphics card manufacturer – NVIDIA, AMD, or Intel – and download the latest drivers for your specific card model and operating system.
In addition to graphics drivers, it’s important to update other drivers as well, including those for the chipset, network adapter, audio, and input devices. These updates can improve overall system stability and compatibility with games.
Updating your operating system is also crucial. Windows updates often contain important patches and fixes that address security vulnerabilities and enhance performance. Make sure your laptop is set to automatically download and install updates, or manually check for updates regularly.
Aside from updating drivers and the operating system, it’s a good idea to keep your gaming platform and game launchers up to date. Popular gaming platforms like Steam, Epic Games Store, or GOG Galaxy frequently release updates that not only improve performance but also introduce new features and bug fixes.
Regularly checking for updates within your games is an important task as well. Game developers often release patches and updates that address gameplay issues, security vulnerabilities, and performance improvements. Keeping your games up to date ensures that you’re playing the most stable and optimized versions.
It’s worth mentioning that while updates are important, it’s a good practice to create system restore points or backup your files before performing any major updates. This gives you a safety net in case something goes wrong during the update process.
By regularly updating drivers, software, and your operating system, you maintain maximum compatibility and performance on your old laptop. You’ll have access to the latest features, improvements, and bug fixes, ensuring a smooth and hassle-free gaming experience.
Step 7: Adjusting Game Settings for Smooth Gameplay
Once you’ve optimized your old laptop’s hardware and software, it’s time to fine-tune the in-game settings for a smooth and enjoyable gaming experience. Adjusting the game settings can greatly impact performance, allowing you to strike a balance between visual quality and smooth gameplay.
Start by launching the game you want to play and accessing its settings menu. Most games offer a range of options that can be adjusted to optimize performance. Here are some settings to pay attention to:
1. Resolution: Adjusting the resolution can have a significant impact on performance. Lower resolutions will generally result in smoother gameplay, but at the cost of visual clarity. Experiment with different resolutions to find a balance that works for your laptop.
2. Graphics Quality: Games usually offer preset graphics settings, such as Low, Medium, High, or Ultra. Experiment with different presets and find the one that provides a good balance between visual quality and performance. Adjust individual settings, such as texture detail, shadows, anti-aliasing, and post-processing effects, to further optimize performance if needed.
3. V-sync and Frame Rate: V-sync synchronizes the game’s frame rate with your display’s refresh rate, eliminating screen tearing but potentially introducing input lag. If you’re experiencing noticeable input lag, consider disabling V-sync. Additionally, adjusting the frame rate cap can alleviate strain on the hardware and provide smoother gaming.
4. Shadows and Lighting: Shadows and lighting effects can greatly enhance the visual quality of a game but can also be resource-intensive. Consider reducing the shadow detail and turning off unnecessary lighting effects to improve performance, especially if you’re experiencing lag during intense scenes.
5. View Distance and Object Detail: View distance determines how far you can see in the game world, while object detail affects the complexity and number of objects rendered. Lowering these settings can help improve performance, especially in open-world games with large environments.
6. Game-specific Optimizations: Some games offer specific performance optimizations or features tailored for lower-end hardware. Look for options like “Performance Mode” or “Low-End Hardware Mode” in the game settings to take advantage of these optimizations.
Keep in mind that not all games will have the same range of settings and options. Some may offer more granular control, while others may have limited customization. It’s important to experiment with the available settings and find the combination that provides the best balance between performance and visual quality for your old laptop.
By adjusting game settings to optimize performance, you can ensure smooth gameplay and an immersive gaming experience on your old laptop. Finding the right settings may require some trial and error, but the effort will be worth it when you can enjoy your favorite games without any performance issues.
Step 8: Installing Anti-virus Software for Protection
When gaming on your old laptop, it’s essential to prioritize the security and protection of your system. Installing reliable anti-virus software is a crucial step to safeguard your laptop from malware, viruses, and other online threats.
Start by researching reputable and well-established anti-virus software solutions. Look for software that offers real-time protection, regular updates, and a comprehensive suite of security features. Popular options include Avast, Norton, AVG, or Malwarebytes.
Once you’ve chosen the anti-virus software, navigate to the official website of the provider and download the latest version. Ensure that you’ve chosen the appropriate version for your operating system and follow the installation instructions provided by the software.
After the installation is complete, launch the anti-virus software and perform a thorough scan of your system. This first scan will detect and remove any existing malware or viruses that may have already infected your laptop.
Configure the software to perform regular automatic scans and update virus definitions on a schedule. This ensures that your laptop is continuously protected from the latest threats. Additionally, configure the software to scan any new files or programs you download before opening or installing them.
Stay vigilant while browsing and downloading games or game-related content. Avoid downloading files from untrusted sources or clicking on suspicious links. Exercise caution when interacting with unfamiliar websites or downloading cracked game files, as they may contain malware or viruses.
Regularly update your anti-virus software to ensure that you have the most up-to-date protection against emerging threats. Anti-virus software providers frequently release updates that include new virus signatures and improved security features.
In addition to installing anti-virus software, it’s crucial to practice safe browsing habits and use caution when sharing personal information online. Avoid downloading software or clicking on links from unknown sources, and never provide sensitive information to suspicious or unsecured websites.
By installing reliable anti-virus software and following safe browsing practices, you can significantly reduce the risk of malware and viruses infecting your old laptop. This not only protects your personal information but also helps maintain the performance and longevity of your gaming system.
Step 9: Cleaning and Maintaining the Laptop for Longevity
Cleaning and maintaining your old laptop is essential to ensure its longevity and optimal performance. Over time, dust, dirt, and grime can accumulate on the surfaces and inside the laptop, leading to decreased airflow, overheating, and potential damage to internal components. By regularly cleaning and maintaining your laptop, you can extend its lifespan and enjoy uninterrupted gaming sessions.
Start by powering off your laptop and disconnecting it from any power sources. Use a soft microfiber cloth or specialized electronics cleaning wipes to gently wipe down the exterior surfaces of the laptop. Pay attention to the keyboard, touchpad, and screen, removing any fingerprints, smudges, or debris.
Next, use compressed air to blow out any dust or debris from the keyboard, ports, and other hard-to-reach areas. Be careful to hold the can of compressed air upright to prevent any moisture from being released onto the components.
Opening up your laptop’s casing to clean the internal components requires technical expertise. If you’re not comfortable doing this yourself, consider consulting a professional technician to perform the cleaning. They can safely remove the casing and use compressed air or specialized cleaning tools to remove dust and debris from the internal components.
Pay special attention to the laptop’s cooling system. Over time, the cooling fans and heat sinks can become clogged with dust, hindering airflow and causing overheating issues. Clean the cooling fans using compressed air and remove any accumulated dust from the heat sinks to ensure proper cooling.
As part of the maintenance process, it’s important to regularly update the operating system, drivers, and software to the latest versions. These updates often include bug fixes, security patches, and performance improvements that can enhance the overall stability and functionality of your laptop.
Additionally, consider installing and running disk cleanup and optimization tools to remove temporary files, unnecessary software, and optimize the storage on your laptop. This can free up storage space, improve disk read/write speeds, and assist in maintaining good system performance.
Finally, make sure to handle your laptop with care. Avoid dropping or bumping it, as this can cause physical damage to the internal components or the screen. Additionally, be mindful of where you place your laptop to avoid spills or exposure to extreme temperatures.
By regularly cleaning and maintaining your laptop, you can ensure its longevity, prevent overheating, and maintain optimal performance while gaming. Taking the time to care for your laptop will not only extend its lifespan but also enhance your overall gaming experience.
Conclusion
Congratulations! You have successfully transformed your old laptop into a capable gaming machine. By following the steps outlined in this guide, you have optimized its hardware, updated software, and implemented various tweaks to enhance performance and maximize compatibility.
Assessing your old laptop’s capabilities was the first crucial step, allowing you to identify areas that needed improvement. Upgrading the RAM and storage significantly improved your laptop’s multitasking abilities and reduced loading times. Installing a dedicated graphics card unleashed the power needed for a smoother and more immersive gaming experience.
Optimizing the cooling system helped prevent overheating and maintained optimal performance during intense gaming sessions. Updating drivers and software ensured maximum compatibility and security. Adjusting game settings allowed you to find the perfect balance between visual quality and smooth gameplay.
Installing anti-virus software provided protection against malware and online threats, while regular cleaning and maintenance ensured your laptop’s longevity and optimal performance. By taking care of your old laptop, you have saved money and unlocked its potential, allowing you to indulge in immersive gaming experiences without breaking the bank.
Remember, while transforming your old laptop into a gaming laptop can significantly enhance its performance, it’s important to be realistic about its capabilities. It may not match the performance of high-end gaming laptops, but with the right optimizations and adjustments, you can still enjoy a satisfying gaming experience.
Now that your old laptop is ready for gaming, it’s time to install your favorite games, connect with fellow gamers, and dive into immersive gaming adventures. Embrace the potential of your newly upgraded laptop and embark on countless hours of gaming enjoyment.