Introduction
Welcome to our comprehensive guide on how to change the graphics card in a laptop. Upgrading your laptop’s graphics card can greatly enhance its gaming and multimedia capabilities, allowing you to enjoy a smoother and more immersive experience. While laptops are generally not as easily upgradable as desktop computers, with a little know-how and the right tools, you can successfully replace the graphics card in your laptop.
Before we dive into the step-by-step process, it’s essential to note that not all laptops support graphics card upgrades. Many models have integrated graphics cards that are soldered onto the motherboard, making them unchangeable. However, if your laptop does have a removable graphics card, this guide is for you.
In this tutorial, we’ll walk you through the process of checking compatibility, gathering the necessary tools, preparing the laptop, opening it up, removing the old graphics card, inserting the new graphics card, connecting the necessary cables and power, and closing the laptop. We’ll also cover the crucial step of installing the latest drivers and testing the new graphics card to ensure everything is working correctly.
Please note that changing the graphics card in a laptop requires intermediate to advanced technical skills. If you’re uncomfortable working with delicate computer components or if your laptop is still under warranty, we recommend consulting a professional technician or contacting the laptop manufacturer for assistance.
Now, let’s proceed to the first step and determine if your laptop is compatible with a graphics card upgrade.</p
Checking Compatibility
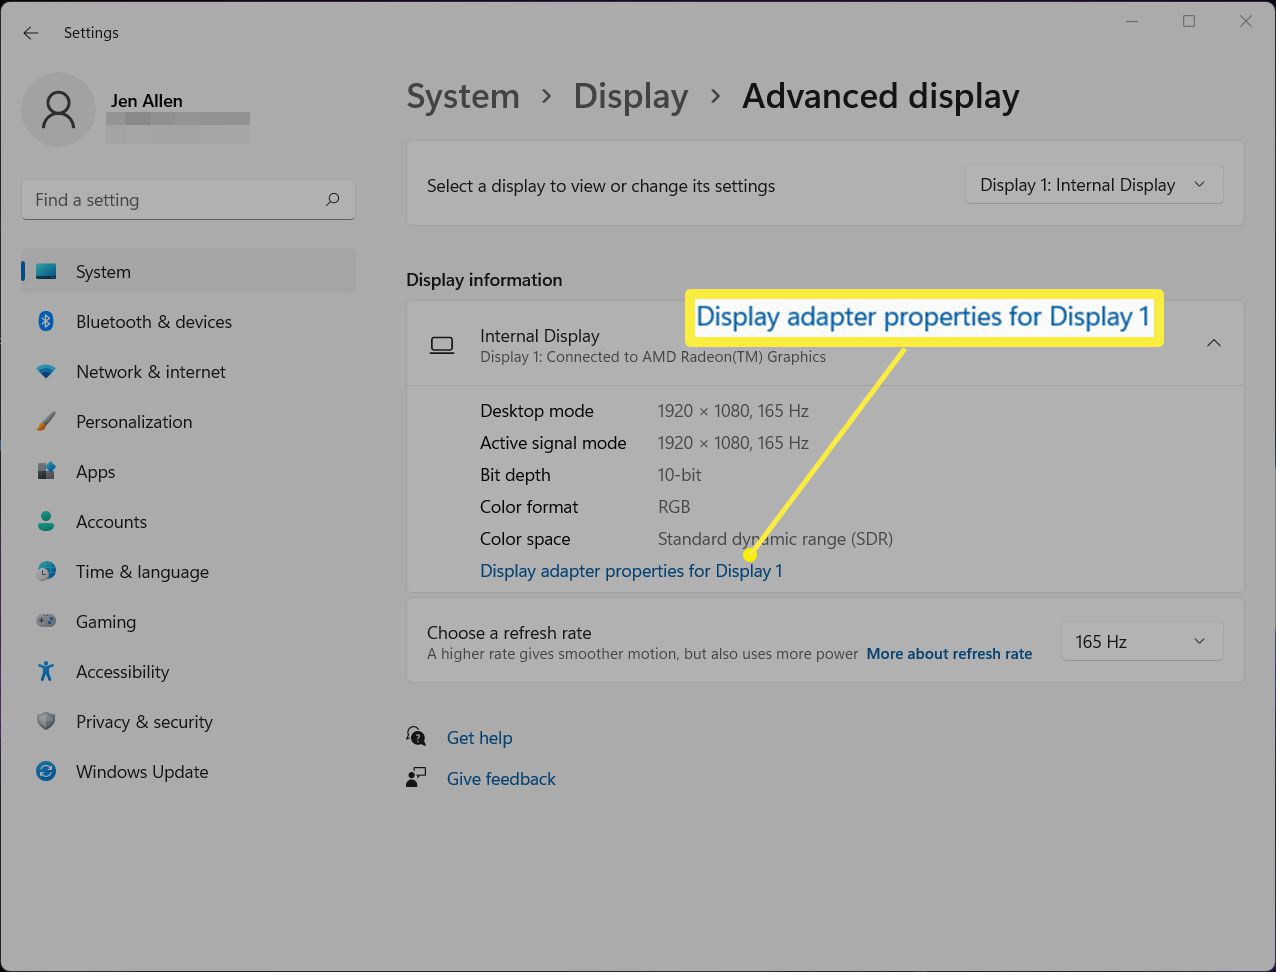
Before you begin the process of changing the graphics card in your laptop, it’s crucial to determine if your laptop is compatible with a graphics card upgrade. While some laptops have user-replaceable graphics cards, others have integrated graphics that cannot be swapped out.
The first step is to consult the user manual or visit the manufacturer’s website to check if your laptop supports graphics card upgrades. Look for information about the laptop’s expansion slots or the ability to upgrade the graphics card. If you can’t find any specific details, it’s worth reaching out to the manufacturer’s customer support for clarification.
Another important factor to consider is the physical space available inside the laptop. Laptops are designed with limited internal space, and not all models have enough room to accommodate a separate graphics card. Additionally, the power supply in your laptop may not be sufficient to handle the power requirements of a dedicated graphics card.
Furthermore, it’s crucial to ensure compatibility between the graphics card and your laptop’s operating system. Research if the graphics card you have in mind supports your laptop’s operating system, including the necessary drivers and software.
If you are unsure about the compatibility of your laptop with a graphics card upgrade, you can also consult online forums, communities, or tech experts who can provide guidance based on your laptop model and specifications.
Once you have confirmed that your laptop is compatible with a graphics card upgrade, you can proceed with gathering the necessary tools for the process. In the next section, we’ll cover the essential tools you’ll need to successfully change the graphics card in your laptop.
Gathering the Necessary Tools
Before you can get started with changing the graphics card in your laptop, it’s essential to gather all the necessary tools. Having the right tools on hand will make the process smoother and more efficient.
Here are the essential tools you’ll need:
- Screwdriver: Depending on your laptop model, you might need a Phillips or Torx screwdriver to remove the bottom panel and access the internal components.
- Antistatic wristband: To prevent accidental damage caused by static electricity, it’s recommended to wear an antistatic wristband throughout the process.
- Thermal paste: When removing the old graphics card, you’ll likely need to apply a fresh layer of thermal paste to ensure efficient heat transfer between the new graphics card and the heatsink.
- Compressed air or a soft brush: These tools can be used to clean any dust or debris that may have accumulated inside the laptop’s cooling system.
- Container or magnetic mat: It’s essential to have a container or magnetic mat to hold and organize the screws and other small components you remove during the process.
It’s worth noting that the specific tools required may vary depending on your laptop model. Therefore, it’s always a good idea to consult the user manual or manufacturer’s website for any additional tools or precautions recommended for your specific laptop.
Once you have gathered all the necessary tools, you’re ready to move on to the next step: preparing your laptop for the graphics card replacement. We’ll cover this in detail in the following section.
Preparing the Laptop
Before you begin the process of changing the graphics card in your laptop, it’s important to properly prepare the device. Taking the time to prepare will help ensure a smooth and successful graphics card replacement.
Here are the steps to prepare your laptop:
- Shut down the laptop: Make sure to power off your laptop completely before starting the process. This will prevent any potential damage to the internal components.
- Disconnect the power adapter: Unplug the power adapter from the laptop and remove the battery if it’s removable. This will eliminate any potential electrical hazards during the process.
- Choose a clean and static-free work area: Find a well-lit and clean workspace where you can comfortably work on your laptop. Make sure to choose a location away from any potential static discharge sources, such as carpets or woolen surfaces.
- Ground yourself: To prevent static electricity from damaging the sensitive internal components of your laptop, it’s important to ground yourself. You can do this by wearing an antistatic wristband or by frequently touching a grounded metal object.
- Organize your tools and workspace: Arrange your tools and the necessary components in an organized manner to avoid misplacing or losing anything during the process. Use a container or a magnetic mat to hold screws and small parts as you remove them.
By following these preparation steps, you’ll create a safe and efficient environment for changing the graphics card in your laptop. Once you’ve completed these preparations, you’re ready to move on to the next section: opening up the laptop.
Opening the Laptop
Now that you have prepared your laptop for the graphics card replacement, it’s time to open up the device. This step will give you access to the internal components, including the old graphics card.
Here’s how to open your laptop:
- Refer to the user manual: Consult the user manual or the manufacturer’s website to understand the specific procedure for opening your laptop. Different laptop models may have different methods for accessing the internal components.
- Remove the bottom panel: Use the appropriate screwdriver (Phillips or Torx) to loosen the screws securing the bottom panel of your laptop. Carefully remove the screws and set them aside in a safe place. Once all the screws are removed, gently lift off the bottom panel to expose the internal components.
- Locate the graphics card: Identify the current graphics card in your laptop. It is usually located near the center of the motherboard and will be connected to the display ports.
- Disconnect any cables or connectors: Before removing the graphics card, carefully disconnect any cables or connectors connected to it. Take note of their positions for reassembly later.
Remember to handle the internal components with care and avoid putting excessive pressure on them. If you encounter any resistance or difficulty during the process, refer to the user manual or seek assistance from a professional technician.
Opening up the laptop is a crucial step in replacing the graphics card. Once you’ve successfully opened the laptop and located the graphics card, you’re ready to move on to the next section: removing the old graphics card.
Removing the Old Graphics Card
With the laptop open and the internal components accessible, it’s time to remove the old graphics card. This step involves careful handling and ensuring that all necessary precautions are taken.
Follow these steps to remove the old graphics card:
- Identify the securing mechanism: Take note of how the old graphics card is secured in its slot. It may be held in place by screws, a latch, or a retention bracket.
- Release the securing mechanism: Depending on the securing mechanism, use the appropriate method to release the old graphics card. This may involve unscrewing the screws, flipping a latch, or pressing down on the retention bracket while gently pulling on the graphics card.
- Gently remove the graphics card: Once the securing mechanism is released, carefully pull the old graphics card out of its slot. Be sure to grip it by its edges and avoid touching the electrical contacts or the sensitive components.
- Place the old graphics card in an antistatic bag: To prevent any damage to the old graphics card, place it in an antistatic bag or wrap it in an antistatic material. This will protect it from electrostatic discharge during handling or storage.
It’s important to note that the removal process may vary depending on your specific laptop model. Always refer to the user manual or manufacturer’s website for detailed instructions tailored to your laptop.
Once you have successfully removed the old graphics card, set it aside and proceed to the next section: inserting the new graphics card.
Inserting the New Graphics Card
Now that you have removed the old graphics card, it’s time to insert the new graphics card into your laptop. This step involves careful alignment and ensuring a secure connection for optimal performance.
Follow these steps to insert the new graphics card:
- Remove the new graphics card from its packaging: Take the new graphics card out of its antistatic bag or packaging, being careful to touch only the edges to avoid any damage to the sensitive components.
- Align the new graphics card with the slot: Carefully align the new graphics card with the slot on the motherboard. Ensure that any notches or guides on the graphics card match up with the corresponding features of the slot. Do not force the graphics card into place; it should slide in smoothly.
- Secure the new graphics card: Once the new graphics card is aligned, use the same securing mechanism that was used for the old graphics card to secure the new one in place. This might involve tightening screws, flipping a latch, or reattaching a retention bracket.
- Connect any necessary cables: Reconnect any cables or connectors that were disconnected from the old graphics card. Ensure that they are properly seated and secure.
It’s important to be gentle when handling the new graphics card and follow the manufacturer’s instructions for proper installation. If you encounter any resistance or difficulties, refer to the user manual or seek assistance from a professional technician.
Once the new graphics card is securely inserted, you’re ready to move on to the next section: connecting the necessary cables and power.
Connecting the Cables and Power
After inserting the new graphics card into your laptop, the next step is to connect the necessary cables and provide it with power. This step ensures that the graphics card is properly integrated into your system and ready to be utilized.
Follow these steps to connect the cables and power to your new graphics card:
- Identify the required cables: Refer to the user manual or the manufacturer’s instructions to identify the cables needed to connect your new graphics card. Common cables include display cables (e.g., HDMI, DisplayPort) and power cables (if applicable).
- Connect the display cables: Attach the appropriate display cables from your new graphics card to the corresponding ports on your laptop. Ensure that the cables are securely inserted and tightened to provide a stable connection.
- Provide power (if necessary): If your new graphics card requires additional power, locate the corresponding power connectors on the card. Connect the appropriate power cables from the power supply or laptop battery to these connectors. Make sure they are properly connected and secure.
- Double-check the connections: Once all the cables and power connections are in place, double-check that everything is properly connected and secure. This will help prevent any potential issues or loose connections that could affect the performance of the graphics card.
It’s essential to consult the user manual or the manufacturer’s instructions to ensure the correct method of connecting cables and providing power for your specific graphics card model. Following these instructions will help ensure a seamless integration of the new graphics card into your laptop.
After connecting the necessary cables and power, the next step is to close up your laptop. We’ll cover this in detail in the following section.
Closing the Laptop
Now that you have successfully connected the cables and provided power to your new graphics card, it’s time to close up your laptop. Closing the laptop involves putting all the components back together and securing the bottom panel in place.
Follow these steps to close your laptop:
- Align the bottom panel: Align the bottom panel with the laptop’s chassis, ensuring that all the screw holes line up correctly.
- Screw in the bottom panel: Use the appropriate screwdriver to securely fasten all the screws back into place. Start by tightening the screws diagonally opposite each other to ensure even distribution of pressure. Continue until all the screws are tightly secured.
- Double-check the connections: Before declaring the laptop closed, double-check that all the cables and connections inside the laptop are properly secured and in their correct positions. This will help avoid any loose or disconnected components.
- Reinstall the battery (if applicable): If you removed the laptop’s battery during the process, carefully reinstall it in its designated slot and ensure it is securely in place.
Once you have completed these steps, your laptop should be closed up and ready for use. Take a moment to admire your work and appreciate the successful installation of the new graphics card.
Now, it’s time to move on to the next section: installing the latest drivers to ensure optimal performance of your newly installed graphics card.
Installing the Latest Drivers
After successfully closing up your laptop, the next crucial step is to install the latest drivers for your newly installed graphics card. Installing the appropriate drivers ensures compatibility and optimal performance of the graphics card with your laptop’s operating system.
Follow these steps to install the latest drivers:
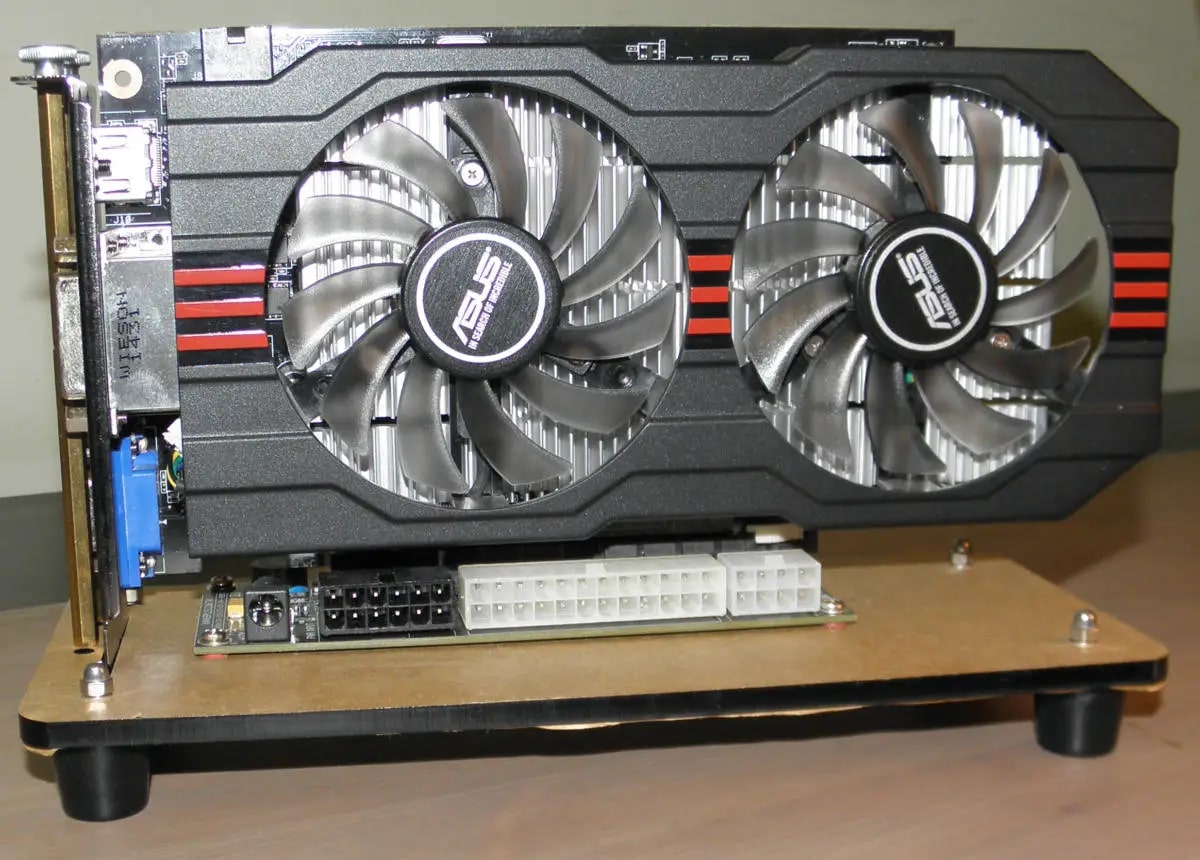
- Identify the graphics card model: Find out the specific model of your new graphics card. This information can usually be found on the card itself or in the user manual.
- Visit the manufacturer’s website: Go to the official website of the graphics card manufacturer, such as Nvidia or AMD, and navigate to the support or drivers section.
- Select your graphics card model and operating system: Choose the exact graphics card model and the version of your laptop’s operating system from the options provided on the website.
- Download the latest drivers: Once you have selected your graphics card model and operating system, download the latest drivers available for your setup.
- Install the drivers: Locate the downloaded driver file on your laptop and double-click on it. Follow the on-screen instructions to install the drivers. Restart your laptop if prompted to complete the installation process.
- Check for updates: After installing the drivers, it’s recommended to check for any additional updates. Graphics card manufacturers frequently release updates that include bug fixes and performance enhancements. Visit their website or use their software tools to find and install any available updates.
It’s important to note that the installation process may vary slightly depending on the graphics card manufacturer and their specific driver installation software. However, the general steps outlined above should guide you through the process.
With the latest drivers installed, your new graphics card is now fully configured and ready to deliver optimal performance. In the next section, we’ll discuss how to test the functionality of your new graphics card.
Testing the New Graphics Card
Now that you have installed the latest drivers for your new graphics card, it’s important to test its functionality and ensure that everything is working as expected. Testing the graphics card will help you verify its performance, compatibility, and identify any potential issues that might need attention.
Follow these steps to test your new graphics card:
- Run benchmarking software: Use benchmarking software like 3DMark or FurMark to stress-test your graphics card. These tools can evaluate the performance of your graphics card by running intensive graphics simulations.
- Play graphics-intensive games or run multimedia applications: Launch and play graphics-intensive games or run multimedia applications that push the limits of your graphics card. This will help you determine if the card can handle demanding tasks and provide smooth and high-quality visuals.
- Check for artifacts or performance issues: Watch out for any visual artifacts or anomalies during gameplay or while running graphics-intensive applications. These may include flickering, screen tearing, or graphical glitches. If you notice any issues, it could indicate a problem with the graphics card or its drivers.
- Monitor temperatures: Keep an eye on the temperatures of your graphics card using monitoring software. High temperatures can indicate potential cooling issues or inadequate thermal management. Ensure that the temperatures remain within safe operating limits.
- Update drivers and firmware: Regularly check for driver and firmware updates for your graphics card. The manufacturer’s website or software tools can help you identify and install any available updates that improve performance or address compatibility issues.
By thoroughly testing your new graphics card, you can identify any potential issues or performance limitations early on. If you encounter any abnormalities or problems during testing, it’s recommended to consult the manufacturer’s support or seek assistance from a professional technician.
Congratulations! With the successful testing of your new graphics card, you have completed the process of changing the graphics card in your laptop. Your laptop is now equipped with an upgraded graphics card that can enhance your gaming and multimedia experiences.
Conclusion
Changing the graphics card in a laptop can greatly improve its performance and enable you to enjoy a better gaming and multimedia experience. While the process may be more challenging than upgrading a desktop computer, with the right tools, knowledge, and precautions, it is possible to successfully replace the graphics card in your laptop.
In this guide, we covered the essential steps involved in changing the graphics card of a laptop. We started by checking compatibility to ensure that your laptop supports graphics card upgrades. Then, we discussed the necessary tools and preparations to make before diving into the process. We explored opening up the laptop, removing the old graphics card, and inserting the new one with caution. We also covered connecting cables and power to ensure proper integration. After closing up the laptop, we highlighted the importance of installing the latest drivers and testing the functionality of the new graphics card to ensure optimal performance.
Remember, it’s crucial to consult the user manual or the manufacturer’s website for specific instructions tailored to your laptop model. If you feel unsure or uncomfortable performing the process yourself, it’s always a good idea to seek assistance from a professional technician or contact the laptop manufacturer for guidance.
By following this guide, you have taken the necessary steps to upgrade your laptop’s graphics card and unlock its full potential. Now, you can enjoy smoother graphics, better frame rates, and enhanced visual experiences for gaming, multimedia, and other graphics-intensive tasks. Embrace the newfound power of your laptop’s upgraded graphics card and let your creativity and enjoyment soar!