Introduction
Welcome to the world of enhanced gaming and graphics performance on your laptop! If you’re a passionate gamer or a professional who relies on high-quality graphics, you may have encountered the limitations of your laptop’s built-in graphics card. Fortunately, there’s a solution that can greatly boost your laptop’s graphics capabilities – an external graphics card.
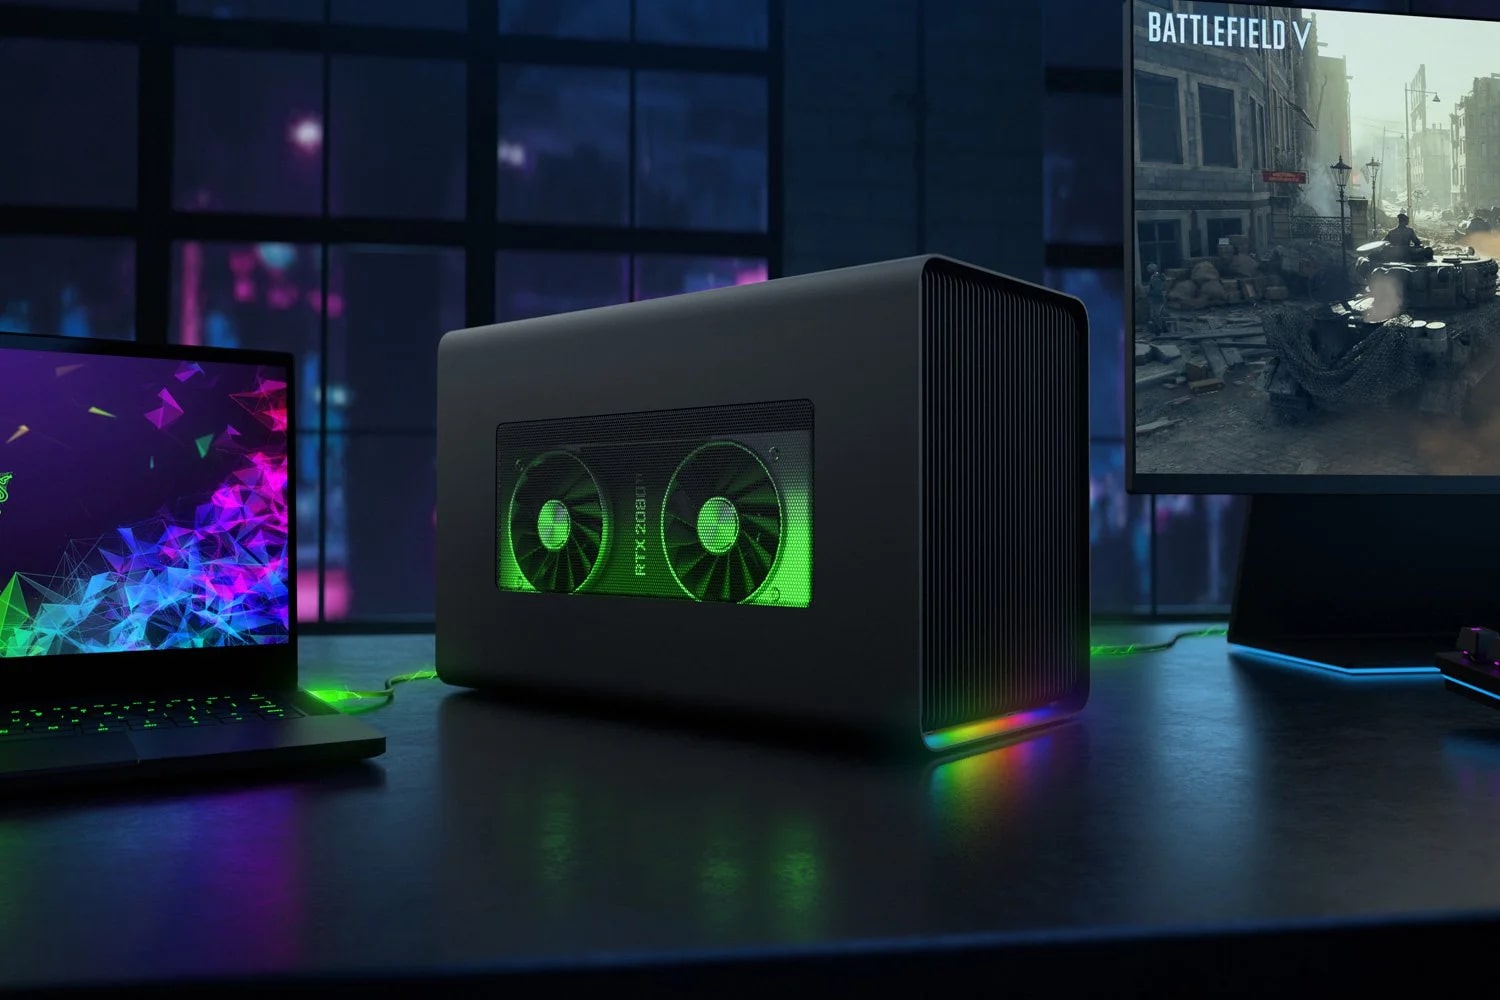
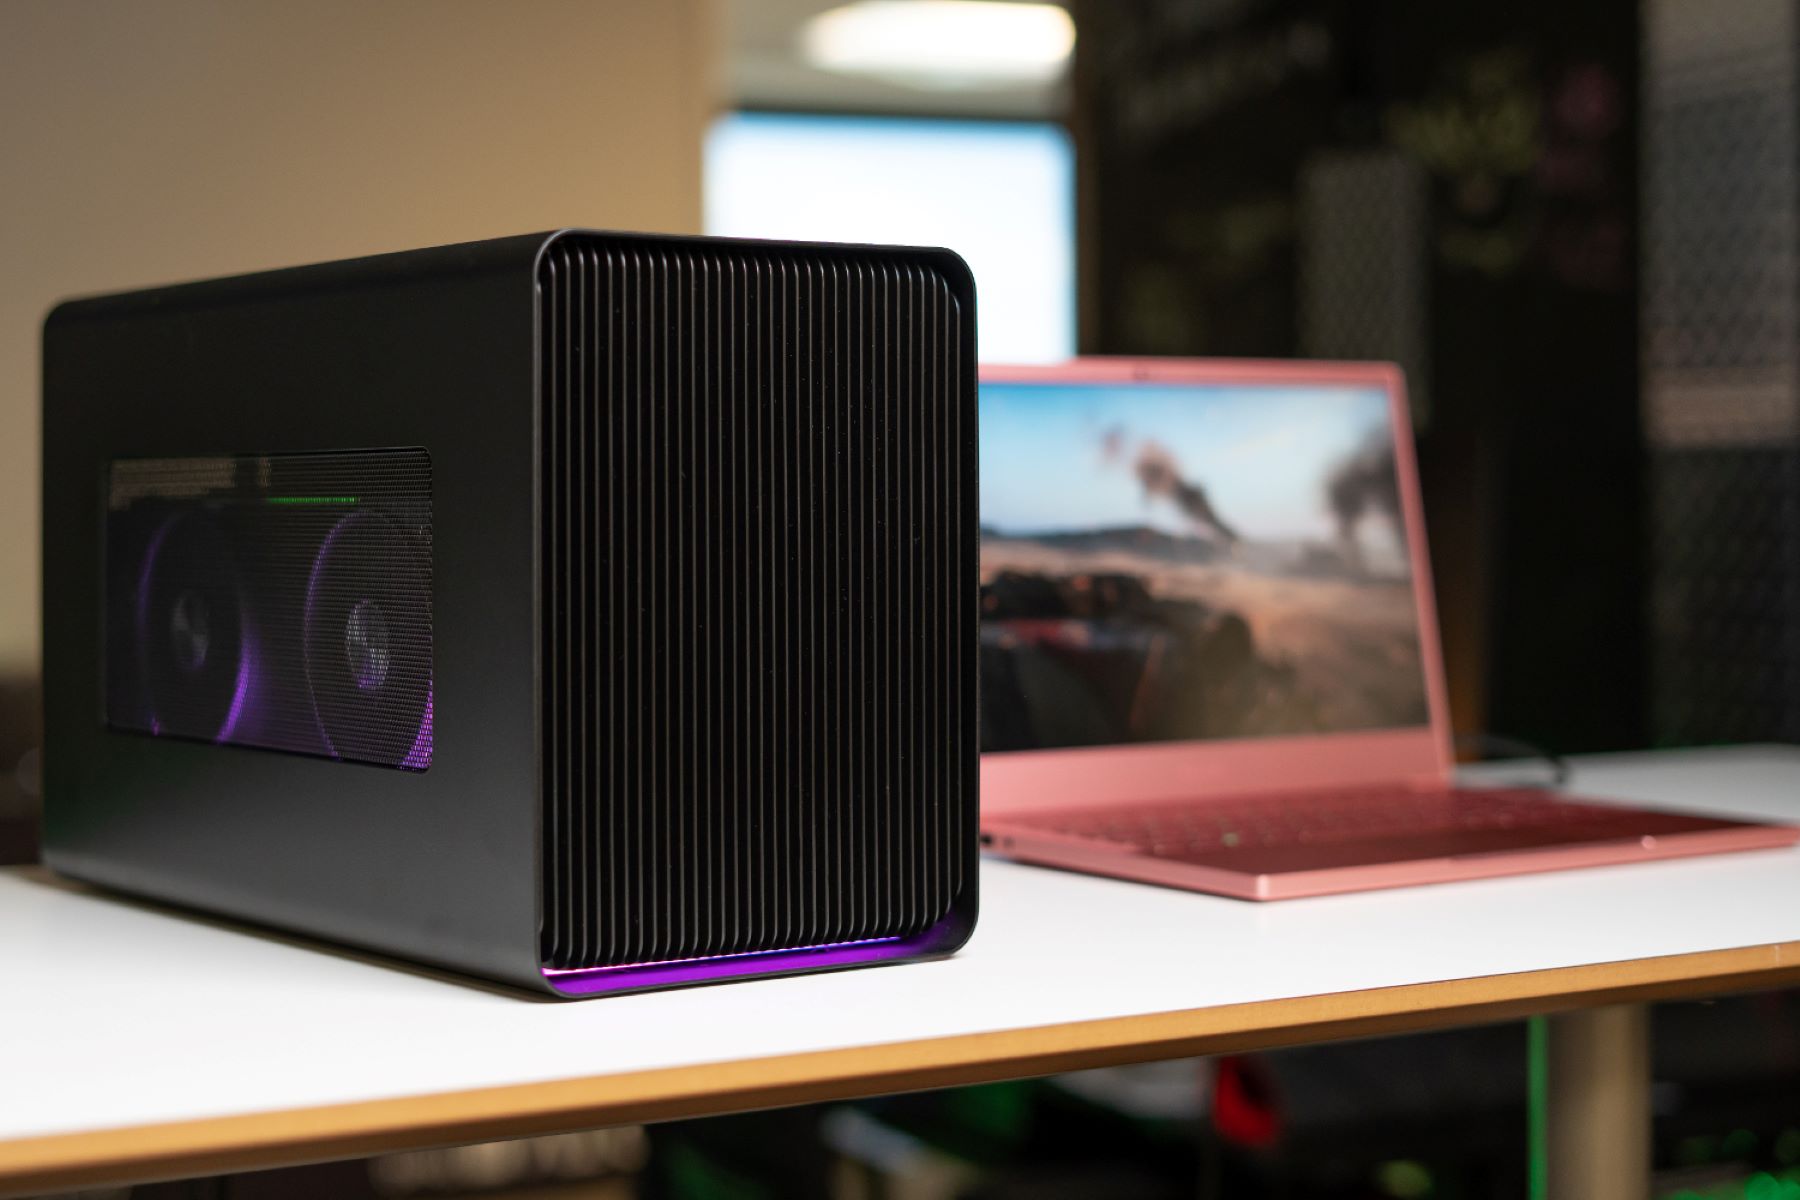
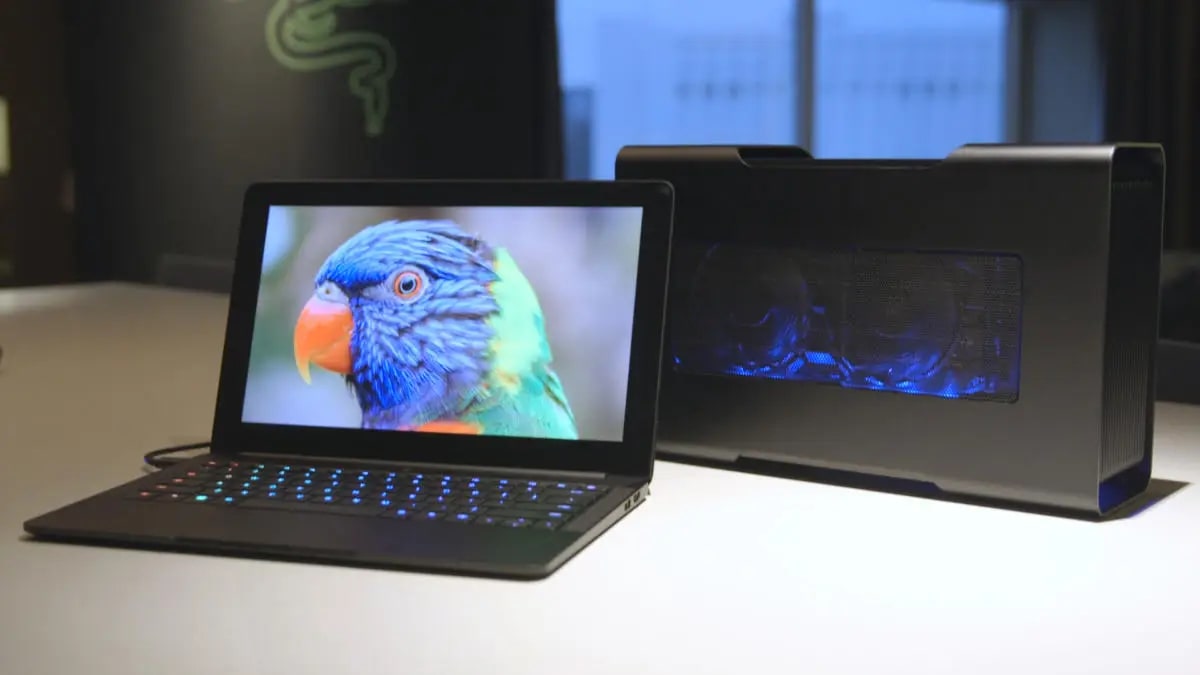
An external graphics card, also known as an eGPU, is a separate unit that connects to your laptop, providing it with the power of a desktop-grade graphics card. This allows you to enjoy smoother gameplay, faster rendering times, and improved graphics performance on your laptop, even for resource-intensive tasks such as gaming, video editing, and 3D modeling.
Before we delve into the details of connecting an external graphics card to a laptop, it’s important to note that not all laptops are compatible with this setup. Your laptop must have the necessary ports and support to connect an external graphics card. Additionally, there may be hardware and software requirements that you need to check before proceeding with the setup.
In this article, we will guide you through the process of connecting an external graphics card to your laptop. We’ll cover everything from compatibility checks to hardware setup, driver installation, and configuring the graphics card settings. By the end of this guide, you’ll have all the information you need to enhance your laptop’s graphics performance and take your gaming or graphic-intensive tasks to the next level.
So, if you’re ready to unlock the full potential of your laptop and step up your graphics game, let’s dive right in and explore the world of external graphics cards!
What is an external graphics card?
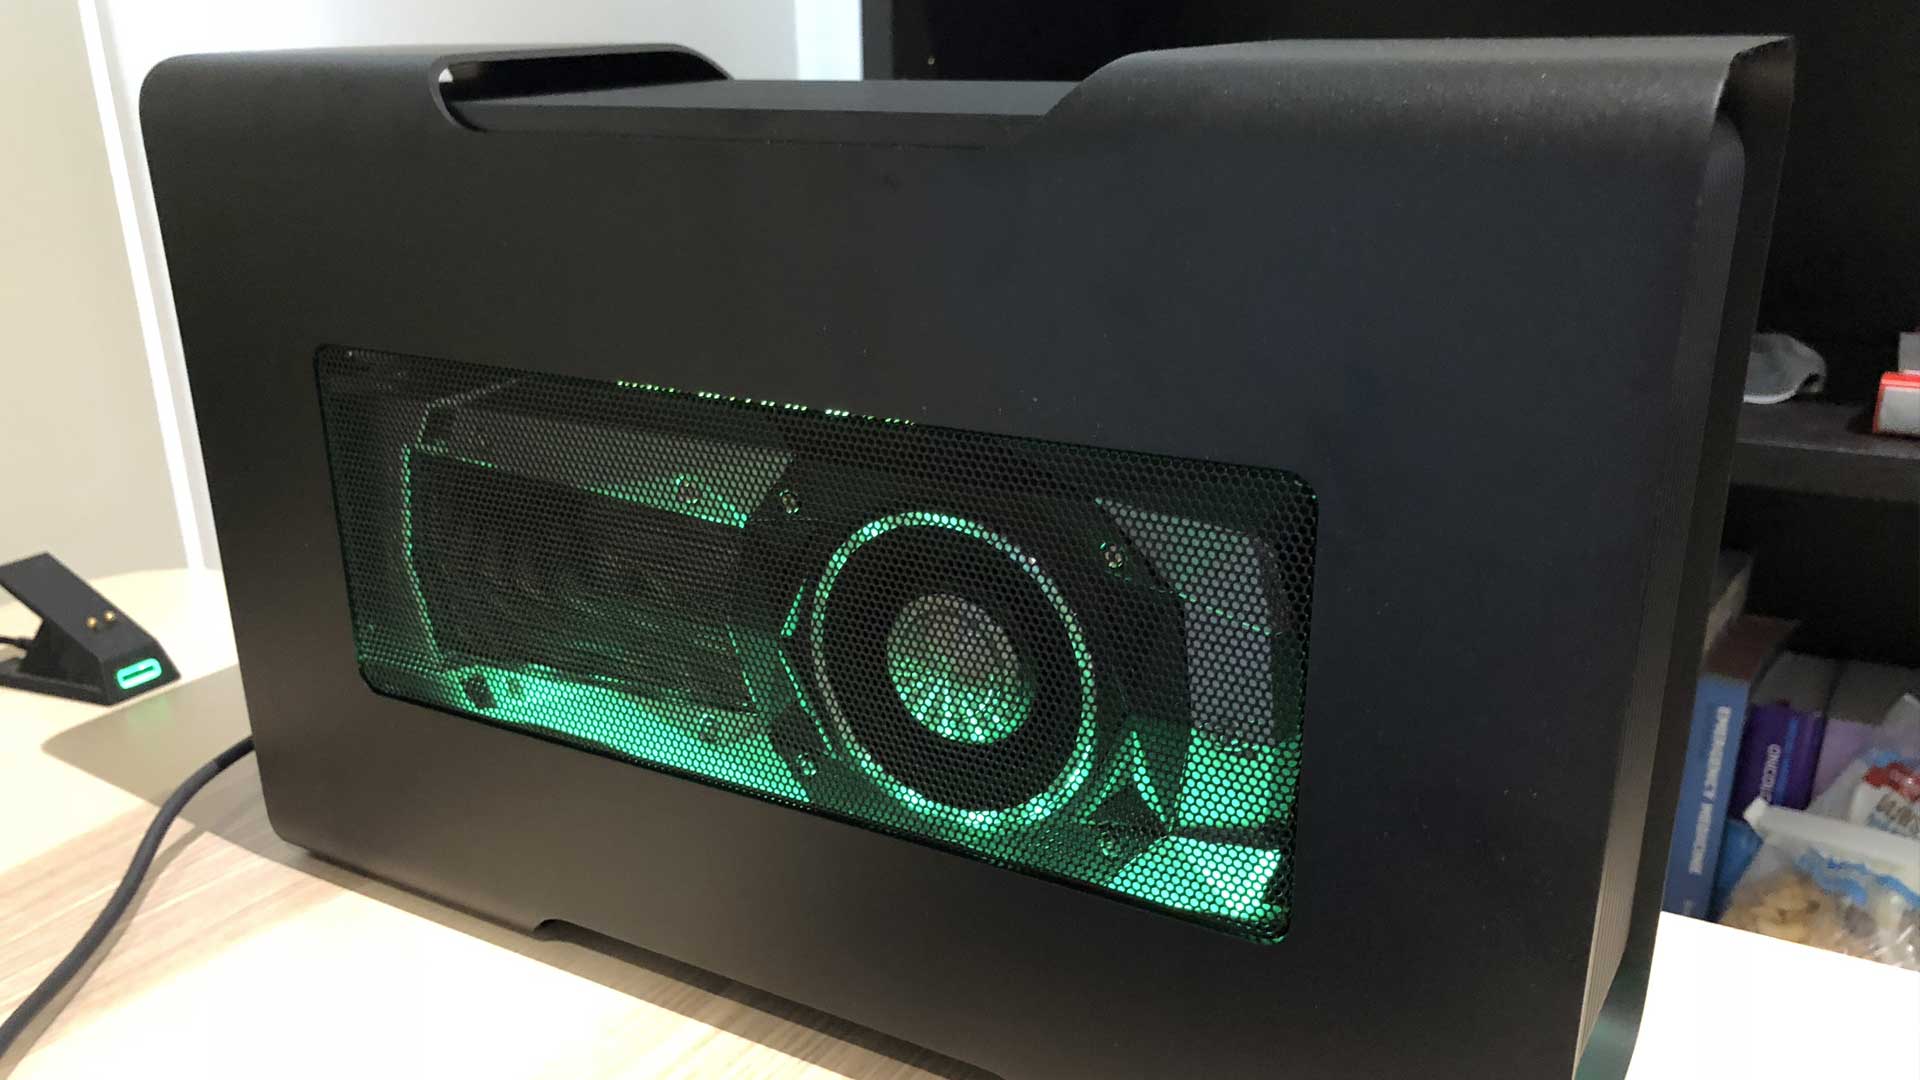
An external graphics card, also known as an eGPU, is a device that allows you to connect a separate, more powerful graphics card to your laptop. It is an external enclosure that houses a desktop-grade graphics card, along with its own power supply and cooling system.
The main purpose of an external graphics card is to enhance the graphics performance of your laptop. While most laptops come with integrated graphics processors, they are often not powerful enough to handle demanding tasks such as gaming, video editing, or graphic design. This is where an external graphics card comes in – it provides a significant boost in graphics processing power, allowing you to run graphics-intensive applications smoothly and with improved performance.
By connecting an external graphics card to your laptop, you can harness the power of a desktop-grade graphics card without having to invest in an entirely new desktop computer. This is particularly beneficial for laptop users who need the flexibility and portability of a laptop but require more graphical processing power for their work or gaming needs.
One of the key advantages of an external graphics card is its versatility. Unlike traditional internal graphics cards, an external graphics card can be easily added or removed from your laptop as needed. This means that you can switch between using the internal graphics card for everyday tasks and connect the external graphics card when you require additional power for more demanding applications.
Additionally, an external graphics card can future-proof your laptop. As newer, more powerful graphics cards are released, you can upgrade the external enclosure while keeping your laptop intact. This allows you to stay up-to-date with the latest graphics technology without having to replace your entire laptop.
In summary, an external graphics card is a device that connects to your laptop, providing it with the power and performance of a desktop-grade graphics card. It can greatly enhance your laptop’s graphics capabilities, allowing you to enjoy smooth gaming, faster rendering times, and improved graphics performance for resource-intensive tasks.
Benefits of using an external graphics card with a laptop
Using an external graphics card with a laptop offers a range of benefits that can greatly enhance your gaming and graphics experience. Let’s explore some of the key advantages of utilizing an external graphics card:
- Improved performance: A laptop’s built-in graphics card may not have the power to handle demanding games or software. By connecting an external graphics card, you can significantly enhance your laptop’s graphical performance, allowing for smoother gameplay, faster rendering times, and improved graphics quality.
- Flexibility: One of the greatest advantages of an external graphics card is its portability and flexibility. You can easily connect or disconnect the external graphics card as needed, allowing you to use the laptop for everyday tasks and connect the graphics card when you require more power for gaming, graphic design, or video editing.
- Future-proofing: As technology advances, newer and more powerful graphics cards are released. With an external graphics card, you can upgrade to the latest and greatest graphics card without having to replace your entire laptop. This allows you to stay up-to-date with the latest graphics technology and ensures that your laptop can handle future graphical demands.
- Cost-effective: Investing in an external graphics card can be a cost-effective solution compared to purchasing an entirely new gaming or high-performance laptop. You can utilize the power of a desktop-grade graphics card with your existing laptop, saving money while still enjoying enhanced graphical performance.
- Enhanced gaming experience: Gaming on a laptop with an external graphics card offers a whole new level of immersion. You can play the latest games with higher frame rates, better visual effects, and improved image quality. This allows you to fully experience games the way they were intended, with stunning graphics and smooth gameplay.
- Increased productivity: An external graphics card is not just beneficial for gamers but also for professionals who rely on graphics-intensive software. Whether you’re a graphic designer, video editor, or 3D modeler, an external graphics card can greatly accelerate your workflow, reducing rendering times and allowing for more complex projects to be handled with ease.
These are just a few of the many benefits you can experience by using an external graphics card with your laptop. Whether you’re a gamer, a creative professional, or someone who simply wants better graphics performance, connecting an external graphics card is a game-changer that can elevate your laptop’s capabilities.
Checking compatibility and requirements
Before diving into the world of external graphics cards, it’s crucial to check the compatibility and requirements to ensure a successful setup. Here are some key factors to consider:
- Laptop compatibility: Not all laptops are compatible with external graphics cards. Look for a dedicated Thunderbolt 3 port on your laptop, as it provides the necessary bandwidth and power delivery required for connecting an external graphics card. Ensure that your laptop’s Thunderbolt 3 port supports external graphics card functionality.
- Operating system: Check the compatibility of your operating system with the external graphics card setup. Most external graphics cards are compatible with both Windows and macOS, but ensure that you are using a supported version of the operating system.
- Power supply: External graphics cards require a dedicated power supply to function properly. Ensure that your laptop’s power supply is capable of delivering sufficient power to both the laptop itself and the external graphics card. In some cases, you may need to use a separate power adapter for the graphics card.
- Graphics card compatibility: Different external graphics card enclosures have different compatibility lists for graphics cards. Ensure that the graphics card you plan to use is compatible with the enclosure you are considering. Check the manufacturer’s specifications and compatibility list to make sure they are compatible.
- Driver compatibility: Before purchasing or connecting an external graphics card, check if there are compatible drivers available for your operating system. The drivers ensure proper communication between your laptop, the external graphics card, and the connected display. Visit the manufacturer’s website to download the latest drivers for your external graphics card and follow the installation instructions.
- Additional requirements: Depending on the specific external graphics card setup, there may be additional requirements such as a specific cable or adapter. Ensure that you have all the necessary cables and adapters to connect the graphics card to your laptop and display.
Checking compatibility and requirements is crucial to ensure a hassle-free external graphics card setup. Failure to meet any of the compatibility or requirement criteria may result in issues or the external graphics card not working as expected.
Take the time to research your laptop’s compatibility, the necessary ports, power supply, and software compatibility before investing in an external graphics card setup. This will help ensure that you have all the necessary components and meet the requirements for a successful and seamless integration.
Choosing the right external graphics card
Choosing the right external graphics card is crucial to ensure optimal performance and compatibility with your laptop. Here are some factors to consider when making your selection:
- Graphics card performance: Consider your requirements and the level of performance you need. Look for a graphics card that aligns with your desired gaming or graphical capabilities. Research benchmarks and reviews to determine which graphics card will provide the best performance for your specific needs.
- Compatibility with enclosure: Ensure that the graphics card you choose is compatible with the enclosure you plan to use. Some enclosures have specific compatibility lists, so cross-reference the graphics card you are interested in with the enclosure’s documentation or manufacturer’s website.
- Power requirements: Take note of the power requirements of the external graphics card. Ensure that your laptop’s power supply can handle the additional power demands of the graphics card. If necessary, consider using a separate power adapter for the graphics card to ensure stable power delivery.
- Connectivity options: Consider the available connectivity options on the external graphics card. Look for options such as DisplayPort, HDMI, or DVI ports to connect your display or monitors. Ensure that the external graphics card has the necessary ports to connect your display setup.
- Price and budget: Set a budget for your external graphics card and look for options that fit within your price range. Balancing performance and budget is essential. Consider both the upfront cost of the graphics card and any additional expenses, such as the enclosure or cables.
- Manufacturer reputation: Choose a reputable manufacturer known for producing reliable and high-quality graphics cards. Look for brands with good customer reviews and strong after-sales support. Consider the warranty coverage offered by the manufacturer as well.
Additionally, consider your future needs and potential upgrade options. Ensure that the external graphics card can be easily upgraded or replaced in the future, allowing you to stay up-to-date with the latest graphics technology without having to purchase a new enclosure.
Take your time to research different external graphics cards, compare their specifications and performance, and read customer reviews. This will help you make an informed decision and choose the right external graphics card that meets your requirements and offers the best value for your investment.
Setting up the hardware
Setting up the hardware for your external graphics card involves several steps to ensure a proper and secure connection. Follow these guidelines to set up your hardware correctly:
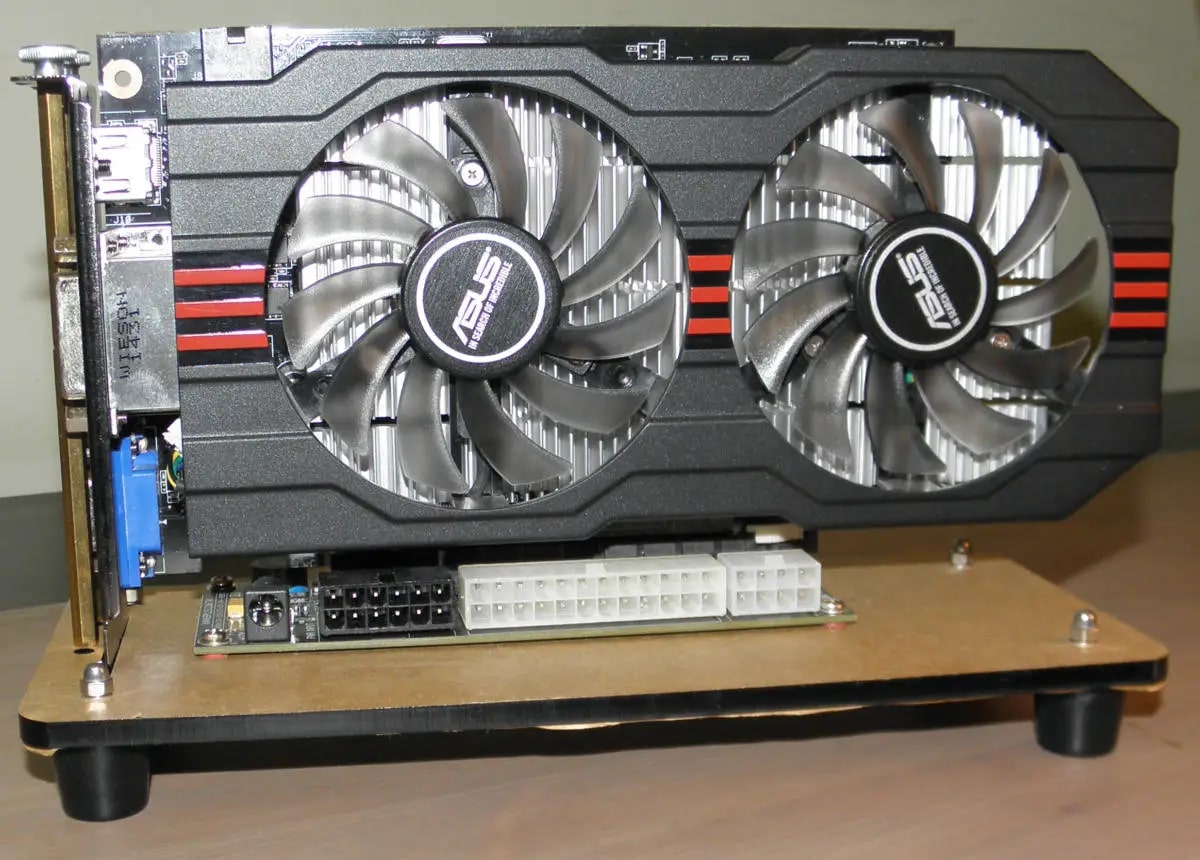
- Choose an enclosure: Select an external graphics card enclosure that is compatible with your laptop and preferred graphics card. Choose an enclosure that provides sufficient power, cooling, and connectivity options for your needs.
- Prepare the enclosure: Open the enclosure and ensure it is powered off and disconnected from any power sources. Familiarize yourself with the installation instructions provided by the enclosure manufacturer.
- Install the graphics card: Insert the graphics card into the designated slot inside the enclosure. Ensure that the graphics card is firmly seated and securely fastened in place according to the enclosure instructions.
- Connect the enclosure: Connect the enclosure to your laptop using the appropriate cable, typically a Thunderbolt 3 cable. Make sure the connection is secure and properly inserted into the laptop’s Thunderbolt 3 port.
- Power on the enclosure: Connect the power supply to the enclosure and ensure it is securely plugged into a power outlet. Follow the enclosure manufacturer’s instructions for powering on the device.
- Configure the display setup: Connect your display or monitors to the ports on the external graphics card. Use the appropriate cables such as DisplayPort, HDMI, or DVI. Ensure that the displays are properly detected by your laptop after connecting them.
- Boot up the laptop: Power on your laptop and allow it to boot up. Once it is fully booted, it should recognize the external graphics card and initiate the necessary drivers and software.
- Install or update drivers: Visit the manufacturer’s website of the external graphics card and download the latest drivers for your operating system. Install the drivers following their instructions to ensure proper communication between your laptop, external graphics card, and display setup.
Ensure that all connections are secure, and the external graphics card enclosure is positioned in a well-ventilated area to prevent overheating. If any issues arise during the setup process, refer to the documentation provided by the enclosure and the graphics card manufacturer or seek assistance from their customer support.
By following these hardware setup steps, you can properly connect and integrate your external graphics card with your laptop, enabling you to take advantage of enhanced graphics performance for gaming, graphic design, and other resource-intensive tasks.
Installing the necessary drivers
Installing the necessary drivers is a crucial step in ensuring that your external graphics card functions optimally with your laptop. Follow these steps to install the required drivers:
- Identify the graphics card model: Determine the exact model of the external graphics card you have installed in your enclosure. This information is usually printed on the graphics card itself or mentioned in the enclosure’s documentation.
- Visit the manufacturer’s website: Go to the official website of the graphics card manufacturer. Look for the section dedicated to drivers and support.
- Choose the correct operating system: Select your laptop’s operating system from the available options provided by the manufacturer. Download drivers that are compatible with your specific operating system version.
- Download and install the drivers: Download the appropriate drivers for your external graphics card. Run the installer and follow the on-screen instructions to install the drivers on your laptop.
- Restart your laptop: Once the driver installation is complete, restart your laptop to ensure that the changes take effect. This will ensure that the drivers are properly initialized and the external graphics card is recognized by your laptop’s operating system.
- Update drivers periodically: Keep an eye on driver updates released by the graphics card manufacturer. Periodically visit their website and download the latest drivers for your external graphics card. This ensures compatibility with new games or software updates and can help resolve any bugs or performance issues.
It’s important to note that some external graphics card setups may require additional software or firmware updates specific to the enclosure. Check the manufacturer’s website or documentation for any additional updates and instructions to ensure full compatibility and proper functionality.
By installing the necessary drivers and keeping them up to date, you allow your laptop to communicate effectively with the external graphics card, enabling it to deliver the best performance and graphics capabilities.
Configuring the graphics card settings
Once you have installed the necessary drivers for your external graphics card, it’s important to configure the settings to ensure optimal performance and customization options. Here are some key steps to configure the graphics card settings:
- Access the graphics card control panel: Most graphics card manufacturers provide a control panel or software suite that allows you to configure various settings. Locate and open the graphics card control panel or software from your laptop’s system tray or by searching for it in the Start menu.
- Adjust performance settings: Look for options related to performance settings. This may include adjusting the power settings, enabling performance mode, or setting the desired levels of graphics processing power. Customize these settings to align with your preferences and the specific requirements of the applications you use.
- Manage display settings: Access the display settings section to configure parameters such as screen resolution, refresh rate, and color calibration. Ensure that your display is set to the optimal resolution and refresh rate for the best visual experience.
- Configure multi-monitor setup: If you are using multiple monitors, explore the settings related to multi-monitor setup. Adjust the arrangement, orientation, and other display settings to suit your workspace preferences. Ensure that the external graphics card is properly detecting and displaying content on all connected monitors.
- Enable additional features: Graphics card control panels often offer additional features such as anti-aliasing, anisotropic filtering, and vertical sync. Explore these options and enable or adjust them based on your preferences and the requirements of your applications or games.
- Monitor temperature and performance: Some graphics card control panels provide real-time monitoring of temperature and performance metrics. Keep an eye on these readings to ensure that the graphics card remains within safe operating temperatures and identify any performance issues or bottlenecks.
- Save and apply settings: After configuring the graphics card settings, ensure that you save and apply the changes. This will ensure that the settings are active and remain in effect even after system restarts or power cycles.
Remember that each graphics card control panel or software suite may have a slightly different interface and organization of settings. Familiarize yourself with the specific options and features available for your graphics card to get the most out of your external graphics card setup.
Lastly, periodically check for updates to the graphics card control panel software. Manufacturers often release updates that introduce new features, performance improvements, or bug fixes, ensuring that you have the best user experience with your external graphics card.
Troubleshooting common issues
While setting up and using an external graphics card with your laptop can greatly enhance your graphics performance, you may encounter some common issues along the way. Here are a few troubleshooting steps to help resolve these issues:
- Ensure proper connections: Double-check that all connections, including the Thunderbolt 3 cable and display connections, are securely and correctly plugged in. Loose connections can result in performance issues or a failure to detect the external graphics card.
- Update drivers: Ensure that you have the latest drivers installed for both your external graphics card and your laptop’s operating system. Outdated or incompatible drivers can lead to compatibility issues or unexpected behavior.
- Check power supply: Make sure that the external graphics card enclosure is receiving adequate power. Verify that the power supply is properly connected and functioning correctly. Insufficient power can cause performance issues or prevent the external graphics card from functioning altogether.
- Reset power settings: If you are experiencing power-related issues, such as the external graphics card not powering on or laptop performance being impacted, reset the power settings to default in the graphics card control panel or power management settings.
- Disable integrated graphics: In some cases, you may need to disable the integrated graphics of your laptop for the external graphics card to work properly. Access the BIOS or UEFI settings of your laptop and search for an option to disable integrated graphics if available.
- Ensure up-to-date firmware: Check if there are any firmware updates available for your external graphics card enclosure. Firmware updates can address compatibility issues and improve overall performance and stability.
- Monitor temperatures: Keep an eye on the temperatures of your external graphics card during prolonged use. High temperatures can lead to performance throttling or even system shutdowns. Ensure that the enclosure has adequate ventilation and consider using additional cooling measures if needed.
- Resetting the enclosure: If you encounter persistent issues, consider resetting the external graphics card enclosure to its factory settings. This can help resolve any software or configuration issues that may be causing the problems.
If you are unable to resolve the issues on your own, consult the support documentation provided by the graphics card and enclosure manufacturers. Additionally, reach out to their customer support for further assistance, as they will have the expertise to guide you through specific troubleshooting steps or provide additional solutions.
Remember, troubleshooting common issues requires patience and a systematic approach. By following these steps and seeking proper guidance when needed, you can overcome any obstacles and enjoy the full benefits of your external graphics card setup.
Conclusion
Connecting an external graphics card to your laptop can significantly enhance your gaming and graphics performance, allowing you to unlock the full potential of your laptop. By following the steps outlined in this guide, you can successfully set up and configure an external graphics card for your laptop.
We began by explaining what an external graphics card is and the benefits it brings, such as improved performance, flexibility, and future-proofing. We then discussed the importance of checking compatibility and requirements to ensure that your laptop supports an external graphics card setup. By choosing the right external graphics card that meets your needs and budget, you can ensure optimal performance.
Setting up the hardware requires careful installation of the graphics card in the enclosure, proper connections, and power supply considerations. Installing the necessary drivers and configuring the graphics card settings are essential steps to ensure optimal performance and customization options.
Lastly, we explored common troubleshooting steps to assist you in resolving any issues you may encounter during the setup or usage of your external graphics card. Regularly updating drivers, checking power supply, and monitoring temperatures are essential for smooth operation.
Remember, while an external graphics card can greatly enhance your laptop’s graphics capabilities, it is important to follow the manufacturer’s instructions and guidelines for your specific external graphics card and laptop model.
With the right external graphics card setup, you can enjoy a more immersive gaming experience, faster rendering times for graphic-intensive tasks, and improved graphics quality. Upgrade your laptop’s graphics capabilities today and take your gaming or professional work to new heights!