Introduction
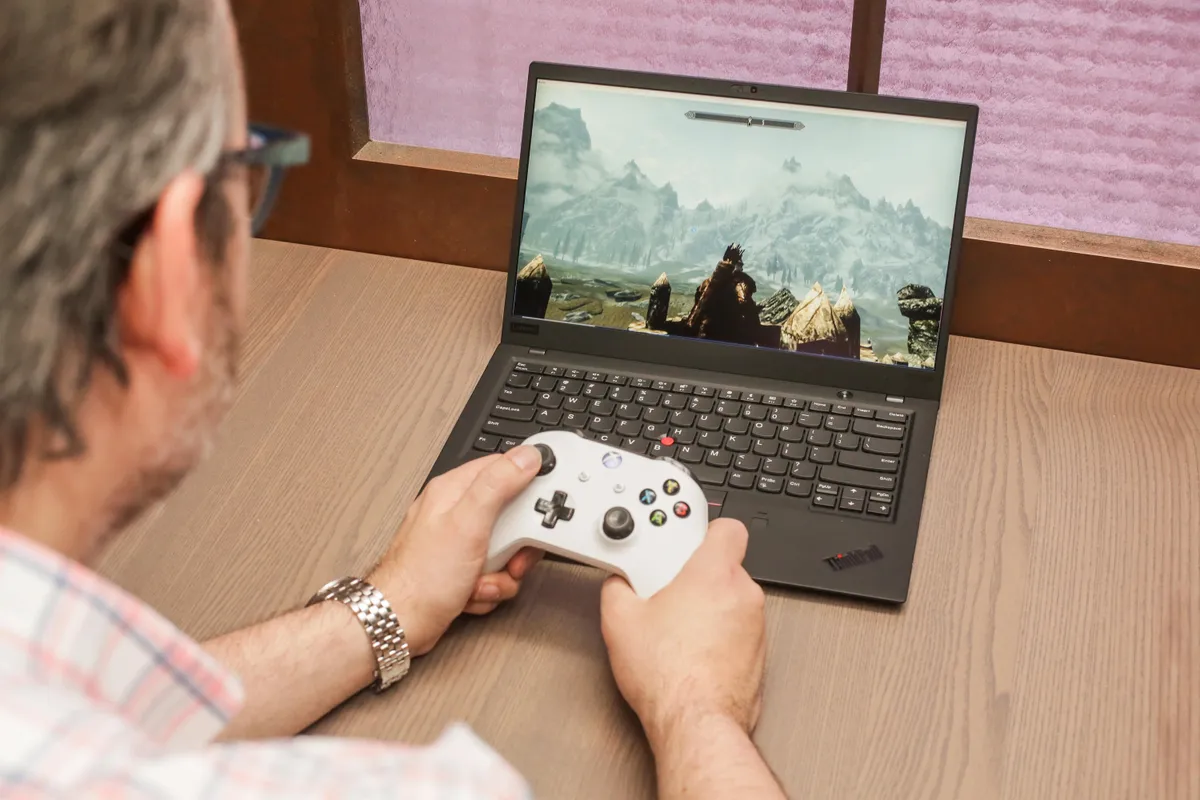
When it comes to laptops, not all of them are designed for gaming. If you’re an avid gamer, you may find yourself in a situation where your current non-gaming laptop just doesn’t deliver the graphical performance you desire. But don’t worry, there are ways to make your non-gaming laptop play with better graphics.
Whether you simply want to improve the performance of your favorite games or you’re looking to explore new gaming avenues on your existing laptop, there are several steps you can take to enhance your laptop’s graphics capabilities.
In this article, we will explore a variety of methods to upgrade your non-gaming laptop’s graphics performance so that you can enjoy games with greater visual fidelity and smoother gameplay. From hardware upgrades to software optimizations, we will cover everything you need to know to get the most out of your laptop.
It’s important to note that while these solutions can help improve your laptop’s graphics performance, they may not match the level of a dedicated gaming laptop. However, they can certainly give you a performance boost without the need for a complete system upgrade. So, if you’re ready to unlock the full potential of your non-gaming laptop for gaming purposes, let’s dive in!
Understanding the limitations of a non-gaming laptop
Before we explore the methods to improve the graphics performance of a non-gaming laptop, it’s important to understand the limitations of such devices. Non-gaming laptops are typically designed for general productivity tasks like web browsing, document editing, and multimedia consumption. As a result, they may lack the necessary hardware components to handle the demanding requirements of modern games.
One of the primary limitations of non-gaming laptops is their integrated graphics processing unit (GPU). Unlike dedicated gaming laptops that come equipped with powerful discrete GPUs, non-gaming laptops rely on integrated GPUs that are integrated into the laptop’s CPU. While integrated GPUs are capable of handling basic graphics tasks, they are often not sufficient for running graphically-intensive games.
In addition to the limitations of the GPU, non-gaming laptops may also have insufficient RAM and storage capacities. Gaming requires ample memory to store and process game assets, and older laptops may have limited RAM configurations. Similarly, the storage capacity of non-gaming laptops may not be enough to accommodate large game installations.
Furthermore, non-gaming laptops may lack adequate cooling systems to dissipate heat generated during heavy gaming sessions. This can lead to thermal throttling, where the CPU and GPU reduce their performance to prevent overheating. Consequently, this can result in compromised graphics performance and reduced frame rates, negatively impacting the gaming experience.
It’s essential to keep these limitations in mind when attempting to enhance the graphics performance of a non-gaming laptop. While you may not be able to achieve the same level of performance as a dedicated gaming laptop, there are still steps you can take to optimize your laptop’s hardware and software settings to get the best possible gaming experience.
Upgrade your laptop’s RAM
One of the most effective ways to improve the graphics performance of a non-gaming laptop is by upgrading its RAM. RAM, or Random Access Memory, plays a crucial role in storing and accessing data for various processes, including gaming.
If your laptop has limited RAM capacity, it may struggle to handle the memory requirements of modern games, leading to laggy gameplay and overall poor graphics performance. By increasing the amount of RAM in your laptop, you can provide it with the necessary resources to effectively run demanding games.
Before upgrading your laptop’s RAM, it’s essential to determine the maximum amount of RAM that your laptop supports. Check the manufacturer’s specifications or consult the laptop’s user manual to find out the compatible RAM types and maximum supported capacity.
Once you have this information, you can purchase additional RAM modules to install in your laptop. Make sure to choose RAM modules that match the specifications of your laptop, including the type (DDR3, DDR4, etc.), speed, and capacity. It’s recommended to opt for higher capacity RAM modules, such as 8GB or 16GB, to provide ample memory for gaming.
Installing the new RAM modules is typically straightforward and can be done by following a few simple steps. Start by shutting down your laptop and removing the battery (if removable). Locate the RAM slots, which are usually located on the underside of the laptop. Carefully insert the new RAM modules into the slots, ensuring they are properly aligned and secure. Finally, reattach the battery and power on your laptop.
After upgrading the RAM, you should notice an immediate improvement in your laptop’s graphics performance. The additional memory allows for smoother multitasking, faster data access, and improved overall responsiveness. Games that previously struggled to run smoothly may now run more efficiently, resulting in better framerates and enhanced visual quality.
Upgrading your laptop’s RAM is a cost-effective way to boost its gaming capabilities. It’s a relatively simple and non-intrusive upgrade that can provide a significant performance improvement, making your non-gaming laptop a more suitable option for gaming purposes.
Upgrade your laptop’s storage
Upgrading your laptop’s storage can have a noticeable impact on the graphics performance, especially if your current storage is a traditional hard disk drive (HDD). Traditional HDDs are slower compared to solid-state drives (SSDs) when it comes to data read and write speeds. This can manifest in slower game loading times and potential performance bottlenecks.
Consider replacing your laptop’s HDD with an SSD for improved graphics performance. SSDs offer faster data transfer rates, which means your games can load more quickly, resulting in reduced wait times and improved overall gaming experience. Additionally, SSDs are more resilient to physical shocks, making them ideal for portable devices like laptops.
When selecting an SSD for your laptop, consider the storage capacity that suits your needs. Games can occupy a significant amount of space, so opt for an SSD with ample storage to accommodate your gaming library. It’s also recommended to select an SSD with high-speed read and write capabilities for optimal gaming performance.
Before replacing the storage drive, it’s important to back up your data to avoid any loss during the migration process. You can connect a new SSD to your laptop using an external enclosure or use a cloning software to transfer your data from the old HDD to the new SSD. Once you have successfully transferred your data, you can swap out the old HDD with the new SSD.
After upgrading to an SSD, you will notice a significant improvement in game load times and overall system responsiveness. The faster data access speed of SSDs can help eliminate buffering issues and reduce stuttering in games, resulting in smoother gameplay and enhanced graphics performance.
If your laptop already has an SSD, consider upgrading to a larger capacity SSD to provide more space for your games and ensure that you don’t run out of storage. Having sufficient storage capacity allows you to install and run multiple games without compromising their performance.
Upgrading your laptop’s storage to an SSD is a worthwhile investment, as it can greatly enhance your gaming experience. Not only will your games load faster, but you’ll also enjoy improved overall system performance. With faster data access, your laptop’s graphics performance will be significantly enhanced, allowing you to fully immerse yourself in your favorite games.
Install a dedicated graphics card
If you’re looking to take your non-gaming laptop’s graphics performance to the next level, installing a dedicated graphics card can make a remarkable difference. Unlike integrated graphics processors found in most non-gaming laptops, dedicated graphics cards are specifically designed to handle graphically demanding tasks, including gaming.
Before proceeding with this upgrade, it’s important to check if your laptop supports external graphics card installation. Some laptops have a designated slot, such as the Thunderbolt 3 port, for connecting an external graphics card dock. If your laptop doesn’t have this capability, unfortunately, you won’t be able to install a dedicated graphics card.
If your laptop does support external graphics card installation, the first step is to purchase a compatible graphics card and an external graphics card enclosure. Consult with the graphics card manufacturer’s specifications to ensure compatibility with your laptop and desired gaming requirements.
Once you have the necessary components, follow these steps to install the dedicated graphics card:
- Disable the integrated graphics card in the laptop’s BIOS settings to prevent conflicts.
- Connect the external graphics card enclosure to your laptop using the appropriate cable.
- Insert the dedicated graphics card into the enclosure and secure it in place.
- Connect the necessary power cables from the enclosure to the graphics card.
- Power on your laptop and install the drivers for the dedicated graphics card.
Once the installation is complete, your laptop will utilize the power of the external graphics card for gaming and other graphically-intensive tasks. This significantly improves the performance and graphics capabilities of your laptop, allowing you to play modern games with better frame rates and higher visual settings.
It’s important to note that the overall performance of the external graphics card can be influenced by factors such as the connection type (e.g., Thunderbolt 3, USB-C) and the specific graphics card model you choose. Some laptops may also have bandwidth limitations for external graphics card usage, which can impact performance to some extent.
Installing a dedicated graphics card is a more advanced and costly route to enhance your laptop’s graphics performance. However, if your non-gaming laptop supports it, it can provide a substantial boost in graphics capabilities, turning your laptop into a gaming powerhouse.
Optimize your laptop’s software settings
In addition to hardware upgrades, optimizing your laptop’s software settings can have a significant impact on its graphics performance. By tweaking certain settings and making adjustments, you can maximize your laptop’s potential for gaming.
Start by updating your graphics drivers to the latest version provided by the manufacturer. Graphics driver updates often include optimizations and bug fixes that can enhance performance and stability. Visit the manufacturer’s website or use their software to download and install the latest drivers specific to your laptop’s graphics card.
Next, adjust the power settings on your laptop to prioritize performance. Open the Power Options in the Control Panel or Settings and select the High-Performance power plan, if available. This ensures that your laptop’s components, including the graphics card, are running at their maximum potential, providing better graphics performance during gaming.
Take advantage of the graphics settings within the games themselves. Many games allow you to adjust various graphics options, such as resolution, antialiasing, texture quality, and effects. Experiment with different settings to find the optimal balance between visuals and performance. Lowering demanding settings like shadows and post-processing effects can significantly improve frame rates without sacrificing too much visual fidelity.
Additionally, close unnecessary background processes and applications before launching a game. These processes can consume system resources and impact gaming performance. Task Manager or third-party software can help you identify resource-hungry processes and close them to free up system resources for gaming.
If your laptop is running on a low-end or outdated operating system, consider upgrading to a newer version. Newer operating systems often have improved performance optimization, which can benefit gaming. However, ensure that your laptop meets the system requirements for the new operating system before proceeding with the upgrade.
Regularly clean up your laptop’s hard drive to keep it running smoothly. Uninstall unused programs, delete unnecessary files, and run disk cleanup utilities to free up storage space. A clutter-free hard drive can contribute to faster read and write speeds, improving overall system performance.
Lastly, consider using optimization software that can automatically fine-tune your laptop’s settings for optimal gaming performance. These software tools can help you optimize your laptop’s settings, including power management, driver updates, and game-specific optimizations.
By making these software optimizations, you can unlock enhanced graphics performance on your non-gaming laptop. While they may not provide as significant a boost as hardware upgrades, they can still make a noticeable difference in the overall gaming experience.
Use external graphics processing unit (eGPU)
If your non-gaming laptop lacks the capability to install a dedicated graphics card internally, you can still enhance its graphics performance by utilizing an external graphics processing unit, commonly known as an eGPU. An eGPU is a separate enclosure that houses a dedicated graphics card, which can be connected to your laptop via a cable.
The eGPU setup allows your laptop to harness the power of the external graphics card, significantly improving its gaming capabilities. This is particularly beneficial for laptops with integrated graphics that may struggle to run demanding games smoothly.
An eGPU setup typically involves the following steps:
- Purchase an eGPU enclosure compatible with your laptop and select a suitable graphics card for your gaming needs.
- Connect the eGPU enclosure to your laptop using a compatible cable, such as Thunderbolt 3.
- Install the graphics card into the eGPU enclosure and secure it in place.
- Install the necessary drivers for the graphics card on your laptop.
- Power on your laptop and configure the graphics settings to utilize the eGPU.
Once the eGPU setup is complete, your laptop will be able to utilize the power of the external graphics card, delivering improved graphics performance for gaming. The dedicated graphics card will handle the demanding graphics processing, resulting in smoother gameplay, higher frame rates, and better visual quality.
It’s important to note that the performance of an eGPU setup can depend on various factors, including the connection type, the specific graphics card used, and the laptop’s resources. Some laptops may have limited bandwidth when using an eGPU, which can slightly impact performance compared to a desktop setup. Additionally, it’s recommended to use a laptop with a high-performance CPU to avoid potential bottlenecks.
An eGPU setup is a versatile solution that allows you to enhance your non-gaming laptop’s graphics performance whenever needed. You can enjoy the benefits of improved graphics for gaming and easily disconnect the eGPU when you’re not gaming, allowing your laptop to be more portable and power-efficient.
Investing in an eGPU can significantly extend the lifespan of your non-gaming laptop, providing a cost-effective way to enjoy visually stunning games without the need for a complete laptop replacement.
Keep your laptop clean and free of dust
An often-overlooked aspect of maintaining optimal graphics performance on a non-gaming laptop is keeping it clean and free of dust. Over time, dust particles can accumulate in and around your laptop’s components, obstructing airflow and causing overheating issues. This can lead to thermal throttling and decreased graphics performance.
Regularly cleaning your laptop can help prevent dust buildup and keep it running smoothly. Here are some steps to follow:
- Power off your laptop and unplug it from the power source.
- Use compressed air or a soft brush to gently remove dust from the keyboard, vents, and other accessible areas. Be careful not to apply too much pressure or use liquids that can damage the components.
- Open up your laptop’s bottom panel, if possible, and carefully clean the internal components using compressed air or a small brush. Pay special attention to the cooling fans and heat sinks, as they tend to accumulate the most dust.
- Ensure that the cooling vents are clear of any obstructions, such as fabric or papers, that could impede airflow.
- If you feel comfortable doing so, you can also clean the laptop’s thermal paste and reapply it for better heat dissipation.
- Regularly clean the laptop’s screen using a microfiber cloth and a gentle screen cleaner. Avoid using harsh chemicals that could damage the screen surface.
By keeping your laptop clean and free of dust, you can improve its overall thermals and prevent overheating during gaming sessions. With better cooling, your laptop’s components, including the graphics card, can operate at optimal temperatures, resulting in improved graphics performance and reduced chances of thermal throttling.
Additionally, maintaining a clean laptop can extend its lifespan and prevent potential hardware damage caused by excessive heat buildup. It’s a good practice to clean your laptop at least every few months, depending on usage and environmental factors.
Remember to handle your laptop and its components with care during the cleaning process. If you’re unsure about opening up your laptop, it’s best to consult a professional to avoid any accidental damage.
Regular maintenance and dust management are essential for ensuring optimal graphics performance on your non-gaming laptop. By keeping it clean and free of dust, you can enjoy smoother gameplay and prevent potential hardware issues that could hinder your gaming experience.
Overclock your laptop’s GPU
If you’re looking to squeeze out some extra performance from your non-gaming laptop’s graphics card, you can consider overclocking it. Overclocking involves adjusting the clock speed and voltage settings of the GPU to operate at higher frequencies than the manufacturer’s default settings.
Before beginning the overclocking process, it’s crucial to understand the risks involved. Overclocking can potentially lead to increased power consumption, higher temperatures, and stability issues. It’s essential to proceed cautiously and monitor your laptop’s temperatures during the overclocking process to prevent overheating.
To overclock your laptop’s GPU, you can use specialized software tools that allow you to increase the clock speed and voltage settings. However, not all GPUs or laptops support overclocking, so make sure to check if your specific model allows it.
Start by researching and finding reliable overclocking software compatible with your laptop’s graphics card. Popular options include MSI Afterburner, EVGA Precision X, and AMD Radeon Software. These tools provide user-friendly interfaces to adjust the GPU parameters and monitor performance.
When overclocking, take incremental steps and test the stability of your laptop’s GPU after each adjustment. Avoid making drastic changes right away to minimize the risk of system instability. Gradually increase the clock speed and observe the results.
When testing the stability of the overclocked GPU, run benchmarks or perform stress tests to ensure that the laptop remains stable and doesn’t encounter crashes, artifacts, or system freezes. Keep an eye on the temperatures as well, as higher clock speeds can generate more heat.
Remember that every laptop and GPU combination is unique, and the level of overclocking achievable may vary. It’s important to find a balance between performance gains and stability. If you experience any issues or instability, revert the GPU settings to their default values.
Overclocking can provide a noticeable boost in graphics performance, resulting in improved frame rates and smoother gameplay. However, it’s important to keep in mind that the gains achieved through overclocking may not be as substantial on a non-gaming laptop compared to a gaming-specific laptop with better cooling and hardware.
Furthermore, be aware that overclocking may void your warranty, as it involves modifying the GPU settings beyond the manufacturer’s specifications. If you’re unsure about the risks or are uncomfortable with the process, it’s best to consult a professional or stick with the default settings provided by the manufacturer.
Overclocking your laptop’s GPU can be an effective way to maximize its graphics performance. However, proceed with caution, monitor temperatures, and always prioritize the stability and well-being of your laptop to ensure a safe and enjoyable gaming experience.
Enhance cooling system for better graphics performance
To improve the graphics performance of your non-gaming laptop, it is crucial to ensure effective cooling. Overheating can lead to thermal throttling, which reduces the performance of your laptop’s components, including the graphics card. By enhancing the cooling system, you can prevent thermal throttling and maintain optimal graphics performance during gaming sessions.
Here are some steps you can take to enhance the cooling system of your laptop:
- Clean the cooling vents and fans: Over time, dust and debris can accumulate in the cooling vents and fans, impeding air circulation. Regularly clean these areas using compressed air or a soft brush to remove any obstructions.
- Invest in a laptop cooling pad: Laptop cooling pads are accessories that help improve airflow by providing additional cooling mechanisms. They typically have built-in fans that help dissipate heat from the laptop’s underside. Placing your laptop on a cooling pad can significantly reduce temperatures and enhance graphics performance.
- Elevate your laptop: Keeping your laptop elevated allows for better airflow underneath, promoting heat dissipation. You can use a laptop stand, a stack of books, or other suitable objects to achieve the desired elevation.
- Improve ventilation: Ensure that you use your laptop on a solid surface to prevent air intake obstructions. Soft surfaces like beds and cushions can restrict airflow, leading to heat buildup. Additionally, consider using a laptop cooling mat or a laptop stand with built-in ventilation to aid in heat dissipation.
- Adjust power settings: Configuring your laptop’s power management settings can help regulate the performance and heat output. Opt for power-saving modes during regular usage and switch to high-performance modes during gaming sessions to facilitate optimum cooling requirements.
- Apply thermal paste: Over time, the thermal paste between the CPU and heat sink can deteriorate, compromising heat transfer efficiency. If you have experience or are comfortable doing so, consider reapplying high-quality thermal paste to improve thermal conductivity.
Enhancing the cooling system of your non-gaming laptop is essential to prevent thermal throttling and maintain optimal graphics performance. By implementing these cooling strategies, you can reduce system temperatures, improve airflow, and ensure that your laptop’s components, including the graphics card, operate at their best.
Keep in mind that while these cooling enhancements can positively impact graphics performance, they may not completely eliminate thermal limitations associated with non-gaming laptops. It’s important to monitor your laptop’s temperatures during gaming sessions and take necessary breaks to prevent prolonged exposure to high temperatures.
Remember to consider your own comfort and safety when implementing cooling modifications. If you’re unsure about making modifications yourself, consult a professional or contact your laptop’s manufacturer for guidance and support.
Conclusion
While non-gaming laptops may not be specifically designed for intensive gaming, there are numerous ways to enhance their graphics performance and enjoy a better gaming experience. By following the steps outlined in this article, you can unlock the full potential of your non-gaming laptop and elevate its gaming capabilities.
First and foremost, understanding the limitations of your non-gaming laptop is crucial. Recognize that it may have integrated graphics, limited RAM, and storage capacities, as well as potential cooling constraints. Being aware of these limitations will help you make informed decisions about the methods you choose to improve its graphics performance.
Consider upgrading your laptop’s RAM and storage, which can significantly impact the overall gaming performance by providing more memory resources and faster data access. Installing a dedicated graphics card or utilizing an external graphics processing unit (eGPU) allows your laptop to harness the power of a dedicated GPU, resulting in smoother gameplay and enhanced visual quality.
In addition to hardware upgrades, optimizing your laptop’s software settings can provide noticeable performance gains. Keep your laptop clean and free of dust to prevent overheating and thermal throttling. Overclocking your GPU and implementing cooling enhancements can further boost graphics performance.
It’s important to remember that while these methods can enhance your non-gaming laptop’s graphics performance, they may not achieve the same level of performance as a dedicated gaming laptop. However, with the right upgrades and optimizations, you can still enjoy a satisfying gaming experience on your non-gaming laptop.
Finally, always prioritize safety and ensure that you are comfortable with the modifications made to your laptop. If you’re unsure about any step or need assistance, consider consulting a professional or reaching out to the manufacturer for guidance.
By implementing these strategies, you can transform your non-gaming laptop into a capable gaming machine, allowing you to enjoy your favorite games with improved visuals, smoother gameplay, and increased overall performance.