Introduction
Welcome to our guide on how to make a group email! In this digital age, communication is key, and having a group email can greatly simplify and enhance your ability to stay connected with a specific group of people. Whether you want to create a group email for your colleagues, classmates, or community organization, this step-by-step guide will walk you through the process.
But first, let’s talk about the benefits of using a group email. With a group email, you can send important announcements, share documents or files, coordinate events, and engage in group discussions all in one place. It eliminates the need to manually email each individual separately and helps ensure that everyone in the group is on the same page.
Now that you understand the advantages, let’s dive into the steps of creating a group email. But before we proceed, it’s important to note that you’ll need to choose an email service provider that offers group email functionality. Popular providers like Gmail, Outlook, and Yahoo Mail all have this feature, so you can select the one you prefer or already use.
Benefits of Using a Group Email
Using a group email has numerous advantages that can greatly enhance your communication and productivity. Let’s explore some of the key benefits:
- Ease of Communication: With a group email, you can reach out to all members of a specific group at once, saving you time and effort. Whether you need to share important updates, discuss ideas, or coordinate activities, a group email ensures that your message reaches everyone simultaneously.
- Centralized Communication: Instead of scattering your conversations across multiple individual email threads, a group email provides a centralized platform for all group-related discussions and collaborations. This makes it easier to find and reference information, eliminating the need to search through countless emails.
- Efficient Sharing of Documents and Files: Group emails allow you to share documents, files, and attachments effortlessly. Instead of individually emailing each member with the same files, you can simply attach them to a group email, making collaboration and file sharing much more efficient.
- Improved Organization: Group emails help you stay organized by keeping all group-related correspondence in one place. You can create folders, labels, or filters to manage and sort group emails, making it easier to locate specific discussions or information when needed.
- Increased Group Engagement: With a group email, members can actively participate in group discussions, exchange ideas, and stay informed about group-related activities. This fosters a sense of community and encourages collaboration among members, leading to increased engagement and productivity.
- Better Group Coordination: Whether you’re organizing an event, scheduling meetings, or assigning tasks, a group email simplifies group coordination. You can easily send reminders, updates, or announcements to all members, ensuring everyone is on the same page and minimizing miscommunication.
- Privacy and Security: Group emails offer privacy and security features to protect your group’s communication. You can control who has access to the group email, set permissions for different members, and ensure that confidential or sensitive information remains within the group.
Now that we understand the benefits of using a group email, let’s move on to the practical steps of creating one.
Step 1: Choosing an Email Service Provider
The first step in creating a group email is selecting an email service provider that offers group email functionality. There are several popular providers to choose from, including Gmail, Outlook, Yahoo Mail, and more. Consider the following factors when deciding:
- Features and Functionality: Look for an email service provider that offers robust group email features, such as the ability to create groups, send emails to multiple recipients, and customize group settings. Additionally, consider features like spam filters, storage capacity, and integration with other tools or platforms that may be relevant to your group’s needs.
- User-Friendly Interface: Opt for an email service provider with an intuitive interface that is easy to navigate and use. This will ensure that both you and the group members can quickly adapt to the platform and make the most out of its features.
- Reliability and Security: Choose an email service provider with a strong reputation for reliability and security. Look for features like strong data encryption, spam protection, two-factor authentication, and regular backups to ensure the safety and privacy of your group’s communication.
- Compatibility and Accessibility: Consider the compatibility of the email service provider with various devices and operating systems. Ideally, the provider should offer seamless integration across desktops, smartphones, and tablets, allowing group members to access and interact with the group emails from anywhere.
- Storage Space: Evaluate the storage space offered by the email service provider. Depending on the size of your group and the nature of your communication, you may need ample storage to accommodate attachments, files, and a substantial email archive.
- Cost Considerations: While many email service providers offer free plans, it’s worth considering any premium plans or additional features that may be available at a cost. Assess the value-for-money proposition and ensure that the chosen provider fits within your budget, especially if you anticipate scaling up your group’s communication needs in the future.
Once you have carefully considered these factors, select the email service provider that best aligns with your group’s specific requirements. In the next step, we’ll cover the process of creating a group email account.
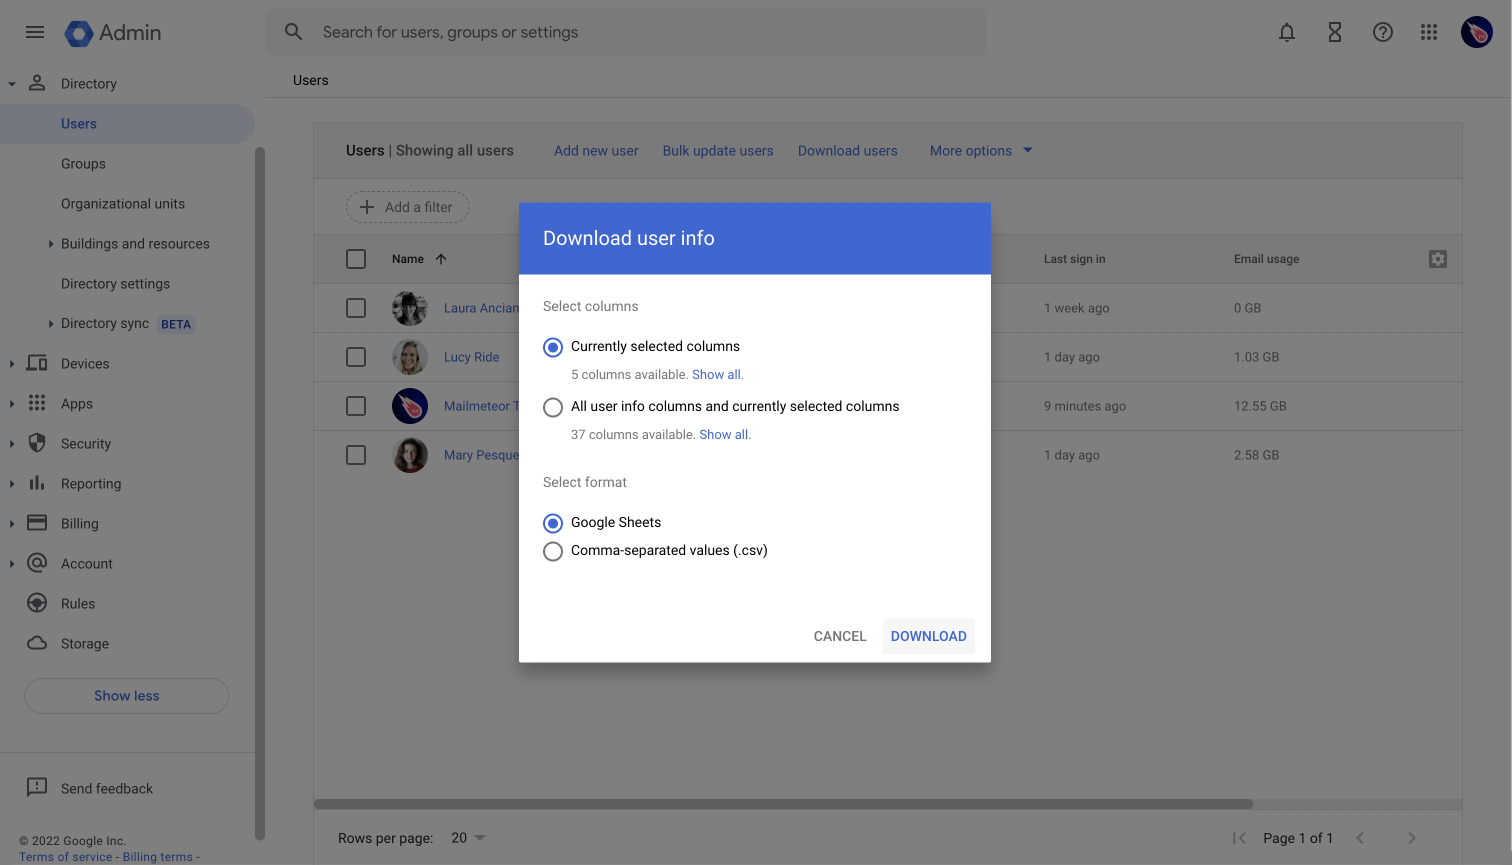
Step 2: Creating a Group Email Account
Now that you have chosen an email service provider, it’s time to create a group email account. Follow these steps to set up your group email:
- Sign Up: Visit the website of your chosen email service provider and look for the “Sign Up” or “Create Account” option. Click on it to begin the account creation process.
- Choose an Email Address: During the sign-up process, you will be prompted to choose an email address for your group email. Consider using a name that represents your group or organization, making it easy for members to identify the purpose of the email.
- Create a Password: Set a strong and unique password for your group email account. Ensure that it meets the provider’s password requirements for length, complexity, and special characters. Remember to keep the password secure and confidential.
- Provide Account Information: Fill in the required account information, such as your name, organization, or any other details requested by the email service provider. This information helps personalize your account and establish trust with the recipients of your group emails.
- Select Additional Options: Depending on the email service provider, you may have the option to customize your group email account further. This could include selecting a profile picture, setting up email signatures, or activating additional security features. Take your time to explore these options and make any desired configurations.
- Agree to Terms and Conditions: Read through the terms and conditions or user agreement provided by the email service provider. Once you are satisfied and agree to abide by the terms, click on the appropriate checkbox or button to acknowledge your consent.
- Verification: Some email service providers may require verification to ensure the security of your account. This may involve entering a verification code sent to your mobile number or an alternate email address. Follow the instructions provided to complete the verification process.
- Access Your Group Email Account: Once you have successfully created your group email account, you can access it by signing in with your email address and password. Take note of the login details for future reference.
Congratulations! You have now created your group email account. The next step is to add members to your group email, which we will cover in the following section.
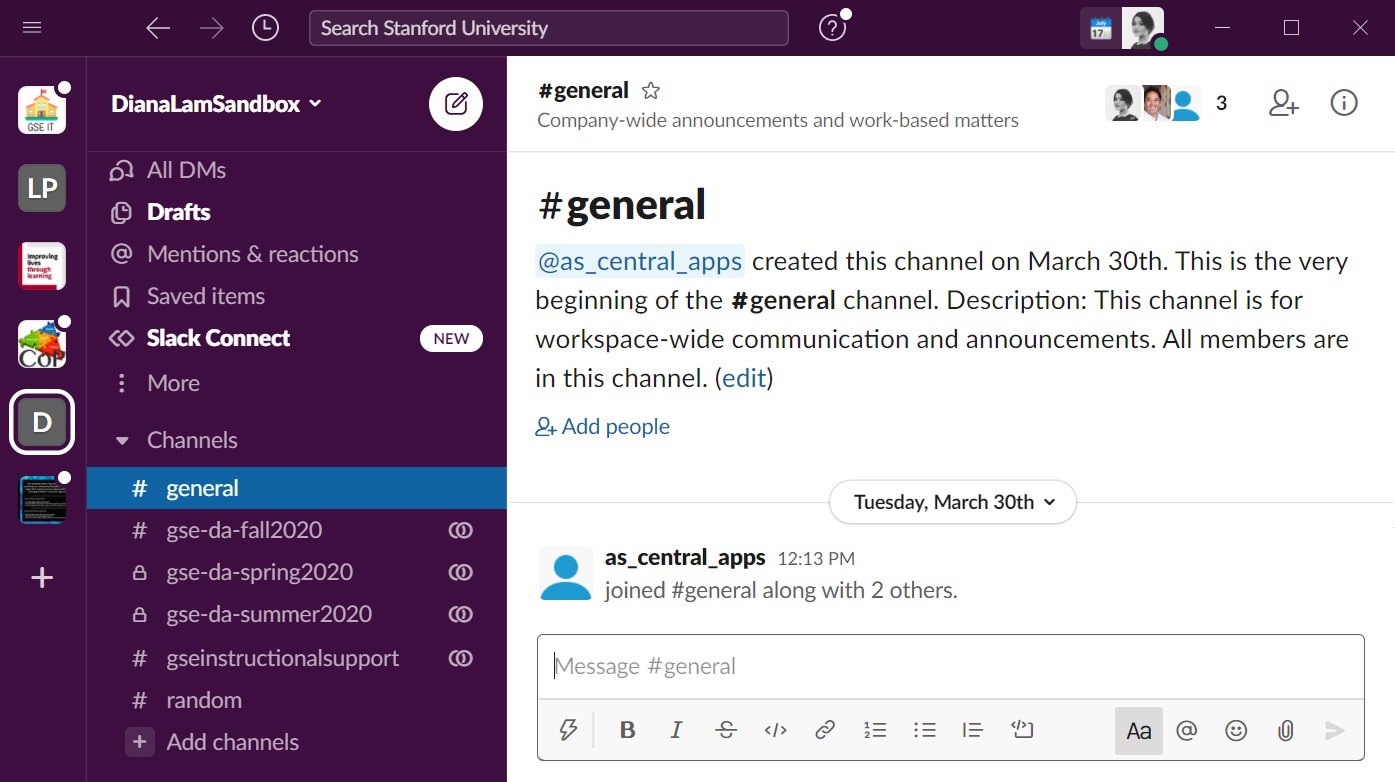
Step 3: Adding Members to Your Group Email
Now that you have created your group email account, it’s time to invite members to join your group. Here’s how you can add members to your group email:
- Identify Group Members: Make a list of the individuals you want to add as members to your group email. Ensure that you have their correct and current email addresses to avoid any communication issues.
- Access Contacts or Address Book: Most email service providers have a contacts or address book feature that allows you to store and manage contact details. Locate this feature within your email account.
- Create a Group: In your contacts or address book, find the option to create a new contact group or distribution list. Click on it to create your group.
- Add Members to the Group: Within the newly created group, look for an option to add members or invite contacts. Click on it and enter the email addresses of the individuals you want to add as members. Separate multiple addresses with commas or semicolons, depending on the provider’s guidelines.
- Assign Group Name: Give your group a name or label that accurately represents its purpose or members. This helps both you and group members identify the correct group email for future correspondence.
- Save and Confirm: Once you have added all the members to your group, save the changes. The email service provider may ask for confirmation or verification before finalizing the addition of members.
- Notify Members: Send a brief email or notification to the added members, informing them about their inclusion in the group email. Provide any necessary instructions or guidelines related to group communication to ensure a smooth experience.
- Periodic Member Updates: It’s common for group compositions to change over time. Periodically review and update the member list, removing any individuals who are no longer part of the group or adding new members as needed.
Adding members to your group email is a crucial step to ensure effective communication and collaboration. Once you have successfully added members, you can move on to the next step of customizing your group email settings.
Step 4: Customizing Group Email Settings
After adding members to your group email, it’s time to customize the settings to suit your group’s needs and preferences. Here are some key aspects to consider when customizing your group email settings:
- Group Alias: Some email service providers offer the option to create a group alias or nickname that can be easier to remember and share with others. Check if this feature is available and set up an alias for your group if desired.
- Email Signature: Personalize your group email by creating a unique email signature. Add important details like your name, group name, contact information, or any additional message you want to include. This helps to establish a professional and consistent image for your group.
- Reply Options: Determine the reply options for your group emails. This may include choosing whether members can reply only to the sender, reply to the entire group, or reply to the sender and group. Consider the nature of your group and the level of interactivity required.
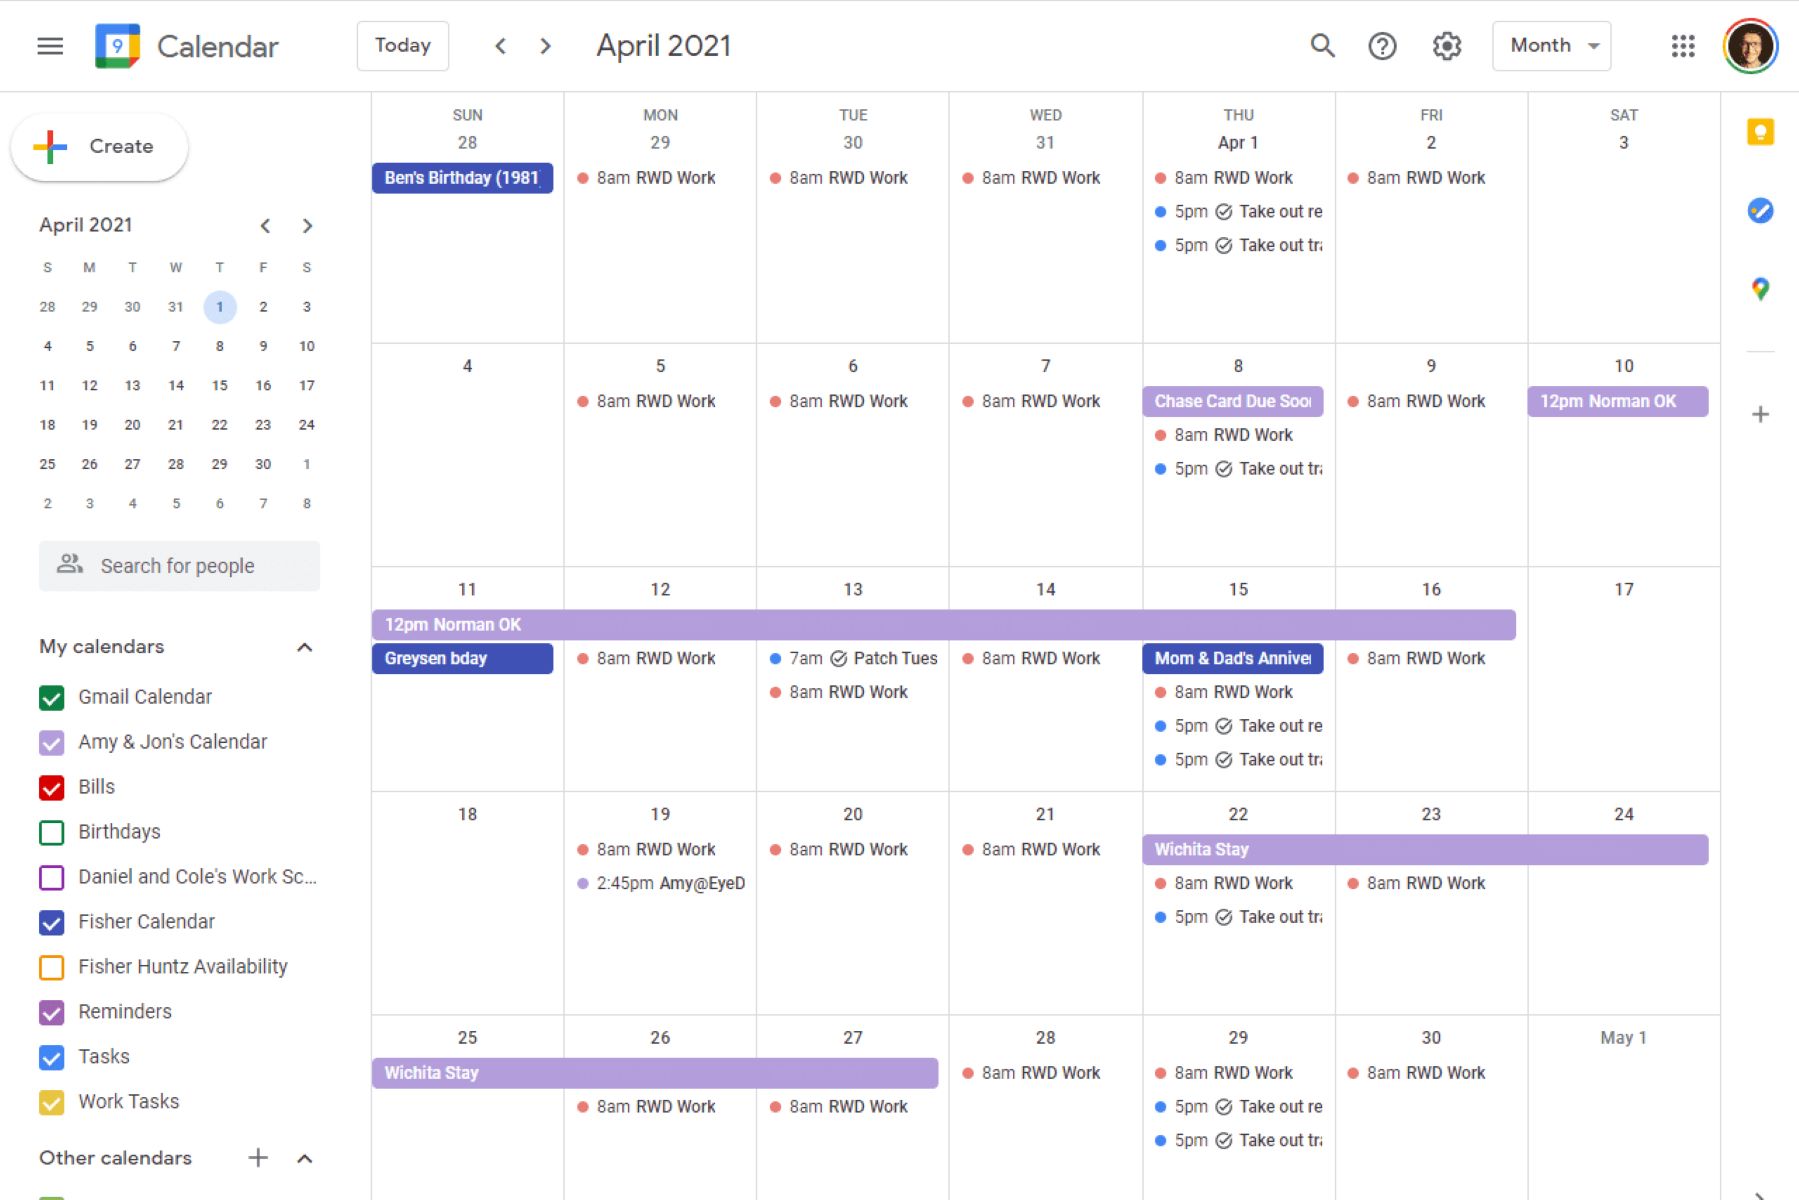
- Autoresponders: Some email service providers allow you to set up autoresponders or out-of-office messages for your group email. This can be useful when group members are on leave or when you want to notify others about important events or updates.
- Delivery Options: Explore the delivery options available for your group email. You may have the choice to receive group emails individually or in a consolidated digest format. Decide which option suits your preferences and the needs of your group.
- Privacy and Permissions: Depending on your group’s requirements, you may want to review and configure privacy and permissions settings. This could include selecting who can join or leave the group, approving members’ requests to join, or setting permissions for different group members regarding posting or modifying content.
- Notification Preferences: Determine how you and group members will be notified of new emails or updates in the group. You can typically choose to receive email notifications, desktop notifications, or push notifications on your mobile device.
- Archiving and Data Management: Familiarize yourself with the options for archiving and data management within your group email settings. This can include setting up automatic archiving of emails after a certain period, determining the storage duration, or managing data usage limits.
Take the time to explore and customize these settings according to your group’s requirements and preferences. Customizing the settings ensures that your group email provides an optimal experience for all members, leading to efficient communication and collaboration.
Step 5: Managing Group Email Permissions
Managing group email permissions is an important aspect of ensuring smooth operations and maintaining control over your group’s communication. Here are some key considerations when it comes to managing group email permissions:
- Admin Roles: Depending on the email service provider, you may have the option to assign different admin roles within your group. These roles can include group owner, manager, or moderator, each with varying levels of permissions and responsibilities. Assess the roles needed for your group and assign them accordingly.
- Member Access: Determine the level of access and permissions that group members have within the group email. This can involve choosing whether members can view the full list of members, post messages, access shared files, or modify existing content. Striking the right balance between collaboration and data security is key.
- Approval Process: If you want to maintain control over who joins your group, consider implementing an approval process. This involves manually approving or vetting requests from individuals who wish to join the group and ensuring they meet the eligibility criteria. This can be especially useful for private or exclusive groups.
- Content Moderation: To maintain a positive and productive environment within your group email, you might want to consider content moderation. This can involve reviewing and approving messages or content before they are published to the group, ensuring that they comply with group guidelines and protocols.
- Member Removal: It’s essential to have protocols in place for removing members from your group email if necessary. This can involve removing members who violate group guidelines, leave the organization or group, or become inactive for an extended period of time.
- Communicating Permissions: Clearly communicate the permissions and guidelines to group members. Make sure they are aware of what they can or cannot do within the group email and encourage them to adhere to the established communications protocols for optimal collaboration and a positive group dynamic.
- Regular Review and Updates: Periodically review the permissions and settings within your group email to ensure they still align with the needs and goals of your group. Make necessary updates or adjustments as the group evolves or if new requirements arise.
Effectively managing group email permissions sets the groundwork for a well-organized and secure communication environment. It allows you to strike the right balance between collaboration and control, ensuring that your group email functions smoothly and efficiently.
Step 6: Sending Emails to the Group
Now that you have set up your group email account, added members, and customized the settings, it’s time to start using it for group communication. Here’s how you can send emails to the group:
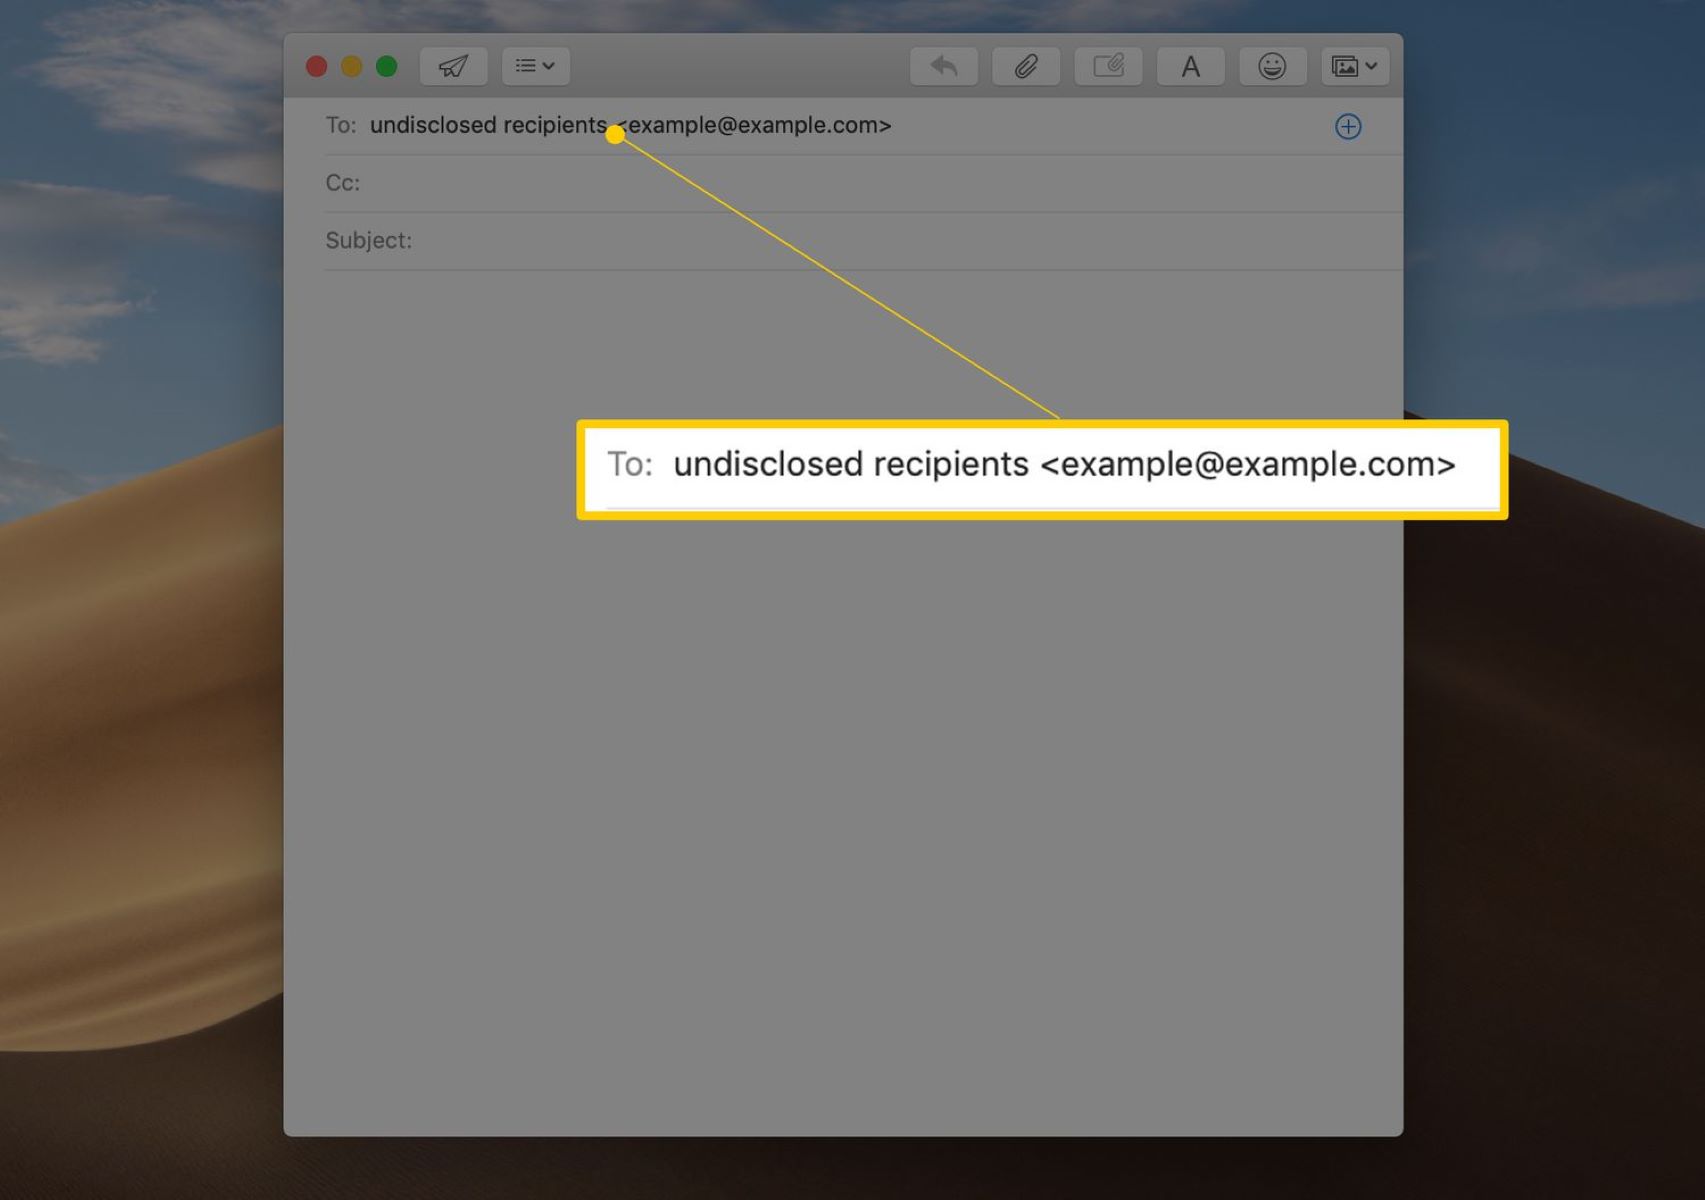
- Compose a New Email: Access your group email account and look for the option to compose a new email. This is usually represented by a button such as “Compose” or “New Message.”
- Add Group Email Address: Instead of entering individual email addresses, enter the group email address as the recipient. This ensures that the email is sent to all members of the group collectively.
- Subject Line: Write a descriptive subject line that accurately reflects the content or purpose of the email. A clear subject line helps the recipients understand the importance of the email and increases the likelihood of it being opened and read.
- Email Content: Craft your email message, keeping in mind the purpose and intended audience of the group. Be concise, clear, and respectful in your communication. Use formatting options such as bold text, headings, or bullet points to enhance readability and highlight important information.
- Attach Files or Documents: If you need to share files, documents, or any other attachments with the group, use the email service provider’s attachment functionality to add them to your email. Ensure that the file sizes are within the specified limits and that the files are relevant and necessary.
- Review and Proofread: Before sending the email, take a moment to review and proofread the content. Check for any spelling or grammatical errors and ensure that the email is concise and professional. Double-check that all the necessary information and attachments are included.
- Send the Email: Once you are satisfied with the content and accuracy of the email, click the “Send” button to deliver it to the group. Depending on the email service provider, you may receive a confirmation message indicating that the email has been sent successfully.
- Follow-Up and Engagement: Monitor the responses and engagement from the group members. Respond promptly to any replies or questions and encourage active participation from the group. Foster a positive and inclusive environment where members feel comfortable sharing their thoughts and ideas.
Sending emails to the group is a crucial component of group communication. By following these steps, you can effectively reach all members of the group, share information, and foster a sense of community among the members.
Step 7: Troubleshooting Common Issues
While using a group email can streamline communication, it’s not uncommon to encounter occasional issues. Here are some common problems that may arise and how to troubleshoot them:
- Email Delivery Issues: If some group members are not receiving emails, verify that their email addresses are correctly added to the group. Additionally, check their spam or junk folders to ensure that the emails are not being filtered incorrectly.
- Member Access or Permissions: If a member is unable to access or view group emails, review the permissions settings for that member. Confirm that they have the necessary permissions to receive and access group emails.
- Unwanted Replies or Spam: If your group is receiving unwanted replies or spam emails, consider implementing additional spam filters or moderating the group’s content. It may also be helpful to educate group members on recognizing and reporting spam emails.
- Inactive or Unresponsive Members: If some members of the group are consistently inactive or unresponsive, consider reaching out to them individually to ensure they are still interested in being part of the group. If necessary, remove them from the group email to maintain active participation.
- Technical Glitches: If you encounter technical glitches within the email service provider, such as slow loading or error messages, check the provider’s status page or help center for any reported issues. It’s also helpful to update your email provider’s app or software to the latest version to ensure optimal performance.
- Privacy and Security Concerns: If you suspect a privacy or security breach within the group email, review the permissions and privacy settings. Ensure that only authorized members have access to the group and that sensitive information is not shared unintentionally.
- Guidelines and Etiquette: If there are issues with inappropriate or off-topic posts within the group, remind members of the defined guidelines and email etiquette. Reinforcing proper communication practices can help maintain a positive and professional environment.
- Technical Support: If you are unable to resolve the issues on your own, reach out to the email service provider’s customer support for assistance. They can provide guidance or troubleshoot specific problems related to their platform.
Remember that troubleshooting may differ based on the email service provider and the specific issues at hand. Remaining proactive and addressing concerns promptly can help ensure a seamless communication experience for your group.
Conclusion
Congratulations! By following the steps outlined in this guide, you have successfully learned how to create a group email. Utilizing a group email can greatly enhance communication within your organization, school, or community group, enabling you to share information, collaborate effectively, and stay connected with ease.
We began by highlighting the benefits of using a group email, including streamlined communication, centralized discussions, efficient document sharing, improved organization, increased group engagement, better coordination, and enhanced privacy and security.
You then learned how to choose an email service provider that offers group email functionality, considering factors such as features, user-friendliness, reliability, compatibility, storage space, and cost. Once you had your chosen provider, you proceeded to create a group email account and add members to your group.
After setting up the basics, you customized your group email settings, managing permissions and ensuring optimal control over your group’s communication. Finally, you learned how to send emails to the group effectively, troubleshoot common issues that may arise, and seek technical support when needed.
Remember, successful group communication requires active participation and collaboration from all members. Encourage engagement, adhere to established guidelines and email etiquette, and foster a positive and inclusive environment within your group email.
Now that you are equipped with the knowledge and skills to create and manage a group email, apply these steps to stay connected, facilitate collaboration, and make communication a breeze within your group.
Best of luck in harnessing the power of group email to enhance your communication and achieve your collective goals!