Introduction
Welcome to the world of email marketing! Email lists are a powerful tool for businesses, allowing you to communicate directly with your audience and build lasting relationships. One popular email service provider is Gmail, which offers a user-friendly platform and robust features for managing your email contacts. In this article, we will guide you through the process of creating an email list in Gmail, as well as provide tips on how to effectively manage and utilize your list.
Setting up an email list in Gmail is a great way to organize and streamline your communication efforts. Whether you are a small business owner, a marketer, or an individual looking to stay in touch with a group of people, Gmail’s mailing list feature can help you accomplish your goals. By creating a centralized contact list, you can easily send out targeted messages, announcements, newsletters, or promotional offers to your desired recipients.
With its intuitive interface and seamless integration with other Google services, Gmail simplifies the process of managing and engaging with your email contacts. In addition, Gmail offers powerful features such as email tracking, customizable templates, and the ability to import contacts from other platforms.
In this article, we will walk you through the steps to create an email list in Gmail, add contacts to your list, import contacts from other platforms, organize and manage your list effectively, send emails to your list, customize email templates, and track the performance of your email campaigns. By following these steps, you will be well-equipped to harness the power of email marketing and take your communication efforts to the next level.
So, let’s dive in and discover how to create and manage your email list in Gmail!
Setting Up a Google Account
Before you can create and manage an email list in Gmail, you’ll need to have a Google account. If you already have one, you can skip this step and proceed to the next section. If not, follow these steps to set up your Google account:
- Go to the Google account creation page by typing “create Google account” into your web browser’s search bar.
- Click on the first result, which should be a link to the “Create your Google Account” page.
- Fill in the required information, including your first and last name, desired email address, password, and phone number.
- Complete the security verification process by entering the verification code sent to your phone number or email address.
- Agree to Google’s terms and conditions, and click on the “Next” button to proceed.
- Set up your account recovery options, such as adding a recovery email address and phone number.
- Personalize your account by adding a profile picture if desired.
- Review the privacy settings and make any adjustments according to your preferences.
- Click on the “Next” button to complete the account setup process.
Once your Google account is set up, you’ll have access to various Google services, including Gmail, Google Drive, Google Calendar, and more. These services are seamlessly integrated, making it easy to manage your email list and collaborate with others.
After setting up your Google account, you can move on to the next section to learn how to navigate to the Gmail platform and create an email list.
Navigating to the Gmail Platform
Now that you have set up your Google account, it’s time to navigate to the Gmail platform. Follow these steps to access your Gmail inbox:
- Open your web browser and type “Gmail” into the search bar.
- Click on the first result, which should be a link to the Gmail homepage.
- Alternatively, you can directly access Gmail by typing “mail.google.com” into your web browser’s address bar.
- If prompted, enter your Google account email address and password to sign in.
- Upon successfully signing in, you will be redirected to your Gmail inbox.
Once you are on the Gmail platform, you will notice a clean and organized interface with various tabs and menus. The main sections of the Gmail interface include:
- Inbox: This is where you will find your incoming emails. Gmail automatically categorizes emails into Primary, Social, Promotions, Updates, and Forums tabs to help you stay organized.
- Compose: To send a new email, click on the “Compose” button located on the upper left-hand side of the screen. This will open a new email window where you can enter the recipient’s email address, subject, and message.
- Labels: Gmail allows you to create labels to categorize your emails. Labels are similar to folders and help you keep your inbox organized. You can create labels for specific projects, clients, or any other category that makes sense for your email organization.
- Contacts: The Contacts section in Gmail allows you to create and manage your email contacts. This is where you can create your email list and add or import contacts to it.
Now that you are familiar with the Gmail platform, let’s move on to the next section and learn how to create an email list in Gmail.
Creating a Mailing List
Now that you’re on the Gmail platform, it’s time to create your mailing list. Creating a mailing list in Gmail involves creating a group of contacts that you can easily send emails to. Follow these steps to create your mailing list:
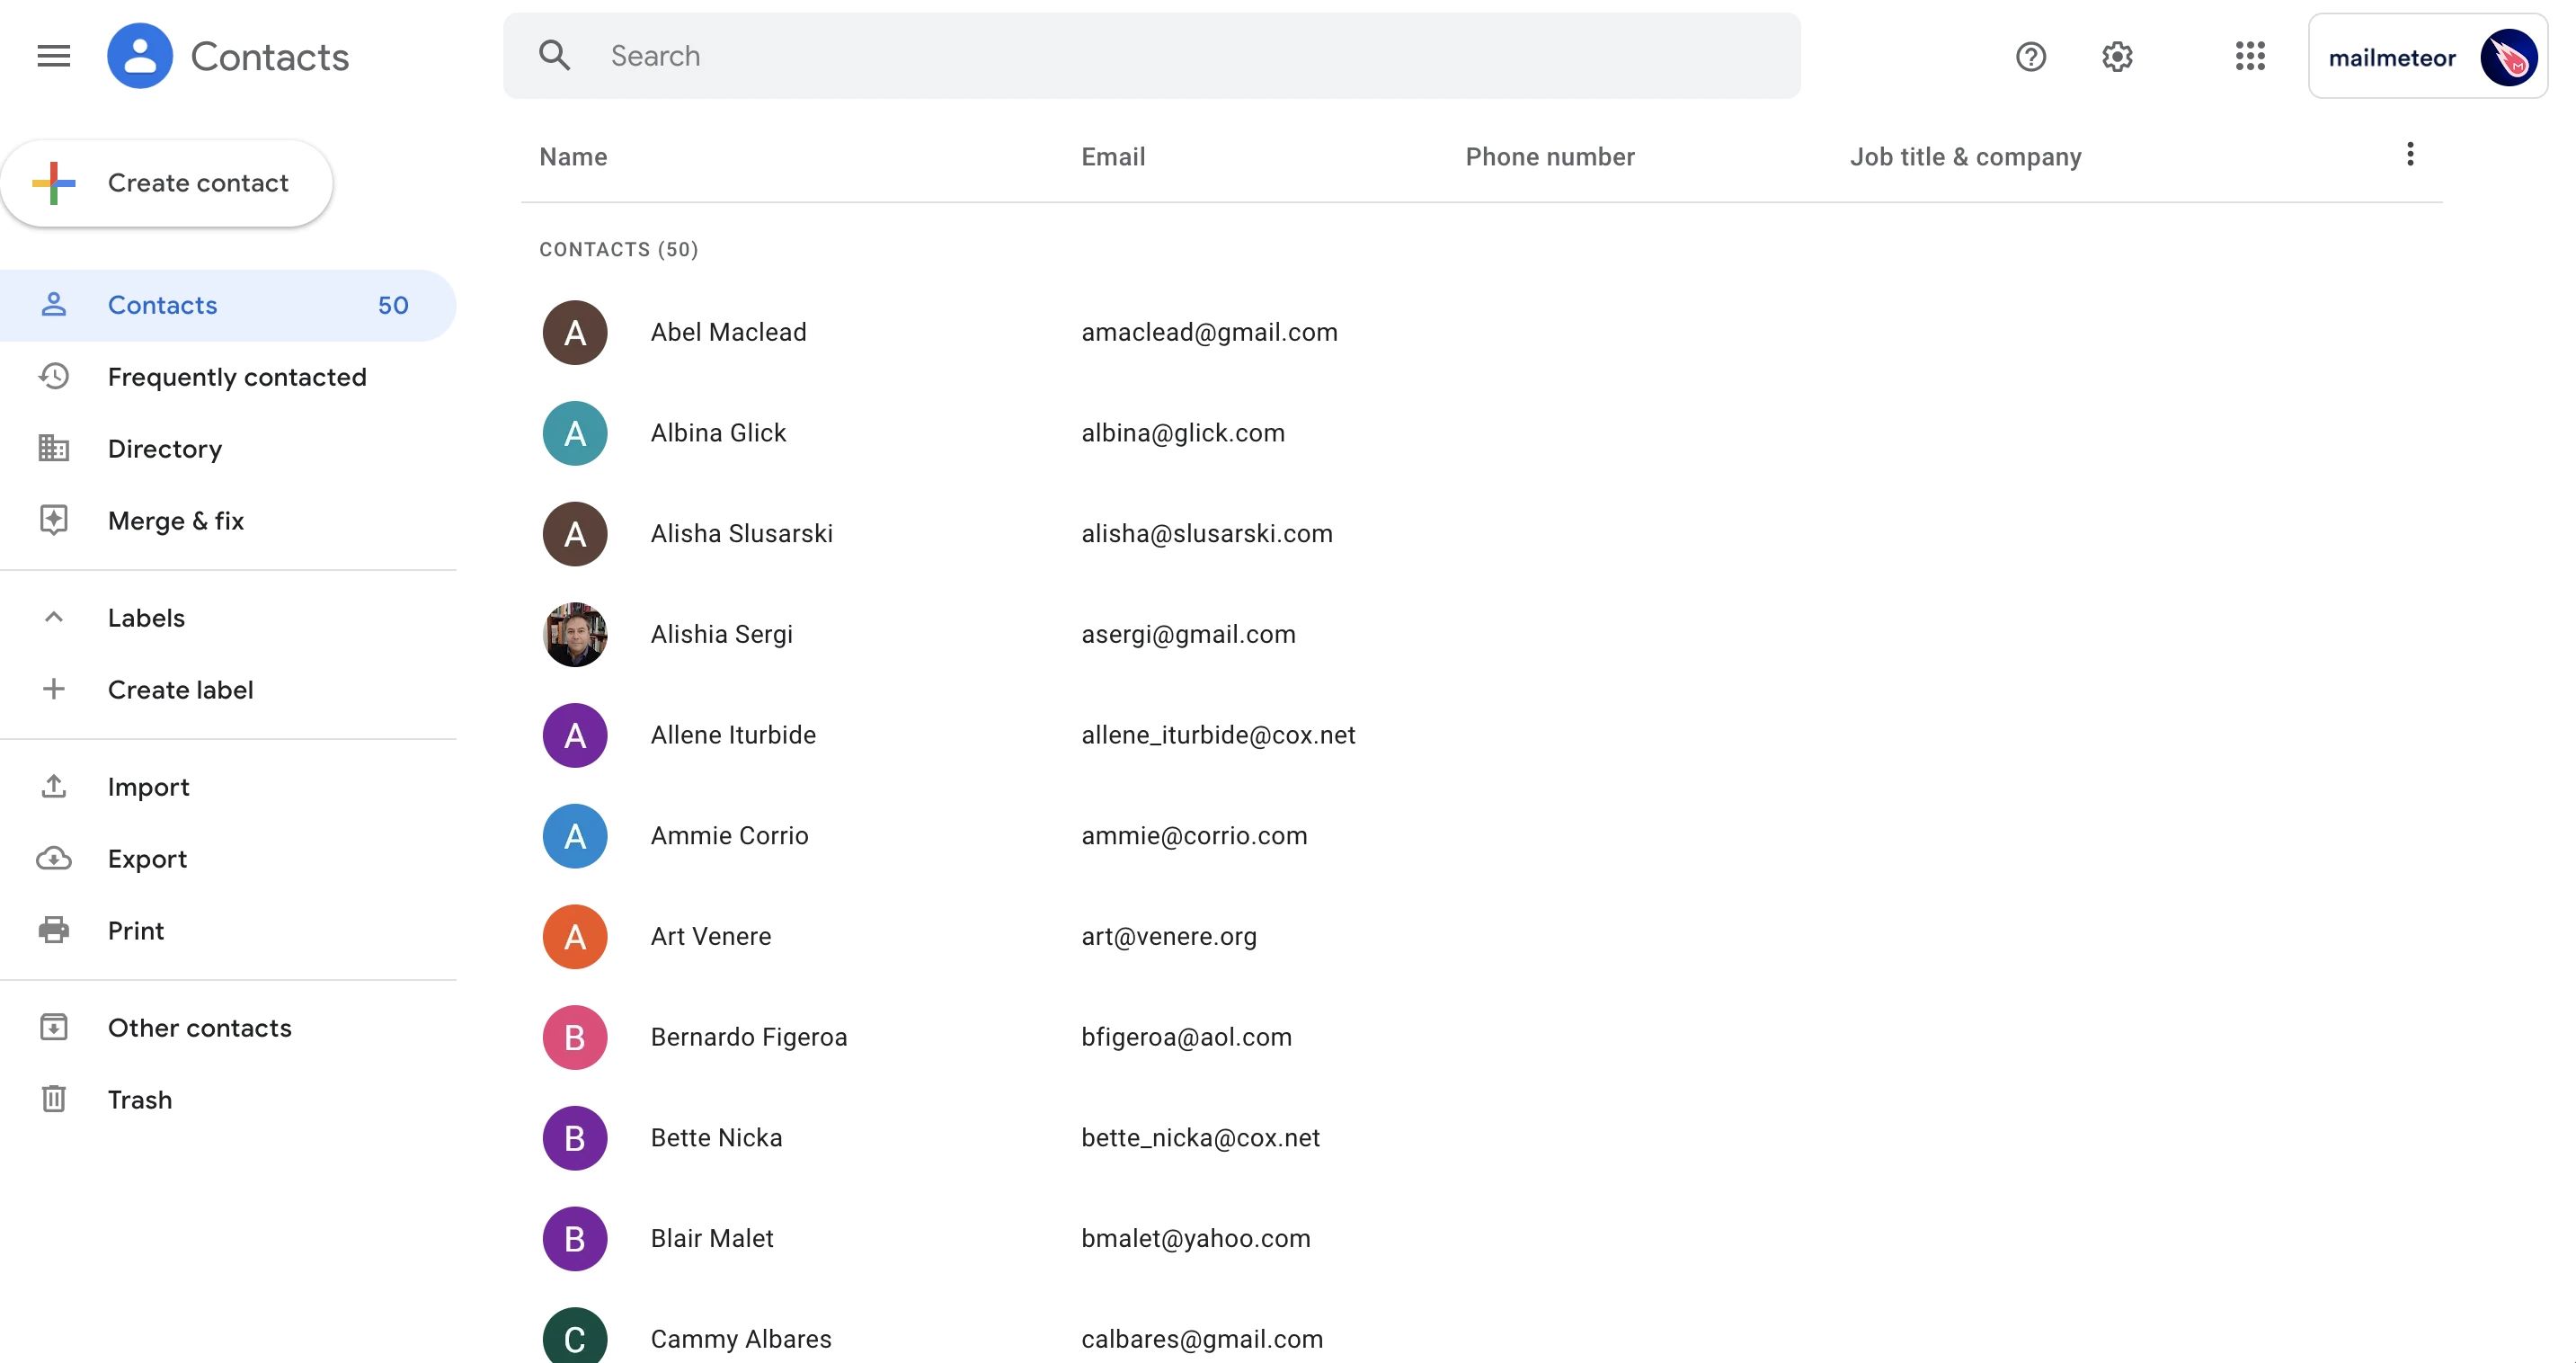
- Click on the “Contacts” button located on the left-hand side of the Gmail interface. This will open the Contacts section.
- In the Contacts section, click on the “Create label” button. A pop-up window will appear.
- Enter a name for your mailing list in the “Label name” field. Choose a name that accurately represents the group of contacts you want to include.
- Click on the “Save” button to create your mailing list label.
Congratulations! You have successfully created your mailing list in Gmail. Now, it’s time to populate your list with contacts.
Adding contacts to your mailing list is a simple and straightforward process. You can add individual contacts manually, import contacts from other platforms, or use a CSV file to add multiple contacts at once.
To manually add contacts to your mailing list, follow these steps:
- In the Contacts section, click on the “Create contact” button. A new contact creation form will appear.
- Enter the necessary information for the contact, such as their name, email address, and any additional details you want to include.
- Click on the “Save” button to add the contact to your mailing list.
If you have a list of contacts stored in another platform or a CSV file, you can easily import them into your Gmail mailing list. To import contacts, follow these steps:
- In the Contacts section, click on the “Import” button. A new window will appear.
- Choose the platform or file type from which you want to import your contacts. Gmail supports importing contacts from various sources, including Outlook, Yahoo, and CSV files.
- Follow the prompts to select and import your contacts into Gmail.
Now that your mailing list is set up and populated with contacts, it’s time to learn how to manage and organize your list effectively in the next section.
Adding Contacts to the Mailing List
Now that you have created your mailing list in Gmail, it’s time to add contacts to it. Adding contacts to your mailing list allows you to easily send emails to multiple recipients at once. There are several ways to add contacts to your list. Let’s explore each method:
1. Manually Add Contacts:
To add contacts to your mailing list manually, follow these steps:
- In the Gmail interface, click on the “Contacts” button located on the left-hand side. The Contacts section will open.
- Click on the “Create contact” button to create a new contact.
- Enter the contact’s name, email address, and any other relevant information.
- Click on the “Save” button to add the contact to your mailing list.
2. Import Contacts:
If you have a list of contacts stored in another platform or a CSV file, you can import them into Gmail. To import contacts, follow these steps:
- In the Contacts section, click on the “Import” button.
- Select the platform or file type from which you want to import your contacts.
- Follow the prompts to select and import your contacts into Gmail.
3. Add Contacts from Emails:
Gmail makes it easy to add contacts from emails you receive. To add a contact from an email, follow these steps:
- Open the email from the contact you want to add.
- Click on the contact’s name or email address to open their contact card.
- Click on the “Add to Contacts” button to add them to your mailing list.
By using these methods, you can quickly build your mailing list and ensure that all the desired contacts are included. Remember to regularly update and maintain your list as contacts may change their email addresses or unsubscribe from your emails.
Now that your mailing list is populated with contacts, you can proceed to the next section to learn how to import contacts from other platforms.
Importing Contacts from Other Platforms
If you have contacts stored in other platforms or email accounts, you can easily import them into your Gmail mailing list. Gmail supports importing contacts from various sources, including Outlook, Yahoo, and CSV files. Here’s how you can import contacts from other platforms:
1. Importing from Outlook:
If you have contacts stored in Outlook, you can import them into Gmail by following these steps:
- In the Contacts section of Gmail, click on the “Import” button.
- Select “Outlook” from the list of options.
- Follow the prompts to authorize access to your Outlook account and select the contacts you want to import.
- Click on the “Import” button to bring your Outlook contacts into Gmail.
2. Importing from Yahoo:
To import contacts from Yahoo, follow these steps:
- In the Contacts section, click on the “Import” button.
- Select “Yahoo Mail” from the list of options.
- Authorize access to your Yahoo account and select the contacts to import.
- Click on the “Import” button to import your Yahoo contacts into Gmail.
3. Importing from CSV Files:
If you have a CSV file containing your contacts’ information, you can import it into Gmail by following these steps:
- In the Contacts section, click on the “Import” button.
- Select “CSV or vCard file” from the list of options.
- Choose the CSV file from your computer and follow the prompts to map the columns correctly.
- Click on the “Import” button to import your contacts from the CSV file into Gmail.
By importing contacts from other platforms, you can quickly consolidate your entire contact list into Gmail, making it easier to manage and communicate with your mailing list. Remember to review your imported contacts and update any missing or outdated information.
Now that you know how to import contacts from other platforms, let’s move on to the next section and explore how to organize and manage your mailing list effectively.
Organizing and Managing the Mailing List
Organizing and managing your mailing list is essential to ensure effective communication and efficient workflow. With Gmail, you have several features at your disposal to help you stay organized and manage your mailing list effectively. Here are some tips on organizing and managing your mailing list in Gmail:
1. Use Labels:
Gmail allows you to create labels to categorize your contacts and emails. You can create labels specific to your mailing list, making it easier to search for and locate contacts within the list. To assign a label to a contact, select the contact, click on the “Labels” button, and choose the relevant label from the list.
2. Create Subgroups:
If you have a large mailing list and want to further categorize your contacts, you can create subgroups within your main mailing list. Subgroups enable you to target specific segments within your mailing list for more personalized communications. To create a subgroup, select the desired contacts, click on the “Labels” button, and choose “Create new” to assign a new label specifically for the subgroup.
3. Regularly Update Contacts:
Keep your mailing list up to date by periodically reviewing and updating contact information. Remove any duplicate or outdated contacts and ensure that new additions are accurately recorded. You can easily edit contact details by selecting the contact and clicking on the “Edit” button.
4. Utilize Search and Filters:
Gmail provides powerful search and filter options to locate specific contacts within your mailing list. Use keywords, email addresses, labels, or other search criteria to find contacts quickly. You can also use filters to automatically categorize incoming emails from your mailing list to specific labels.
5. Enable and Monitor Bounce Notifications:
Bounce notifications alert you when an email sent to a contact from your mailing list is undeliverable. Enabling and monitoring bounce notifications allows you to identify and remove invalid email addresses from your list, ensuring that your communication reaches the intended recipients.
By implementing these tips and utilizing the features provided by Gmail, you can effectively organize and manage your mailing list. Having a well-organized mailing list will streamline your communication efforts and allow for a more targeted approach to your email campaigns.
Now that you have learned how to organize and manage your mailing list, it’s time to move on to the next section and explore how to send emails to your mailing list.
Sending Email to the Mailing List
Now that you have a well-organized and managed mailing list in Gmail, it’s time to send emails to your contacts. Gmail provides a user-friendly interface and various tools to help you compose and send emails to your entire mailing list or specific segments within it. Follow these steps to send email to your mailing list:
1. Compose a New Email:
Click on the “Compose” button in the Gmail interface to open a new email composition window. Enter the desired subject line and the content of your email.
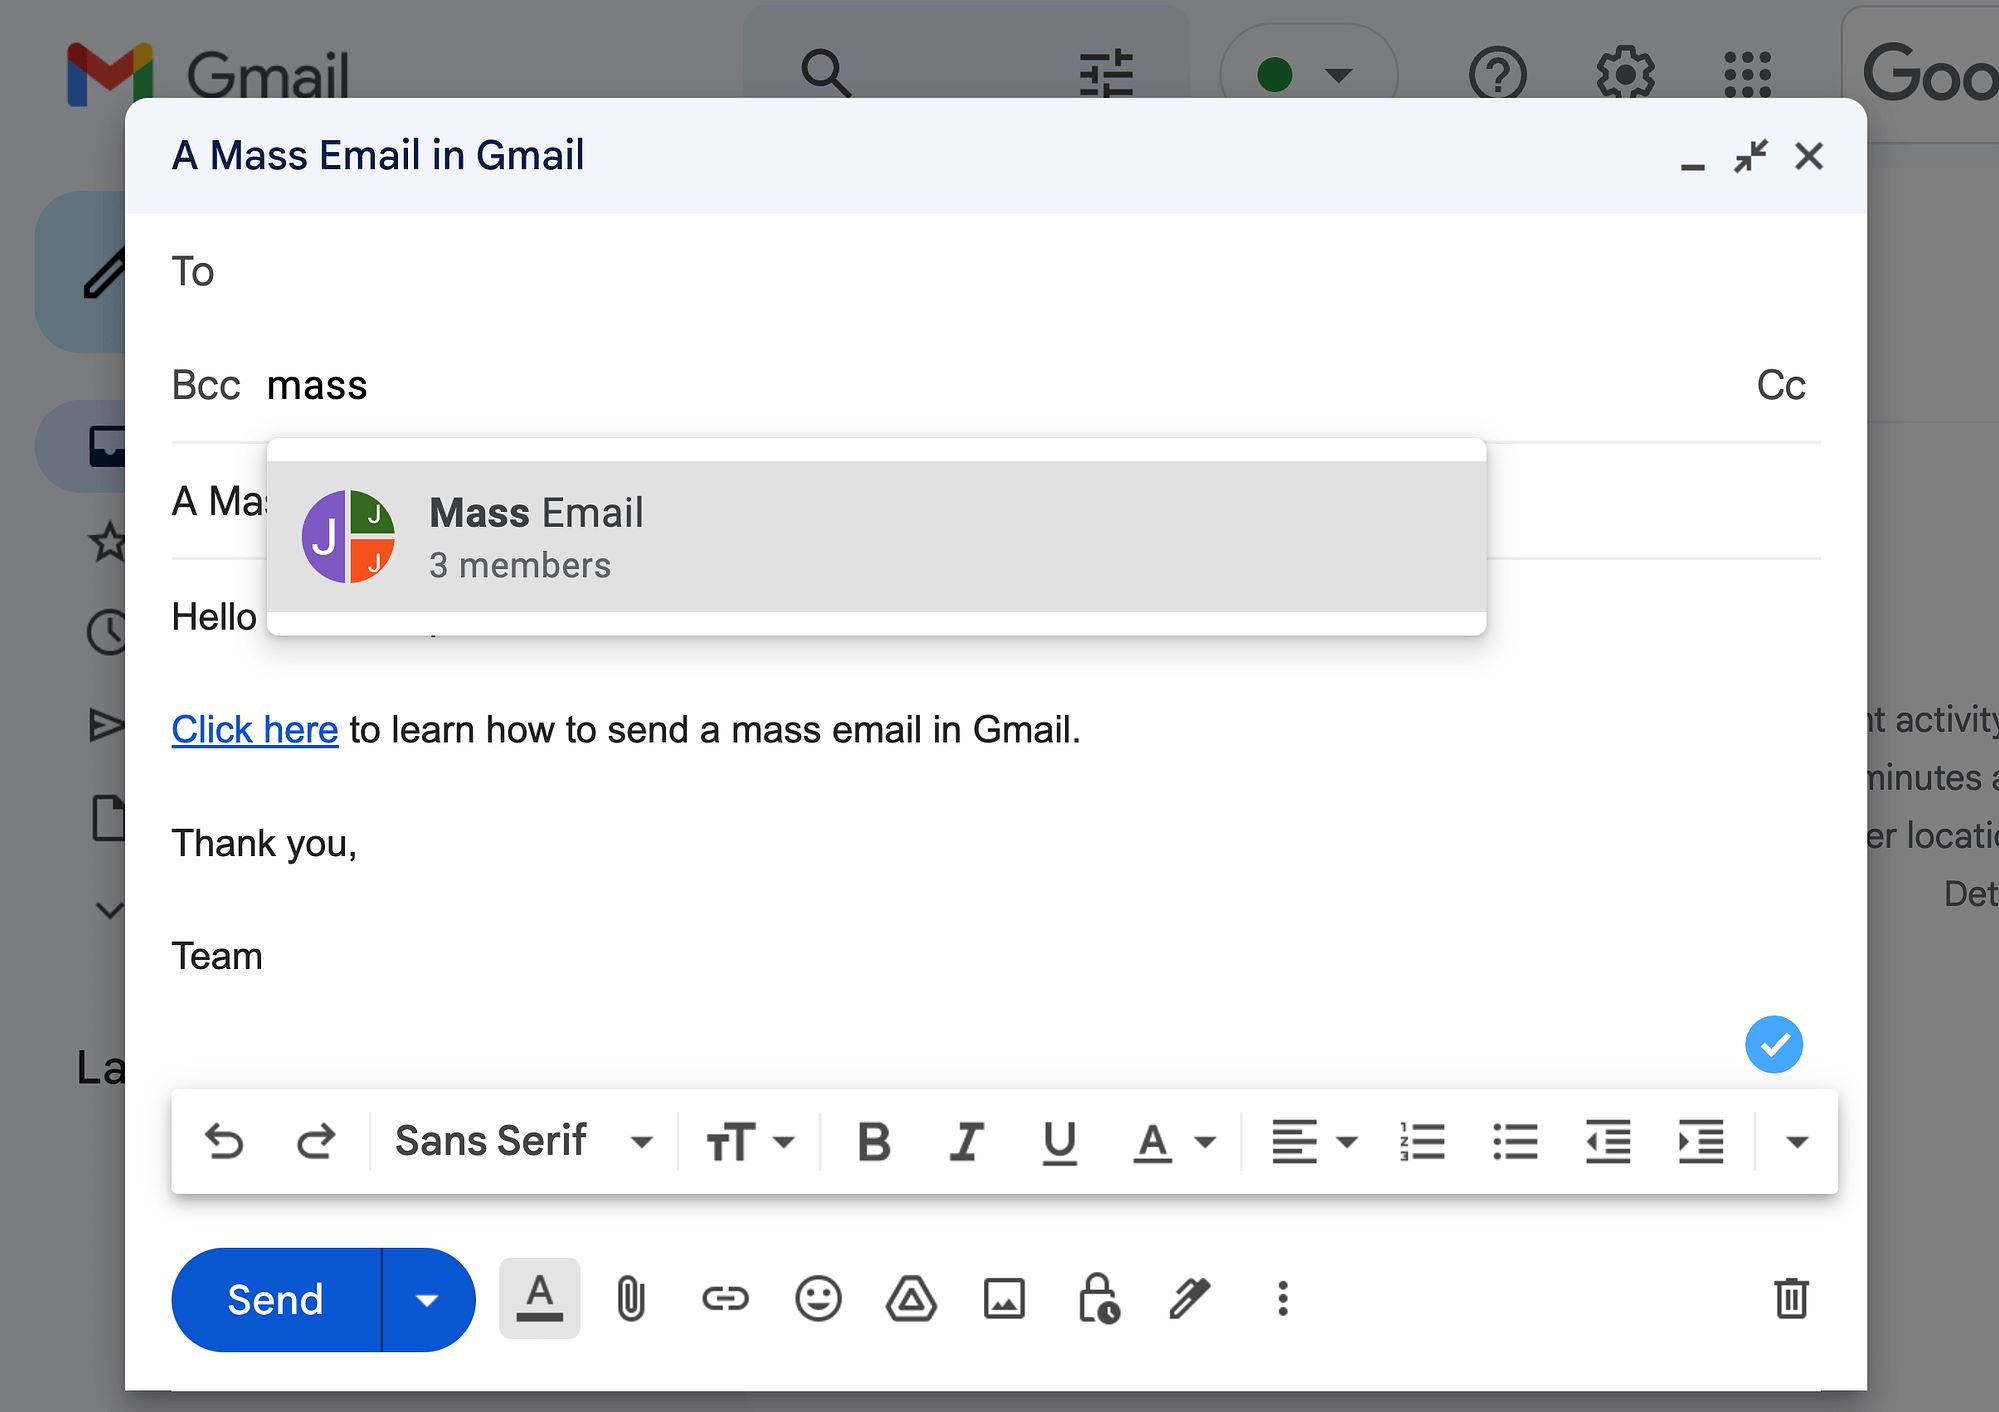
2. Add the Mailing List as Recipients:
To send the email to your mailing list, enter the name of the mailing list label you created in the “To” field. Gmail will suggest the corresponding label as you type.
3. Personalize the Email:
If you want to personalize the email by addressing each recipient individually, use the “Mail merge” feature provided by Gmail add-ons or extensions. This allows you to customize certain elements of the email, such as the recipient’s name.
4. Review and Send the Email:
Double-check the content of your email, ensure that all necessary information is included, and proofread for any errors. When you are satisfied with the email, click on the “Send” button to deliver it to your mailing list.
5. Monitor Email Performance:
After sending the email, monitor its performance by analyzing open rates, click-through rates, and other engagement metrics. Gmail also provides tracking features that allow you to see whether your email was opened and when it was viewed.
By following these steps, you can send emails to your mailing list in a quick and efficient manner. Remember to keep the content of your emails engaging, relevant, and valuable to your recipients to ensure the success of your email campaigns.
Now that you know how to send emails to your mailing list, let’s move on to the next section and explore how to customize email templates in Gmail.
Customizing Email Templates
Customizing email templates in Gmail is a great way to save time and maintain a consistent brand image in your email communications. By creating and using templates, you can easily create professional and personalized emails for your mailing list. Follow these steps to customize email templates in Gmail:
1. Enable Templates:
Before you can start customizing email templates, you need to enable the “Templates” feature in Gmail. Go to your Gmail settings by clicking on the gear icon in the top-right corner and selecting “Settings” from the dropdown menu. Then, navigate to the “Advanced” tab, find the “Templates” section, and enable the feature.
2. Create a Template:
To create a new template, compose a new email and include the desired content, subject line, and any elements you want to include in the template. Once the email is ready, click on the three-dot menu in the lower-right corner of the email composition window and select “Templates” > “Save draft as template” > “Save as new template”. Give your template a descriptive name.
3. Customize the Template:
To customize the template, go to the “Templates” section in the Gmail settings. You will see a list of your saved templates. Click on the pencil icon next to the template you want to customize. Edit the content, formatting, or any other elements of the template to suit your needs. Save the changes when you are satisfied.
4. Use a Template:
To use a template when composing an email, click on the compose button and open a new email composition window. Click on the three-dot menu in the lower-right corner and select “Templates”. Choose the desired template from the list. The template will be applied to the email, and you can customize it further if needed before sending.
5. Save and Manage Templates:
As you create and customize templates, you can save them for future use or edit existing templates. To manage your templates, go to the “Templates” section in the Gmail settings. From there, you can rename, edit, delete, or create new templates as needed. Regularly review and update your templates to ensure their relevancy and effectiveness.
By customizing email templates in Gmail, you can streamline your email creation process and ensure consistent branding and messaging in your communications. Experiment with different templates to find the ones that best resonate with your audience and achieve your email marketing goals.
Now that you know how to customize email templates in Gmail, let’s move on to the next section and explore how to track the performance of your email campaigns.
Tracking Email Campaigns
Tracking the performance of your email campaigns is crucial for assessing their effectiveness and making data-driven decisions to optimize your future efforts. Gmail offers built-in tracking features that allow you to monitor various metrics and gather insights about how your emails are performing. Here are the steps to track your email campaigns in Gmail:
1. Enable Email Tracking:
Before you can track your email campaigns, you need to enable the “Email tracking” feature in Gmail. To do this, go to your Gmail settings by clicking on the gear icon in the top-right corner and selecting “Settings” from the dropdown menu. Then, navigate to the “Advanced” tab and enable the “Email tracking” option.
2. Send Tracked Emails:
When composing an email, make sure the tracking feature is enabled. You can do this by checking the box next to “Track” in the email composition window. This ensures that the email is sent with tracking enabled.
3. Monitor Open and Click Rates:
After sending out your tracked emails, you can monitor the open and click rates to gauge engagement. In your Gmail interface, open the sent email and click on the tracking icon (usually represented by an eye or graph icon). This will display statistics such as how many recipients opened the email, clicked on links within the email, and when these actions occurred.
4. Analyze Email Engagement:
Take the time to analyze the engagement data from your tracked emails. Look for patterns or trends that emerge and identify high-performing emails. This analysis can help you understand what resonates with your audience and guide your future email marketing strategies.
5. Use A/B Testing:
Experiment with different subject lines, email layouts, or call-to-action buttons by performing A/B testing. Create multiple versions of your email and send them to different segments of your mailing list. Analyze the performance of each version to determine which one yields better results and helps improve your overall email campaign success.
6. Make Data-Driven Decisions:
Based on the insights gained from tracking your email campaigns, make data-driven decisions to optimize your future efforts. Adjust your email content, timing, or targeting strategies to continuously improve engagement and achieve your email marketing goals.
By tracking your email campaigns in Gmail, you can gain valuable insights into the effectiveness of your communication efforts. Use this information to refine your strategies and deliver more engaging and impactful emails to your mailing list.
Now that you know how to track your email campaigns, you are ready to take your email marketing to the next level. In the concluding section, we will recap the key points covered and highlight the importance of effective email list management.
Conclusion
Congratulations! You have now learned how to create, manage, and optimize an email list in Gmail. By following the steps outlined in this guide, you can effectively communicate with your audience, build lasting relationships, and achieve your email marketing goals.
Setting up a Google account and navigating to the Gmail platform is the first step towards creating your mailing list. With the ability to add contacts manually or import them from other platforms, you can easily populate your list with the desired recipients. Organizing and managing your mailing list ensures that you can efficiently communicate with specific segments and keep your contact information up to date.
Sending email to your mailing list becomes a seamless process with Gmail’s intuitive interface and the ability to personalize messages. By using templates, you can save time and maintain a consistent brand image in your email communications. Tracking the performance of your email campaigns allows you to monitor engagement metrics and make data-driven decisions to improve your strategies.
Remember, effective email list management is essential in maintaining a successful email marketing campaign. Regularly update your contact information, analyze engagement metrics, and adjust your strategies accordingly. Always strive to deliver valuable and engaging content to your audience to nurture relationships and achieve your marketing goals.
Now it’s time to put your newfound knowledge into action. Start building your email list, creating impactful email campaigns, and leveraging the power of Gmail to connect with your audience like never before. Happy emailing!