Introduction
Welcome to the world of listening to music on your school Chromebook! If you’re someone who loves music and can’t imagine going a day without your favorite tunes, you’re in the right place. While Chromebooks are primarily designed for educational purposes, that doesn’t mean you have to sacrifice your love for music during school hours. In this guide, we’ll take you through a step-by-step process to help you listen to music on your school Chromebook without any hassle.
Listening to music can have numerous benefits, such as improving focus, relieving stress, and enhancing your overall mood. However, it’s essential to keep in mind that schools may have specific policies regarding the use of personal devices, including listening to music. Before diving into the various methods of listening to music on your Chromebook, it’s important to understand and respect your school’s guidelines.
In this article, we’ll explore different approaches to listening to music on your school Chromebook and discuss some tips and tricks to optimize your audio experience. Whether you’re studying for an important exam, taking a break between classes, or simply looking to unwind after a long day, having access to music on your Chromebook can greatly enhance your school experience.
So, if you’re ready to learn how to jam out to your favorite songs on your school Chromebook, let’s dive into the step-by-step process together. By the end of this guide, you’ll be equipped with the knowledge and resources to enjoy your favorite music without any interruptions during your school day.
Step 1: Check the school’s policy on listening to music
Before you start listening to music on your school Chromebook, it’s crucial to familiarize yourself with your school’s guidelines and policy on using personal devices. Schools often have specific rules regarding the use of headphones, music streaming, and the overall usage of electronic devices during school hours.
The best way to find out about your school’s policy on music is to refer to the student handbook or reach out to your teachers or school administrators. They can provide you with information on whether listening to music on your Chromebook is allowed and if there are any specific restrictions or guidelines you need to follow.
Some schools may permit listening to music during designated free time, study periods, or while working individually, while others may have stricter regulations prohibiting the use of headphones or personal devices altogether. By understanding the policies, you can ensure that you’re following the rules while still enjoying your favorite playlists.
It’s important to respect your school’s guidelines and use music as a tool to enhance your learning experience rather than as a distraction. If music is allowed, remember to be mindful of the volume and choose appropriate content that won’t disrupt your ability to focus or distract others around you.
By checking the school’s policy on listening to music, you’ll have a clear understanding of what is and isn’t permitted. This will allow you to navigate the next steps and explore different methods of enjoying music on your school Chromebook while staying within the boundaries set by your school.
Step 2: Understand the limitations of Chromebooks
While Chromebooks are versatile and user-friendly devices, it’s important to be aware of their limitations when it comes to listening to music. Unlike traditional laptops, Chromebooks primarily rely on web-based applications and cloud storage for most tasks, including music playback. Here are some key limitations to keep in mind:
1. Limited storage: Chromebooks typically come with limited internal storage, which means you might not be able to store a large music library directly on the device. However, there are alternative solutions to overcome this limitation, such as streaming music online or using external storage devices.
2. Offline playback restrictions: Chromebooks are designed to excel with an internet connection. While streaming music platforms offer offline playback options, not all of them are available for Chromebooks. Make sure to check if the music streaming service you prefer supports offline listening on Chromebook.
3. Limited audio customization: Chromebooks may not offer extensive audio customization options compared to dedicated music devices or high-end laptops. So, if you’re an audiophile looking for advanced audio settings or equalizer controls, you might need to consider external devices or software.
4. Compatibility with certain file formats: Chromebooks are primarily designed for web-based applications and may have limited support for certain audio file formats. Ensure that the music files you want to listen to are compatible with Chromebook’s default audio player or consider using third-party players or browser-based music apps.
Understanding these limitations will help you make informed decisions and explore workarounds to maximize your music listening experience on your Chromebook. While these limitations may seem daunting, don’t worry! There are plenty of solutions and alternative methods to overcome them and enjoy your favorite tunes.
Now that you’re aware of the limitations, let’s move on to the next step and explore different methods to listen to music on your Chromebook.
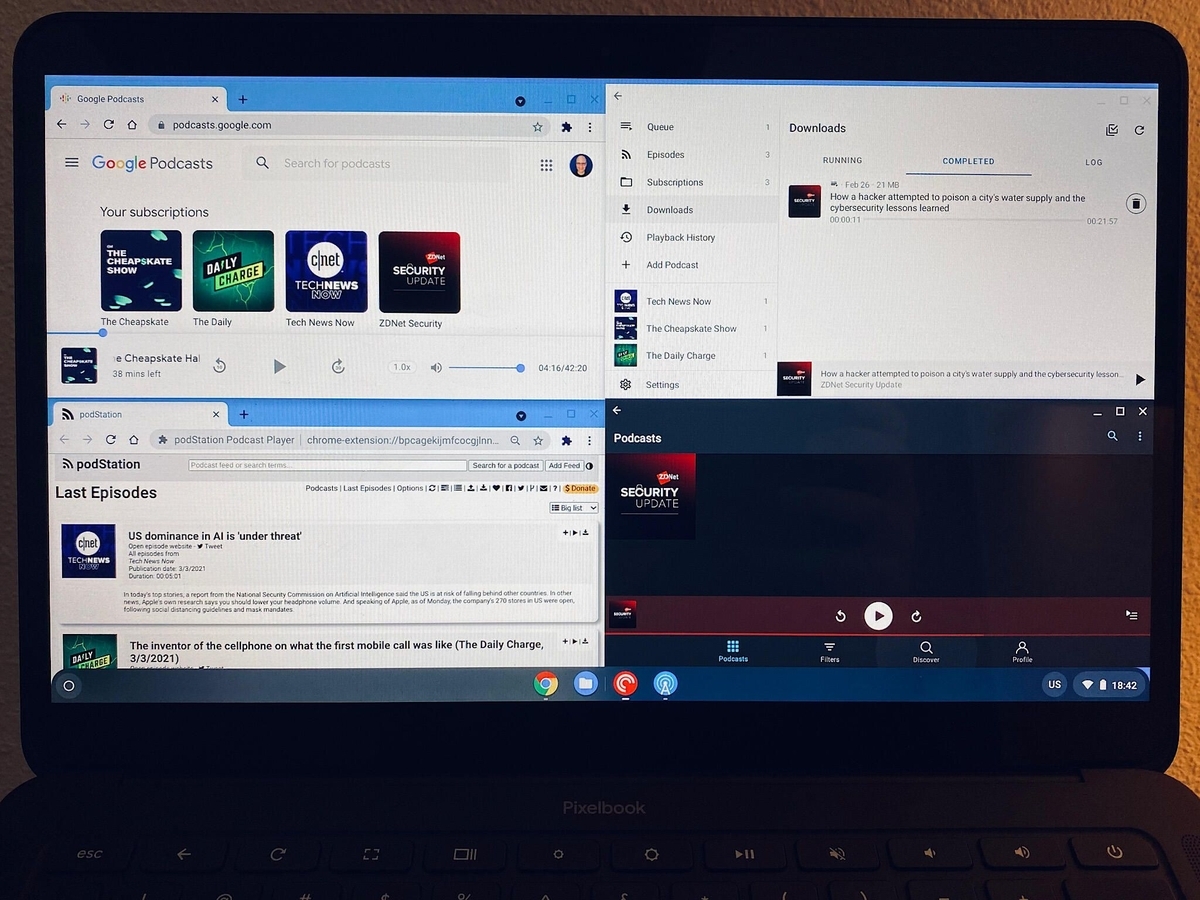
Step 3: Use online music streaming platforms
One of the easiest and most popular ways to listen to music on your school Chromebook is by using online music streaming platforms. These platforms provide access to a vast library of songs that you can enjoy without the need to download or store them on your device. Here’s how you can use online music streaming platforms on your Chromebook:
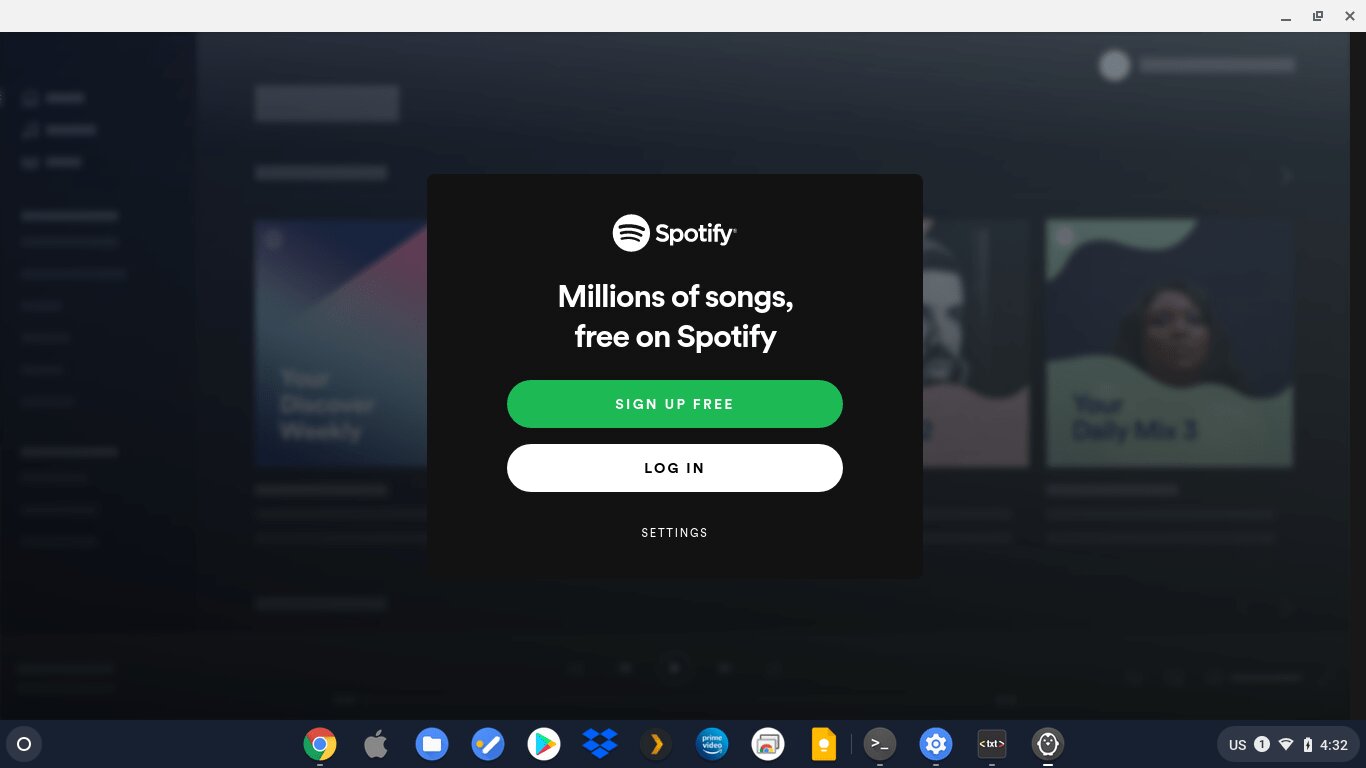
1. Choose a music streaming platform: There are numerous online music streaming platforms available, such as Spotify, Apple Music, Amazon Music, and Google Play Music. Explore different platforms to find one that suits your preferences in terms of content library, user interface, and features.
2. Sign up or log in: Create an account or log in to your existing account on the chosen music streaming platform. Most platforms offer free basic plans with limited features, as well as premium subscription plans that provide ad-free listening and additional benefits.
3. Explore music genres and playlists: Once you’re logged in, start exploring the vast collection of songs based on genres, artists, or curated playlists. Discover new music, listen to your favorite artists, or find playlists that match your mood or activities.
4. Create your own playlists: Many streaming platforms allow you to create and customize your own playlists. Organize your favorite songs into playlists that suit different moods or activities. This way, you can easily access and enjoy your preferred music whenever you want.
5. Discover personalized recommendations: Streaming platforms often provide personalized recommendations based on your listening history and preferences. Take advantage of these recommendations to discover new songs or artists that align with your taste.
6. Use offline playback: Some music streaming platforms offer offline playback features, allowing you to download songs or playlists to your Chromebook for listening without an internet connection. This can be useful when you’re in areas with limited or no Wi-Fi access.
With online music streaming platforms, you can access a vast library of music and enjoy a wide range of genres and artists without the need to store the actual music files on your Chromebook. This provides a convenient and flexible way to listen to your favorite songs while using your school Chromebook.
Now that you know how to use online music streaming platforms, let’s move on to the next step and explore how you can download music for offline listening on your Chromebook.
Step 4: Download music for offline listening
While online music streaming platforms offer a great way to access a wide array of music, there may be times when you don’t have an internet connection or prefer to conserve data. In such cases, downloading music for offline listening on your Chromebook can be a lifesaver. Here’s how you can do it:
1. Check if your streaming platform allows downloads: Not all music streaming platforms provide the option to download songs or playlists for offline listening. Make sure to choose a platform that supports this feature. Platforms like Spotify, Apple Music, and Amazon Music offer this functionality.
2. Use the offline download feature: Once you have confirmed that your chosen streaming platform allows downloads, look for the download or offline playback feature within the app or website. Typically, you’ll find an option to download songs, albums, or playlists by selecting the download icon or a specific download button.
3. Manage your downloaded music: After downloading music for offline listening, the songs or playlists will be stored within the app’s offline or downloads section. You can usually access this section by navigating to your library or profile. From there, you can manage and organize your downloaded music.
4. Enable offline mode: Some streaming platforms require you to enable offline mode to play the downloaded music. This is usually done within the settings or preferences of the app. Make sure to check if your streaming platform has this requirement and follow the necessary steps to enable offline mode.
5. Enjoy your downloaded music offline: Once you’ve downloaded your favorite songs or playlists, you can enjoy them even without an internet connection. Whether you’re on a long commute, in a location with poor Wi-Fi, or simply want to conserve data, having offline music on your Chromebook ensures you never have to miss out on your favorite tunes.
Downloading music for offline listening provides a convenient solution for moments when you’re unable to connect to the internet or prefer not to use your data. By following these steps, you can create a personalized offline music library on your Chromebook and enjoy your favorite songs anytime, anywhere.
Now that you’ve learned how to download music for offline listening, let’s move on to the next step and explore how you can utilize external devices to enhance the audio quality on your school Chromebook.
Step 5: Utilize external devices for better audio quality
While Chromebooks come with built-in speakers, you may find that the audio quality is not as impressive as you’d like. Fortunately, you can enhance the audio experience on your school Chromebook by utilizing external devices. Here are some options to consider:
1. Headphones or earphones: Investing in a good pair of headphones or earphones can significantly improve your listening experience. Look for headphones that offer high-quality sound, comfort, and noise isolation. Wired or wireless options are available depending on your preference and budget.
2. External speakers: If you prefer listening to music without headphones, external speakers can be a fantastic addition to your Chromebook. There are various portable and compact speakers available that can connect to your Chromebook via Bluetooth or USB. Choose a speaker that offers good audio output and fits your budget.
3. USB DAC (Digital-to-Analog Converter): A USB DAC can enhance the audio quality by converting digital signals to analog signals before they reach your headphones or speakers. This can result in improved sound clarity, dynamics, and overall fidelity. Ensure that the USB DAC you choose is compatible with your Chromebook.
4. Audio amplifier: An audio amplifier can provide extra power to your headphones or speakers, allowing you to drive them at higher volumes with better sound quality. This is particularly useful if you have high-impedance headphones that benefit from an extra boost in amplification.
5. External sound card: Some external sound cards offer better audio processing capabilities compared to the built-in sound card of your Chromebook. These can provide improved audio quality, recording capabilities, and customizable settings that allow you to fine-tune your audio experience.
By utilizing external devices, you can tailor your audio setup to your liking and enjoy a better sound quality when listening to music on your school Chromebook. Whether you prefer the immersive experience of headphones or the convenience of external speakers, these devices can take your music listening to the next level.
Now that you know how to enhance the audio quality on your Chromebook, let’s move on to the next step and discover how to optimize the Chromebook settings for an optimal music playback experience.
Step 6: Optimize Chromebook settings for music playback
To further enhance your music listening experience on your school Chromebook, you can optimize the settings to ensure optimal sound quality and performance. Here are some settings you can tweak:
1. Equalizer settings: Explore the audio settings on your Chromebook to see if there is an equalizer available. An equalizer allows you to adjust the levels of different sound frequencies, giving you the ability to customize the audio output according to your preferences. Experiment with different equalizer presets or manually adjust the frequencies to find the best sound for your music.
2. Audio output settings: Check the audio output settings on your Chromebook to ensure that you have selected the appropriate output device, such as headphones or external speakers. This ensures that the audio is directed to the correct output source, providing optimal sound quality.
3. Power management: Chromebooks often have power management settings that can affect the audio performance. Adjust the power settings to prioritize audio performance, as some power-saving options may limit the processing power and impact the audio quality.
4. Audio enhancements: Explore the audio settings on your Chromebook to see if there are any enhancements or audio effects available. Some Chromebooks offer features like virtual surround sound, bass boost, or improved spatial audio. Enable or adjust these enhancements to suit your preference and enhance your music listening experience.
5. Chromebook updates: Keep your Chromebook’s operating system and applications up to date. Updates often include bug fixes, performance improvements, and new features that can positively impact audio playback. Regularly checking for updates ensures that you are utilizing the latest optimizations available for your Chromebook.
By optimizing the settings on your Chromebook, you can tailor the audio output to your liking, ensuring that you’re getting the best possible sound quality when listening to music. Experimenting with these settings allows you to customize your audio experience and make it more enjoyable.
Now that you’ve learned how to optimize the Chromebook settings for music playback, you’re well-equipped to maximize the audio quality on your school Chromebook and enjoy your favorite songs with an enhanced sound experience.
To sum it up, by checking the school’s policy, understanding the limitations of Chromebooks, utilizing online music streaming platforms, downloading music for offline listening, utilizing external devices, and optimizing the Chromebook settings, you have a range of options to enjoy music on your school Chromebook while respecting the school guidelines. So go ahead, crank up the volume, and enjoy the rhythm of your favorite tunes!
Conclusion
Listening to music on your school Chromebook is a great way to enhance your learning experience, improve focus, and create a positive and enjoyable atmosphere. By following the steps outlined in this guide, you can make the most of your Chromebook and enjoy your favorite tunes without any hassle.
First and foremost, check your school’s policy on listening to music to ensure that you are following the guidelines and respecting the rules. Understanding the limitations of Chromebooks is crucial in order to navigate around them and find alternative solutions.
Utilizing online music streaming platforms provides easy access to a vast library of songs without the need for downloads or storage. Moreover, downloading music for offline listening allows you to enjoy your favorite tunes even without an internet connection.
For a better audio experience, consider utilizing external devices like headphones, speakers, USB DACs, or audio amplifiers. These devices can significantly enhance the sound quality and provide a more immersive listening experience.
Optimizing the Chromebook settings, such as equalizer adjustments, audio output configurations, and power management, can further enhance the audio performance and tailor it to your preferences.
In conclusion, with the right approach and understanding of the available options, you can enjoy music on your school Chromebook while still adhering to the school guidelines. Whether you’re studying, taking a break, or simply relaxing, let the power of music accompany you on your Chromebook and enhance your overall school experience.