Introduction
Welcome to the exciting world of 3D printing! In recent years, 3D printing has revolutionized various industries, from manufacturing and healthcare to design and education. This innovative technology allows you to transform your digital designs into physical objects with ease.
But what exactly is 3D printing? Simply put, it is the process of creating three-dimensional objects by layering materials using a computer-controlled machine. Unlike traditional manufacturing methods, which involve subtracting material from a solid block, 3D printing builds objects layer by layer, offering unparalleled precision and customization.
So why should you learn 3D printing? The answer is simple: it opens up a world of endless possibilities. Whether you’re a hobbyist, an entrepreneur, or a professional in a specific industry, acquiring 3D printing skills can empower you to bring your ideas to life and unleash your creativity like never before.
Are you ready to dive into the world of 3D printing? Before you get started, it’s crucial to choose the right 3D printer for your needs. With a wide range of options available on the market, understanding the key features and specifications of 3D printers will help you make an informed decision and achieve the best results.
In addition to selecting the right hardware, it’s equally important to familiarize yourself with 3D modeling software. From beginner-friendly software with intuitive interfaces to more advanced tools with powerful features, there are various options to suit your skill level and design requirements.
Once you’ve chosen your 3D printer and software, it’s time to start designing in 3D. Learning the fundamentals of 3D modeling will enable you to create complex shapes, detailed textures, and intricate structures. Don’t worry if you’re new to the world of design—there are plenty of resources and tutorials available to help you get started.
As you gain confidence in your 3D design skills, you’ll need to learn how to prepare your files for 3D printing. This involves ensuring your design is optimized for printing, making any necessary adjustments or repairs, and exporting your file in a format that your 3D printer can understand.
Of course, materials and filaments play a crucial role in the 3D printing process. Understanding the different types of materials available, their strengths, and limitations will allow you to select the right material for your specific project. Whether you’re printing with plastics, resins, or metals, each material has its unique properties and considerations.
Once you’ve set up your 3D printer and selected your materials, you’ll need to calibrate your printer to ensure optimal printing results. This involves adjusting settings such as layer height, print speed, and temperature to achieve the desired level of print quality. Calibration is an iterative process that may require some trial and error, but it’s essential for achieving consistent, high-quality prints.
Despite your best efforts, you may encounter common issues during the 3D printing process. From failed prints and warping to clogged nozzles and layer adhesion problems, troubleshooting these issues is part of the learning process. By understanding the root causes and implementing appropriate solutions, you’ll become more proficient in identifying and resolving 3D printing challenges.
Once you’ve mastered the basics of 3D printing, you can explore more advanced techniques and workflows. From multi-color and multi-material printing to using support structures for intricate designs, there are endless possibilities to take your 3D printing skills to the next level.
So, are you ready to embark on your 3D printing journey? In the following sections, we will delve deeper into each topic, providing you with the knowledge and resources you need to become an accomplished 3D printing enthusiast or professional. Let’s dive in and unlock the endless possibilities of this fascinating technology!
What is 3D Printing?
3D printing, also known as additive manufacturing, is a process of creating physical objects by depositing material layer by layer to build a three-dimensional structure. Unlike traditional manufacturing methods, which involve subtracting material from a solid block, 3D printing starts with a digital 3D model and adds material gradually until the object is complete.
The process of 3D printing begins with a design file created using computer-aided design (CAD) software or obtained from a 3D scan of an existing object. This design file serves as the blueprint for the 3D printer, guiding it to create the desired object. The printer reads the file and translates it into a series of instructions for creating the object layer by layer.
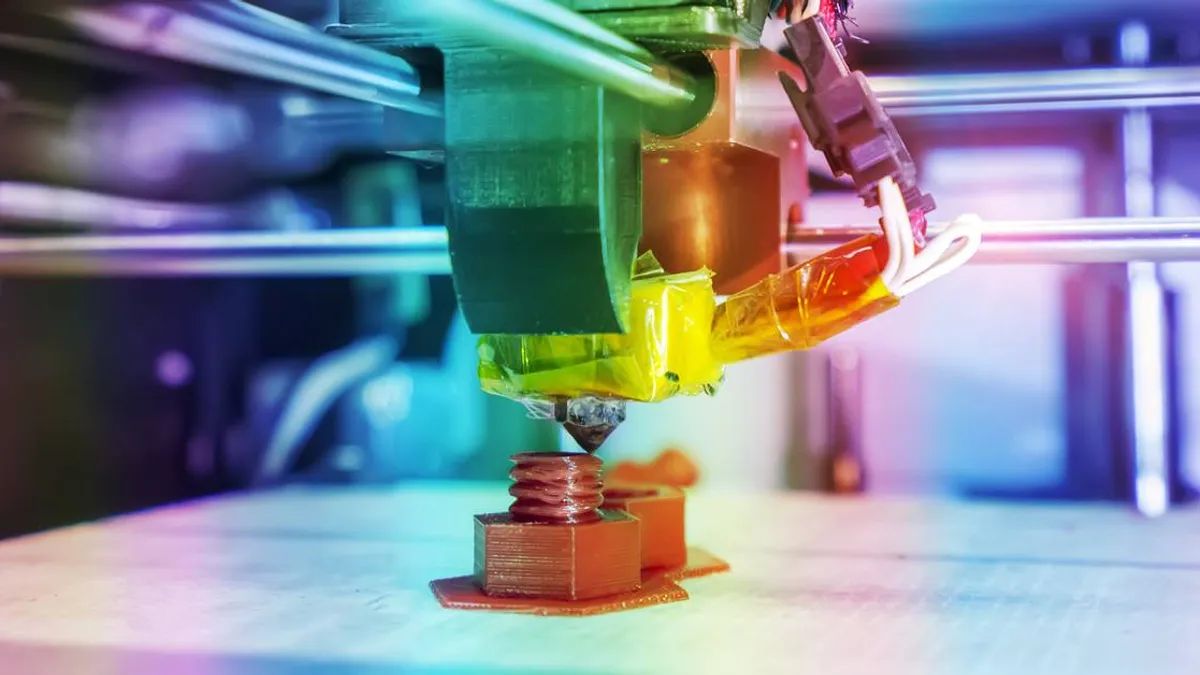
There are several 3D printing technologies available, each with its unique approach to building objects. The most common method is known as fused deposition modeling (FDM) or fused filament fabrication (FFF). In this technique, a thermoplastic material, typically in the form of a filament, is heated and extruded through a nozzle. The printer head moves along predetermined paths, depositing the molten material layer by layer until the object is complete.
Other 3D printing technologies include stereolithography (SLA), selective laser sintering (SLS), and digital light processing (DLP), among others. These methods use different materials and processes to create objects, such as curing liquid resin with a light source or sintering powdered material with a laser.
3D printing offers numerous advantages over traditional manufacturing methods. Firstly, it allows for complex geometries that would be impossible or difficult to produce with conventional techniques. The layer-by-layer approach of 3D printing allows for intricate details, internal cavities, and overhangs without the need for additional assembly or machining.
Additionally, 3D printing enables customization and personalization on a mass scale. With traditional manufacturing, producing individualized products can be costly and time-consuming. However, with 3D printing, each object can be customized without incurring substantial additional costs, making it ideal for creating personalized consumer goods, prosthetics, and medical devices.
Furthermore, 3D printing reduces material waste and energy consumption compared to traditional manufacturing. Most traditional methods involve removing excess material from a block, resulting in significant wastage. With 3D printing, only the necessary amount of material is used, reducing waste and making it a more sustainable manufacturing option.
Overall, 3D printing opens up new possibilities in various industries. It has the potential to revolutionize manufacturing, arts and design, healthcare, aerospace engineering, and many other fields. The versatility, customization options, and cost-effective nature of 3D printing make it an attractive solution for prototyping, small-scale production, and even creating one-of-a-kind objects.
Now that you have a clear understanding of what 3D printing is, let’s explore the reasons why learning this technology can be beneficial for you.
Why Learn 3D Printing?
3D printing is a rapidly growing technology that offers numerous benefits and opportunities for individuals and businesses alike. Whether you’re a hobbyist, an entrepreneur, or a professional in a specific field, learning 3D printing can provide you with a competitive edge and unlock a world of possibilities.
One of the primary reasons to learn 3D printing is the ability to bring your ideas to life. With 3D printing, you no longer have to rely on traditional manufacturing processes and the associated costs and limitations. Instead, you can easily turn your digital designs into physical objects, allowing you to test and iterate on your concepts quickly and efficiently.
Furthermore, 3D printing encourages creativity and innovation. The technology enables you to design and produce complex geometries, intricate details, and customized objects that are not feasible with traditional manufacturing methods. Whether you’re an artist, designer, or engineer, 3D printing provides a platform for pushing the boundaries of what’s possible and unleashing your imagination.
In addition to creative expression, learning 3D printing can also have practical applications. For entrepreneurs and small business owners, 3D printing can be a game-changer. It allows for rapid prototyping, enabling you to iterate on your designs quickly and reduce the time and costs associated with traditional prototyping methods.
Moreover, 3D printing opens up opportunities for small-scale production. Instead of relying on large manufacturing facilities and significant upfront investments, you can use 3D printing to produce limited batches of products or even create one-of-a-kind customized items. This level of flexibility and customization can help differentiate your business and cater to niche markets.
The healthcare industry is another field where 3D printing is making significant advancements. Medical professionals can utilize 3D printing to create patient-specific models for pre-surgical planning, design custom-made prosthetics and implants, and even print human tissues and organs for transplantation in the future. Learning 3D printing in the context of healthcare can contribute to groundbreaking advancements and enhance patient care.
Furthermore, 3D printing education is becoming more prevalent in schools and universities. By learning 3D printing, students can develop valuable skills in design, problem-solving, and critical thinking. They can apply these skills across various disciplines, including engineering, architecture, product design, and more, setting them up for success in a technology-driven world.
Lastly, 3D printing offers a gateway to a vibrant and supportive community. Online platforms and forums dedicated to 3D printing enthusiasts provide opportunities to connect with like-minded individuals, share knowledge, and collaborate on projects. Being part of a community that shares a passion for 3D printing can be inspiring, motivating, and a source of ongoing learning and growth.
Whether you want to explore your creative potential, start a business, innovate in your industry, or simply learn a valuable skill, 3D printing offers a wealth of opportunities. In the following sections, we will delve deeper into the practical aspects of 3D printing, including choosing the right printer, understanding design software, troubleshooting common issues, and exploring advanced techniques. Get ready to embark on an exciting journey into the world of 3D printing!
Choosing the Right 3D Printer
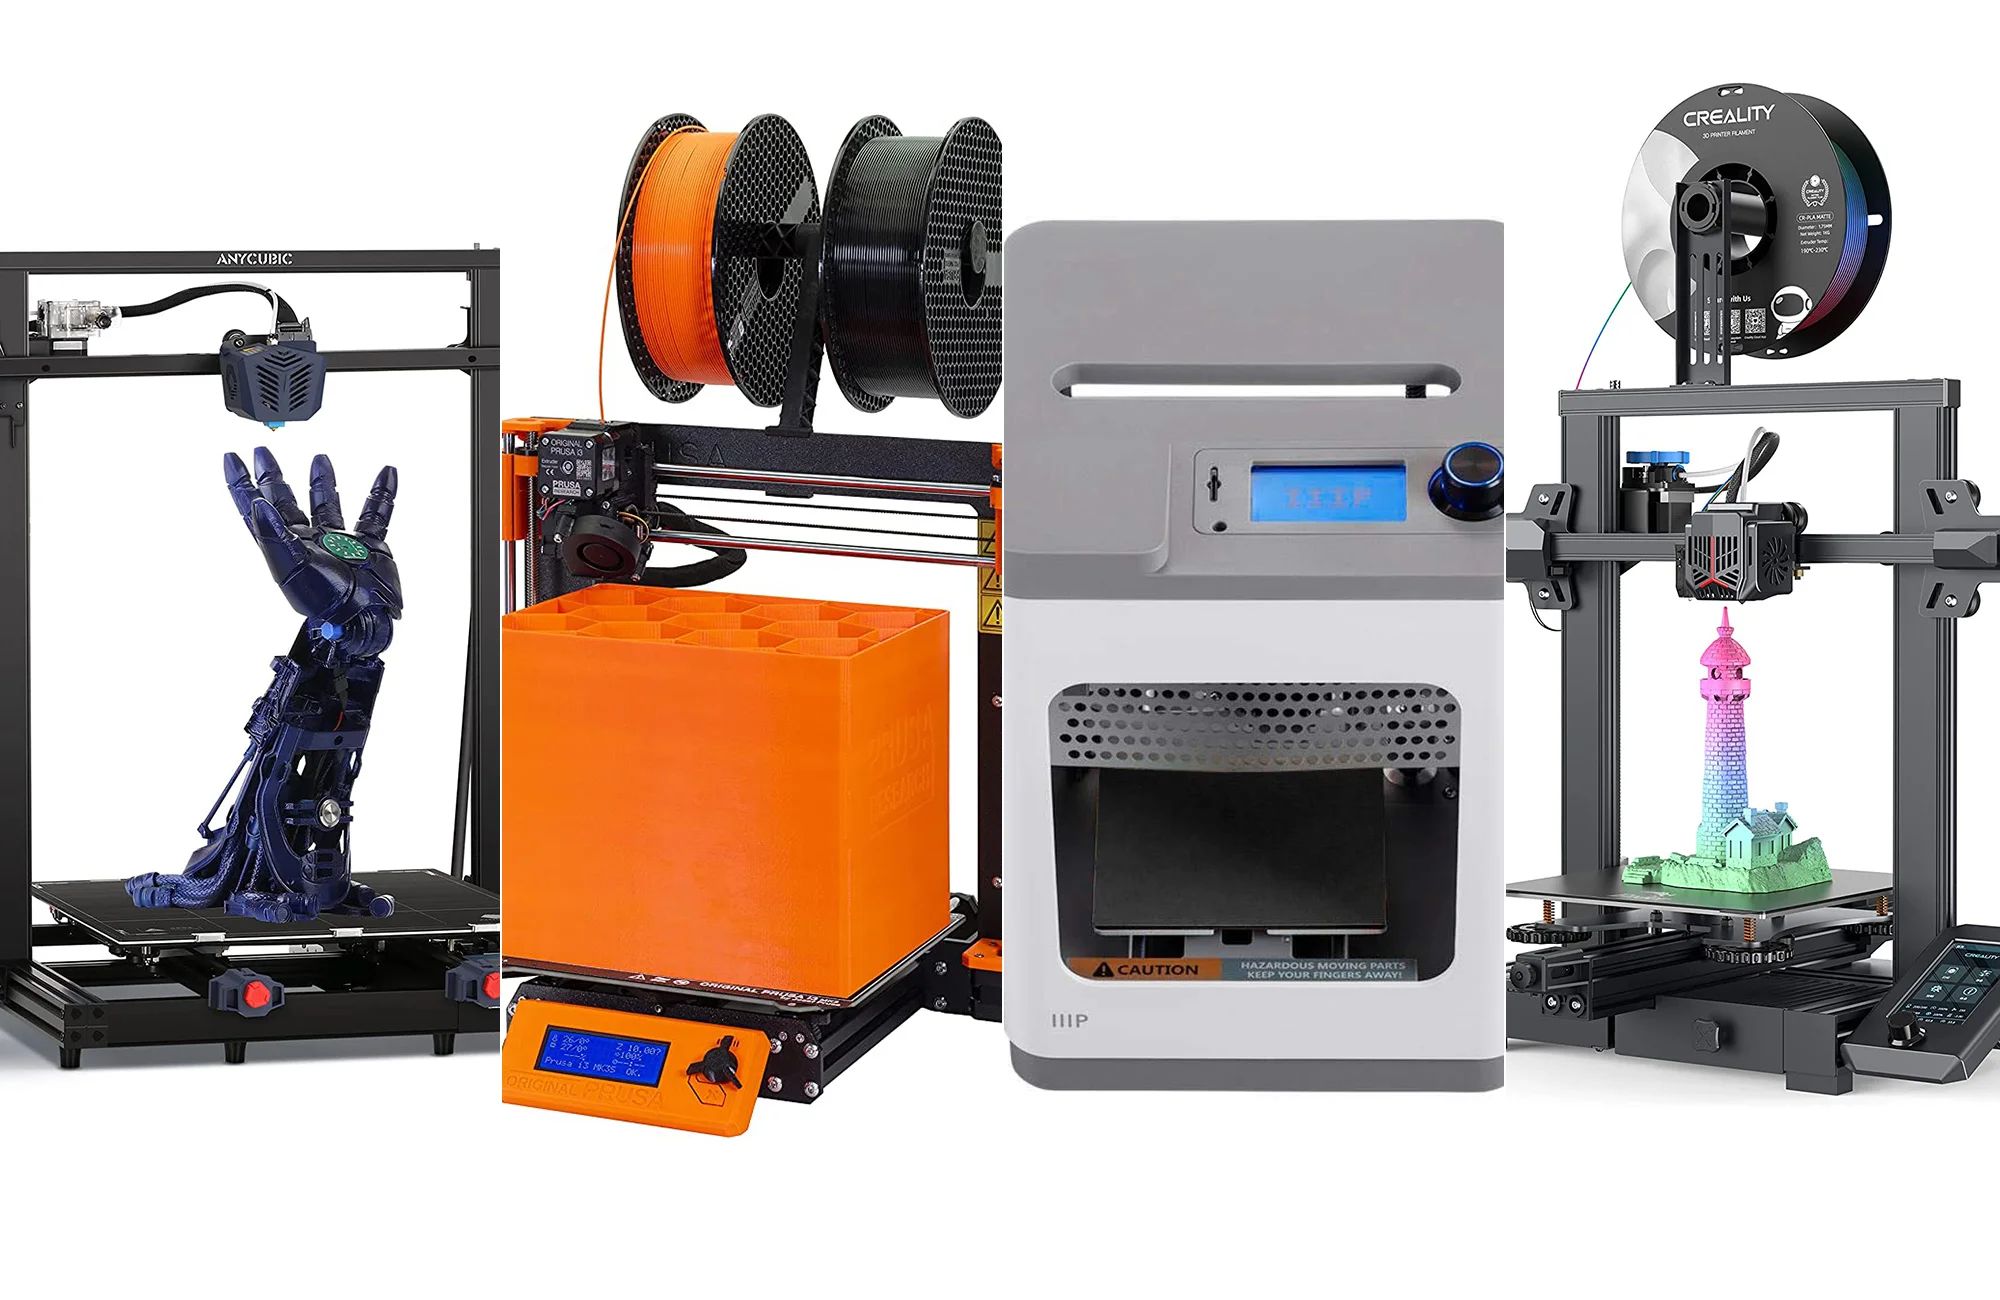
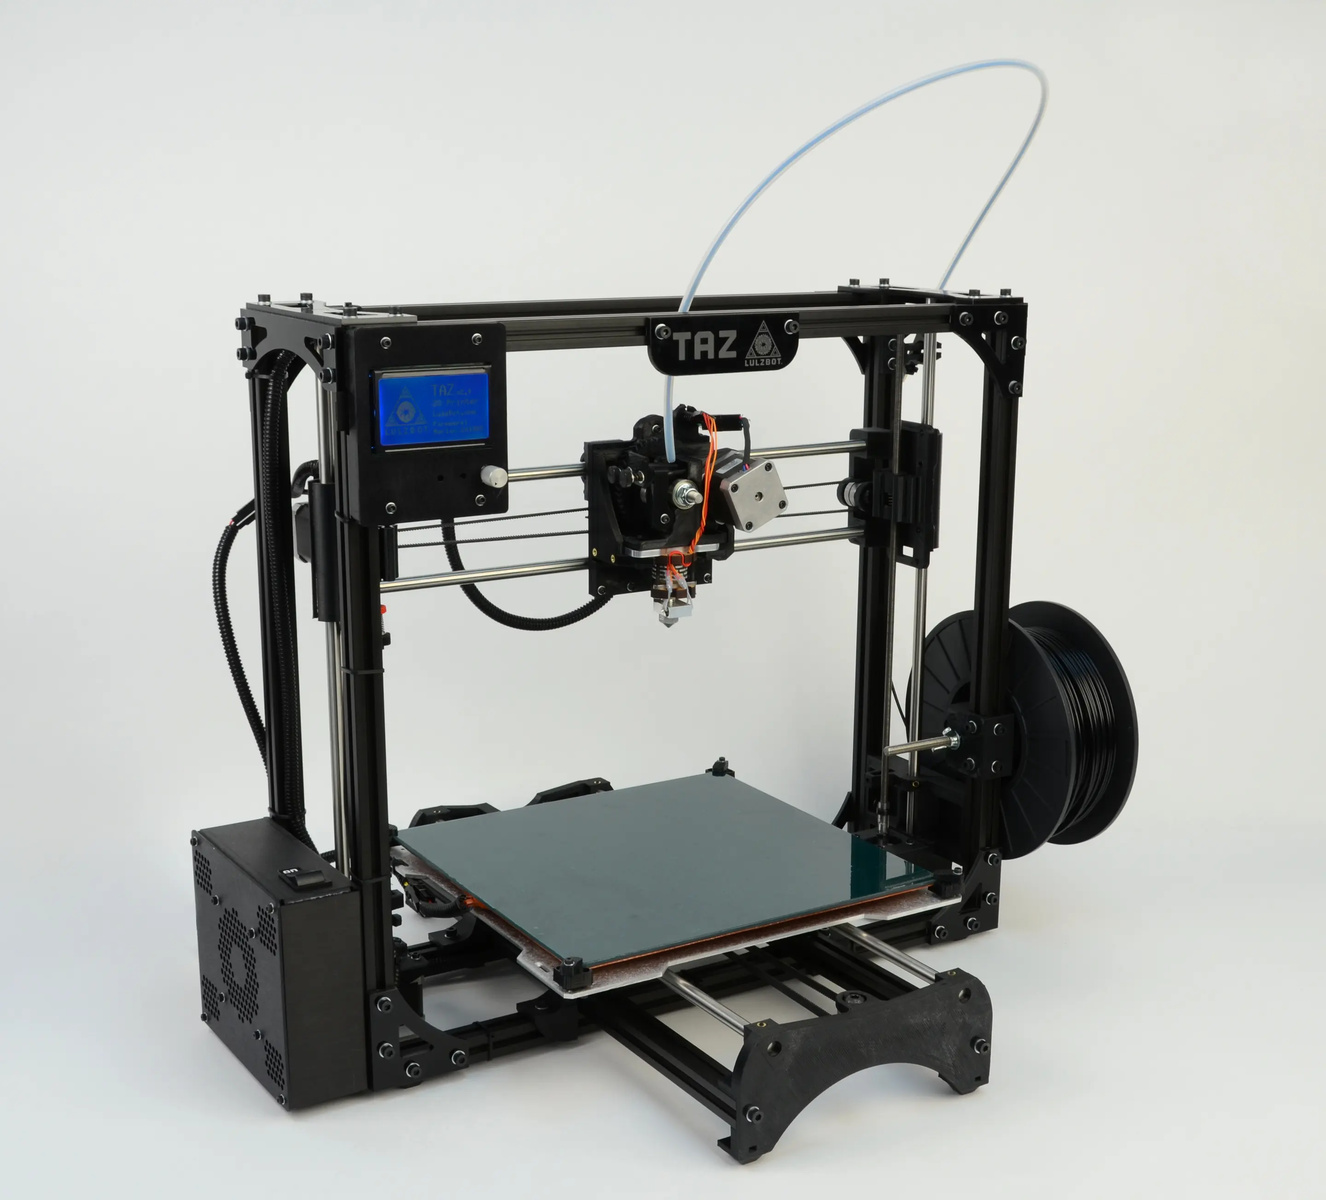
When it comes to 3D printing, one of the most crucial decisions you’ll make is choosing the right 3D printer for your needs. With a wide array of options available on the market, understanding the key features and considerations will help you make an informed choice and ensure the best printing experience.
The first factor to consider is your budget. 3D printers can vary significantly in price, ranging from affordable entry-level models to high-end professional machines. Determine your budget range and consider the long-term financial implications of the printer, including maintenance costs, materials, and upgrades.
Next, consider the build volume or the maximum size of objects the printer can produce. If you plan on printing large and complex objects, you’ll need a printer with a larger build volume. On the other hand, if you primarily work with smaller models, a printer with a smaller build volume may be sufficient and more cost-effective.
Another important consideration is the printer’s resolution or the level of detail it can achieve. This is typically measured in microns, with smaller numbers indicating higher resolution. Keep in mind that higher resolution often comes with a trade-off in print speed, so consider your priorities and the level of detail required for your projects.
Additionally, consider the type of printing technology used by the printer. The most common technology for consumer-grade printers is fused deposition modeling (FDM), which uses melted plastic filament to create objects layer by layer. Other technologies, such as stereolithography (SLA) and selective laser sintering (SLS), offer different benefits and may be suitable for specific applications.
Connectivity options should also be taken into account. Most printers offer USB connectivity, allowing you to connect your computer directly to the printer. However, some models offer wireless connectivity or even the ability to print directly from an SD card or a smartphone app. Choose a printer that offers the level of connectivity that aligns with your workflow preferences.
Consider the availability and diversity of compatible materials for the printer. Some printers support a wide range of filament types, such as PLA, ABS, PETG, and more, allowing you to experiment with different materials for various applications. Additionally, check if the printer has a heated bed, which can improve adhesion and reduce warping when printing certain materials.
Finally, factor in the overall user experience and customer support. Look for reviews and feedback from other users to gain insights into the reliability, ease of use, and customer service provided by the printer manufacturer. A user-friendly interface, a supportive community, and readily available technical support can make your 3D printing journey more enjoyable and efficient.
By considering these factors and doing thorough research, you can choose a 3D printer that meets your budget, size requirements, resolution needs, and printing technology preferences. The right printer will empower you to unleash your creativity, bring your ideas to life, and embark on a rewarding journey into the world of 3D printing.
Understanding 3D Modeling Software
3D modeling software is a crucial tool for creating and designing 3D objects that can be printed with a 3D printer. It enables you to transform your ideas and concepts into digital models that can be further refined, modified, and prepared for the printing process.
There are various 3D modeling software options available, ranging from beginner-friendly software with intuitive interfaces to more advanced tools with powerful features. The choice of software depends on your skill level, design requirements, and preferred workflow.
One of the popular software options is Tinkercad, which is widely used for its simplicity and user-friendly interface. Tinkercad is ideal for beginners as it provides an intuitive drag-and-drop system to create basic shapes and assemble them into more complex designs. It offers a range of editing tools, and you can easily export your designs for 3D printing.
If you’re looking for more advanced software with comprehensive features, Autodesk Fusion 360 is a popular choice. Fusion 360 offers a range of powerful tools for parametric and organic modeling, allowing you to create intricate designs with detailed control. It also provides features for collaboration, simulation, and rendering, making it a versatile software for both professionals and enthusiasts.
Another popular option is Blender, a free and open-source software known for its robust capabilities and flexibility. Blender is a powerful tool for creating complex 3D models, animations, and visual effects. While it has a steeper learning curve compared to other software, it offers a wealth of features for advanced users and professionals.
For those focused on sculpting and organic modeling, ZBrush is a leading software choice. ZBrush provides powerful tools and intuitive workflows for creating highly detailed and realistic 3D models. It supports dynamic sculpting, texturing, and rendering, making it a favored software for artists, character designers, and game developers.
When choosing 3D modeling software, consider the compatibility with your 3D printer and the file formats it supports. Most printers accept standard formats such as STL, OBJ, and AMF. Ensure that the software you choose can export in these formats to streamline the process of preparing your designs for printing.
Additionally, take advantage of the extensive tutorials, documentation, and online communities associated with the software you choose. Learning from others, exploring tutorials, and participating in forums can greatly enhance your understanding of the software and help you overcome any challenges you may encounter.
Before investing in a specific software, consider trying out a few options to find the one that best fits your workflow and design requirements. Many software providers offer trial versions or free versions with limited features, allowing you to explore and evaluate the software before making a commitment.
Remember, learning 3D modeling software is an ongoing process, and practice is key to improving your skills. Experiment with different design techniques, explore advanced features, and continuously seek knowledge through tutorials and resources. With time and dedication, you’ll become proficient in creating impressive 3D models that can be printed with your 3D printer.
Getting Started with Designing in 3D
Designing in 3D is an exciting and rewarding process that allows you to bring your creative ideas to life. Whether you’re a beginner or an experienced designer, there are several steps and considerations to keep in mind when starting your 3D design journey.
The first step is to familiarize yourself with the 3D modeling software of your choice. Take some time to explore the user interface, understand the basic tools and functions, and learn how to navigate the software efficiently. Many software providers offer introductory tutorials and documentation to help you get started.
Next, it’s important to understand the fundamentals of 3D design. Familiarize yourself with concepts such as vertices, edges, and faces, which form the basic building blocks of 3D models. Learn about different modeling techniques, such as extrusion, lofting, and Boolean operations, as these will be the tools you’ll use to create your designs.
A helpful exercise for beginners is to start with simple geometric objects and practice creating and modifying them. Start with a cube, sphere, or cylinder and experiment with manipulating their shapes, sizes, and positions. This will help you gain confidence and understanding of how the software functions.
As you progress, consider expanding your knowledge and skills by exploring more complex modeling techniques. Learn how to create and manipulate curves, use modifiers to create intricate patterns, apply textures and materials to your models, and incorporate lighting and rendering techniques to enhance the visual appeal of your designs.
Additionally, seek inspiration from other designers, artists, and 3D design communities. Study their work, pay attention to their techniques, and analyze how they achieve specific effects or details in their designs. This can provide valuable insights and help you broaden your design approach.
When designing for 3D printing, keep in mind the limitations and considerations specific to the printing process. Ensure that your designs are suitable for the capabilities of your 3D printer, such as minimum wall thickness, overhang angles, and support structure requirements. Many 3D modeling software have built-in tools to help you analyze and optimize your designs for printing.
Practice, practice, practice! The more you design, the more you’ll improve your skills. Don’t be afraid to experiment and make mistakes. It’s through trial and error that you’ll learn and grow as a designer. Remember, 3D design is a continuous learning process, and each project you undertake will help you refine your techniques and expand your creativity.
Lastly, keep up with the latest trends and advancements in 3D design. Attend webinars, workshops, and conferences, and stay connected with the 3D design community. Engage in discussions, seek feedback on your designs, and collaborate with fellow designers. The field of 3D design is constantly evolving, and by staying up to date, you can continue to refine your skills and stay inspired.
Now that you’re equipped with the basics of 3D design, it’s time to move on to the next step: preparing your files for 3D printing. In the following section, we will explore the essential considerations and techniques for ensuring your designs are ready for a successful print!
Preparing Your Files for 3D Printing
Once you have created your 3D design, the next crucial step is preparing your files for 3D printing. Proper preparation ensures that your design will be accurately translated into a physical object and minimizes the chances of any printing issues or errors. Follow these essential considerations and techniques to ensure your designs are ready for a successful print.
The first step is to check your design for any errors or issues. Most 3D modeling software provides tools to automatically analyze your model for potential problems, such as non-manifold geometry, intersecting faces, or flipped normals. Addressing these issues before printing will help prevent any unexpected errors during the printing process.
Once you’ve checked for errors, it’s important to ensure that your design is oriented correctly for printing. Position your model in a way that minimizes the need for excessive support structures and maximizes the overall stability of the print. Consider factors such as overhangs, bridging, and accessibility to fine details to achieve the best print quality.
If your design requires support structures, especially for complex geometries or overhangs, utilize the support generation tools provided by your 3D modeling software. These structures provide temporary support during the printing process and can be easily removed once the print is complete. Adjust the support settings to balance the need for support with the desire for a smooth, clean finish on your printed object.
It is also essential to ensure that your model has a sufficient wall thickness. Different 3D printers have different specifications for the minimum thickness they can accurately print. Check the recommended guidelines for your printer and adjust the thickness of your model accordingly to avoid any issues with print quality or structural integrity.
Incorporating proper tolerance or clearance in your designs is important, especially for components that need to fit or interact with each other. Allow enough space between moving parts or mating surfaces to ensure a functional fit without interference. Test your design with trial prints or prototypes to verify the fit before committing to a full-scale print.
Before exporting your design for 3D printing, ensure that your file is in the appropriate format, typically STL or OBJ. These formats are widely supported by 3D printers and slicing software. Also, consider scaling your model to the desired size for printing. Take into account the limitations of your printer’s build volume and the intended purpose of the printed object.
Lastly, consider optimizing your design for printing time and material usage. Different slicing software allows you to adjust settings such as layer height, infill density, and print speed. Balancing these settings can optimize the print time and material consumption without compromising the quality or structural integrity of your print.
Now that your design is properly prepared and optimized, it’s time to move on to the final step: sending your file to the 3D printer and starting the printing process. Pay attention to the printer’s specific instructions regarding file transfer and ensure that your printer is calibrated correctly for optimal printing results.
By following these guidelines for preparing your files for 3D printing, you’ll be well on your way to achieving successful prints with accurate details and desired qualities. With practice and experience, you’ll gain a deeper understanding of the printing process and be able to fine-tune your designs for the best possible results.
Materials and Filaments for 3D Printing
When it comes to 3D printing, the choice of materials and filaments plays a significant role in determining the properties, strength, and appearance of your printed objects. There is a wide range of materials available, each with its unique characteristics and applications. Understanding the different options will help you select the right material for your specific project.
One of the most commonly used materials for 3D printing is polylactic acid (PLA). PLA is a biodegradable thermoplastic derived from renewable resources such as corn starch or sugarcane. It offers ease of printing, low warping, and a wide range of color choices. PLA is suitable for a variety of applications, including prototypes, artistic models, and decorative objects.
Another popular material is acrylonitrile butadiene styrene (ABS), which provides excellent durability and strength. ABS is known for its resistance to impact, heat, and chemicals, making it suitable for functional prototypes, automotive parts, and electronic enclosures. However, ABS has a higher tendency to warp during printing, and it may emit fumes, so proper ventilation is important.
Polyethylene terephthalate glycol-modified (PETG) is gaining popularity due to its balance of strength and ease of printing. It offers higher impact resistance than PLA and is less prone to warping compared to ABS. PETG is commonly used for functional parts, mechanical components, and containers.
For more specialized applications, there are filaments infused with various materials. For example, carbon fiber-infused filaments provide increased strength and rigidity, making them suitable for high-stress applications. Wood-infused filaments give printed objects a natural wood-like appearance and can be sanded and stained like real wood.
Flexible filaments, such as thermoplastic polyurethane (TPU) or thermoplastic elastomer (TPE), allow for the production of objects with elasticity and flexibility. They are often used for rubber-like parts, gaskets, and wearable devices. These materials require a specialized extruder or a printer capable of handling flexible filaments.
In addition to different material options, filament diameter is an important consideration. The two most common filament diameters are 1.75mm and 2.85mm. Ensure that your printer is compatible with the filament diameter you choose, as using the wrong diameter can result in poor print quality or even damage to the printer.
When selecting materials for 3D printing, also consider the specific requirements of your project. For example, if you need heat resistance or chemical resistance, you may opt for filaments such as polycarbonate (PC) or nylon (PA). If you require transparent or translucent parts, materials like clear PETG or transparent resin may be suitable.
It’s worth noting that different printers have different specifications and may have limitations on the type of material they can handle. Be sure to check the compatibility of your printer with the materials you intend to use and follow the manufacturer’s guidelines for optimal printing settings.
Ultimately, the choice of materials and filaments for your 3D printing projects depends on your desired properties, functionality, and aesthetic requirements. Experimentation and testing with different materials will help you understand their capabilities and allow you to create printed objects that meet your specific needs.
Setting Up and Calibrating Your 3D Printer
Setting up and calibrating your 3D printer is a crucial step in ensuring optimal print quality and consistent results. Proper calibration ensures that your printer is properly aligned, calibrated, and ready to produce accurate and reliable prints. Here are some key steps to follow when setting up and calibrating your 3D printer.
The first step is to carefully unpack and assemble your 3D printer according to the manufacturer’s instructions. Make sure all the components are securely attached and tightened, and any protective materials or packaging have been removed.
Next, verify that your printer is level and stable. An unlevel printer can lead to skewed prints and inconsistent layer heights. Use a spirit level or a calibration tool provided by your printer manufacturer to ensure that the printer bed is perfectly level in all directions.
Calibrating the printer’s extruder is essential for accurate filament deposition. This involves adjusting the steps per millimeter (or steps per unit) settings to ensure that the extruder precisely pushes out the specified amount of filament. Use the calibration procedure provided by your printer manufacturer or follow online guides specific to your printer model.
Check and adjust the printer’s bed height or nozzle height. The distance between the nozzle and the print bed should be calibrated to ensure proper adhesion and consistent layer height. Most printers have a manual bed leveling process or inbuilt auto-leveling sensors that can assist with this calibration step.
Temperature calibration is another important aspect. Your printer’s hot end and heated bed temperatures need to be calibrated to ensure accurate and consistent melting and adhesion of the material. Use a reliable digital thermometer or a temperature calibration device to verify the accuracy of the temperature readings on your printer.
Before printing a complete model, it’s advisable to perform a test print or a calibration print. These prints typically involve printing objects with specific features, such as overhangs, bridges, and small details, to evaluate the printer’s capabilities and fine-tune the settings if necessary. This step helps identify any issues and allows you to make adjustments for optimal print quality.
During the calibration process, it’s important to take note of any specific settings or adjustments made. Maintain a record of the successful calibration settings for future reference, especially if you switch between different print materials or need to reset your printer to its original calibration.
Regular maintenance is essential to keep your printer in optimal condition. This includes cleaning the print bed, regularly checking and tightening belts, lubricating moving parts as necessary, and replacing worn-out nozzles or other components. Following the manufacturer’s maintenance guidelines will help prolong the life of your printer and ensure consistent performance over time.
Keep in mind that calibration is an iterative process. It may take several attempts and adjustments to achieve the desired print quality and performance. Do not hesitate to reach out to online forums, support communities, or the manufacturer’s support team if you encounter challenges during calibration or need assistance with specific printer models.
With proper setup and regular calibration, your 3D printer will be optimized to produce consistent, high-quality prints. Investing time and effort in this calibration process will pay off in the long run, allowing you to unlock the full capabilities of your printer and achieve the best possible results for your 3D printing projects.
Troubleshooting Common 3D Printing Issues
Despite your best efforts, it’s not uncommon to encounter some common issues during the 3D printing process. Understanding these issues and their potential causes will help you troubleshoot and resolve them effectively, ensuring successful and high-quality prints. Here are some common 3D printing issues and tips for troubleshooting:
1. Stringing and oozing: Stringing refers to the thin strands of filament that can appear between different parts of your print, while oozing occurs when filament leaks from the nozzle during non-printing moves. To minimize stringing and oozing, try adjusting the retraction settings in your slicing software, increase travel speed, or enable features like coasting or wiping.
2. Warping and adhesion problems: Warping occurs when the edges of your print lift or curl up, leading to a distorted shape and poor adhesion to the print bed. Ensure that your print bed is level and clean, and consider using a heated bed or applying adhesive aids like glue stick or painter’s tape to improve adhesion. Additionally, enclosing the printer or using a heated chamber can help prevent warping, especially for materials like ABS.
3. Layer adhesion issues: Weak layer adhesion can result in parts that are prone to breaking or separating. Make sure your print bed is properly calibrated and leveled, and consider increasing bed and/or nozzle temperature slightly to improve layer-to-layer bonding. Adjusting the printing speed and using a higher infill density can also improve layer adhesion.
4. Inconsistent extrusion: Inconsistent extrusion can lead to gaps or under-extrusion in your prints. Check that your filament is loaded correctly and free from any obstructions. Also, verify that your extruder gear or drive is properly tensioned and clean, and ensure that the nozzle is not clogged or partially blocked. Adjusting the extrusion multiplier or flow rate in your slicing software may also help fine-tune the extrusion.
5. Poor surface quality: If your prints have rough or bumpy surfaces, try adjusting the layer height to a smaller value, increasing the print temperature for better layer bonding, or adjusting your print speed. Cleaning or replacing your nozzle can also help achieve smoother prints. Additionally, consider optimizing your model’s orientation and adding support structures where necessary to improve surface quality.
6. Nozzle clogging: Clogged nozzles can occur due to debris or filament buildup. Regularly clean your nozzle by performing cold or hot pulls (also known as atomic pulls) to remove any residual filament. If the clog persists, you may need to disassemble the hot end and clean it thoroughly. Additionally, ensure that the filament is properly stored and protected from dust and moisture to prevent future clogging.
7. Print shifting or shifting layers: Shifting occurs when layers in your print shift or move from their intended positions. This can happen due to loose pulleys or belts, insufficient motor current, or mechanical obstructions. Check and tighten all screws, pulleys, and belts, and ensure that the printer’s mechanical components are properly aligned and free from any debris or obstructions.
Remember, troubleshooting 3D printing issues may require a combination of adjustments to hardware, software, and print settings. It’s essential to approach troubleshooting systematically, addressing one issue at a time and making small adjustments to avoid introducing new problems. Keeping a log of the changes made and their effects will help you pinpoint the underlying cause and find the best solution.
If you encounter persistent issues that you’re unable to resolve, reach out to the 3D printing community, online forums, or the manufacturer’s support team for guidance. Don’t get discouraged – troubleshooting is part of the learning process, and with practice, you’ll become more skilled at identifying and resolving common 3D printing issues.
Exploring Advanced 3D Printing Techniques
Once you’ve mastered the basics of 3D printing, you can take your skills to the next level by exploring advanced techniques that push the boundaries of what’s possible with this versatile technology. These techniques can open up new avenues for creativity, functionality, and complexity in your printed objects. Here are some advanced 3D printing techniques to explore:
1. Multi-color and multi-material printing: Traditional 3D printers are typically limited to printing in a single color or material at a time. However, some advanced printers and techniques enable you to print in multiple colors or even simultaneously print with different materials. This allows for more intricate and visually striking designs, with the ability to create vibrant and detailed objects.
2. Support structures and overhangs: Incorporating support structures into your designs is essential for printing objects with complex geometries and overhangs. Advanced slicing software provides tools for automatically generating support structures that can be removed after printing. Experiment with different support configurations and orientations to minimize the amount of support material needed and optimize the surface finish of your prints.
3. Post-processing techniques: 3D printing doesn’t end with the completion of a print. Post-processing techniques can add further refinement and customization to your printed objects. This can include sanding, polishing, painting, or applying various finishes to achieve the desired aesthetic or functional properties. Consider exploring different post-processing techniques and materials, such as primers, fillers, or specialty paints, to enhance the appearance and texture of your prints.
4. Textures and patterns: Advanced 3D printing techniques allow for the creation of intricate textures and patterns on the surface of your printed objects. Experiment with different modeling techniques, such as parametric design or generative algorithms, to create unique textures and patterns that add visual interest and complexity to your prints. These techniques can be particularly useful for creating detailed art pieces or architectural models.
5. Hybrid printing: Hybrid printing combines traditional manufacturing methods with 3D printing to create objects that leverage the strengths of both technologies. For example, you can design and print custom jigs or fixtures that interface with traditional manufacturing processes, like milling or injection molding, to enhance efficiency and accuracy. Hybrid printing opens up exciting possibilities for creating functional, high-quality parts and prototypes.
6. Experimental materials: While traditional filament materials such as PLA and ABS are commonly used in 3D printing, there is a growing range of experimental and specialty materials available. Conductive filaments, flexible filaments, carbon fiber composites, and even biomaterials are being used to expand the applications of 3D printing. Explore these alternative materials to unlock new functional and aesthetic possibilities in your designs.
7. Large-scale 3D printing: Advanced 3D printing techniques have made it possible to print objects on a much larger scale than traditional desktop printers. Large-scale 3D printers can fabricate objects that range from furniture and architectural models to life-sized sculptures. Experimenting with large-scale printing allows you to explore new design possibilities and challenges that emerge when working with larger volumes.
Keep in mind that advanced 3D printing techniques often require a deeper understanding of the technology, advanced design skills, and specialized equipment. Invest time in learning and experimenting with these techniques to expand your capabilities and take your 3D printing projects to new heights. Collaborate with other enthusiasts, attend workshops or webinars, and stay up to date with advancements in the field to continually challenge yourself and stay at the forefront of this exciting technology.
Conclusion
Learning 3D printing opens up a world of possibilities for creativity, innovation, and problem-solving across various industries and disciplines. Whether you’re a hobbyist, an entrepreneur, or a professional, acquiring the skills to design and print three-dimensional objects empowers you to bring your ideas to life and explore new frontiers.
Throughout this guide, we have covered the essentials of 3D printing, from understanding the technology and choosing the right printer to mastering 3D modeling software and troubleshooting common issues. By following the steps outlined in this guide and combining them with your own creativity and perseverance, you’ll be well-equipped to embark on your own 3D printing journey.
Remember that 3D printing is a continuous learning process. As you gain experience, don’t be afraid to experiment, explore advanced techniques, and push the boundaries of what you can achieve with this versatile technology. Engage with the 3D printing community, seek inspiration from fellow enthusiasts, and keep an eye on the latest advancements and materials.
With practice, you’ll refine your skills and be able to produce intricate and functional objects that were once only possible through traditional manufacturing methods. This technology empowers you to iterate on designs quickly, customize products to meet specific needs, and even create prototypes for validation and testing.
Embrace the possibilities that 3D printing offers. Unleash your creativity, challenge yourself to learn new techniques, and embrace the iterative process of designing, printing, and refining your creations. Whether you’re creating art, prototypes, functional components, or entirely new products, the world of 3D printing is yours to explore and shape.
Now, armed with the knowledge and techniques shared in this guide, it’s time to dive in and see where your 3D printing journey takes you. Embrace the excitement, embrace the challenges, and enjoy the satisfaction of transforming your ideas into tangible, three-dimensional realities.


