Introduction
Installing Windows from a USB drive can be a convenient and efficient way to set up or reinstall your operating system. Not only does it eliminate the need for physical installation media, such as DVDs, but it also allows for faster installation speeds. Whether you’re upgrading to a newer version of Windows or performing a clean installation, using a USB drive can simplify the process.
In this guide, we will walk you through the step-by-step process of installing Windows from a USB drive. Whether you’re a Windows novice or a seasoned user, this guide will provide you with all the information you need to successfully install Windows on your computer.
Before we proceed, it’s important to note that this guide assumes you already have a valid Windows installation ISO file or a PC with a pre-installed Windows operating system. If you don’t have an ISO file, you can download one directly from the Microsoft website or obtain it from a trusted source.
Now let’s dive into the prerequisites and steps involved in installing Windows from a USB drive.
Prerequisites
Before you can proceed with installing Windows from a USB drive, there are a few prerequisites you need to fulfill. These requirements will ensure a smooth and successful installation process. Here’s what you need:
- A USB drive with a minimum capacity of 8GB (preferably a USB 3.0 drive for faster data transfer)
- A working computer with a USB port to create the bootable USB drive
- A valid Windows installation ISO file or a PC with a pre-installed Windows operating system
- A stable internet connection to download any required software or drivers during the installation process
- An understanding that installing Windows will erase all the data on the target hard drive, so make sure you have backed up any important files
It is crucial to ensure that you have the necessary resources before proceeding with the installation. Double-check your hardware and software requirements to avoid any potential issues during the installation process.
Once you have gathered all the prerequisites, you are ready to create a bootable USB drive to install Windows. In the next section, we will provide you with a detailed step-by-step guide on how to create a bootable USB drive and set up the BIOS to initiate the installation process.
Step 1: Create a Bootable USB Drive
To begin the process of installing Windows from a USB drive, you first need to create a bootable USB drive. A bootable USB drive contains the necessary files to initiate the Windows installation process on your computer. Follow these steps to create a bootable USB drive:
- Insert your USB drive into a USB port on your computer.
- Download a tool called “Rufus” from the official website (https://rufus.ie/) and install it on your computer.
- Launch Rufus and select your USB drive from the “Device” dropdown menu.
- In the “Boot selection” section, click the “Select” button and browse to the location where you have stored the Windows installation ISO file.
- Ensure that the partition scheme is set to “MBR” (Master Boot Record) and the file system is set to “FAT32”.
- Leave all other settings at their default values and click the “Start” button to begin the process.
- Rufus will format the USB drive and create a bootable USB with the Windows installation files.
- Once the process is complete, safely eject the USB drive from your computer.
Congratulations! You have successfully created a bootable USB drive for installing Windows. In the next section, we will guide you on how to set up the BIOS to initiate the Windows installation process using the USB drive you just created.
Step 2: Set Up the BIOS
After creating a bootable USB drive, you need to configure the BIOS settings on your computer to ensure it boots from the USB drive. Follow these steps to set up the BIOS:
- Insert the bootable USB drive into a USB port on your computer.
- Restart your computer and enter the BIOS setup by pressing the designated key (such as F2, Del, or Esc) displayed on the boot screen.
- Navigate to the “Boot” or “Boot Order” section of the BIOS setup.
- Set the USB drive as the primary boot device by moving it to the top of the boot order list.
- Save the changes and exit the BIOS setup. Your computer will restart.
- During the boot process, your computer will recognize the bootable USB drive and initiate the Windows installation process.
Note that the exact steps to access the BIOS setup may vary depending on your computer’s manufacturer and model. Refer to the documentation or support website of your computer for specific instructions.
By configuring the BIOS to boot from the USB drive, you are now ready to install Windows on your computer. In the next section, we will guide you through the installation process using the bootable USB drive and the BIOS settings you have just configured.
Step 3: Install Windows from USB
Now that you have set up the BIOS to boot from the USB drive, it’s time to proceed with the installation of Windows. Follow these steps to install Windows from the USB drive:
- Ensure that the USB drive is inserted into a USB port on your computer.
- Restart your computer and wait for it to boot from the USB drive.
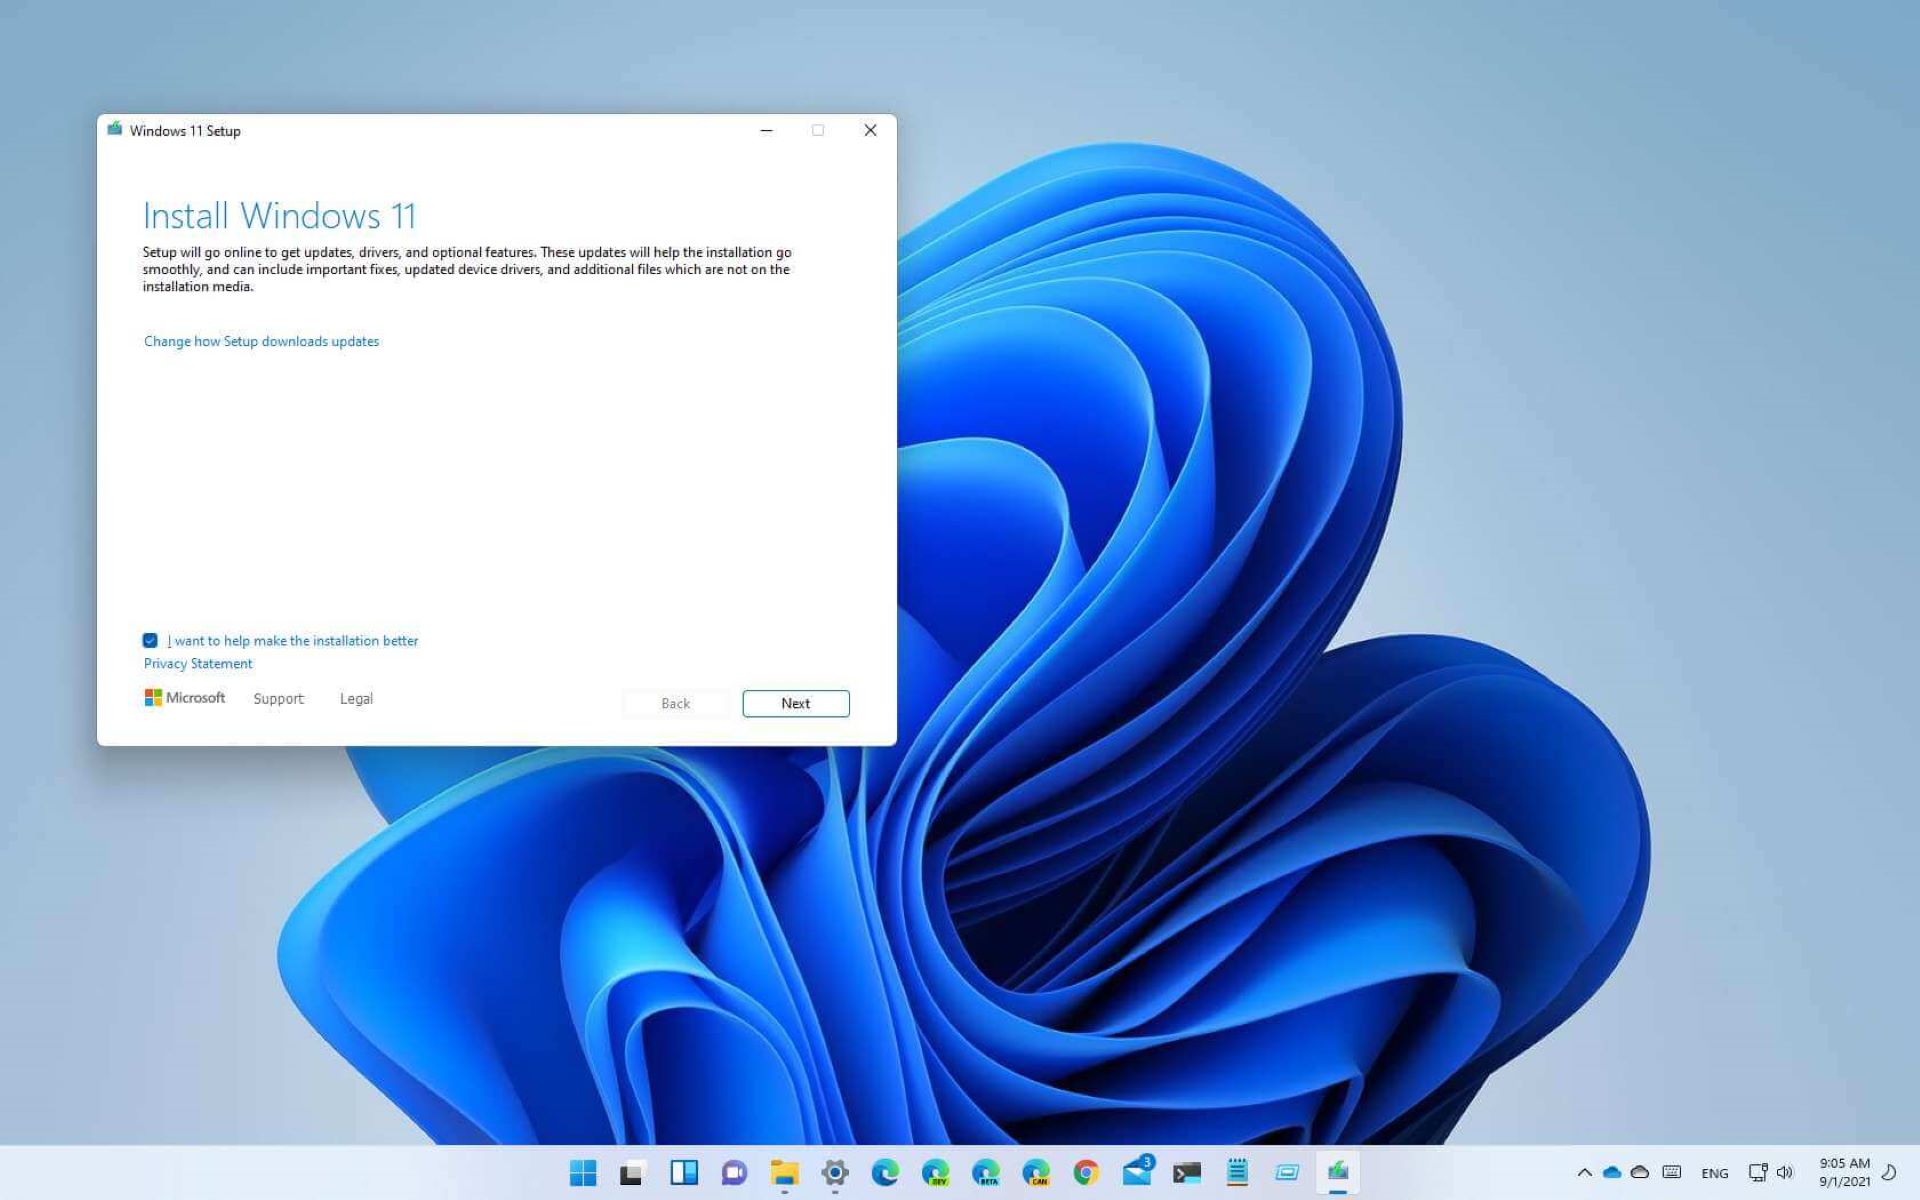
- The Windows installation screen will appear, prompting you to select your language, time format, and keyboard layout. Choose the desired options and click “Next”.
- Click on the “Install Now” button to start the installation process.
- Enter the product key when prompted. If you don’t have a product key, you can choose to skip this step and activate Windows later.
- Read and accept the license terms and click “Next”.
- Choose the “Custom: Install Windows only (advanced)” option.
- Select the partition where you want to install Windows. If there are multiple partitions, choose the one that suits your needs and click “Next”.
- The Windows installation process will begin. Your computer may restart several times during the installation.
Be patient as the installation process may take some time to complete. Once the installation is finished, your computer will restart, and you will be greeted with the Windows setup screen to configure your settings.
In the next section, we will guide you through the final steps to complete the installation process and set up Windows on your computer.
Step 4: Follow the Installation Prompts
After the initial installation is complete, your computer will restart, and you will need to follow the installation prompts to finalize the setup of Windows. Here are the steps to follow:
- Choose your region and language preferences, and click “Next”.
- Enter a username and password for your user account. You can also choose to set up a PIN or use a Microsoft account to log in. Click “Next” to proceed.
- If prompted, set up security questions for your user account and click “Next”.
- You will be asked to choose privacy settings. Review the options and choose the settings that align with your preferences. Click “Next” to continue.
- Windows will then proceed to finalize the installation and prepare your computer for first-time use. This may take a few moments.
- Once the setup process is completed, you will be greeted with the Windows desktop. Congratulations, you have successfully installed Windows from a USB drive!
Take a moment to explore the newly installed operating system and ensure that everything is functioning as expected. You can now begin customizing and personalizing your Windows experience by installing your desired applications, changing settings, and transferring any backed-up files back onto your computer.
In the final section, we will conclude the installation process and offer some additional tips for a smooth Windows experience.
Step 5: Complete the Installation Process
Once you have followed the installation prompts, there are a few final steps to complete the installation process and ensure your Windows installation is set up properly. Here’s what you need to do:
- Make sure all your hardware components, such as sound cards, graphics cards, and printers, are recognized and functioning correctly. If necessary, install drivers for any devices that are not automatically detected by Windows.
- Install necessary software applications that you use regularly, such as web browsers, antivirus software, office suites, or any other programs that meet your needs.
- Customize your Windows settings according to your preferences. This can include adjusting display settings, configuring power options, setting up email accounts, and personalizing backgrounds and themes.
- Ensure that Windows is up to date by checking for and installing any available updates. These updates include important security patches, bug fixes, and new features.
- Set up regular backup procedures to protect your data. Windows includes built-in backup tools, or you can use third-party backup software for added flexibility.
By completing these final steps, you will have successfully installed Windows from a USB drive and set up your computer for optimal performance and functionality. Congratulations on your newly installed operating system!
Remember to regularly maintain and update your Windows installation to keep it secure and running smoothly. Stay organized and back up important files to prevent data loss. If you encounter any issues or have questions, consult Windows documentation or visit the Microsoft support website for troubleshooting assistance.
We hope this guide has been helpful in guiding you through the installation process. Enjoy your newly installed Windows operating system and make the most of its features and capabilities.
Conclusion
Installing Windows from a USB drive can be a convenient and efficient way to set up or reinstall your operating system. It eliminates the need for physical installation media and allows for faster installation speeds. Throughout this guide, we have walked you through the step-by-step process of installing Windows from a USB drive, starting from creating a bootable USB drive to completing the installation process.
We discussed the prerequisites for a successful installation, including the necessary hardware and software requirements. We also provided detailed instructions on creating a bootable USB drive using Rufus and setting up the BIOS to boot from the USB drive.
Once the initial setup is complete, we guided you through the installation prompts, where you chose your language preferences, created a user account, and set up privacy and security settings. We also emphasized the importance of finalizing the installation process by installing necessary drivers, software applications, and customizing your Windows settings.
Remember to keep your Windows installation updated and regularly back up your data to ensure smooth performance and protect against data loss. If you encounter any issues or have questions, consult the Windows documentation or reach out to Microsoft support for assistance.
We hope this guide has provided you with the knowledge and guidance needed to successfully install Windows from a USB drive. Enjoy your newly installed operating system and make the most of its features and capabilities!