Introduction
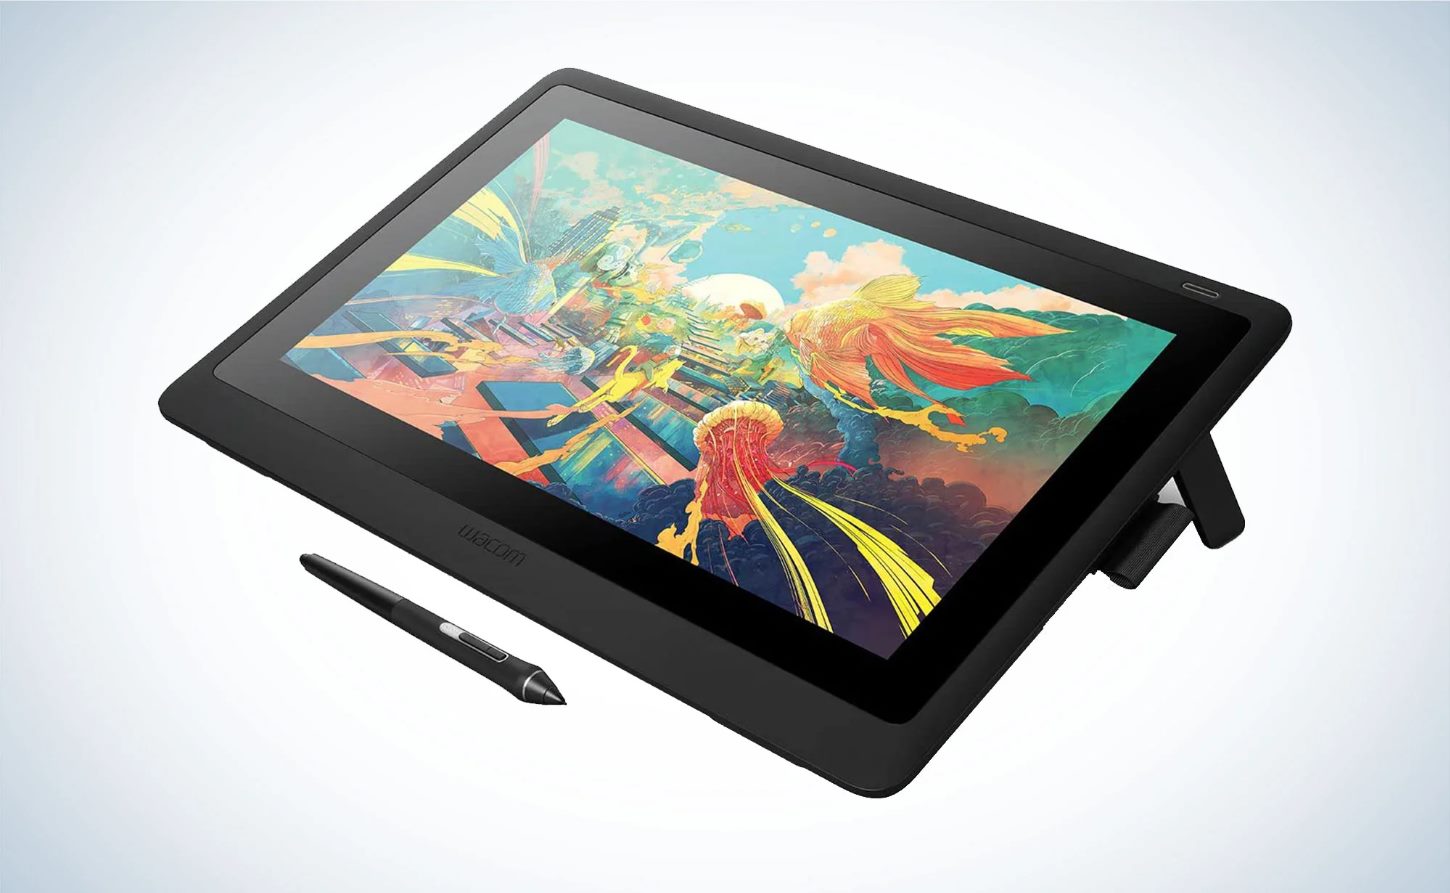
Welcome to this guide on how to install a Wacom tablet on Windows 10. Wacom tablets are popular among digital artists, graphic designers, and anyone who wants to have precise control over their computer input. These tablets offer a more natural and intuitive way to interact with your computer, allowing you to draw, paint, edit photos, and more.
Whether you’re a professional artist or a hobbyist, setting up your Wacom tablet on Windows 10 is a straightforward process. In this guide, we’ll walk you through the necessary steps to download and install the tablet driver, connect the tablet to your computer, calibrate it, customize the settings, and test its functionality. We’ll also cover some common troubleshooting tips to help you resolve any issues that may arise.
Before we dive into the installation process, let’s take a look at the system requirements to ensure that your computer meets the necessary specifications:
System Requirements:
- Windows 10 (32-bit or 64-bit)
- USB port
- Internet connection (for driver download)
With these basic requirements met, you’re ready to proceed with the installation process. In the next sections, we’ll guide you through the entire setup from driver download to testing your tablet’s functionality. So let’s get started!
System Requirements
Before you begin the installation process for your Wacom tablet on Windows 10, it’s essential to ensure that your computer meets the necessary system requirements. Here are the basic specifications that your computer should have:
1. Windows 10: Make sure your computer is running on Windows 10 operating system. The Wacom tablet driver is compatible with both 32-bit and 64-bit versions of Windows 10.
2. USB Port: You’ll need an available USB port on your computer to connect the Wacom tablet. Most Wacom tablets come with a USB cable for connection, so make sure you have a free USB port available.
3. Internet Connection: An active internet connection is required to download the Wacom tablet driver. The driver ensures that your computer recognizes the tablet and allows you to configure its settings properly.
It’s important to note that different Wacom tablet models may have additional requirements, such as specific hardware or software compatibility. To find the detailed system requirements for your specific tablet model, refer to the manufacturer’s website or the documentation that came with your tablet.
Once you’ve confirmed that your computer meets the system requirements, you can proceed with downloading and installing the Wacom tablet driver. In the next section, we’ll guide you through the steps to download the driver onto your computer.
Downloading the Driver
Now that you’ve ensured your computer meets the system requirements, it’s time to download the Wacom tablet driver. The driver is essential as it enables your computer to recognize and communicate with the tablet effectively. Follow the steps below to download the driver:
Step 1: Open your web browser and navigate to the official Wacom website. You can find the website by performing a simple internet search for “Wacom tablet drivers.”
Step 2: Once you are on the Wacom website, navigate to the Support or Drivers section. Look for a search bar or an option to select your tablet model or series. Enter the model number of your Wacom tablet to find the appropriate driver.
Step 3: From the list of available drivers, select the one that matches your tablet model and operating system (Windows 10). Ensure that you are downloading the latest version of the driver for optimal performance and compatibility.
Step 4: Click on the download link for the driver to initiate the download. The file size may vary depending on the tablet model and driver version.
Step 5: Once the download is complete, locate the downloaded driver file on your computer. It is usually in the Downloads folder or the location you specified during the download process.
That’s it! You’ve successfully downloaded the Wacom tablet driver onto your computer. In the next section, we’ll guide you through the installation process, allowing you to start using your tablet in no time.
Installing the Driver
Now that you have downloaded the Wacom tablet driver, it’s time to install it on your computer. The driver installation process is straightforward and should only take a few minutes. Follow the steps below to install the driver:
Step 1: Locate the downloaded driver file on your computer. It is typically in the Downloads folder or the location you specified during the download process.
Step 2: Double-click on the driver file to begin the installation process. You may be prompted to allow the installation to proceed by granting administrator privileges.
Step 3: Follow the on-screen instructions provided by the driver installer. The installer will guide you through the necessary steps to install the driver onto your computer.
Step 4: During the installation process, you may be asked to agree to the Wacom terms and conditions or select additional software components to install. Review the options and make selections according to your preferences.
Step 5: Once the installation is complete, you will be notified of the successful installation. At this point, you can connect your Wacom tablet to your computer.
It’s important to note that some Wacom tablets require you to connect them to your computer before or during the driver installation process. If this is the case for your tablet model, make sure to follow the specific instructions provided by the driver installer.
With the driver installed, you are now ready to connect your Wacom tablet to your computer and configure its settings. In the next section, we will guide you through the steps for connecting your tablet to your computer successfully.
Connecting the Tablet to Your Computer
Now that you have successfully installed the Wacom tablet driver, it’s time to connect your tablet to your computer. Follow the steps below to ensure a proper connection:
Step 1: Locate the USB cable that came with your Wacom tablet. It should have a USB-A connector on one end and a connector specific to your tablet model on the other end.
Step 2: Connect the USB-A end of the cable to an available USB port on your computer. Make sure the connection is secure.
Step 3: Connect the other end of the cable to the corresponding port on your Wacom tablet. The port location may vary depending on your tablet model. Refer to the user manual for precise instructions.
Step 4: Once the tablet is connected to the computer, you may see a notification indicating the successful connection. Your computer may also automatically detect the tablet.
Step 5: If the tablet does not get detected automatically, restart your computer and check if it recognizes the tablet upon reboot. If not, ensure that the USB connection is secure and try connecting it to a different USB port.
Once your tablet is successfully connected to your computer, you are ready to proceed with calibrating it to ensure accurate input and customize its settings according to your preferences. In the next section, we will guide you through the calibration process.
Calibrating the Tablet
Calibrating your Wacom tablet is essential to ensure accurate input and precise control over your digital artwork and other tasks. The calibration process allows your tablet to align with the cursor movements on your computer screen. Follow the steps below to calibrate your tablet:
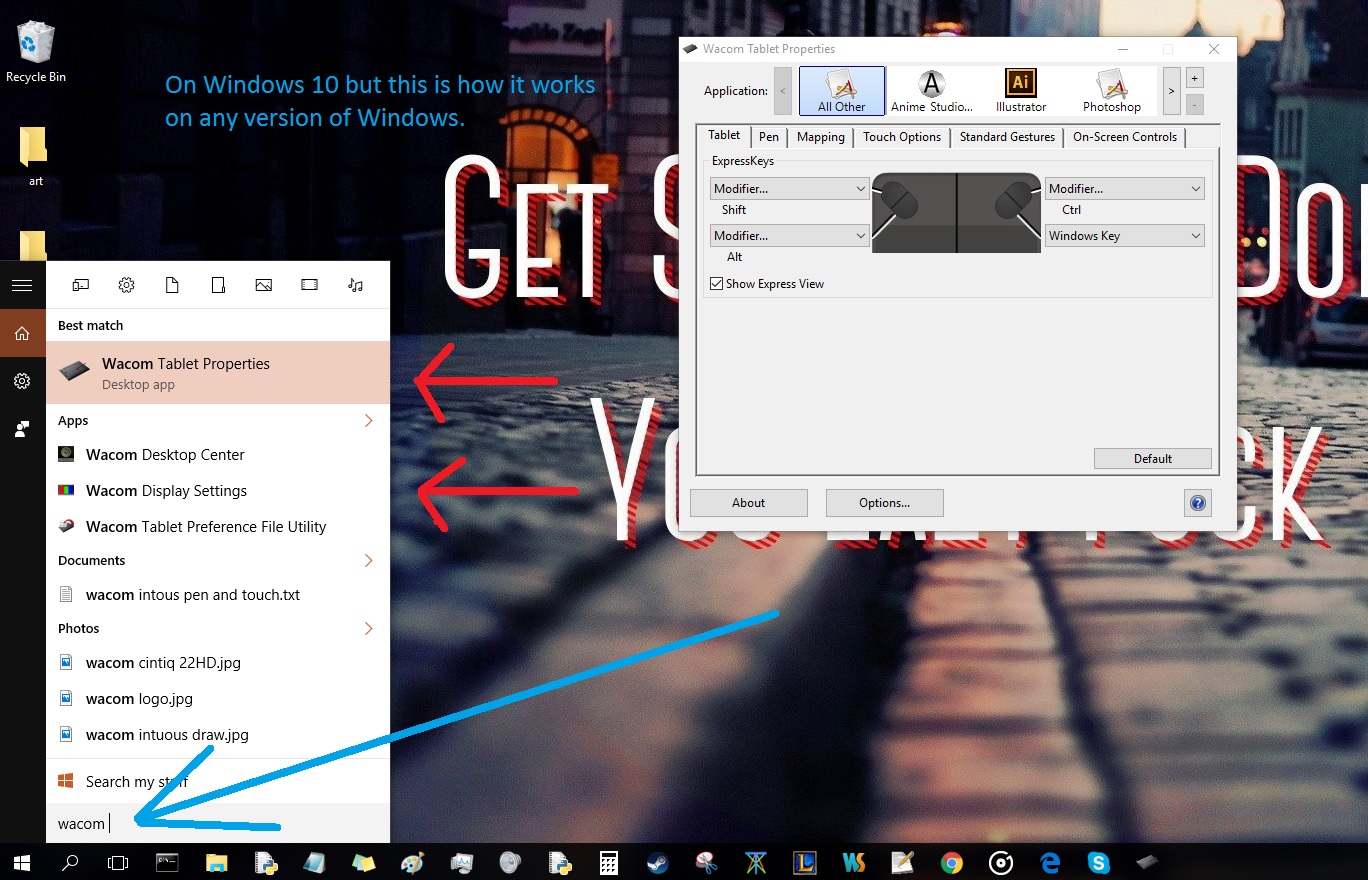
Step 1: Start by opening the Wacom Tablet Properties or Wacom Control Panel. You can usually find this software in your computer’s system tray or by searching for it in the Start menu.
Step 2: Once the software is open, navigate to the Calibration or Pen tab. The exact location may vary depending on the version of the software or your tablet model.
Step 3: Look for the Calibrate or Calibrate Tablet button and click on it to initiate the calibration process.
Step 4: Follow the on-screen instructions provided by the calibration wizard. Typically, this involves touching specific points on the tablet surface with your stylus.
Step 5: Make sure to follow the instructions carefully and perform the calibration process in a quiet environment to minimize any external factors that may interfere with the accuracy.
Step 6: Once the calibration process is complete, the software will notify you, and your tablet will be calibrated and ready to use.
It’s important to note that you may need to recalibrate your tablet periodically, especially if you notice any inaccuracies or changes in its performance over time. Most Wacom tablets allow you to recalibrate them through the same software or control panel that you used for the initial calibration.
With your tablet successfully calibrated, you can now proceed to customize its settings according to your preferences. In the next section, we will guide you through the process of customizing your tablet settings.
Customizing Tablet Settings
Customizing the settings of your Wacom tablet allows you to personalize your user experience and optimize it according to your workflow. Whether you prefer specific pen sensitivity levels, express keys configuration, or application-specific settings, the Wacom tablet software provides various options for customization. Follow the steps below to customize your tablet settings:
Step 1: Launch the Wacom Tablet Properties or Wacom Control Panel software on your computer. You can typically find it in your system tray or by searching for it in the Start menu.
Step 2: Once the software is open, explore the different tabs or sections available. These may include Pen Settings, ExpressKeys, Touch, and more, depending on your tablet model and software version.
Step 3: Select the desired tab or section to access the specific settings you want to customize. For example, if you want to adjust pen sensitivity, navigate to the Pen Settings or Pen Pressure section.
Step 4: Within each section, you’ll find various options to customize. These may include adjusting pen sensitivity, assigning specific functions to the express keys, configuring touch gestures, or setting application-specific settings.
Step 5: Make the desired changes to the settings according to your preferences. Take your time to experiment with different options and see how they affect your tablet’s performance and overall user experience.
Step 6: Once you have customized the settings to your liking, click on the Apply or OK button to save the changes. Some tablets may require you to restart your computer for the settings to take effect.
Remember that the customization options available may vary depending on your tablet model and software version. Refer to the user manual or online resources for your specific tablet model to explore all the available customization options.
With your tablet settings customized, it’s time to test its functionality and ensure that everything is working as expected. In the next section, we will guide you through the testing process.
Testing the Tablet
After you have installed and customized your Wacom tablet, it’s important to test its functionality to ensure that everything is working as expected. Testing your tablet will allow you to verify that pen pressure, touch gestures, express keys, and other features are functioning properly. Follow the steps below to test your Wacom tablet:
Step 1: Open your preferred drawing or graphic editing application, such as Adobe Photoshop, Corel Painter, or Autodesk Sketchbook.
Step 2: Create a new canvas or open an existing project to work on.
Step 3: Use the stylus that came with your Wacom tablet to draw and make strokes on the canvas. Pay attention to the pen pressure sensitivity and how it affects the thickness or opacity of your lines.
Step 4: Try using touch gestures on the tablet’s surface, such as pinch-to-zoom or swipe gestures, to navigate and interact with the canvas or application.
Step 5: Test the functionality of the express keys by assigning different functions to them, such as undo/redo, brush size adjustment, or zoom in/out, and ensure that they are working correctly.
Step 6: Experiment with any other features or settings that you customized in the previous section and observe how they affect the tablet’s performance.
Step 7: If you encounter any issues, such as unresponsiveness or inconsistency in pen pressure or touch sensitivity, refer to the troubleshooting section of the Wacom tablet documentation or visit the manufacturer’s website for assistance.
By thoroughly testing your Wacom tablet, you can familiarize yourself with its capabilities and ensure that it meets your expectations. If everything is functioning correctly, congratulations! You are now ready to unleash your creativity and enjoy the intuitive and precise control that a Wacom tablet offers.
In the next section, we will address some common issues that you may encounter while using your Wacom tablet and provide troubleshooting tips to help you resolve them.
Troubleshooting Common Issues
While setting up and using your Wacom tablet, you may encounter some common issues. Don’t worry! Here are a few troubleshooting tips to help you resolve these issues:
Issue 1: Tablet not being recognized: If your computer does not detect your Wacom tablet, try the following steps:
- Ensure that the tablet is properly connected to the computer via the USB cable.
- Try connecting the tablet to a different USB port on your computer.
- Restart your computer and check if it detects the tablet upon reboot.
- If the issue persists, reinstall the tablet driver and ensure that you are using the latest version.
Issue 2: Pen pressure not working: If you’re experiencing issues with pen pressure sensitivity, try the following troubleshooting steps:
- Ensure that you have enabled pen pressure sensitivity in the settings of your drawing or graphic editing application.
- Calibrate your tablet again to ensure proper alignment between the pen and the screen.
- Check if the pen nib is worn out and needs replacement. Worn nibs may affect pressure sensitivity.
- In some cases, certain application updates may cause compatibility issues. Check the application’s website or support forums to see if any known issues are reported.
Issue 3: Express keys not functioning: If the express keys on your tablet are not working correctly, try the following troubleshooting steps:
- Ensure that you have assigned the desired functions to the express keys in the tablet settings.
- Verify that the correct application is being linked to the express key configurations. Some tablets allow you to assign different functions for different applications.
- If the issue persists, try resetting the tablet settings to their default values and reconfigure the express keys.
Issue 4: Inconsistent touch sensitivity: If you’re experiencing inconsistency in touch sensitivity on your tablet’s surface, try the following troubleshooting steps:
- Clean the tablet’s surface with a soft cloth to remove any dust or debris that may affect touch sensitivity.
- Ensure that your fingers are clean and dry when using touch gestures on the tablet.
- If the issue persists, check for any firmware updates for your tablet and install them to address any known touch sensitivity issues.
If none of these troubleshooting tips resolve the issue, it’s recommended to contact the Wacom support team or consult the manufacturer’s website for further assistance. They will be able to provide specific guidance based on your tablet model and the issues you are facing.
With these troubleshooting tips, you can overcome common issues and ensure a smooth experience with your Wacom tablet.
Now that you’re equipped with the knowledge to troubleshoot common issues, we can conclude this guide. Remember to regularly update drivers and software to ensure optimal performance. Enjoy your Wacom tablet and unleash your creativity!
Conclusion
Congratulations on successfully installing and setting up your Wacom tablet on Windows 10! You’ve learned how to download and install the driver, connect the tablet to your computer, calibrate it, customize the settings, test its functionality, and troubleshoot common issues. As a result, you can now fully enjoy the benefits of a Wacom tablet’s intuitive and precise control for your digital art, graphic design, and other creative endeavors.
Remember to periodically check for driver and software updates from Wacom to ensure that your tablet continues to run smoothly and takes advantage of any new features or enhancements. Additionally, proper maintenance, such as cleaning the tablet’s surface and replacing worn-out pen nibs, will help optimize your tablet’s performance and prolong its lifespan.
Whether you’re a professional artist or a hobbyist, a Wacom tablet offers a more natural and immersive way to express your creativity. Take the time to explore the various customization options and find the settings that work best for your artistic workflow. Experiment with different pen pressures, express key configurations, and touch gestures to tailor your tablet to your specific needs.
If you encounter any further issues or questions about your Wacom tablet, don’t hesitate to reach out to the Wacom support team or consult the manufacturer’s website for additional resources and assistance. They have a wealth of knowledge and expertise to help you get the most out of your tablet.
Now, take your new Wacom tablet for a spin and let your creativity soar! Whether you’re sketching, painting, editing photos, or designing, the Wacom tablet will be your trusted tool in bringing your artistic visions to life. Embrace the endless possibilities and enjoy your creative journey!