Introduction
Upgrading the operating system (OS) on your tablet can bring new features, increased performance, and improved security. If you’re feeling adventurous and want to install a new Android OS version on your tablet, this guide is for you.
Before you begin the process of installing a new Android OS on your tablet, it’s important to note that this is an advanced procedure that requires technical know-how. Make sure you are comfortable with the risks involved, such as potential data loss and voiding the device’s warranty.
In this article, we will walk you through the steps to install a new Android OS on your tablet. From checking compatibility to flashing the new OS, we’ve got you covered. Just follow each step carefully, and you’ll be on your way to experiencing the latest and greatest Android features.
It’s worth mentioning that different tablets may have variations in the installation process based on the manufacturer and model. Therefore, while this guide provides a general overview, it’s crucial to refer to your device’s specific instructions and consult the manufacturer’s website for any additional information.
Are you ready to breathe new life into your tablet? Let’s dive into the step-by-step process of installing a new Android OS.
Step 1: Check Compatibility
Before embarking on the journey of installing a new Android OS on your tablet, you need to ensure that your device is compatible with the desired OS version. Not all tablets can support the latest Android updates, so it’s essential to verify compatibility to avoid potential issues.
The first step is to visit the official website of your tablet’s manufacturer. Look for the list of supported devices and check if your tablet model is included. Typically, manufacturers provide a compatibility matrix that outlines the supported OS versions for each device.
If your tablet is listed as compatible with the desired Android OS version, that’s great news! You can proceed with the installation process. However, if your tablet is not compatible, it means that the manufacturer has not released an official update for your device.
In this case, you have two options. Firstly, you can check if there are any custom ROMs available for your tablet that offer the desired Android OS version. Custom ROMs are operating systems created by third-party developers and may provide support for unsupported devices. However, keep in mind that installing custom ROMs can void your warranty and carry risks, so proceed with caution.
The second option is to consider upgrading your tablet to a new model that supports the desired Android OS version officially. This might be a more straightforward and hassle-free solution, ensuring proper optimization and compatibility.
Remember that each Android OS version comes with specific hardware requirements, and installing an OS incompatible with your tablet can lead to performance issues, instability, and even bricking your device. So, double-check the compatibility before proceeding to the next step.
Step 2: Backup Your Data
Prior to installing a new Android OS on your tablet, it’s crucial to backup all your important data. This step ensures that your files, apps, contacts, and settings are safely stored, minimizing the risk of data loss during the installation process.
There are several ways to backup your data on an Android tablet:
- Cloud backup: Utilize cloud storage services like Google Drive, Dropbox, or OneDrive to automatically backup your photos, videos, documents, and other files. Ensure that your device is connected to a stable internet connection, enable automatic syncing, and let the cloud services do the work for you.
- Local backup: Use an SD card or USB drive to manually transfer your photos, videos, and documents. Simply connect the storage device to your tablet, navigate to the desired files, and copy them to the external storage. This method provides a physical copy of your data, which can be easily restored on your tablet later.
- Backup apps and settings: In the Settings menu of your tablet, look for a “Backup & Reset” or similar option. Ensure that the “Backup My Data” and “Automatic Restore” options are enabled. This will backup your app data, Wi-Fi passwords, and device settings to your Google account, making it easy to restore them during the setup process.
Remember to select the most suitable backup method based on the amount of data you have and the available storage options. It’s always better to err on the side of caution and backup more than you think you need.
Once you have successfully backed up your data, verify that the backup is accessible and complete. Check that all your essential files are safely stored and ready for restoration after the new Android OS installation is complete.
By taking the time to backup your data, you can enjoy peace of mind knowing that your valuable information is safely secured. Now, let’s move on to the next step of installing a new Android OS on your tablet.
Step 3: Download the Latest Android OS Version
Once you have checked the compatibility of your tablet and backed up your data, the next step is to download the latest Android OS version that you want to install on your device.
Visit the official Android website or the website of the custom ROM developer to find the appropriate Android OS version for your tablet. Make sure to choose the version that is compatible with your tablet’s model and meets your requirements in terms of features and functionality.
Downloading the Android OS can be done in two ways:
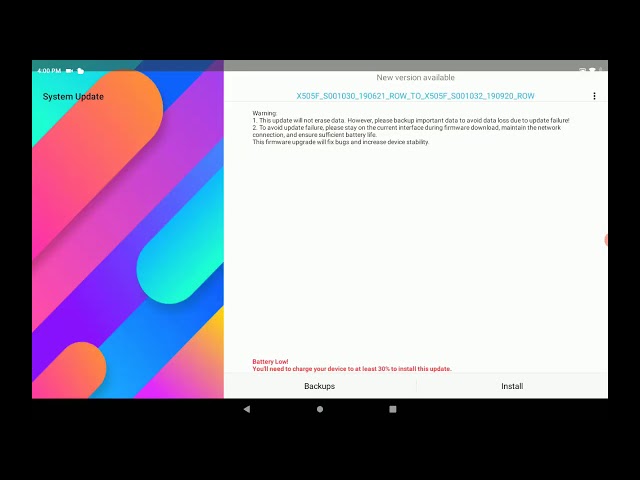
- Official OTA update: If an official update is available for your tablet, you can download it directly from the system settings of your device. Go to the “About Tablet” or “Software Update” section in the settings menu and check for any available updates. If an update is found, follow the on-screen instructions to download and install the new OS version.
- Custom ROM: If you’ve decided to install a custom ROM, you’ll need to visit the developer’s website or a reputable Android customization forum. Look for the specific ROM that matches your tablet model and download the corresponding file. Custom ROMs are typically provided in a ZIP or TWRP-flashable format.
Ensure that you download the Android OS version from a reliable and trusted source to avoid any potential malware or compatibility issues. It’s advisable to double-check the download file’s integrity by verifying the MD5 or SHA-256 checksum provided by the source.
Depending on the size of the Android OS update or custom ROM file, make sure you have a stable internet connection and enough storage space on your tablet to accommodate the download. It’s best to download the file on your computer and transfer it to your tablet via USB connection if needed.
With the latest Android OS version downloaded and ready, you can proceed to the next steps of enabling USB debugging and installing necessary drivers. Let’s continue our journey towards a new and improved Android experience!
Step 4: Enable USB Debugging
Before you can proceed with installing a new Android OS on your tablet, you need to enable USB debugging. USB debugging allows your tablet to communicate with the computer, enabling the transfer of files and commands during the installation process.
Enabling USB debugging is a simple process:
- On your tablet, go to the “Settings” menu.
- Scroll down and tap on “About Tablet” or “About Device”.
- Locate the “Build Number” option and tap on it seven times. This will enable Developer Options on your tablet.
- Go back to the main “Settings” menu and you’ll see “Developer Options”. Tap on it.
- Scroll down and find “USB Debugging” or “Android Debugging”. Toggle the switch to enable it.
Once USB debugging is enabled, you can connect your tablet to the computer using a USB cable. Your tablet may prompt you to authorize the computer’s connection. Make sure to grant permission to establish a trusted connection.
If you encounter any issues during the process, make sure you have the necessary USB drivers installed on your computer. Manufacturers often provide specific drivers that allow smooth communication between the tablet and computer. Visit the manufacturer’s website or search for the drivers online based on your tablet’s model.
Enabling USB debugging is a crucial step in the installation process, as it ensures a seamless connection between your tablet and computer. Once enabled, you’re ready to move on to the next steps, such as installing necessary drivers and unlocking the bootloader.
Step 5: Install Necessary Drivers
To establish a stable and efficient connection between your tablet and computer during the installation process of a new Android OS, it is essential to have the necessary drivers installed on your computer.
The specific drivers required may vary depending on the manufacturer and model of your tablet. Manufacturers often provide their own set of drivers, which can be found on their official website or included in the firmware package. Follow these steps to install the necessary drivers:
- Visit the official website of your tablet’s manufacturer and navigate to the support or downloads section.
- Search for the appropriate drivers for your tablet model and download them to your computer.
- Once the drivers have been downloaded, locate the file and double-click to start the installation process.
- Follow the on-screen instructions provided by the driver installer.
- Restart your computer after the installation is complete.
Keep in mind that some tablets may require additional drivers beyond the basic ones provided by the manufacturer. These additional drivers are often specific to certain features or functionalities of the tablet, such as camera drivers or touchscreen drivers. It is advisable to consult the manufacturer’s website and forums to identify any additional drivers that may be necessary.
If you are planning to install a custom ROM, you may need to install specific drivers recommended by the custom ROM developer. These drivers are often included in the custom ROM package or provided separately on the developer’s website.
Installing the necessary drivers ensures that your tablet and computer can communicate effectively, allowing for a smooth installation process. With the drivers installed, you are one step closer to installing a new Android OS on your tablet.
Step 6: Unlock Bootloader
In order to install a new Android OS on your tablet, you may need to unlock the bootloader. The bootloader is a piece of software that runs when the device is powered on, and it helps load the operating system. By default, the bootloader is locked to prevent unauthorized modifications to the system.
Please note that unlocking the bootloader is an advanced procedure and could have risks associated with it. It may void your warranty and can potentially brick your tablet if not done correctly. Ensure that you understand the implications before proceeding.
The process to unlock the bootloader may vary depending on the tablet’s manufacturer and model. Generally, the steps to unlock the bootloader are as follows:
- Visit the official website of your tablet’s manufacturer and check if they provide instructions on how to unlock the bootloader. Some manufacturers offer official bootloader unlock tools or specific instructions for their devices.
- Enable USB debugging on your tablet, as mentioned in the previous step.
- Connect your tablet to the computer using a USB cable.
- Open a command prompt or terminal on your computer and navigate to the location where you have installed the Android SDK or platform tools.
- Enter the necessary command to initiate the bootloader unlocking process. The command may vary, but it is usually something like
adb reboot bootloader. - Once your tablet is in bootloader mode, use the appropriate command to unlock the bootloader. This command could be
fastboot oem unlockor similar depending on your device. - Follow the on-screen instructions on your tablet to confirm the bootloader unlocking process.
- After the bootloader is successfully unlocked, your tablet will reboot.
It’s important to note that unlocking the bootloader will erase all the data on your tablet, so ensure that you have taken a backup of your important files.
Unlocking the bootloader provides you with the freedom to install custom firmware, such as custom ROMs or the new Android OS version you desire. Once the bootloader is unlocked, you can proceed to the next step – installing a custom recovery.
Step 7: Install Custom Recovery
After unlocking the bootloader, the next step in installing a new Android OS on your tablet is to install a custom recovery. A custom recovery allows for advanced system-level operations, such as flashing custom ROMs, creating backups, and performing system maintenance tasks.
One of the most popular custom recovery options for Android devices is TWRP (Team Win Recovery Project). To install TWRP or any other custom recovery, follow these general steps:
- Visit the official website of the custom recovery you want to install, such as TWRP’s website.
- Search for your tablet’s model in the list of supported devices. Make sure you download the correct recovery image specifically built for your tablet.
- Download the custom recovery image (usually a .img or .tar file) to your computer.
- Enable USB debugging on your tablet if it’s not already enabled, as explained in previous steps.
- Connect your tablet to the computer using a USB cable.
- Open a command prompt or terminal on your computer and navigate to the location where you have installed the Android SDK or platform tools.
- Enter the necessary command to reboot your tablet into bootloader mode. This command is usually something like
adb reboot bootloader. - Once your tablet is in bootloader mode, use the appropriate command to flash the custom recovery image onto your tablet. The exact command may vary, but it typically looks like
fastboot flash recovery [recovery_image_file_name]. - After the custom recovery is successfully flashed, you can reboot your tablet.
Now that you have installed a custom recovery, you have gained additional control over your tablet’s operating system. With the custom recovery in place, you are ready to perform advanced system-level operations, including flashing the new Android OS image.
Keep in mind that using a custom recovery involves risks, and any improper actions may result in irreversible damage to your tablet. Make sure to read the documentation and follow the instructions provided by the custom recovery developer to ensure a successful installation.
Step 8: Wipe Data and Cache Partitions
Before proceeding with the installation of a new Android OS on your tablet, it is important to wipe the data and cache partitions. This step ensures a clean slate and eliminates any potential conflicts or compatibility issues between the old and new OS versions.
Wiping the data and cache partitions will erase all the existing data on your tablet, including apps, settings, and personal files. It is crucial to back up your important data before proceeding, as it cannot be recovered once wiped.
Here’s how you can perform the data and cache wipe:
- Boot into the custom recovery you installed during the previous step. Typically, you can do this by turning off your tablet, then pressing and holding a specific combination of buttons (such as Volume Up + Power) to enter the recovery mode.
- Once you’re in the recovery mode, use the volume buttons to navigate and the power button to select options.
- Find the “Wipe” or “Wipe Data/Factory Reset” option and select it.
- Confirm your choice to wipe data by selecting “Yes” or “Confirm” when prompted.
- Next, find the “Wipe Cache Partition” option and select it.
- Confirm the cache wipe by selecting “Yes” or “Confirm” when prompted.
- Wait for the process to complete, which may take a few minutes.
- Once the data and cache partitions have been wiped, go back to the main menu of the custom recovery.
Performing a data and cache wipe ensures a clean installation of the new Android OS, free from any residual files or settings from the previous OS. This step is crucial to avoid compatibility issues or performance problems.
After completing the data and cache wipe, you’re now ready for the next step: flashing the new Android OS onto your tablet. This exciting step will bring a fresh and updated user experience to your device.
Step 9: Flash the New Android OS
Now that you have prepared your tablet by checking compatibility, backing up data, unlocking the bootloader, installing a custom recovery, and wiping the data and cache partitions, it’s time to flash the new Android OS onto your tablet.
Flashing refers to the process of installing a new operating system on your device. Here are the general steps to flash the new Android OS:
- Connect your tablet to the computer using a USB cable.
- Copy the downloaded Android OS file (usually a .zip file) to the internal storage or SD card of your tablet.
- Boot your tablet into custom recovery by turning it off and then pressing and holding the appropriate buttons (such as Volume Up + Power) to enter recovery mode.
- In the custom recovery menu, select the “Install” or “Install ZIP” option.
- Navigate to the location where you stored the Android OS file, and select it.
- Confirm the installation by swiping or selecting “Yes” when prompted.
- Wait for the installation process to complete. This may take a few minutes.
- Once the installation is finished, go back to the main menu and select the “Reboot System” option.
During the installation process, the custom recovery will extract and install the new Android OS onto your tablet. It may also apply additional patches or modifications, depending on the custom recovery and the Android OS version you are installing.
Keep in mind that the installation process may vary slightly depending on the custom recovery you are using. Some recoveries may have additional options or settings that you can configure during the installation.
After rebooting your tablet, you will be greeted with the fresh new Android OS. Take some time to explore the updated interface, new features, and improvements that the new OS version brings.
Congratulations! You have successfully flashed the new Android OS onto your tablet. Enjoy the enhanced functionality and improved user experience that the latest Android OS provides!
Step 10: Reboot and Enjoy Your New Android OS
After completing the installation of the new Android OS, it’s time to reboot your tablet and immerse yourself in the exciting features and improvements that the new OS brings.
To reboot your tablet and start using the new Android OS, follow these simple steps:
- In the custom recovery menu, select the “Reboot System” or “Reboot” option. This will initiate the reboot process.
- Wait for your tablet to restart. The first boot after installing a new OS may take a bit longer than usual as the system initializes and sets up the new environment.
- Once your tablet has booted up, you will be prompted to go through the initial setup process. Follow the on-screen instructions to configure your device settings, connect to Wi-Fi, and sign in to your Google account.
- Restore your backed-up data and settings by following the prompts during the setup process. If you used the backup options provided by Android, you can easily restore your apps, Wi-Fi passwords, and other settings from your Google account.
- Once the setup is complete, explore and indulge in the new Android OS experience. Discover the enhanced features, improved performance, and user interface changes that the new OS version offers.
Take some time to check out the revamped notification center, explore the updated app drawer, and experiment with any new functionalities specific to the Android OS version you installed.
Remember that installing a new Android OS on your tablet may come with a learning curve as you familiarize yourself with the changes and new features. Be patient, and don’t hesitate to explore online resources or forums for guidance and tips on getting the most out of your new Android OS.
Congratulations on successfully installing and booting up your new Android OS! Enjoy the exciting new possibilities and improved performance that the latest OS version brings to your tablet.


