Introduction
Android is a versatile and customizable operating system that powers the majority of smartphones and tablets around the world. One of the key advantages of Android is its ability to install applications outside of the official Google Play Store. These applications are usually in the form of APK files, also known as Android Package files.
Installing APK files on your Android device allows you to access a wide range of apps that may not be available on the official app store. Whether it’s a popular app that hasn’t been released on the Play Store or a custom app developed by a third-party, installing APK files gives you the flexibility to explore a variety of applications.
In this guide, we will take you through the step-by-step process of installing APK files on your Android device. By the end of this tutorial, you will be able to successfully install any APK file and start using the app on your device.
Before we dive into the installation process, it’s important to note that installing APK files from unknown sources can pose potential security risks. Always ensure that you download APK files from trusted sources to minimize the risk of malware or other malicious software being installed on your device.
Now, let’s get started with the installation process!
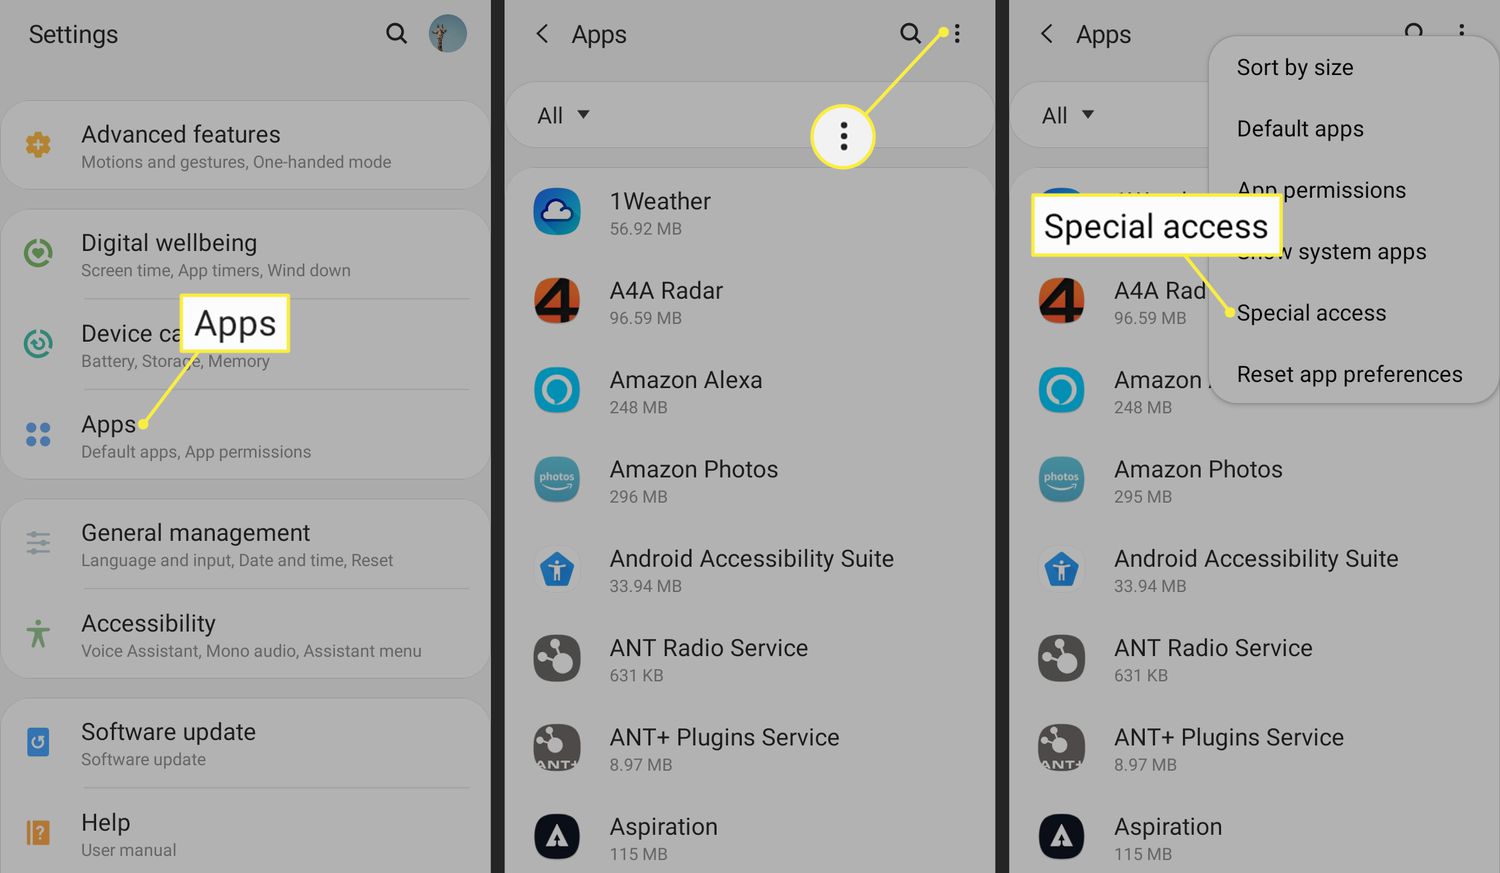
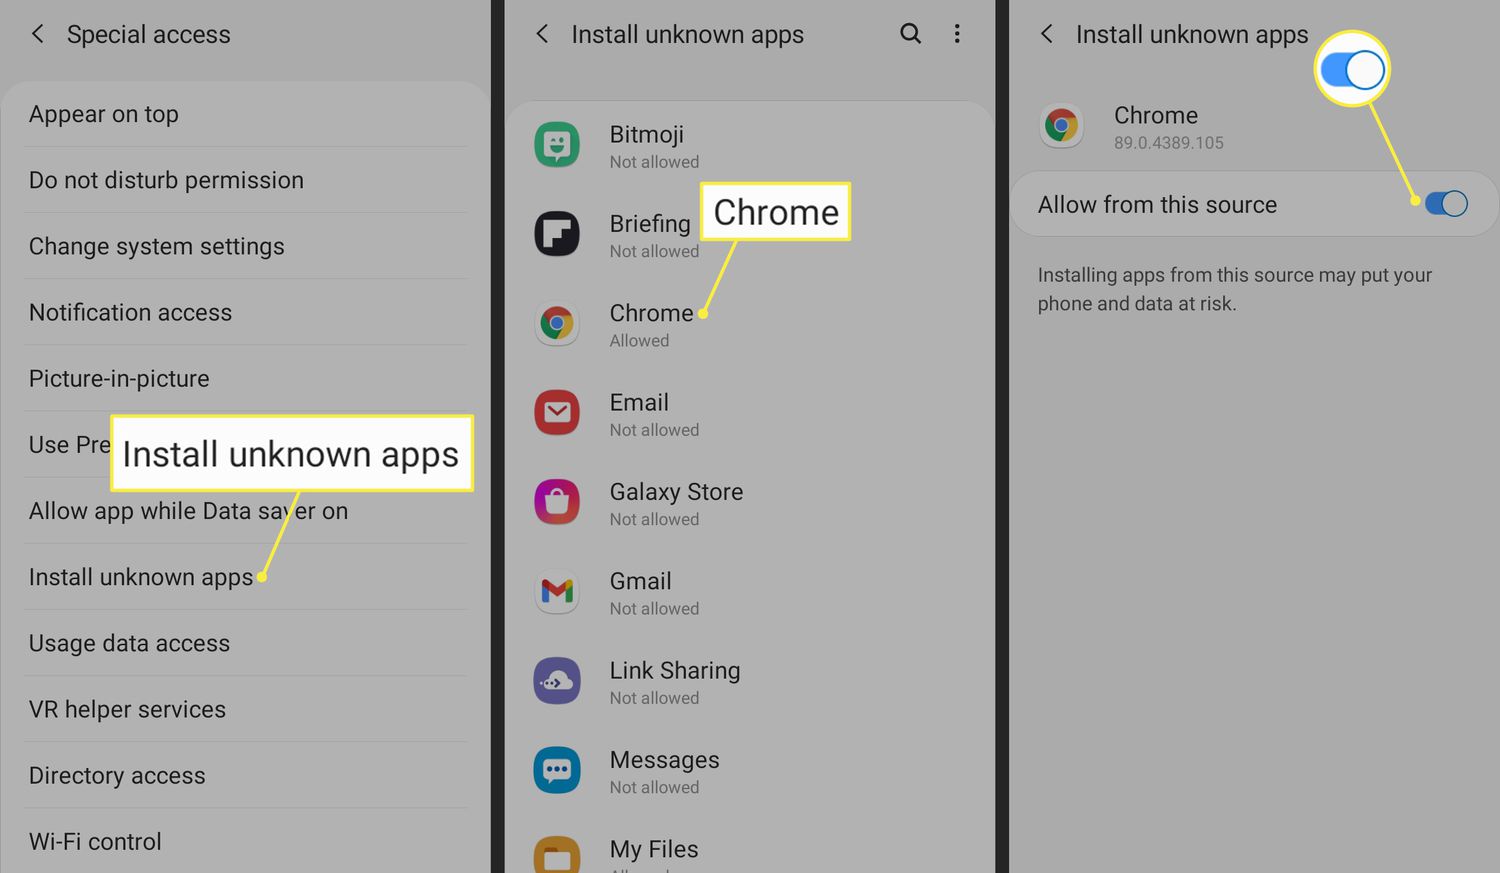
Step 1: Enable Unknown Sources
Before you can install an APK file on your Android device, you need to enable the “Unknown Sources” option in your device settings. By default, Android only allows the installation of apps from the Google Play Store for security reasons. By enabling Unknown Sources, you are granting your device permission to install apps from other sources.
Here’s how you can enable Unknown Sources:
- Go to the “Settings” on your Android device. You can find it in the app drawer or by swiping down from the top of your screen and tapping the gear icon.
- Scroll down and tap on “Security” or “Privacy” depending on your device model.
- Look for the “Unknown Sources” option. It may be located under the “Device Administration” or “Applications” section. The exact location may vary depending on your device.
- Toggle the switch next to “Unknown Sources” to enable it. You will be presented with a warning message stating the potential risks associated with installing apps from unknown sources. Read the message carefully and tap “OK” to proceed.
Once you have enabled Unknown Sources, you are now ready to install APK files on your Android device. However, it’s important to exercise caution and only download APK files from reliable sources to avoid any security issues.
Now that Unknown Sources is enabled, let’s move on to the next step – downloading the APK file.
Step 2: Download the APK File
Once you have enabled the “Unknown Sources” option on your Android device, you can proceed to download the APK file of the app you want to install. APK files can be downloaded from various sources on the internet, including third-party app stores, developer websites, and trusted APK download sites.
Here’s how you can download an APK file:
- Open a web browser on your Android device.
- Search for the APK file of the app you want to install. You can use search engines or visit trusted APK download sites like APKMirror, APKPure, or Aptoide.
- Once you have found the APK file, tap on the download button or link to initiate the download process.
- Depending on your web browser and device settings, you may need to grant permission to download the APK file. Tap “Allow” or “Okay” to proceed.
- The APK file will now start downloading. The time taken for the download to complete will depend on the file size and your internet connection speed.
It’s important to note that downloading APK files from external sources can be risky, as they may contain malware or other malicious content. To minimize the risk, always download APK files from trusted sources.
Once the APK file has finished downloading, you are now ready to proceed to the next step – installing the APK file on your Android device.
Step 3: Install the APK File
Now that you have successfully downloaded the APK file on your Android device, it’s time to proceed with the installation process. Installing an APK file is a straightforward process and requires just a few simple steps.
Here’s how you can install an APK file:
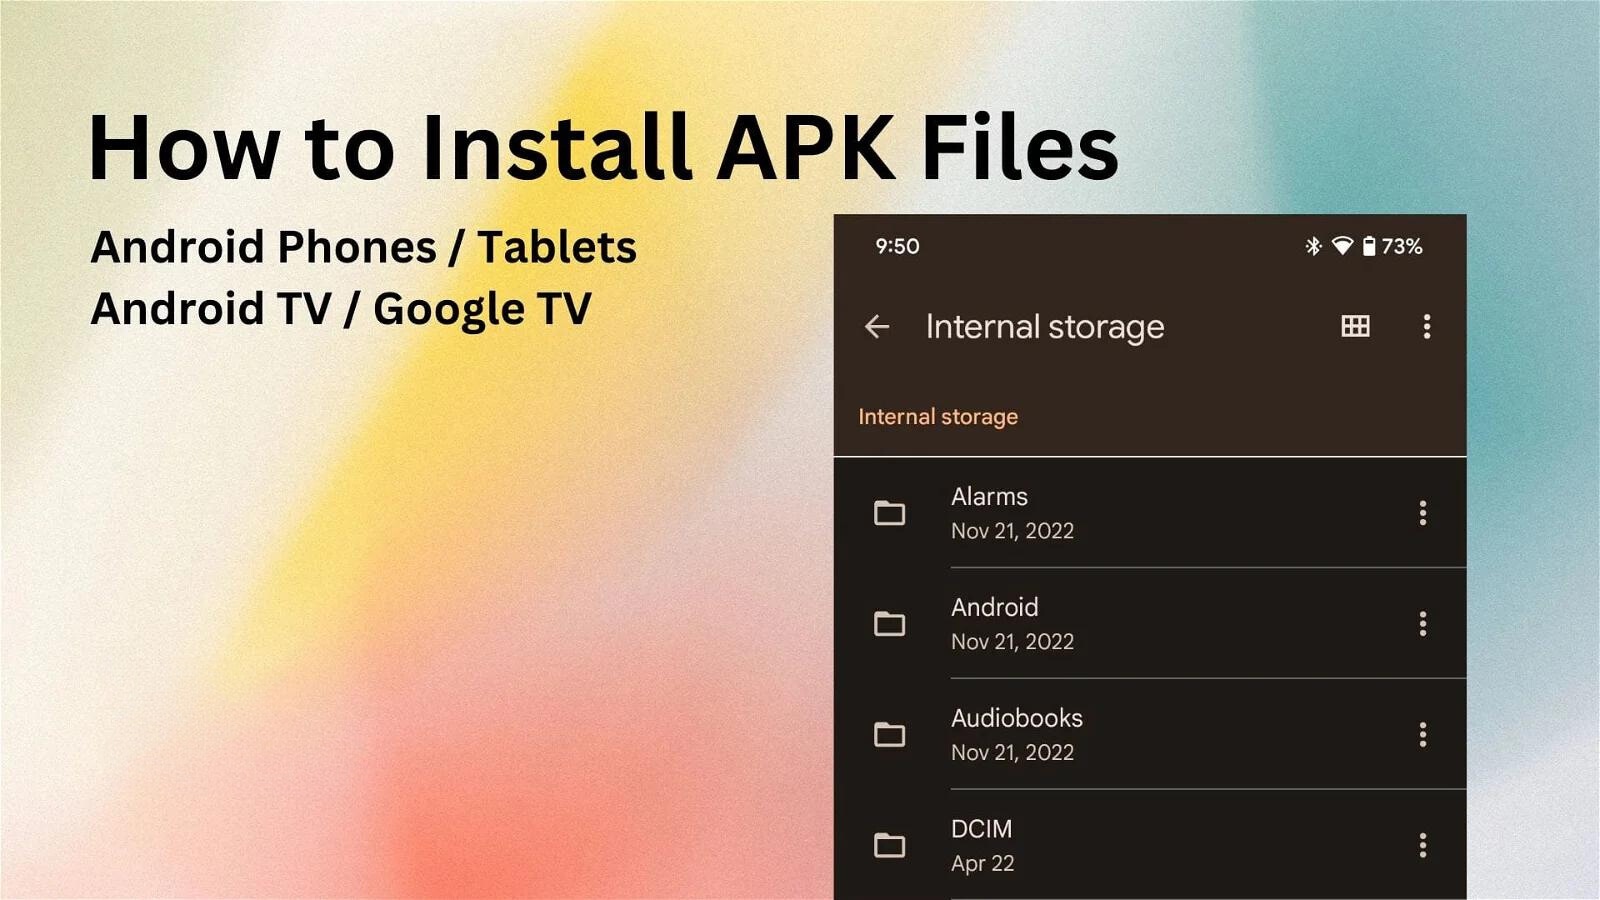
- Open the “Downloads” or “Files” app on your Android device. This app may have a different name depending on your device manufacturer or the file manager app you have installed.
- Navigate to the folder where you saved the APK file. By default, it is usually located in the “Downloads” folder.
- Tap on the APK file to start the installation process. You may be prompted with a confirmation message asking if you want to install the app. Tap “Install” to proceed.
- The installation process may take a few moments. Once completed, you will see a confirmation message stating that the app has been installed successfully.
- If you have downloaded multiple APK files, repeat steps 3 and 4 for each APK file you want to install.
It’s important to note that during the installation process, the app may request certain permissions to access various features or data on your device. Carefully review the permissions and ensure that the app has a legitimate reason for requesting them. If you are unsure about certain permissions, you can choose to deny them or seek more information before proceeding with the installation.
With the APK file successfully installed on your device, you are now ready to move on to the next step – granting permissions to the app.
Step 4: Grant Permissions
After successfully installing the APK file on your Android device, you may need to grant certain permissions to the app in order for it to function properly. Permissions allow the app to access specific features or data on your device. It’s important to review these permissions and ensure that the app has a valid reason for requesting them.
Here’s how you can grant permissions to an app:
- Launch the app that you just installed. Depending on the app, you may be prompted with a series of permission requests as soon as you open it for the first time.
- Read each permission request carefully and decide whether you want to grant or deny access. If you trust the app and understand the need for the requested permissions, tap “Accept” or “Allow”.
- If you are unsure about certain permissions, you can tap on the permission request to get more information about why the app needs that particular access. Based on the information provided, you can make an informed decision to grant or deny access.
- It’s important to note that denying certain permissions may result in the app not functioning properly or missing out on certain features.
- After granting or denying the requested permissions, the app will continue to launch and you can start using it on your Android device.
It’s advisable to review the permissions of any app you install, even if it’s from a trusted source. This will help you maintain control over the data and features that the app can access on your device.
Now that you have granted the necessary permissions, you are ready for the final step – launching the app!
Step 5: Launch the App
With the APK file successfully installed and the necessary permissions granted, it’s time to launch the app on your Android device. Launching the app will allow you to start using its features and functionalities. The exact process may vary slightly depending on the app you installed.
Here’s how you can launch the app:
- Locate the app icon on your device’s home screen, app drawer, or in the list of recently installed apps. The app icon may have been automatically added to your home screen after installation.
- Tap on the app icon to launch it. If you are launching the app for the first time, it may take a few moments to set up or load any necessary data.
- Follow any on-screen instructions or prompts presented by the app during the initial launch. These instructions may include setting up an account, configuring preferences, or providing additional permissions.
- Once the app has finished initializing, you will be presented with the main interface or home screen of the app. You can now begin using the app and explore its features according to your preferences.
It’s worth noting that some apps may require an active internet connection or specific account credentials to function properly. Make sure your device is connected to the internet and, if necessary, provide the required login information to access the complete functionality of the app.
Congratulations! You have successfully installed and launched the app on your Android device. Enjoy exploring its features and make the most out of the app’s capabilities.
Conclusion
Installing APK files on your Android device gives you the freedom to explore a wide range of apps that may not be available on the official Google Play Store. With just a few simple steps, you can unlock a world of possibilities and customize your device to suit your needs.
Throughout this guide, we have covered the step-by-step process of installing APK files on your Android device. By enabling the “Unknown Sources” option, downloading the APK file, installing it, granting necessary permissions, and finally launching the app, you can easily enjoy the benefits of third-party apps.
However, it’s essential to exercise caution when installing APK files. Ensure that you only download APK files from trusted sources to minimize the risk of malware or other security threats. Always review the permissions requested by the app and make informed decisions about granting access to your device’s features and data.
By following these steps, you can safely and effortlessly install APK files on your Android device. So go ahead, explore new apps, and enhance your Android experience!