Introduction
Are you ready to take your graphics and gaming experience to the next level? Installing a new Nvidia graphics card is a fantastic way to enhance your computer’s performance and unlock new possibilities for gaming, design, and video editing. Whether you’re a seasoned tech enthusiast or a beginner looking to upgrade your system, this step-by-step guide will walk you through the process of installing an Nvidia graphics card with ease.
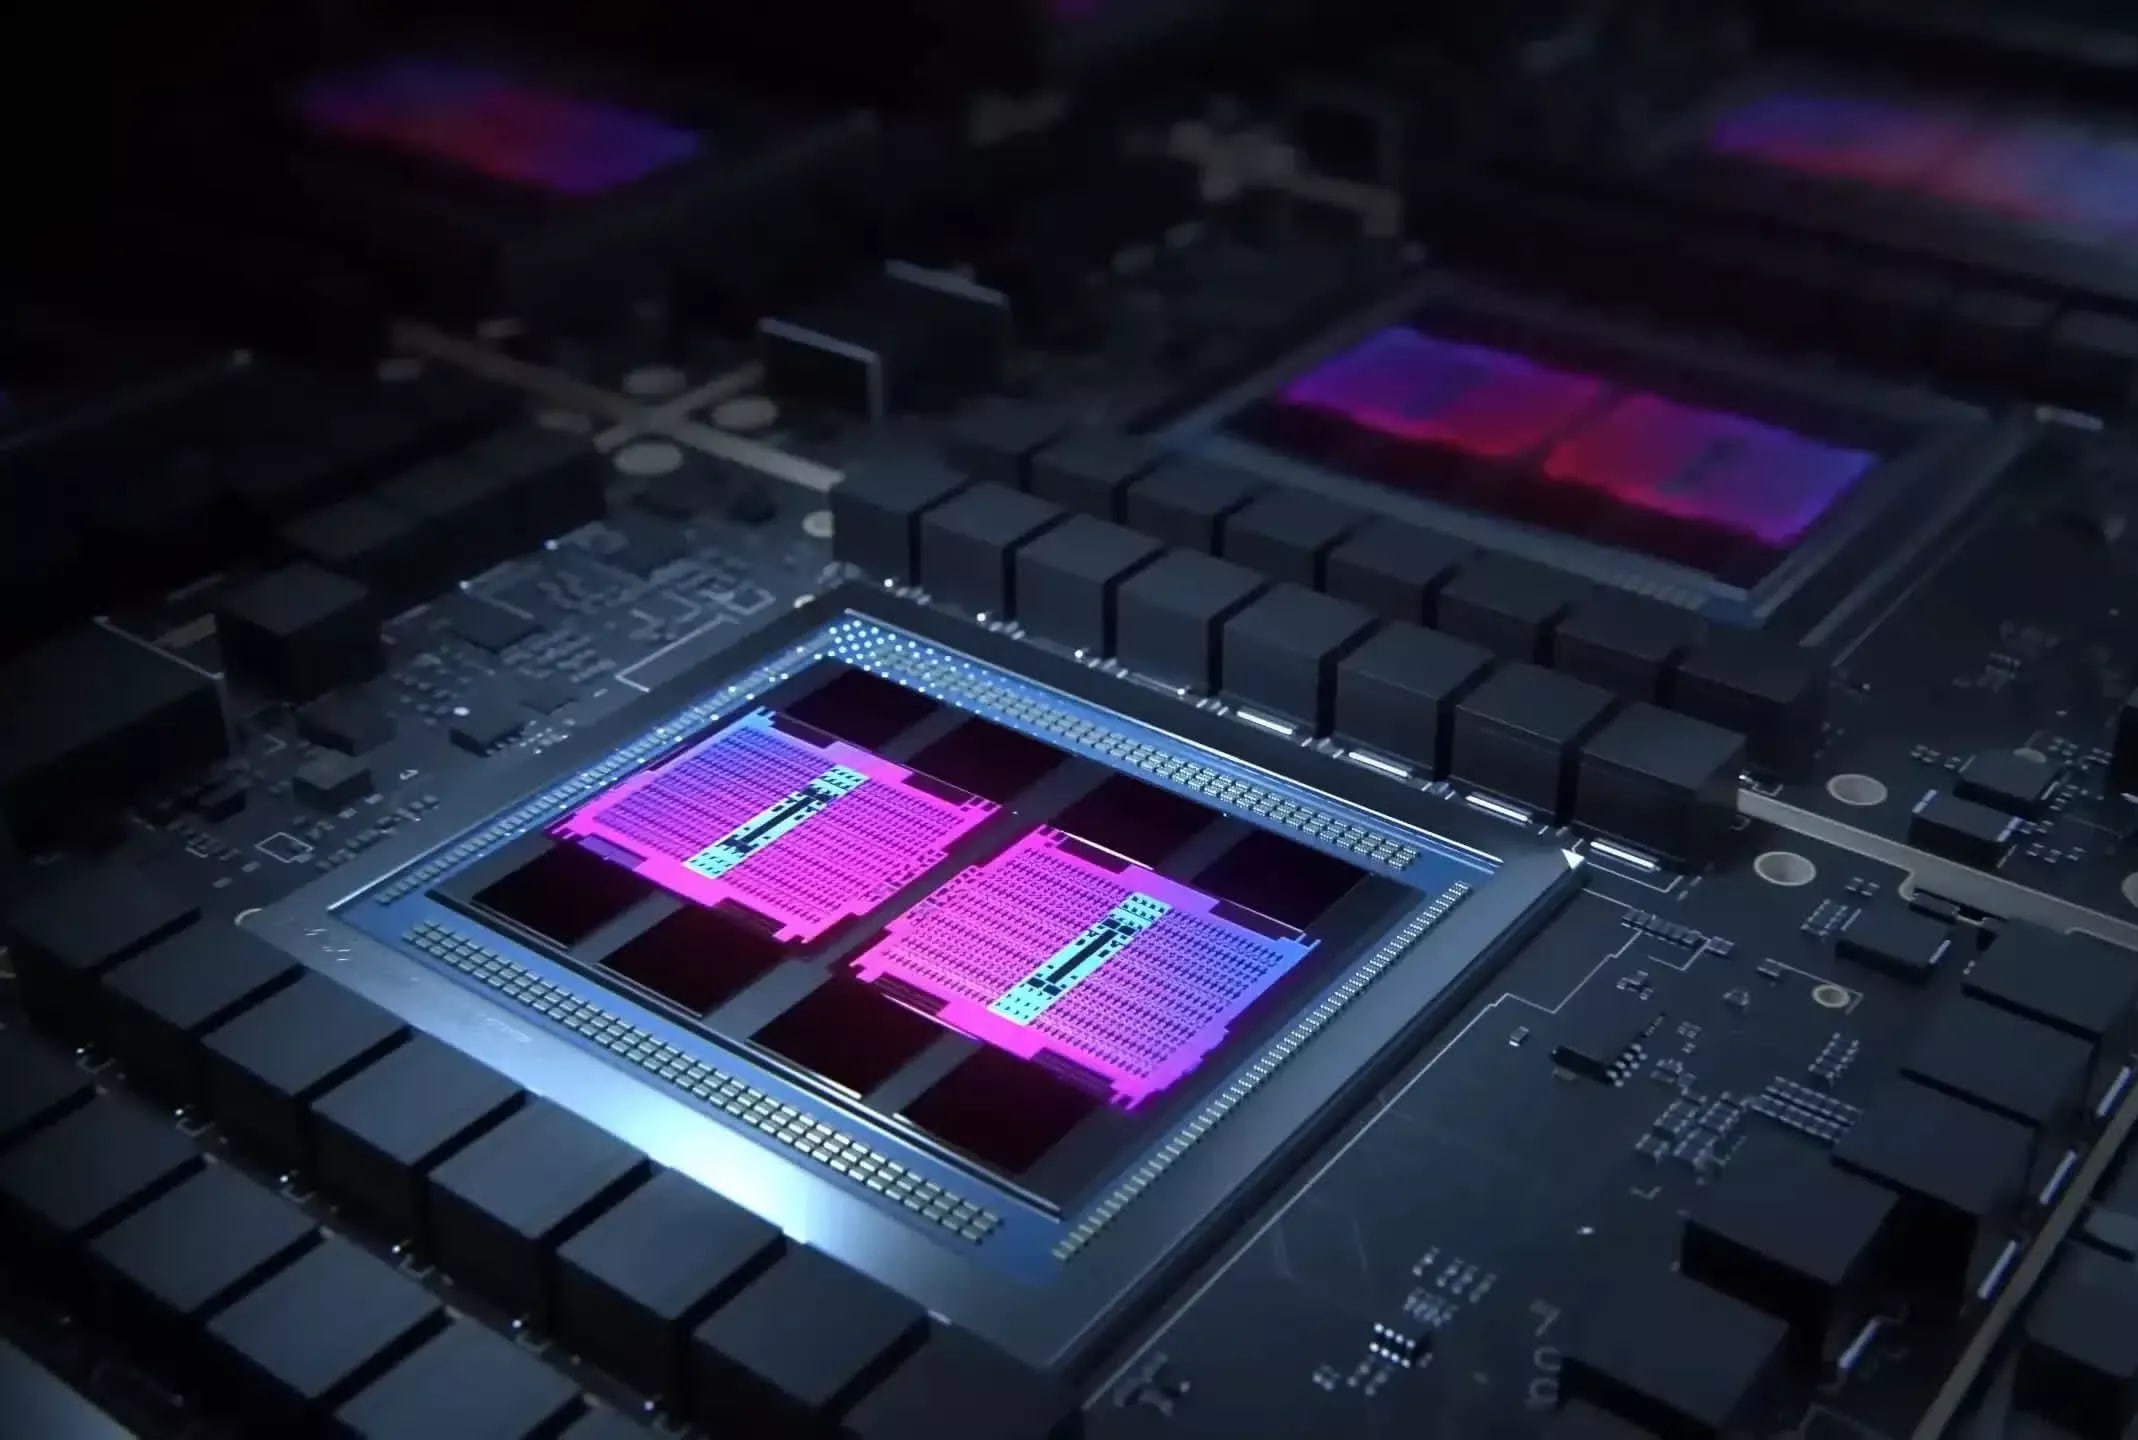
A graphics card is an essential component that handles the complex rendering of images and videos on your computer. Nvidia is renowned for producing high-quality graphics cards that offer exceptional performance and visual fidelity. By installing an Nvidia graphics card, you can enjoy smoother gameplay, faster video rendering, and improved graphics quality.
Before diving into the installation process, it’s important to choose the right Nvidia graphics card for your needs. Nvidia offers a range of graphics cards with varying specifications and performance levels. Consider factors such as your budget, desired performance, and compatibility with your system. Make sure to research the specific model and its requirements to ensure a smooth installation process.
In this guide, we will cover the necessary steps to install your new Nvidia graphics card. We’ll explore how to prepare for the installation, open your computer case, remove the old graphics card, insert the new graphics card, connect power cables, and reassemble your computer case. Additionally, we’ll discuss how to install graphics card drivers and test your new graphics card to ensure it’s functioning optimally.
Installing a new graphics card may seem intimidating at first, but with the right guidance and a bit of caution, the process can be straightforward and rewarding. So, let’s get started with the preparations and embark on this exciting journey of upgrading your computer’s graphics capabilities. By the end of this guide, you’ll have a powerful Nvidia graphics card installed and ready to take your computing experience to new heights.
Preparing for the Installation
Before you begin the installation process, there are a few essential steps you need to take to ensure a smooth and successful installation of your new Nvidia graphics card. By properly preparing for the installation, you’ll minimize the risk of any compatibility issues and maximize the performance benefits of your new hardware.
Firstly, ensure that you have the necessary tools for the installation. You will need a screwdriver to open your computer case and remove the old graphics card. It’s also a good idea to have an antistatic wristband or mat to protect your components from static electricity. This will prevent any potential damage that can occur from static discharge during the installation process.
Before proceeding, it’s crucial to back up any important data on your computer. While the installation process is generally safe, it’s always better to err on the side of caution. Backing up your data will ensure that you don’t lose any valuable files in case of any unforeseen circumstances during the installation.
Next, ensure that your computer’s power supply is sufficient to handle the new graphics card’s power requirements. Nvidia graphics cards can be demanding in terms of power consumption, so it’s essential to check if your power supply unit (PSU) has the necessary wattage and connectors. Refer to the manufacturer’s specifications for your specific graphics card model to determine the minimum PSU requirements. If your current PSU does not meet these requirements, you may need to upgrade it before installing the new graphics card.
It’s also crucial to check your computer’s compatibility with the new graphics card. Ensure that your motherboard has a compatible PCI Express slot for the graphics card. Typically, modern motherboards have PCI Express x16 slots, which are compatible with most Nvidia graphics cards. However, it’s always prudent to double-check the specifications of your motherboard to ensure compatibility.
Lastly, download the latest graphics card drivers from the Nvidia website. Having the most up-to-date drivers is crucial for optimal performance and compatibility with your new graphics card. Before installing the new graphics card, it’s recommended to have the drivers downloaded and ready so that you can easily install them after the hardware installation is complete.
By properly preparing for the installation, you can ensure a smooth and successful transition to your new Nvidia graphics card. Taking the time to gather the necessary tools, back up your data, evaluate your power supply, check compatibility, and download the latest drivers will set the stage for a hassle-free installation process. So, let’s move on to the exciting part and get ready to open up your computer case.
Opening Your Computer Case
To install your new Nvidia graphics card, you’ll first need to open up your computer case. Opening the case gives you access to the internal components where the graphics card will be installed. Here’s a step-by-step guide on how to open your computer case safely and effectively.
1. Shut down your computer: Before opening the case, make sure to shut down your computer properly. This will ensure that you’re working with the hardware in a powered-off state, reducing the risk of any accidents or damage.
2. Unplug all cables: Disconnect all external cables connected to your computer, including the power cable, monitor cable, and any other peripherals. This will ensure that there are no live connections that could pose a risk while working on the internal components.
3. Ground yourself: Static electricity can damage sensitive computer components, so it’s important to ground yourself before touching any internal parts. You can do this by touching a metal object such as the computer case or using an anti-static wristband. This will discharge any built-up static electricity and prevent it from damaging the hardware.
4. Remove the side panel: Most computer cases have a side panel that can be easily removed to access the internal components. Look for screws or latches on the back or side of the case that secure the panel. Unscrew the screws or release the latches and gently slide or lift off the panel. Be careful not to apply excessive force or damage any components inside.
5. Set the panel aside: Once the side panel is removed, set it aside in a safe place. This will prevent it from getting misplaced or damaged during the installation process.
6. Inspect the internal components: With the side panel removed, you’ll have a clear view of the internal components of your computer. Take a moment to inspect the layout and familiarize yourself with the various parts. This will make it easier to locate the current graphics card and identify the slot where the new graphics card will be installed.
By following these steps, you can safely and effectively open your computer case in preparation for installing your new Nvidia graphics card. Remember to exercise caution and avoid touching any components unless necessary. With the case open, you’re now ready to proceed to the next step of removing the old graphics card and making way for the new one.
Removing the Old Graphics Card
Before installing your new Nvidia graphics card, you’ll need to remove the old graphics card from your computer. Removing the old card is a crucial step in the installation process, and here’s a step-by-step guide on how to do it safely and effectively.
1. Locate the current graphics card: Take a look inside your computer case and locate the existing graphics card. It will be inserted into a PCI Express slot on your motherboard and will have video output ports on the rear. Identify any screws or fasteners securing the graphics card to the case or motherboard.
2. Disconnect power cables: Carefully disconnect any power cables connected to the current graphics card. Some cards may have multiple power connectors, so be sure to remove all of them. Power connectors are usually located on the side or top of the graphics card and will have a latch or clip that needs to be gently pressed or released to remove the cables.
3. Remove any screws or fasteners: If the graphics card is secured with screws or fasteners, use a screwdriver to carefully remove them. Keep the screws in a safe place, as you may need them later for the new graphics card installation.
4. Disengage the locking mechanism: PCI Express slots have a locking mechanism to secure the graphics card in place. Locate the lever or clip on the end of the slot and carefully slide it to release the current graphics card. The graphics card should now be loose and can be gently lifted out of the slot.
5. Handle the graphics card with care: When removing the graphics card, handle it with care and avoid touching any exposed circuitry or connectors. Hold the graphics card by its edges and avoid applying excessive force, as this can cause damage.
6. Set aside the old graphics card: Once the old graphics card is removed, place it in an anti-static bag or on a non-conductive surface. It’s always a good idea to keep your old graphics card as a backup or for future use.
By following these steps, you can safely remove the old graphics card from your computer. With the old graphics card out of the way, you’re now ready to move on to the exciting part of installing your new Nvidia graphics card.
Inserting the New Graphics Card
Now that you’ve successfully removed the old graphics card from your computer, it’s time to insert the new Nvidia graphics card. Inserting the new card properly ensures a secure connection and optimal performance. Follow these step-by-step instructions to install your new graphics card with ease.
1. Identify the appropriate PCI Express slot: Look for an available PCI Express x16 slot on your motherboard. This is where the new graphics card will be inserted. Ensure that the slot is clear of any obstructions or dust.
2. Prepare the new graphics card: Remove the new graphics card from its packaging and handle it with care. Avoid touching any circuitry or connectors. Take note of any protective covers or tabs on the card and remove them if necessary.
3. Align the graphics card with the slot: Position the new graphics card above the PCI Express slot, aligning the connectors on the card with the slot on the motherboard. The gold contacts on the card should be facing down and the bracket at the rear of the card should line up with the corresponding opening in the case.
4. Insert the graphics card: Gently but firmly push the new graphics card into the PCI Express slot. Apply even pressure on both ends of the card until it is fully seated in the slot. The card should fit snugly, and you may hear a click as it locks into place.
5. Secure the graphics card: If your graphics card requires screws or fasteners to secure it to the case or motherboard, use a screwdriver to reattach them. Make sure not to overtighten, as this can damage the card or the motherboard.
6. Connect power cables: If your new graphics card requires additional power connections, refer to the card’s manual or documentation to identify the required connectors. Connect the power cables from your power supply to the appropriate ports on the graphics card. Ensure that they are securely attached and properly latched.
7. Double-check connections: Take a moment to double-check all connections. Ensure that the graphics card is fully inserted into the slot and securely fastened. Verify that the power cables are properly connected and that there are no loose cables or connections.
By following these steps, you can confidently insert your new Nvidia graphics card into your computer. The graphics card is now properly installed, and you’re one step closer to experiencing enhanced performance and stunning visuals. Next, we’ll discuss how to connect the power cables to ensure your graphics card receives the necessary power supply.
Connecting Power Cables
After successfully installing your new Nvidia graphics card, it’s essential to connect the appropriate power cables to ensure that your graphics card receives the necessary power supply for optimal performance. The power cables provide the required electrical power to the graphics card, enabling it to function properly. Follow these steps to connect the power cables securely.
1. Refer to the graphics card manual: Different graphics cards may require different power connections. Check the instruction manual or documentation that came with your graphics card to identify the specific power requirements.
2. Locate the required power connectors: The graphics card will have one or more power connectors, typically located on the side or top of the card. These connectors are usually in the form of six or eight-pin ports. Identify the required power connectors based on your graphics card model.
3. Connect the power cables: Retrieve the appropriate power cables from your power supply unit (PSU) that match the required power connectors on the graphics card. Ensure that the cables are long enough to reach the graphics card without strain. Insert the power cables into the designated ports on the graphics card. The connectors are designed to fit in only one direction, so align them correctly and gently push until they click into place.
4. Secure the connections: After connecting the power cables, ensure that they are securely attached and properly latched. Give them a gentle tug to confirm that they are firmly in place. Loose connections can cause instability or performance issues, so it’s important to double-check the security of the power cables.
5. Manage the cables: To ensure proper airflow within your computer case, it’s crucial to manage the cables neatly. Use cable ties or Velcro straps to secure the cables and prevent them from obstructing the airflow or coming into contact with any moving parts, such as fans or cooling components.
6. Check for any additional power requirements: Some high-end or power-hungry graphics cards may require additional power connections, such as dual six or eight-pin connectors. Make sure to consult the graphics card manual and your power supply unit specifications to determine if any additional cables or power requirements are needed.
By following these steps, you can ensure that your new Nvidia graphics card is properly powered and ready to deliver optimal performance. Connecting the power cables securely is an essential step in the installation process, as it ensures that your graphics card receives the necessary power supply to handle demanding tasks. Now that the power cables are properly connected, you can proceed to reassemble your computer case and prepare for the next steps in the installation process.
Reassembling Your Computer Case
Now that you’ve successfully installed and connected your new Nvidia graphics card, it’s time to reassemble your computer case. Reassembling the case is an important step in the installation process to ensure the proper functioning and protection of your components. Follow these steps to reassemble your computer case securely.
1. Gather the components: Collect all the necessary components, including the side panel, screws, and any other parts that were removed during the opening of the case. Having all the components ready will make the reassembly process smoother and more efficient.
2. Position the side panel: Line up the side panel with the case, aligning the screw holes and any clips or latches. Gently slide or push the panel into place until it sits flush with the rest of the case. Be careful not to force the panel, as it should fit snugly and smoothly.
3. Secure the side panel: Use the screws that were removed earlier to secure the side panel back onto the case. Tighten the screws just enough to hold the panel securely in place, but avoid overtightening, as it can damage the case or strip the screw threads.
4. Check for any loose cables: Take a moment to ensure that all cables inside the case are properly organized and secured. Any loose cables can obstruct airflow or come into contact with moving parts, potentially causing damage or performance issues. Use cable ties or Velcro straps to tidy up the cables and keep them in place.
5. Confirm proper cable connections: Double-check all cable connections, including power cables, data cables, and any other peripheral connections. Make sure that everything is securely plugged in and properly seated in their respective ports. This will help prevent any connectivity issues or hardware malfunctions.
6. Clean the exterior: Once the case is reassembled, take a moment to clean the exterior surfaces using a soft cloth or an appropriate cleaning agent. This will remove any fingerprints, dust, or smudges, leaving your computer looking clean and presentable.
By following these steps, you can confidently reassemble your computer case after installing your new Nvidia graphics card. Proper reassembly ensures the protection and proper functioning of your components, as well as a neat and organized appearance. With the case reassembled, you can now move on to the next crucial step of installing the graphics card drivers to optimize the performance of your new hardware.
Installing Graphics Card Drivers
After successfully reassembling your computer case, it’s time to install the graphics card drivers for your new Nvidia graphics card. Graphics card drivers are essential software that enables your operating system to communicate effectively with the graphics card, ensuring optimal performance and compatibility. Follow these steps to install the graphics card drivers effectively.
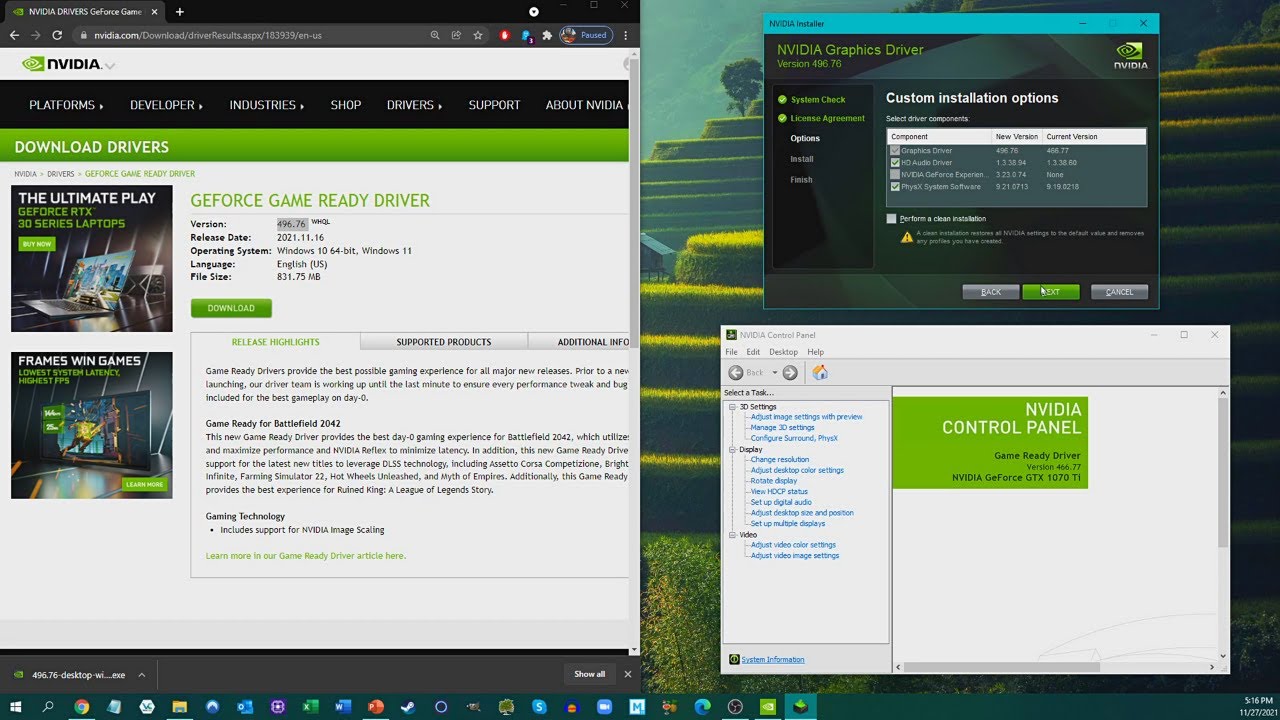
1. Visit the Nvidia website: Open your web browser and navigate to the Nvidia website (www.nvidia.com). Nvidia provides the latest drivers for their graphics cards, ensuring compatibility and accessing the latest features and optimizations.
2. Locate the appropriate drivers: Use the site’s search function or navigate through the website to find the drivers specific to your graphics card model and operating system. Select the correct drivers from the available options. Make sure to download the most up-to-date version for optimal performance.
3. Download the drivers: Once you have located the appropriate drivers, initiate the download by clicking on the respective download button or link. The download should start automatically, and the driver package will be saved to your computer.
4. Run the driver installer: Locate the downloaded driver package on your computer and run the installer by double-clicking on it. Follow the on-screen prompts and instructions to begin the installation process. The installer will guide you through each step, including accepting the license agreement and selecting the installation options.
5. Customize the installation (optional): During the installation process, you may have the option to customize the installation. You can choose between the standard installation or a custom installation with specific options. If you’re unsure, it’s generally recommended to proceed with the standard installation for the optimal configuration.
6. Complete the installation: Allow the driver installation to complete. The installation process may take a few minutes, depending on your system and the driver package size. Ensure that you do not interrupt or close the installer until the installation is fully finished.
7. Restart your computer: After the driver installation is complete, it’s advisable to restart your computer. Restarting will ensure that the newly installed drivers are fully activated and integrated into the operating system. It also allows any necessary configurations to take effect.
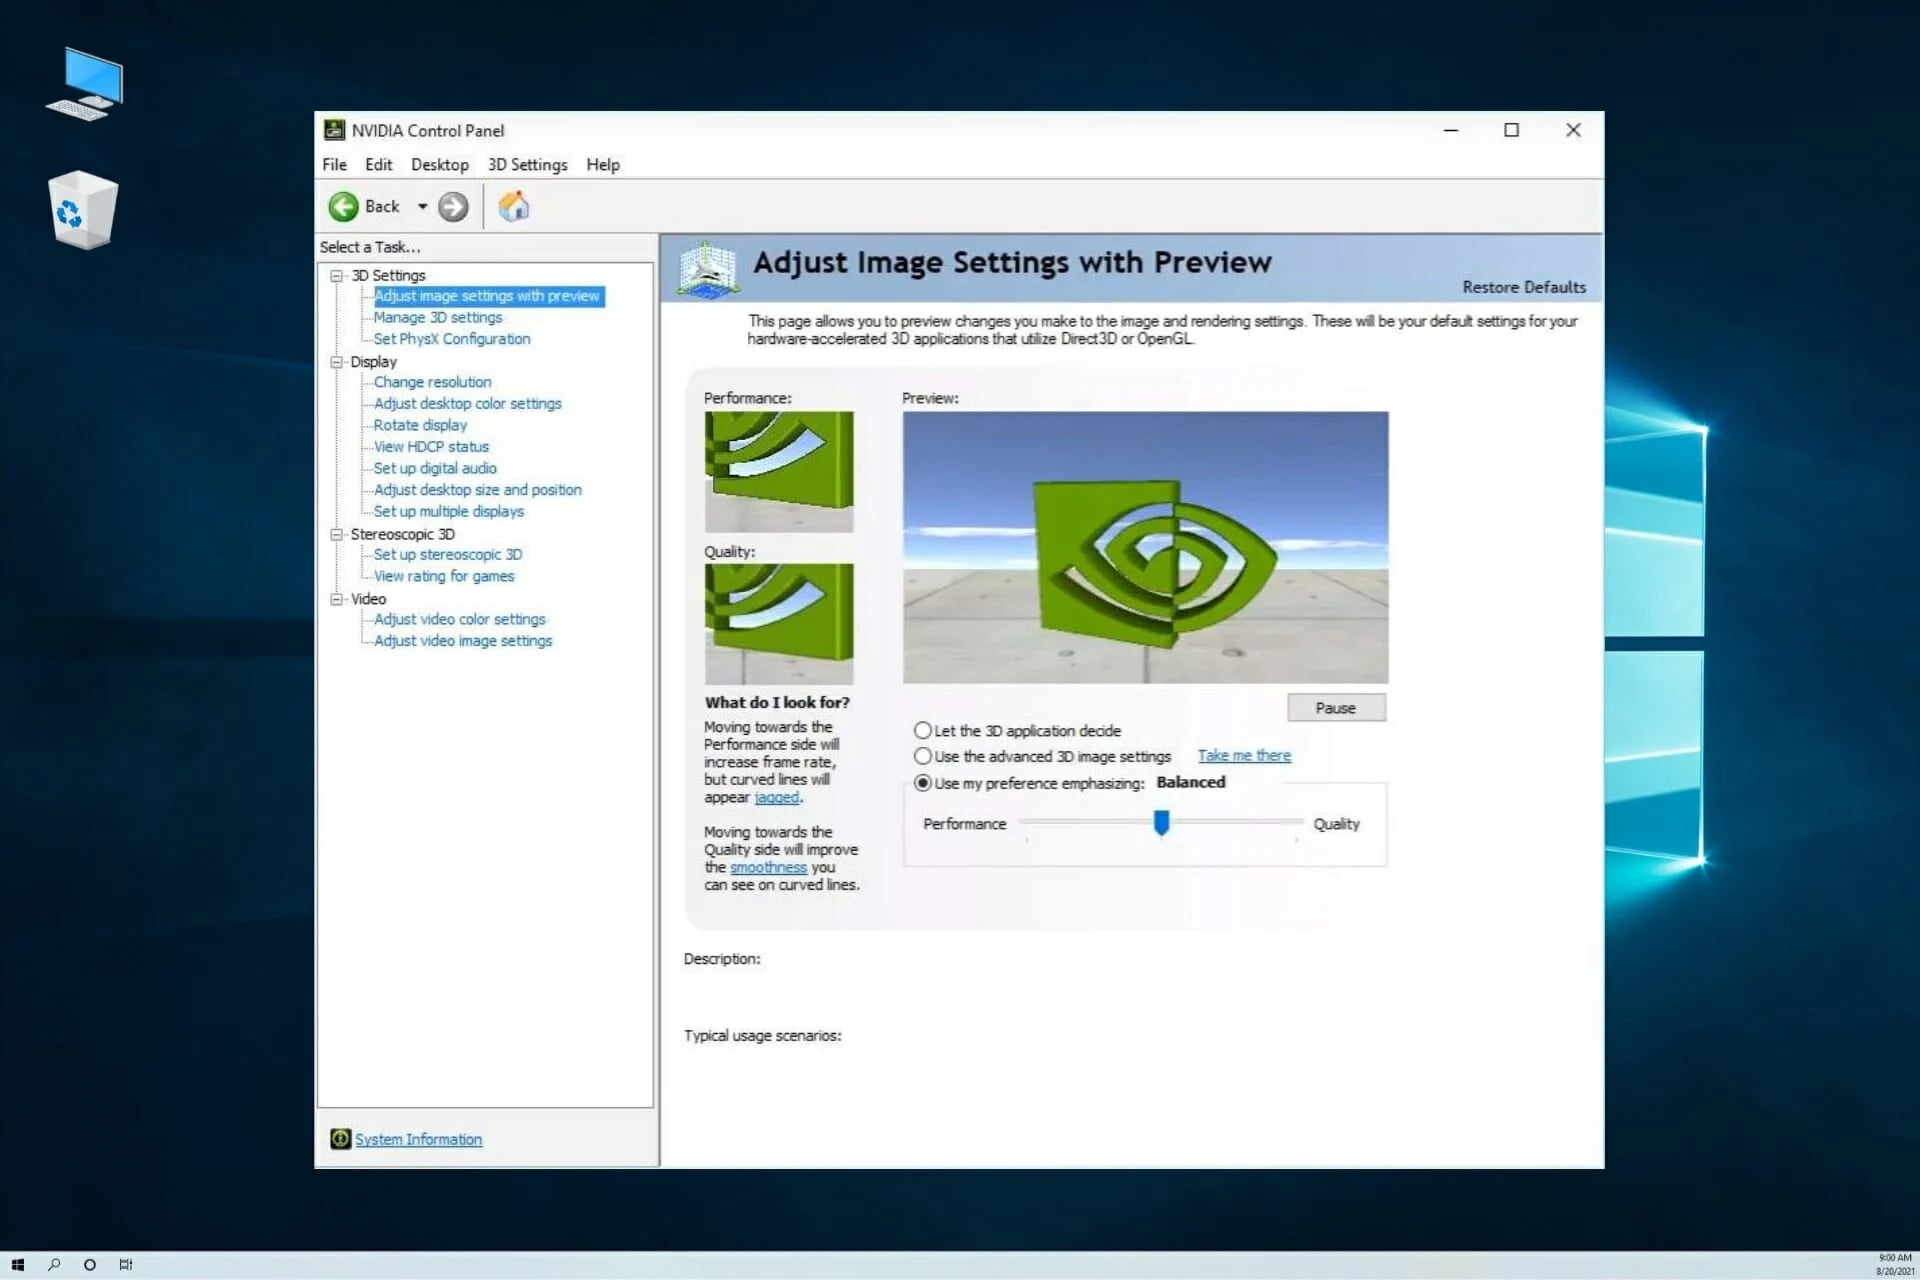
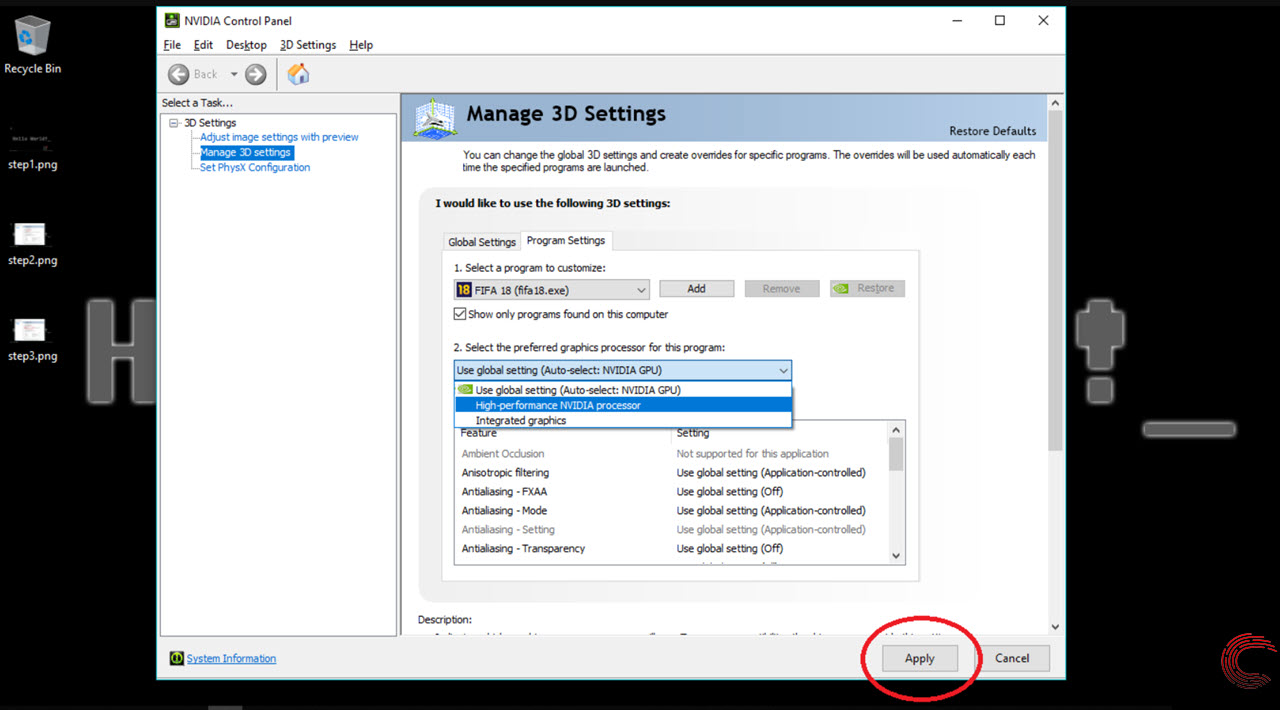
8. Verify the installation: Once your computer restarts, verify that the graphics card drivers have been installed successfully. You can do this by accessing the Nvidia control panel or checking the device manager in your operating system. Ensure that the graphics card is recognized, and the driver version is displayed correctly.
By following these steps, you can successfully install the graphics card drivers for your Nvidia graphics card. Having the latest drivers installed ensures proper functionality, compatibility, and access to the latest features and optimizations. With the drivers installed, your new graphics card is ready to deliver exceptional performance and visuals for all your computing needs.
Testing Your New Graphics Card
After installing the graphics card drivers, it’s time to put your new Nvidia graphics card to the test. Testing your graphics card allows you to ensure that it’s functioning optimally and to evaluate its performance in various scenarios. Here are some methods to test your new graphics card effectively.
1. Benchmarking software: Utilize benchmarking software such as 3DMark or Unigine Heaven to gauge the performance of your graphics card. These programs run intensive tests and provide a score or rating that reflects the capabilities of your graphics card. Compare your results to similar systems to get a sense of how well your graphics card is performing.
2. Gaming performance: One of the best ways to test your new graphics card is by playing graphics-intensive games. Choose graphically demanding games that push your hardware to its limits. Monitor the frame rates, visual quality, and overall smoothness of gameplay to assess the performance of your new graphics card.
3. Video rendering: If you’re into content creation or video editing, use software like Adobe Premiere Pro or Sony Vegas to render videos and observe the rendering time. A powerful graphics card should significantly reduce the time it takes to render videos, allowing for faster and more efficient editing workflows.
4. GPU stress tests: Stress testing tools such as FurMark or MSI Kombustor put your graphics card under high workload to verify its stability and cooling performance. These tests simulate demanding scenarios, allowing you to assess how well your graphics card handles prolonged periods of heavy usage.
5. Temperature monitoring: Install monitoring software like MSI Afterburner or HWMonitor to keep an eye on your graphics card’s temperature. Ensure that the temperature remains within safe limits during demanding tasks. Overheating can impact performance and potentially damage the card, so it’s essential to address any cooling issues if temperatures are excessive.
6. Monitor connectivity and resolution: Confirm that your graphics card is correctly connected to your monitor and that the desired resolution and refresh rate are set. Check for any flickering, artifacts, or resolution issues that may indicate a problem with the graphics card or the connection.
By engaging in these testing methods, you can verify the performance, stability, and compatibility of your new Nvidia graphics card. Identifying any issues or anomalies early on will help ensure an enjoyable and productive experience with your upgraded graphics capabilities. If any issues arise during testing, refer to manufacturer guidelines or seek assistance from the Nvidia support team for further troubleshooting.
Conclusion
Congratulations on successfully installing your new Nvidia graphics card! By following this step-by-step guide, you’ve unlocked the potential for enhanced gaming, graphic design, and video editing experiences. The installation process involved preparing for the installation, opening your computer case, removing the old graphics card, inserting the new graphics card, connecting power cables, reassembling your computer case, installing graphics card drivers, and testing your new graphics card’s performance.
Taking the time to properly prepare for the installation, open your computer case with caution, remove the old graphics card safely, insert the new graphics card securely, connect power cables accurately, and reassemble your computer case ensures a smooth and successful transition to your upgraded graphics capabilities. Installing the latest graphics card drivers and testing your graphics card’s performance allow you to optimize your system and ensure that it meets your computing needs.
Remember to regularly check for driver updates from Nvidia’s website to stay current with the latest features, bug fixes, and performance enhancements. Additionally, keep your new graphics card clean and ensure proper cooling to maximize its lifespan and performance.
Now that your new Nvidia graphics card is up and running, immerse yourself in stunning visuals, smoother gameplay, faster video rendering, and improved graphics quality. Explore new gaming worlds, unleash your creativity in design projects, and enjoy seamless multitasking with confidence in your system’s graphical prowess.
If you encounter any issues during or after the installation process, refer to the manufacturer’s documentation or seek assistance from Nvidia’s support channels. They are available to help you troubleshoot any technical difficulties and provide guidance to ensure a positive experience with your new graphics card.
Enjoy the amazing capabilities of your new Nvidia graphics card and have an incredible time exploring the boundless potential it brings to your computer system. Upgrade your graphics and elevate your computing experience to new heights!