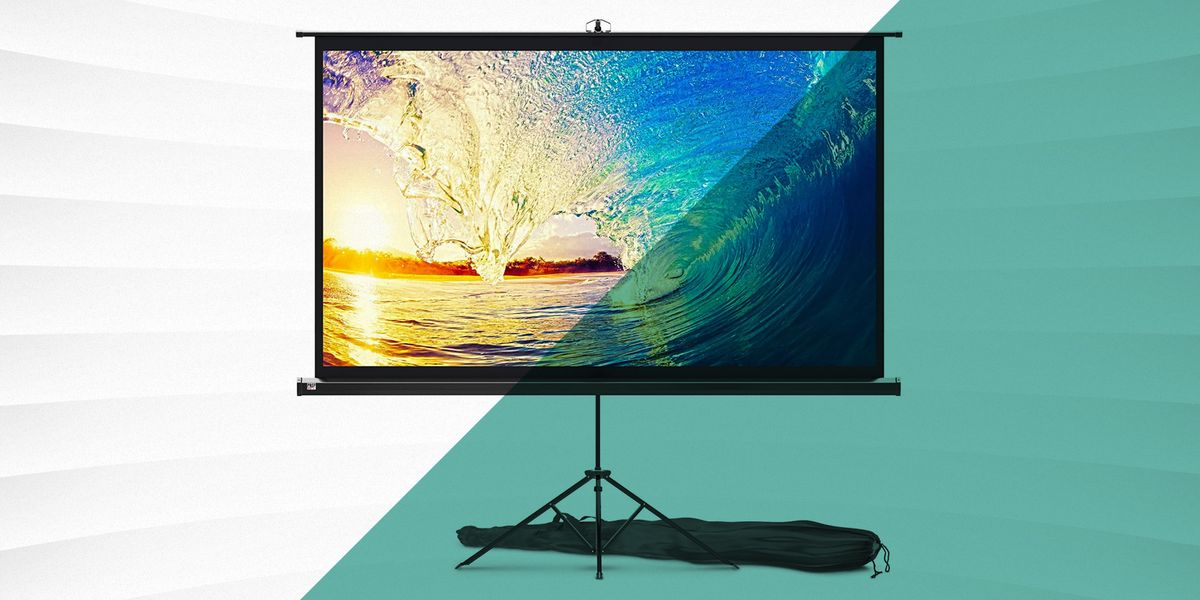
Types of Projector Screens
When it comes to choosing a projector screen, there are several types available, each with its own unique features and benefits. Understanding the different types can help you make an informed decision and ensure that you get the most out of your projector setup.
1. Fixed Frame Screens:
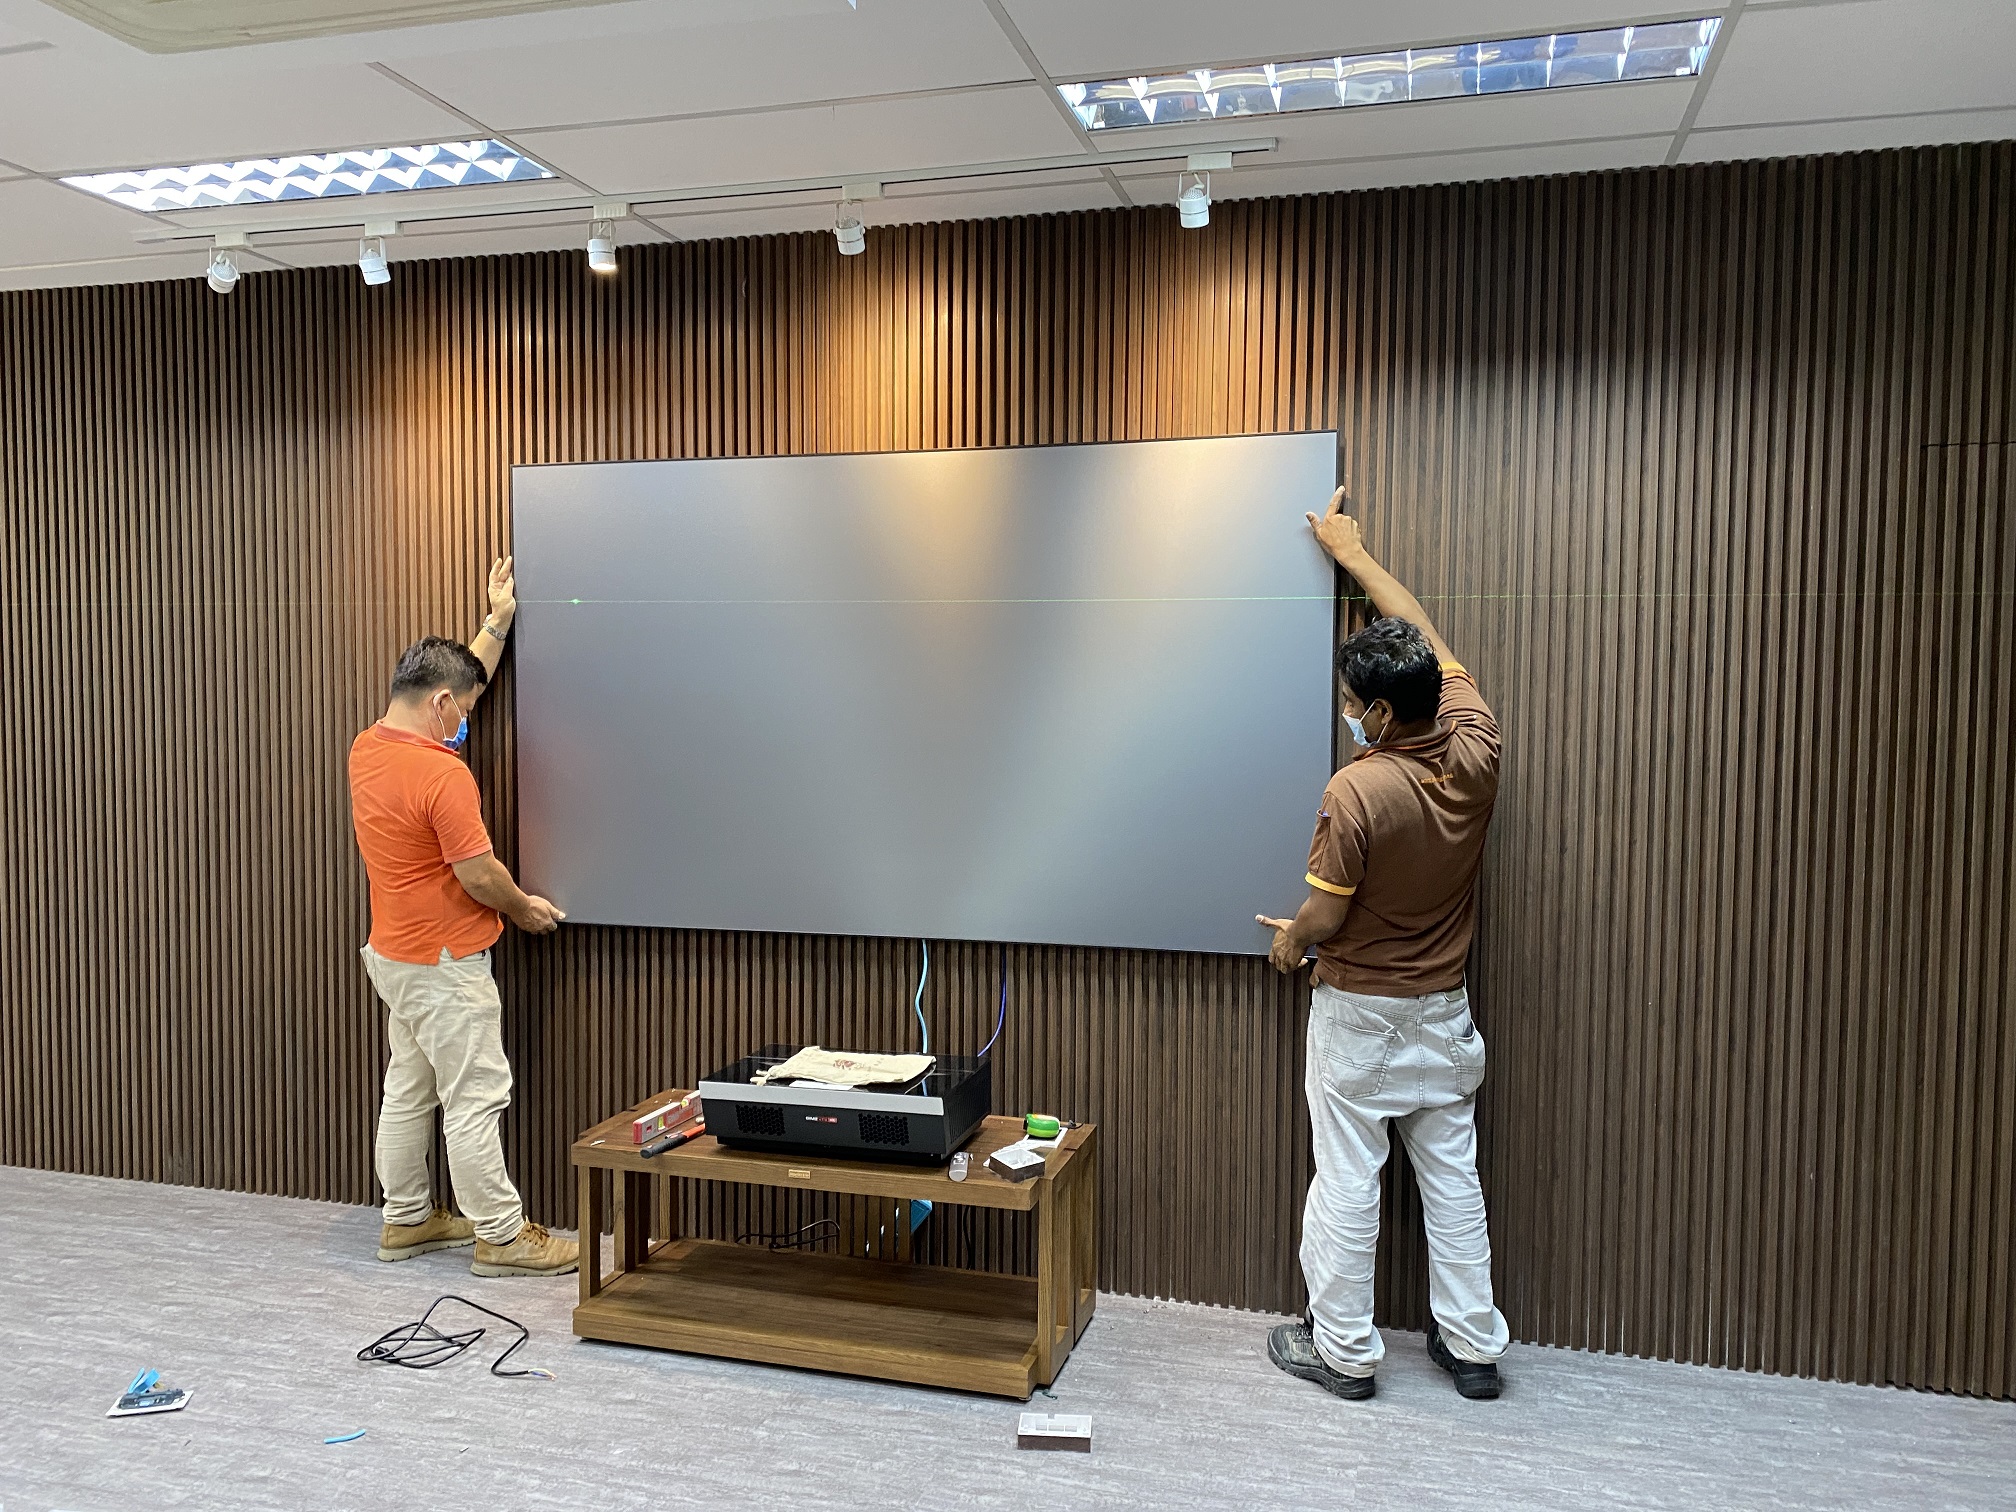
Fixed frame screens are a popular choice for dedicated home theaters or conference rooms. As the name implies, these screens have a sturdy frame that keeps the screen taut, providing a flat, wrinkle-free surface for optimal image quality. Fixed frame screens are typically mounted on the wall and offer a sleek and professional look.
2. Motorized Screens:
If convenience is a priority, motorized screens are an excellent option. These screens can be mounted on the wall or ceiling and feature a motorized mechanism that allows them to roll up or down with the push of a button or a remote control. Motorized screens are perfect for multipurpose rooms or spaces where a retractable screen is desired.
3. Portable Screens:
For those who need flexibility and portability, portable screens are a popular choice. These screens are lightweight and easy to set up, making them ideal for presentations, events, or situations where a fixed installation is not feasible. Portable screens come in various sizes and can be easily transported.
4. Manual Pull-Down Screens:
Manual pull-down screens are a cost-effective option for those on a budget. These screens are mounted on the wall or ceiling and can be manually pulled down to the desired height. Manual pull-down screens are easy to use and offer reliable performance, making them a popular choice for classrooms, offices, or smaller home theater setups.
5. Outdoor Screens:
If you enjoy outdoor movie nights or want to take your presentations outside, outdoor screens are a must-have. These screens are designed to withstand various weather conditions and provide excellent visibility even in broad daylight. Outdoor screens come in different sizes and materials, allowing you to create an immersive outdoor viewing experience.
Each type of projector screen has its own advantages and considerations. It’s important to consider factors such as the room size, ambient light, viewing distance, and your specific needs before selecting the right type of screen for your setup. With the wide array of options available, you can find a projector screen that suits your requirements and enhances your viewing experience.
The Science behind Projector Screens
Projector screens may seem like simple devices, but there is actually some fascinating science behind how they work to deliver crisp and vibrant images. Understanding the principles behind projector screens can help you appreciate their importance in creating a superior viewing experience.
At the core of a projector screen is its reflective surface, which is designed to efficiently reflect and distribute light. The surface material plays a crucial role in determining the image quality and overall performance of the screen.
One key factor is the screen’s gain, which refers to its ability to reflect light back to the viewers. A higher gain indicates a more reflective surface, resulting in a brighter image. However, a very high gain can also increase the visibility of hotspots, where the center of the screen appears brighter than the edges.
Another important aspect is the viewing angle, which refers to the maximum angle from which the projected image can be seen clearly. A wider viewing angle ensures that viewers seated off-center still enjoy a clear and vibrant image. A screen with a narrow viewing angle may result in a decrease in image brightness and color accuracy for viewers on the sides.
Aspect ratio is another consideration when it comes to projector screens. The aspect ratio refers to the proportional relationship between the screen’s width and height. The most common aspect ratios are 16:9, which is ideal for widescreen movies and high-definition content, and 4:3, which is commonly used for presentations and older video formats. Choosing the right aspect ratio ensures that the projected image fits perfectly on the screen, without any distortion or cropping.
Additionally, projector screens are designed to minimize the impact of ambient light in the viewing area. Screens with specialized technologies, such as ambient light-rejecting (ALR) screens, help to improve image contrast and color accuracy even in brightly lit rooms.
Lastly, the size of the screen is an essential factor to consider. A larger screen allows for a more immersive viewing experience, but it’s important to balance it with the viewing distance. Sitting too close to a large screen can make the image appear pixelated, while sitting too far away may decrease the level of detail.
Understanding the science behind projector screens can help you make an informed decision when selecting the right screen for your needs. By considering factors such as gain, viewing angle, aspect ratio, and screen size, you can create a captivating viewing environment that brings your movies, presentations, and multimedia content to life.
Components of a Projector Screen
Projector screens consist of various components that work together to provide a seamless and immersive viewing experience. Understanding these components can help you choose the right screen and ensure optimal performance.
1. Screen Material:
The screen material is the most essential component of a projector screen. It determines the reflectivity, image quality, and overall performance. Different screen materials are designed for specific purposes, such as providing high contrast, enhancing color accuracy, or minimizing ambient light interference.
2. Frame:
The frame is the structure that holds the screen material. In fixed frame screens, the frame remains fixed and taut, providing a flat and wrinkle-free surface for the projected image. The frame can be made of aluminum or steel to ensure stability and durability.
3. Tensioning System:
Some projector screens, especially fixed frame screens, feature a tensioning system. This system keeps the screen material stretched tightly across the frame, ensuring a smooth surface and preventing sagging or wrinkles that can negatively impact image quality.
4. Mounting Mechanism:
The mounting mechanism allows the projector screen to be securely installed on a wall, ceiling, or floor. Depending on the type of screen, the mounting mechanism may include brackets, hooks, or screws. Motorized screens may also have a motorized mechanism that allows for easy retractable installation.
5. Control Options:
Motorized projector screens often come with control options for convenient operation. This can include a wall-mounted control panel, a remote control, or even integration with a smart home automation system. These control options make it easy to adjust the screen height or retract it when not in use.
6. Masking System:
Some high-end projector screens feature a masking system. This system allows the screen to adjust its aspect ratio to match the content being projected, ensuring that the image fills the screen without any black bars. Masking systems can be motorized or manual, depending on the screen model.
7. Surface Coating:
Specialized projector screens may have a surface coating to enhance their performance. For example, an ambient light-rejecting (ALR) screen may have a micro-optical filter that helps to minimize light interference and improve contrast in brightly lit environments. Other coatings may be designed to enhance the brightness, color accuracy, or viewing angle of the projected image.
Understanding the components of a projector screen allows you to make an informed decision when selecting the right screen for your needs. By considering factors such as screen material, frame quality, tensioning system, mounting mechanism, control options, masking system, and surface coating, you can create a superior viewing experience that brings your content to life.
Understanding Aspect Ratio
Aspect ratio is an important consideration when it comes to projector screens. It refers to the proportional relationship between the width and height of the screen and plays a significant role in determining how content is displayed. Understanding aspect ratio can help you select the right screen for your specific needs.
The two most common aspect ratios for projector screens are 16:9 and 4:3.
The 16:9 aspect ratio is often referred to as widescreen or HDTV format. It is widely used for movies, high-definition television, and most modern multimedia content. A 16:9 screen provides a wider and more cinematic viewing experience, with a broader field of view. This aspect ratio is ideal for watching movies, playing video games, and enjoying immersive multimedia content.
The 4:3 aspect ratio is a more square-like format that was commonly used in the past for television and computer displays. Although it is less prevalent today, it is still encountered in certain applications, such as older video formats or business presentations. A 4:3 screen offers a more traditional and square-shaped viewing area, which can be suitable for presentations or situations where older content needs to be displayed without distortion.
It’s important to consider the aspect ratio of your content and the compatibility with your projector when selecting a projector screen. If your projector supports both 16:9 and 4:3 ratios, you may have the flexibility to choose the aspect ratio that best suits your viewing preferences and the type of content you primarily consume.
When choosing a projector screen, it’s crucial to ensure that the screen’s aspect ratio matches that of your projector or the majority of your content. Using a screen with the wrong aspect ratio can result in image distortion or cropping, detracting from the overall viewing experience.
Beyond the standard 16:9 and 4:3 aspect ratios, there are also other less common aspect ratios, such as 2.35:1 (Cinemascope) and 16:10 (common in computer displays). These aspect ratios are typically used in specific applications and require specialized screens or additional adjustment options to properly display content without black bars or image distortion.
By understanding aspect ratio and its impact on your viewing experience, you can make an informed decision when selecting a projector screen. Consider the aspect ratio of your projector and the majority of your content to ensure you choose a screen that provides optimal image quality and seamlessly displays your favorite movies, presentations, and multimedia content.
Gain and Viewing Angles
When selecting a projector screen, two important factors to consider are gain and viewing angles. These aspects play a significant role in determining the image brightness, clarity, and the viewing experience. Understanding gain and viewing angles can help you choose a screen that provides optimal performance for your specific setup.
Gain:
Gain refers to the measure of a screen’s ability to reflect light back to the viewers. It determines how effectively the projected image appears on the screen. A high-gain screen reflects more light, resulting in a brighter image, while a low-gain screen scatters light in a broader pattern, which can result in a wider viewing angle.
A screen with high gain is ideal for environments with high levels of ambient light, as it helps combat the washout effect caused by light interference. However, high-gain screens may also produce hotspots, where the center of the screen appears brighter than the edges. It’s important to strike a balance, considering both ambient light conditions and the desired viewing experience, when choosing the gain level of your screen.
Viewing Angles:
The viewing angle of a projector screen indicates the maximum angle from which the projected image can be viewed clearly without any loss in image quality. It is crucial to consider viewing angles to ensure that everyone in the room has an optimal viewing experience, regardless of their seating position.
A wide viewing angle allows viewers to sit off-center and still enjoy a clear and vibrant image. Screens with wide viewing angles provide consistent brightness and contrast levels throughout the viewing area. On the other hand, screens with narrow viewing angles may result in decreased image brightness and color accuracy for viewers seated on the sides or at extreme angles.
It’s worth noting that the viewing angle can be affected by the screen size and the screen material. Larger screens inherently have wider viewing angles, while certain screen materials, such as those with higher gain, may have more limited viewing angles. Therefore, it’s crucial to consider the size of your room, the seating arrangements, and the intended viewing angles when selecting a projector screen.
An understanding of gain and viewing angles enables you to choose a projector screen that provides an optimal viewing experience in your specific environment. Consider the level of ambient light, the desired screen brightness, and the seating arrangements to determine the appropriate gain level. Likewise, ensure that the screen provides a wide enough viewing angle to accommodate viewers seated at various positions in the room.
Choosing the Right Projector Screen for Your Needs
With various types, sizes, and features available, choosing the right projector screen can greatly enhance your viewing experience. Consider the following factors to ensure that you select a screen that meets your specific needs and preferences.
1. Screen Size:
Determine the appropriate screen size based on your viewing distance and the size of your room. A larger screen can offer a more immersive experience, but ensure that it doesn’t overwhelm the space or compromise image quality if you’re sitting too close.
2. Screen Type:
Consider the type of screen that suits your requirements. Fixed frame screens provide a sleek and professional look, while motorized screens offer convenience and flexibility. Portable screens are ideal for on-the-go setups, and manual pull-down screens are a cost-effective option.
3. Aspect Ratio:
Your projector’s aspect ratio and the content you primarily consume should determine the aspect ratio of the screen. Choose between 16:9 for widescreen content or 4:3 for presentations or older video formats.
4. Gain and Viewing Angles:
Assess the amount of ambient light in your viewing area. Opt for higher gain screens if you have a well-lit room, but be cautious of potential hotspots. Consider screens with wider viewing angles to ensure optimal image quality for viewers seated off-center.
5. Screen Material:
Different screen materials offer specific characteristics such as enhanced contrast, color accuracy, or ambient light rejection. Choose a screen material that complements your projection system and viewing environment.
6. Installation and Maintenance:
Consider the practical aspects of installation and maintenance. Ensure that the screen can be easily mounted, or if looking for a motorized screen, ensure that it fits the available space. Also, consider how easy it is to clean and maintain the screen to prolong its lifespan.
7. Budget:
Set a budget for your projector screen while keeping in mind that higher quality screens tend to have superior image reproduction. Balance your budget with the features and performance you desire to ensure a worthwhile investment.
By considering these factors, you can make an informed decision when choosing a projector screen that aligns with your specific needs and preferences. Take into account the screen size, type, aspect ratio, gain, viewing angles, screen material, installation and maintenance requirements, and budget to create an immersive and enjoyable viewing environment.
Installing and Maintaining a Projector Screen
Installing and properly maintaining your projector screen is essential for optimal performance and longevity. Follow these guidelines to ensure a smooth installation process and to effectively maintain your screen for years of enjoyable viewing.
1. Preparing the Installation Area:
Before installing your projector screen, prepare the area by ensuring it is clean, free from obstructions, and properly aligned with your projector. Measure the wall or ceiling space to determine the appropriate screen size and position for optimal viewing.
2. Mounting the Screen:
Follow the manufacturer’s instructions to mount the screen securely on the wall or ceiling. Use the appropriate tools and hardware provided to ensure a safe and stable installation. Ensure that the screen is level and taut, without any wrinkles or sagging.
3. Connecting Cables and Power:
If your projector screen is motorized, carefully route the power and control cables as instructed. Make sure the connections are secure and avoid bending or crushing the cables during the installation process.
4. Testing the Operation:
After installation, test the operation of your motorized screen by extending and retracting it several times to ensure smooth and consistent movement. Verify that the screen stops at the desired height without any issues.
5. Regular Cleaning:
To maintain optimal image quality, regularly clean the surface of your projector screen. Use a soft, lint-free cloth or microfiber cloth to gently remove dust and smudges. Avoid using harsh chemicals or abrasive materials that could damage the screen’s surface.
6. Protection from Moisture and Sunlight:
If you have an outdoor or retractable screen, take precautions to protect it from moisture and direct sunlight when not in use. Store the screen in a dry and secure location to prevent damage from rain, dew, or extreme weather conditions.
7. Periodic Maintenance:
Periodically check the screen for any signs of wear, such as loose screws or dents, especially in fixed frame screens. Tighten any loose screws or bolts and inspect the tensioning system to ensure that the screen remains taut and properly aligned.
8. Professional Assistance:
If you encounter any technical issues or are unsure about the installation and maintenance process, consider seeking professional assistance. An experienced technician can ensure a proper and safe installation, as well as provide guidance on maintaining your projector screen.
By following these guidelines and properly maintaining your projector screen, you can enjoy a high-quality viewing experience and prolong the lifespan of your screen. Regular cleaning, protection from moisture and sunlight, as well as periodic maintenance, are key to keeping your screen in optimal condition for years to come.
Troubleshooting Common Issues with Projector Screens
While projector screens are designed to provide a seamless viewing experience, it’s not uncommon for certain issues to arise. Understanding how to troubleshoot and resolve common problems can help you quickly get back to enjoying your favorite movies, presentations, and multimedia content.
1. Image Distortion:
If you notice image distortion on your projector screen, such as keystone distortion or stretching, first check the projector settings. Adjust the keystone correction or aspect ratio settings to align the image properly. If the issue persists, ensure that the screen is properly mounted and positioned to prevent any warping or stretching of the screen material.
2. Uneven Screen Tension:
If you have a fixed frame screen and notice wrinkles or uneven tension, inspect the tensioning system. Make sure all the tensioning rods or clips are properly secured and tensioned. If necessary, readjust the tension or contact the manufacturer for assistance or replacement parts.
3. Motorized Screen Malfunction:
If your motorized screen fails to extend or retract, check the power connection and ensure that the control switch or remote control has batteries and is functioning properly. If the motorized mechanism still does not work, consult the user manual for troubleshooting steps or contact the manufacturer for technical support.
4. Screen Hotspots:
If your screen exhibits hotspots, where the center of the screen appears brighter than the edges, adjust the projector’s positioning or zoom level. Additionally, consider using a screen with a lower gain value to reduce the visibility of hotspots. Alternatively, consult with a professional installer or upgrade to a screen that employs advanced ambient light-rejecting (ALR) technology to minimize hotspots.
5. Screen Contamination:
If your screen becomes dirty or smudged, clean it gently using a soft, lint-free cloth or microfiber cloth. Avoid using harsh chemicals or abrasive materials that could damage the screen’s surface. If the contamination persists, consult the manufacturer’s cleaning recommendations or seek guidance from a professional technician.
6. Screen Not Responding:
If your screen stops responding to control commands or becomes unresponsive, first check the power connection and ensure that the control switch or remote control is functioning correctly. If the issue persists, consult the user manual for reset instructions or contact the manufacturer for further assistance.
7. Screen Frame Stability:
If you notice any instability or wobbling of the fixed frame screen, check the frame assembly and make sure all the joints and connections are secure. Tighten any loose screws or bolts and inspect the frame for any signs of damage. If the problem persists, consider contacting the manufacturer for replacement parts or professional assistance.
By troubleshooting these common issues, you can quickly identify and resolve any problems with your projector screen. If the troubleshooting steps provided do not resolve the problem, reach out to the manufacturer’s support team or consult with a professional installer or technician for further assistance.