Introduction
Welcome to the world of SSD externals! Are you tired of limited storage space on your computer or struggling with sluggish performance? It’s time to upgrade to an SSD external drive and experience the lightning-fast speeds and ample storage capacity it has to offer.
SSD, which stands for Solid-State Drive, is a state-of-the-art storage technology that uses flash memory to store data. Unlike traditional hard drives, SSDs have no moving parts, resulting in faster data access, quicker file transfers, and improved overall system performance.
In this guide, we will walk you through the process of installing an SSD external drive. From gathering the necessary tools and materials to transferring data and enjoying the benefits, we’ve got you covered. Whether you’re a tech-savvy enthusiast or a novice user, this step-by-step tutorial will help you make the most of your new SSD external.
But before we dive into the installation process, it’s important to note that each computer system may have specific requirements and compatibility factors when it comes to using an SSD external. Therefore, it’s always a good idea to consult your computer’s manufacturer or refer to the user manual to ensure a seamless installation.
Now, without further ado, let’s get started on this exciting journey to enhance your computer’s performance and storage capacity with an SSD external drive!
Step 1: Gather the Necessary Tools and Materials
Before you begin the installation process, it’s essential to gather all the necessary tools and materials to ensure a smooth and hassle-free experience. Here’s a list of what you’ll need:
- SSD External Drive: First and foremost, you’ll need an SSD external drive. Choose a drive with adequate storage capacity to meet your needs.
- Computer: You’ll need a computer to connect and initialize the SSD external. Ensure that your computer has a USB port or the necessary interface compatible with the SSD external.
- USB Cable: Most SSD externals come with a USB cable, but double-check to ensure you have the appropriate cable to connect the drive to your computer.
- Power Adapter: Depending on the SSD external you choose, it might require a power adapter for proper functioning. If so, make sure you have the power adapter supplied with the drive.
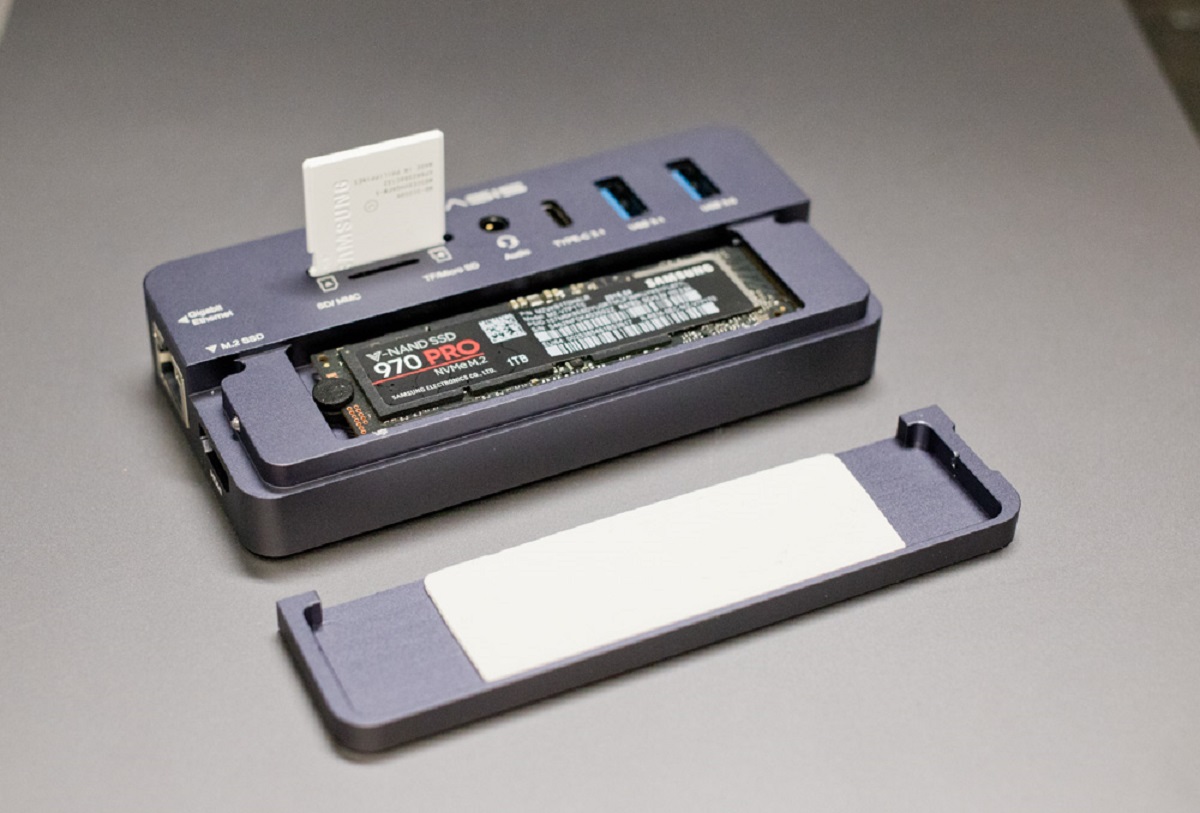
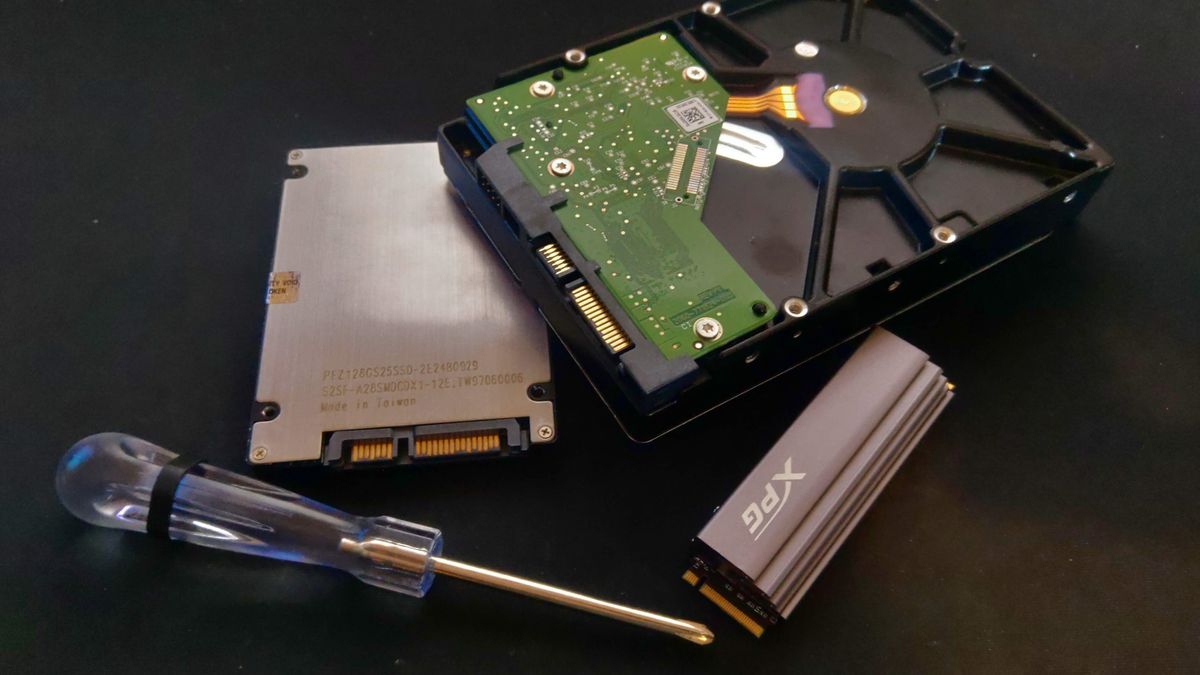
- Screwdriver: In some cases, you may need to open the SSD external enclosure to install the SSD drive. Keep a small screwdriver handy in case it’s required.
- Software or Drivers: Although most SSD externals are plug-and-play, it’s a good idea to check if any specific software or drivers are required for the installation. Visit the manufacturer’s website and download any necessary software or drivers in advance.
Now that you have all the tools and materials ready, you’re one step closer to installing your SSD external drive. In the next step, we’ll guide you through preparing your computer for the installation process.
Step 2: Prepare Your Computer
Before connecting your SSD external drive, it’s important to prepare your computer for the installation. Follow these steps to ensure a smooth setup:
- Back Up Your Data: It’s always a good practice to back up your data before making any changes to your system. This step ensures that you don’t lose any important files during the installation process.
- Update Your Operating System: Check for any available updates for your computer’s operating system. Installing the latest updates will ensure compatibility with the SSD external and improve overall performance.
- Disable Any Antivirus Software: Temporary disable your antivirus software or any other security programs. These programs can sometimes interfere with the installation process, so it’s best to turn them off until the installation is complete.
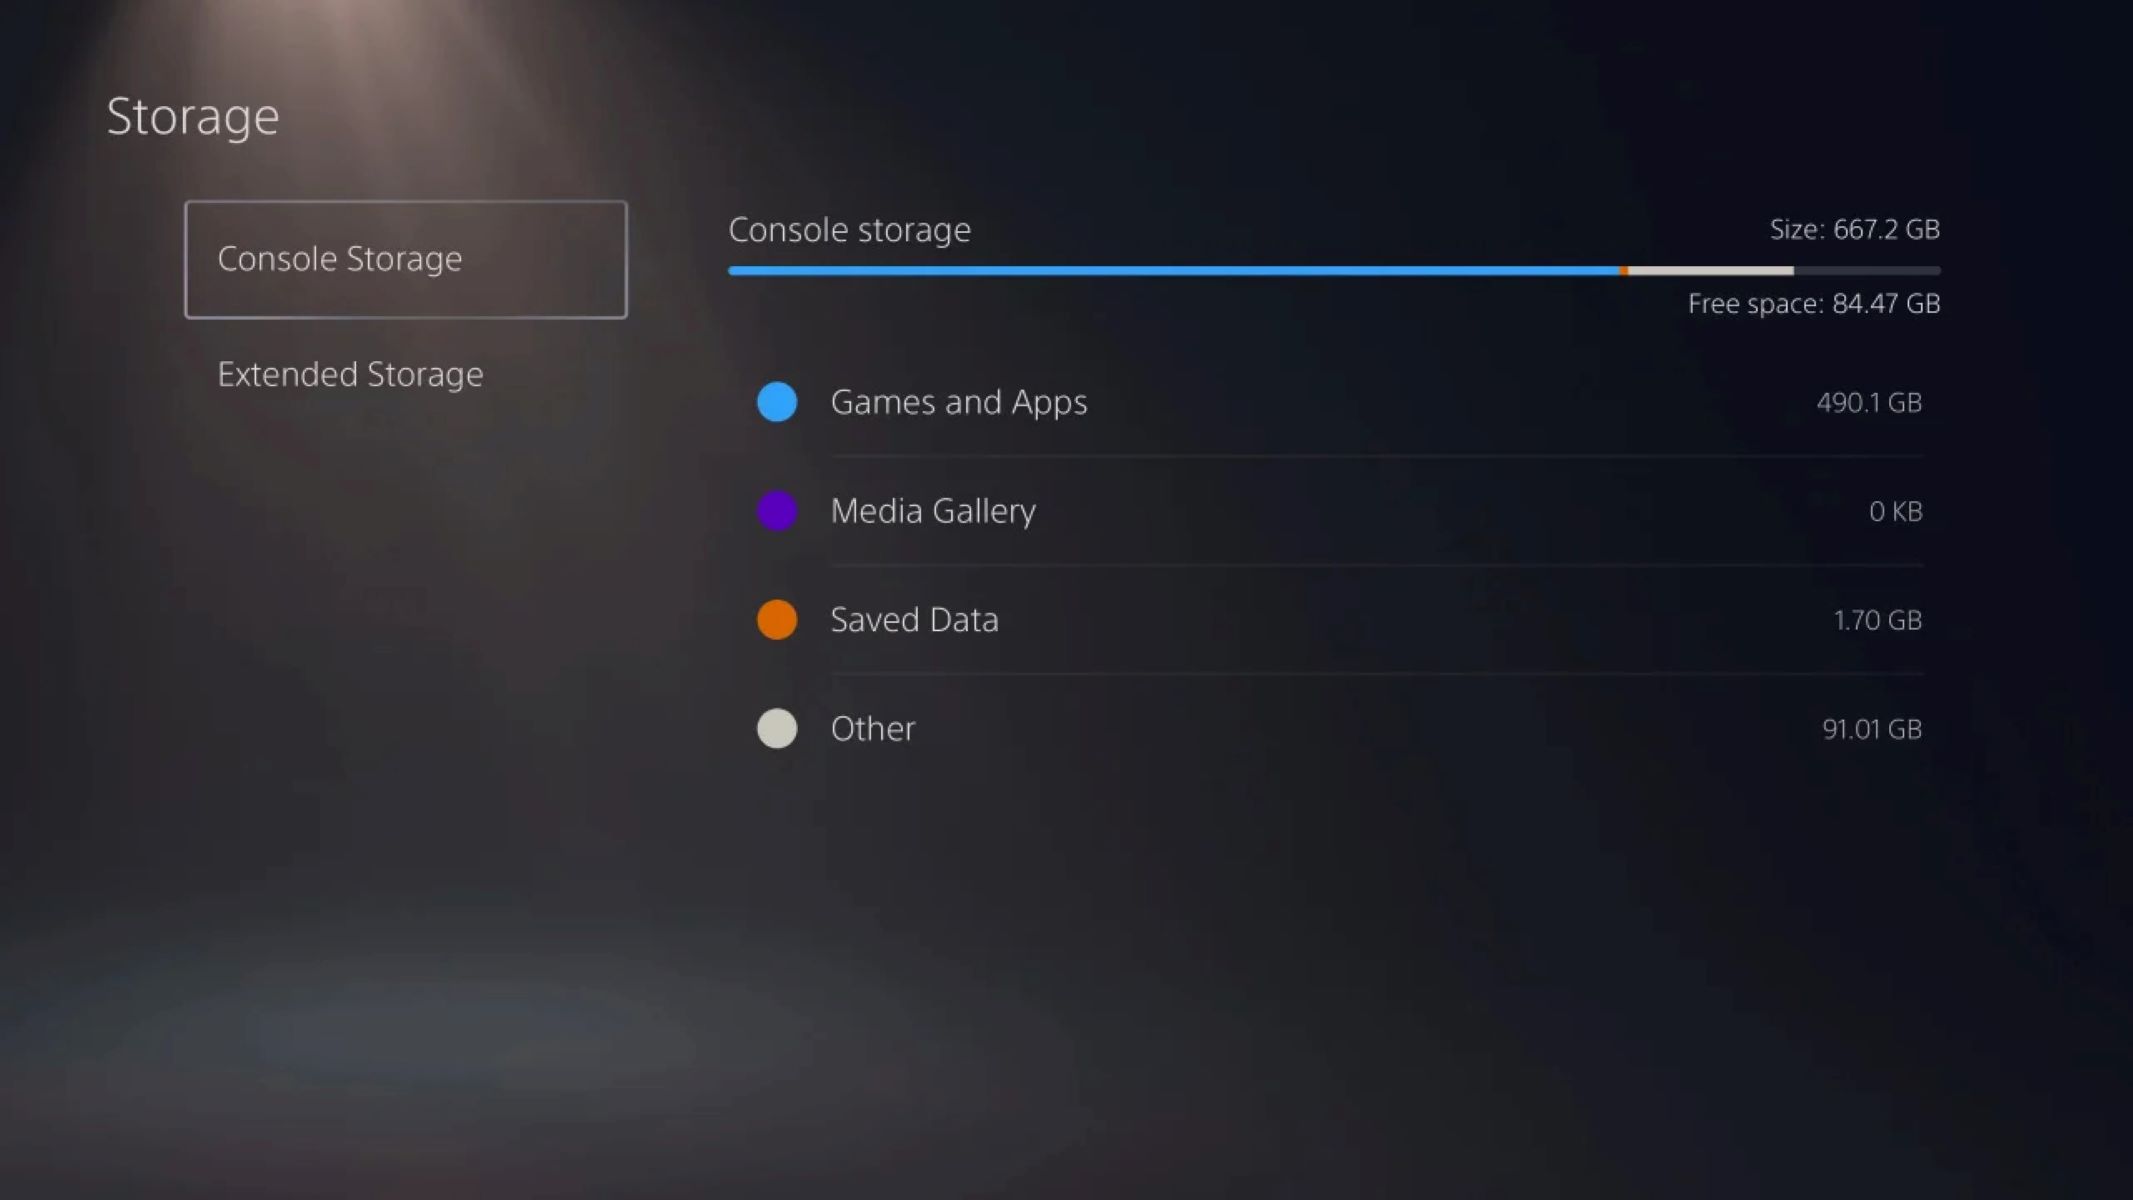
- Free Up Disk Space: Make sure you have enough free disk space on your computer to accommodate the data you’ll be transferring to the SSD external. Delete any unnecessary files or applications to create adequate space.
- Unplug Any External Devices: Disconnect any external devices, such as printers or scanners, from your computer. This step reduces the chances of any conflicts or interruptions during the installation process.
- Shut Down Your Computer: Properly shut down your computer before proceeding with the installation. This step ensures that the SSD external will be recognized when you connect it later.
By following these preparation steps, you’re setting the stage for a successful installation of your SSD external drive. In the next step, we’ll guide you through choosing the right SSD external for your needs.
Step 3: Choose the Right SSD External
Choosing the right SSD external is crucial to ensure optimal performance and compatibility with your computer. Here are some factors to consider when making your selection:
- Storage Capacity: Assess your storage needs and select an SSD external with sufficient capacity to accommodate your files, documents, and media. It’s recommended to choose a drive with a slightly higher capacity than your current storage requirements to allow for future expansion.
- Interface: Determine the interface compatibility with your computer. The most common interfaces for SSD externals are USB, Thunderbolt, and USB-C. Ensure that your computer has the corresponding port to connect the SSD external.
- Transfer Speed: Consider the transfer speed of the SSD external. Look for the drive’s read and write speeds, which will determine how quickly you can transfer files to and from the drive. Higher transfer speeds result in faster data access and file transfers.
- Form Factor: Choose a form factor that suits your needs and preferences. SSD externals come in various sizes, including portable, slim designs, and larger desktop-sized enclosures. Consider factors such as portability, storage capacity, and aesthetics when selecting the form factor.
- Reliability and Durability: Look for SSD externals that offer reliability and durability features. Consider factors such as shock resistance, temperature tolerance, and power surge protection to ensure the safety of your data.
- Brand Reputation: Research the brand reputation and read reviews from reliable sources before making your purchase. Opt for reputable brands known for producing high-quality and reliable SSD externals.
By considering these factors, you can choose an SSD external that meets your specific needs and requirements. Once you’ve made your selection, it’s time to move on to the next step: connecting the SSD external to your computer.
Step 4: Connect the SSD External to Your Computer
Now that you’ve chosen the right SSD external, it’s time to connect it to your computer. Follow these steps to ensure a successful connection:
- Locate the USB Port: Identify the USB port on your computer where you will connect the SSD external. Most computers have multiple USB ports located on the front or back of the system.
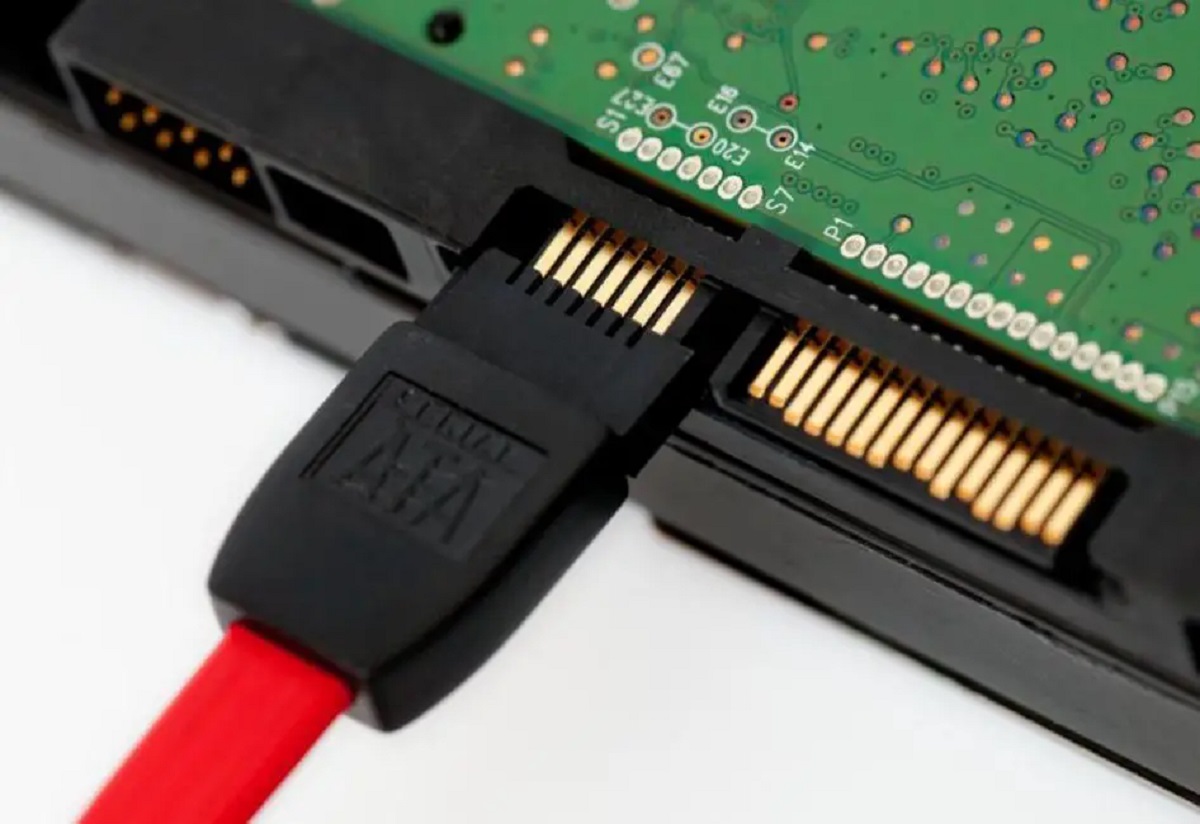
- Insert the USB Cable: Take the USB cable that came with the SSD external and insert one end into the USB port on your computer.
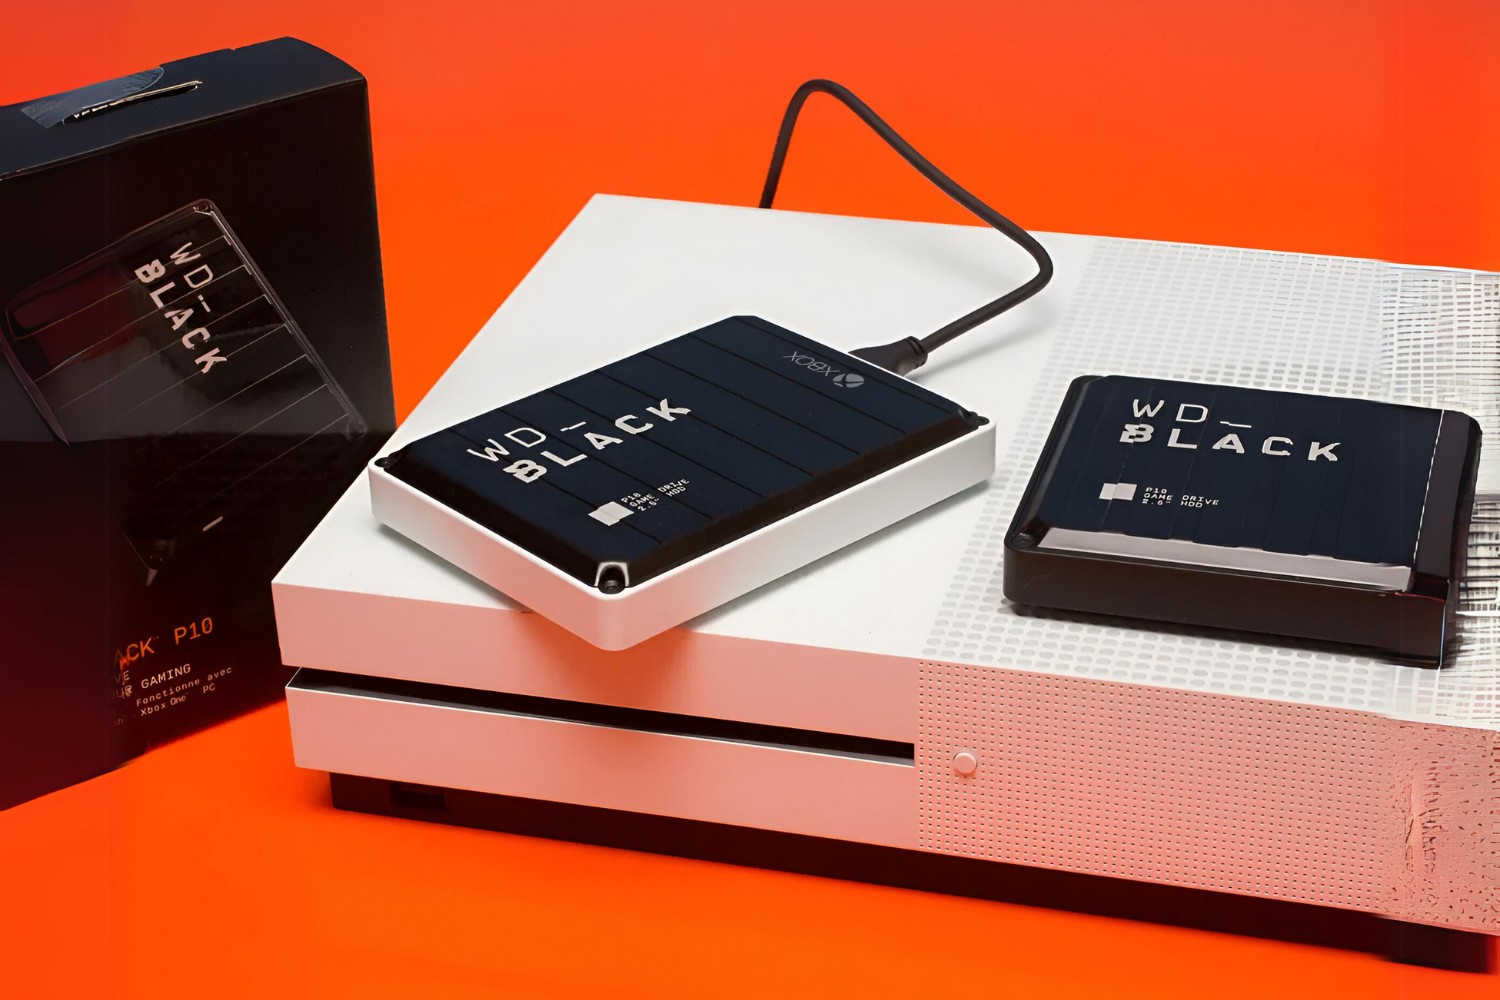
- Connect the SSD External: Take the other end of the USB cable and connect it to the corresponding port on the SSD external. Ensure a secure and snug connection.
- Power On the SSD External: If your SSD external requires a power adapter, plug it into a power source and turn on the drive. If it is a portable SSD external, it may not require a separate power source.
- Wait for the SSD External to be Recognized: Once the SSD external is connected and powered on, allow your computer a few moments to recognize the drive. You may hear a notification sound or see a pop-up indicating that a new device has been detected.
- Device Installation (if necessary): In some cases, your computer may require you to install device drivers or software specific to the SSD external. If prompted, follow the on-screen instructions to complete the installation process.
Once you’ve successfully connected the SSD external to your computer, it should be ready to use. In the next step, we’ll guide you through formatting the SSD external to ensure compatibility and optimal performance.
Step 5: Format the SSD External
After connecting the SSD external to your computer, the next step is to format the drive. Formatting prepares the SSD external for use, ensures compatibility with your operating system, and allows you to start storing and accessing data. Follow these steps to format your SSD external:
- Open File Explorer: On your computer, open the File Explorer or My Computer, depending on your operating system. You can typically find these options in the Start menu or on the desktop.
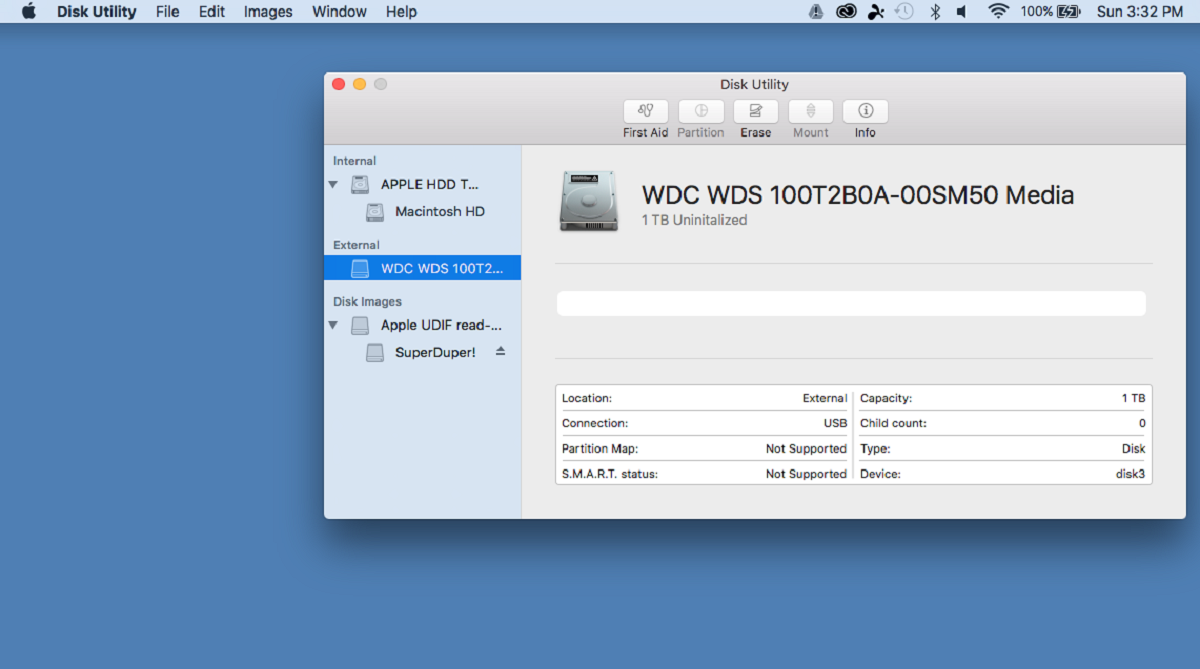
- Locate the SSD External Drive: In the File Explorer, look for the SSD external drive. It is usually labeled with the drive name or a letter.
- Right-Click on the SSD External Drive: Once you’ve located the SSD external drive, right-click on it to open a context menu.
- Select “Format”: From the context menu, select the “Format” option. This will open the Format dialog box.
- Choose File System and Allocation Unit Size: In the Format dialog box, you can choose the desired file system for the SSD external. For Windows, NTFS is the recommended file system. Additionally, choose the allocation unit size based on your requirements.
- Give the SSD External a Volume Label: Optionally, you can give the SSD external a volume label or name to easily identify it.
- Start the Formatting Process: Once you’ve selected the file system, allocation unit size, and provided a volume label, click on the “Start” button to begin the formatting process.
- Wait for Formatting to Complete: The formatting process may take several minutes depending on the size of the SSD external. Wait for the process to complete.
- Formatting is Complete: Once the formatting is done, you will receive a notification that the process was successful. The SSD external is now ready to use.
By formatting the SSD external, you’ve ensured compatibility with your operating system and prepared the drive for data storage. In the next step, we’ll discuss how to transfer data to the SSD external.
Step 6: Transfer Data to the SSD External
With your SSD external formatted and ready to use, it’s time to start transferring your data. Follow these steps to transfer your files, documents, and media to the SSD external:
- Open File Explorer: Open the File Explorer or the equivalent file management application on your computer.
- Navigate to the Files to Transfer: Locate the files you want to transfer to the SSD external. This can be done by navigating through different folders or using the search function to find specific files.
- Select the Files: Once you’ve located the files, select them by clicking and dragging a box around them, or hold down the Ctrl key while clicking on each file individually. This will highlight the selected files.
- Right-Click and Choose “Copy”: Right-click on the selected files and choose the “Copy” option from the context menu.
- Navigate to the SSD External: In the File Explorer, navigate to the location of the SSD external. You can find it under the “This PC” or “My Computer” section.
- Right-Click and Choose “Paste”: Right-click on an empty area within the SSD external location and choose the “Paste” option from the context menu.
- Wait for the Transfer to Complete: The files will begin to transfer from your computer to the SSD external. The time it takes to transfer the files will depend on their size and the transfer speed of the SSD external.
- Verify the Transfer: Once the transfer is complete, verify that the files have been successfully copied to the SSD external. You can open the SSD external folder and check if the files are present.
- Eject (Safely Remove) the SSD External: It’s important to safely remove the SSD external before unplugging it from your computer. Right-click on the SSD external drive icon in the File Explorer and choose the “Eject” or “Safely Remove” option.
By following these steps, you’ve successfully transferred your data to the SSD external. Enjoy the fast and convenient access to your files and media that the SSD external provides. In the next step, we’ll guide you through safely removing the SSD external from your computer.
Step 7: Safely Remove the SSD External
Before disconnecting the SSD external from your computer, it’s important to properly eject or safely remove it to ensure data integrity. Follow these steps to safely remove the SSD external:
- Save and Close any Open Files: Make sure you save and close any files or applications that are being accessed from the SSD external. This step ensures that all data is written to the drive before removal.
- Locate the SSD External Drive: In the File Explorer or the equivalent file management application, locate the SSD external drive that you want to safely remove.
- Right-Click on the SSD External Drive: Right-click on the SSD external drive icon and select the “Eject” or “Safely Remove” option from the context menu. This action prepares the drive for safe removal.
- Wait for the Safe Removal Notification: Once you’ve clicked on the eject or safely remove option, wait for a notification to appear indicating that it is safe to remove the SSD external.
- Disconnect the SSD External: Once you receive the safe removal notification, gently unplug the USB cable connecting the SSD external drive from your computer’s USB port. If you need to remove the power adapter, do so carefully.
- Secure the SSD External: Store the SSD external in a safe location, such as a protective case or a designated storage area, to prevent any damage or accidental data loss.
By following these steps, you can safely remove your SSD external drive from your computer without risking data corruption or loss. It’s important to always eject or safely remove the drive before physically disconnecting it. In the next step, we’ll conclude the installation process and discuss the benefits of using an SSD external.
Step 8: Enjoy the Benefits of Your SSD External
Congratulations! You’ve successfully installed and set up your SSD external drive. Now, it’s time to enjoy the countless benefits it has to offer. Here are some advantages of using an SSD external:
- Improved Performance: With an SSD external, you’ll experience lightning-fast data access speeds and quicker file transfers. Your computer’s overall performance will be enhanced, allowing for smoother multitasking and faster application loading times.
- Ample Storage Space: Say goodbye to storage limitations. An SSD external offers generous storage capacity, providing you with ample space to store your files, documents, photos, videos, and more.
- Portability: SSD externals are designed to be portable and lightweight, making it easy to carry your data with you wherever you go. It’s perfect for students, professionals, and travelers who need to access their files on the go.
- Data Security: With an SSD external, you can keep your data secure. SSDs are less prone to physical damage, such as shock or vibration, compared to traditional hard drives. Additionally, many SSD externals offer built-in encryption options to protect your sensitive data.
- Easy Plug-and-Play: Installing and using an SSD external is hassle-free. Most SSD externals are plug-and-play, meaning you can simply connect them to your computer and start using them without any complicated setup or configuration.
- Compatibility: SSD externals are compatible with various operating systems, including Windows, macOS, and Linux. You can easily transfer files between different systems and devices, making it convenient for collaboration and sharing.
Now that you’re familiar with the benefits of using an SSD external, make the most of your newly installed drive. Whether you’re using it for work, media storage, or backups, the SSD external will greatly enhance your computing experience.
Remember to regularly backup your data and keep your SSD external clean from dust and debris for optimal performance and longevity. Enjoy the speed, convenience, and reliability that your SSD external brings to your digital life!
Conclusion
Congratulations on successfully installing your SSD external drive! By following the step-by-step guide in this article, you’ve equipped your computer with improved performance, ample storage space, and enhanced data security. Let’s recap the installation process:
1. You gathered all the necessary tools and materials, ensuring that you were prepared for the installation.
2. You prepared your computer by backing up data, updating the operating system, and freeing up disk space.
3. You chose the right SSD external based on storage capacity, interface compatibility, transfer speed, and other factors.
4. You connected the SSD external to your computer using the appropriate cable and power source, ensuring a secure connection.
5. You formatted the SSD external, making it compatible with your operating system and ready for data storage.
6. You transferred your data to the SSD external, enjoying the fast and convenient access to your files and media.
7. You safely removed the SSD external, protecting your data and preventing any potential loss or corruption.
8. Finally, you learned about the benefits of using an SSD external, including improved performance, ample storage space, portability, and data security.
Now that you’re equipped with an SSD external drive, take full advantage of its capabilities. Whether you’re a student, professional, or casual computer user, the SSD external will enhance your productivity and make your digital life more efficient.
Remember, regular backups and proper care of your SSD external will ensure its longevity and optimal performance. Enjoy the speed, convenience, and reliability that an SSD external brings to your computing experience.
Thank you for choosing an SSD external drive and following this installation guide. The possibilities are endless with your newfound storage power!