Introduction
Are you looking to boost the performance of your computer’s storage system? One effective way to do so is by installing a solid-state drive (SSD) alongside your existing hard disk drive (HDD). This combination can provide the best of both worlds – the speed and responsiveness of an SSD, along with the ample storage capacity of an HDD.
By harnessing the strengths of each storage device, you can significantly improve your computer’s overall performance, whether you’re a gamer, a creative professional, or simply a power user. In this guide, we’ll walk you through the steps of installing an SSD with an HDD, ensuring a smooth and successful setup.
But before we dive into the installation process, let’s take a moment to understand the benefits of combining SSD and HDD.
Benefits of using SSD with HDD
When you install an SSD alongside your HDD, you benefit from the best features of both drives. The SSD’s main advantage lies in its lightning-fast data access speeds, while the HDD offers the advantage of large storage capacity at a lower cost. Here are the key benefits of using SSD with HDD:
1. Improved system performance: The SSD delivers blazing-fast read and write speeds, which results in faster boot times and quicker application launches. Your computer will run smoother and more efficiently, allowing you to complete tasks in a fraction of the time.
2. Ample storage capacity: While SSDs are known for their fast performance, they typically offer smaller storage capacities compared to HDDs. By combining an SSD with an HDD, you can store your operating system, frequently used programs, and important files on the SSD for optimal performance, while keeping your less frequently accessed files, media libraries, and data backups on the HDD for abundant storage space.
3. Enhanced reliability and durability: SSDs have no moving parts, making them less susceptible to mechanical failures. This means you can expect a longer lifespan and improved reliability compared to traditional HDDs, reducing the risk of data loss.
4. Energy efficiency: SSDs consume less power than HDDs, resulting in reduced energy consumption and longer battery life for laptops. This makes SSDs an excellent choice for users seeking enhanced energy efficiency and portability.
Now that we understand the benefits of combining SSD and HDD, let’s move forward and prepare for the installation process.
Benefits of using SSD with HDD
When you install a solid-state drive (SSD) alongside your existing hard disk drive (HDD), you can unlock a range of benefits that enhance the performance and storage capacity of your computer system. Let’s explore the key advantages of combining SSD and HDD:
1. Enhanced Speed and Performance: The SSD, known for its lightning-fast data access speeds, significantly improves your system’s performance. With faster boot times and near-instant application launches, you’ll experience a notable boost in overall speed and responsiveness. By storing your operating system and frequently used programs on the SSD, tasks that previously took minutes will now be completed in seconds.
2. Ample Storage Capacity: Although SSDs typically offer smaller storage capacities compared to HDDs, combining the two provides the best of both worlds. You can harness the SSD’s speed by storing your operating system, frequently accessed files, and crucial applications, while utilizing the HDD to store less frequently accessed files, large media libraries, and data backups. This way, you’ll have plenty of storage space without sacrificing the SSD’s performance benefits.
3. Improved Reliability and Durability: SSDs are designed without any moving parts, making them more resistant to mechanical failures. Unlike HDDs, which rely on spinning disks and read/write heads, SSDs offer enhanced durability and reliability. This translates to a longer lifespan for your storage system and reduces the risk of data loss due to physical damage.
4. Energy Efficiency: SSDs consume less power compared to HDDs, resulting in increased energy efficiency. This is especially advantageous for laptops and other portable devices, as it extends battery life. With an SSD-HDD setup, you can enjoy improved power efficiency without compromising on performance.
5. Quieter Operation: HDDs tend to generate more noise due to their mechanical nature, while SSDs operate silently since they have no moving parts. By incorporating an SSD into your system, you’ll benefit from a quieter computer experience, allowing you to focus on your work without distraction.
6. Seamless Compatibility: SSDs and HDDs are compatible with most operating systems and can be used in a wide range of hardware configurations. Whether you have a desktop computer, laptop, or even a gaming console, you can easily incorporate an SSD alongside your HDD to boost performance and storage capacity.
In summary, combining an SSD with an HDD offers a multitude of benefits for your computer system. This setup allows you to enjoy the blazing-fast speeds of an SSD, ample storage capacity of an HDD, improved reliability, energy efficiency, and a quieter operation. With these advantages, you can optimize your workflow, enhance productivity, and elevate your overall computing experience.
Preparing for Installation
Before diving into the installation process of a solid-state drive (SSD) alongside your existing hard disk drive (HDD), it’s important to take a few preparatory steps to ensure a smooth and successful setup. Let’s go through the necessary preparations:
1. Backup Your Data:
Before making any changes to your storage system, it’s crucial to back up all your important data. This includes documents, photos, videos, and any other files you don’t want to lose. You can use an external hard drive, cloud storage, or a reliable backup software to create a backup. This step ensures that your data remains safe in case of any unforeseen issues during the installation process.
2. Determine the Physical Installation Space:
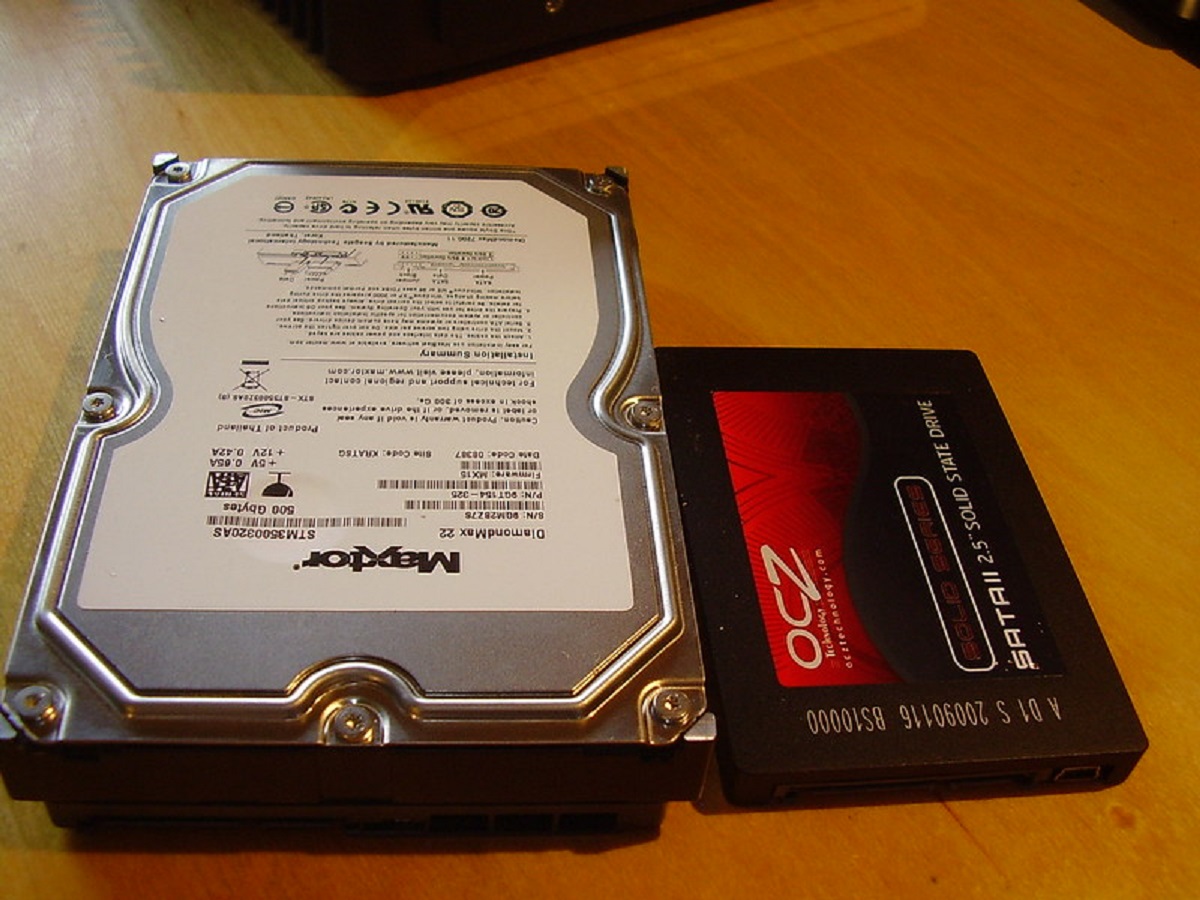
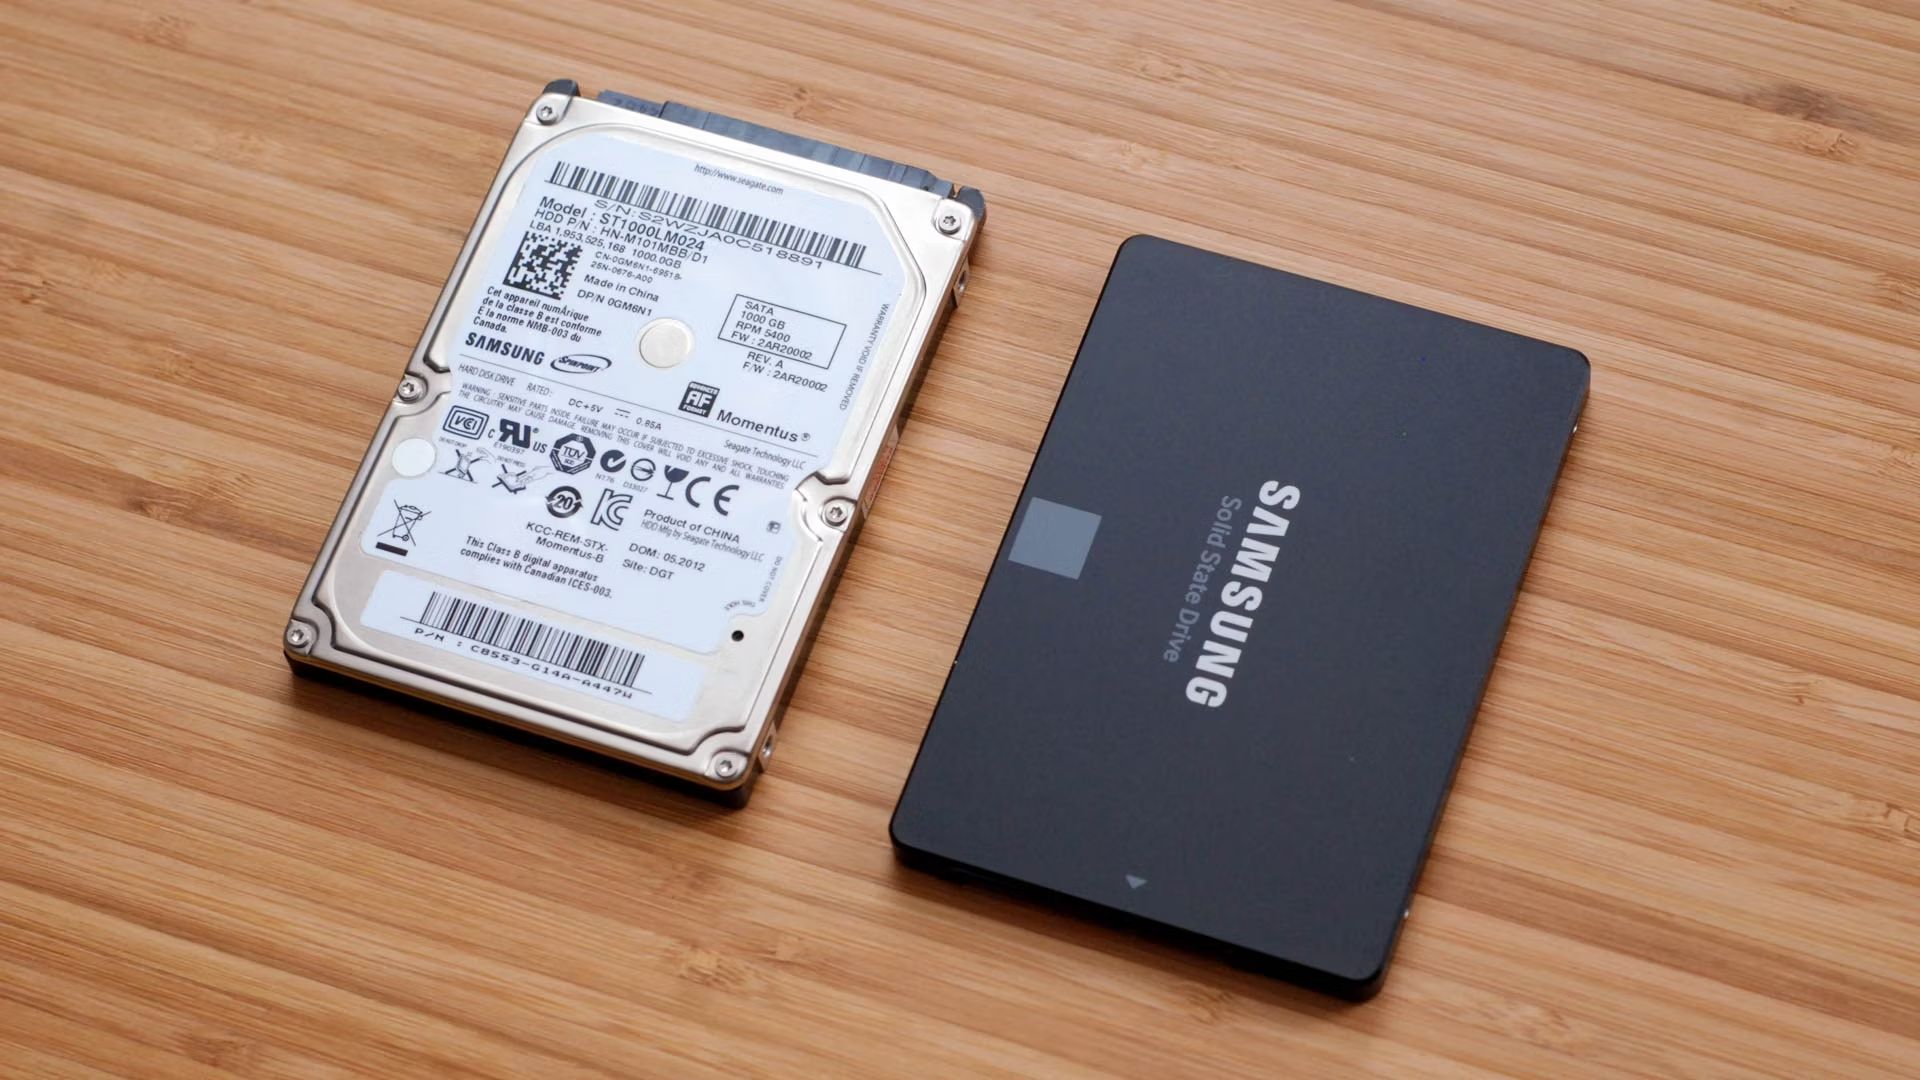
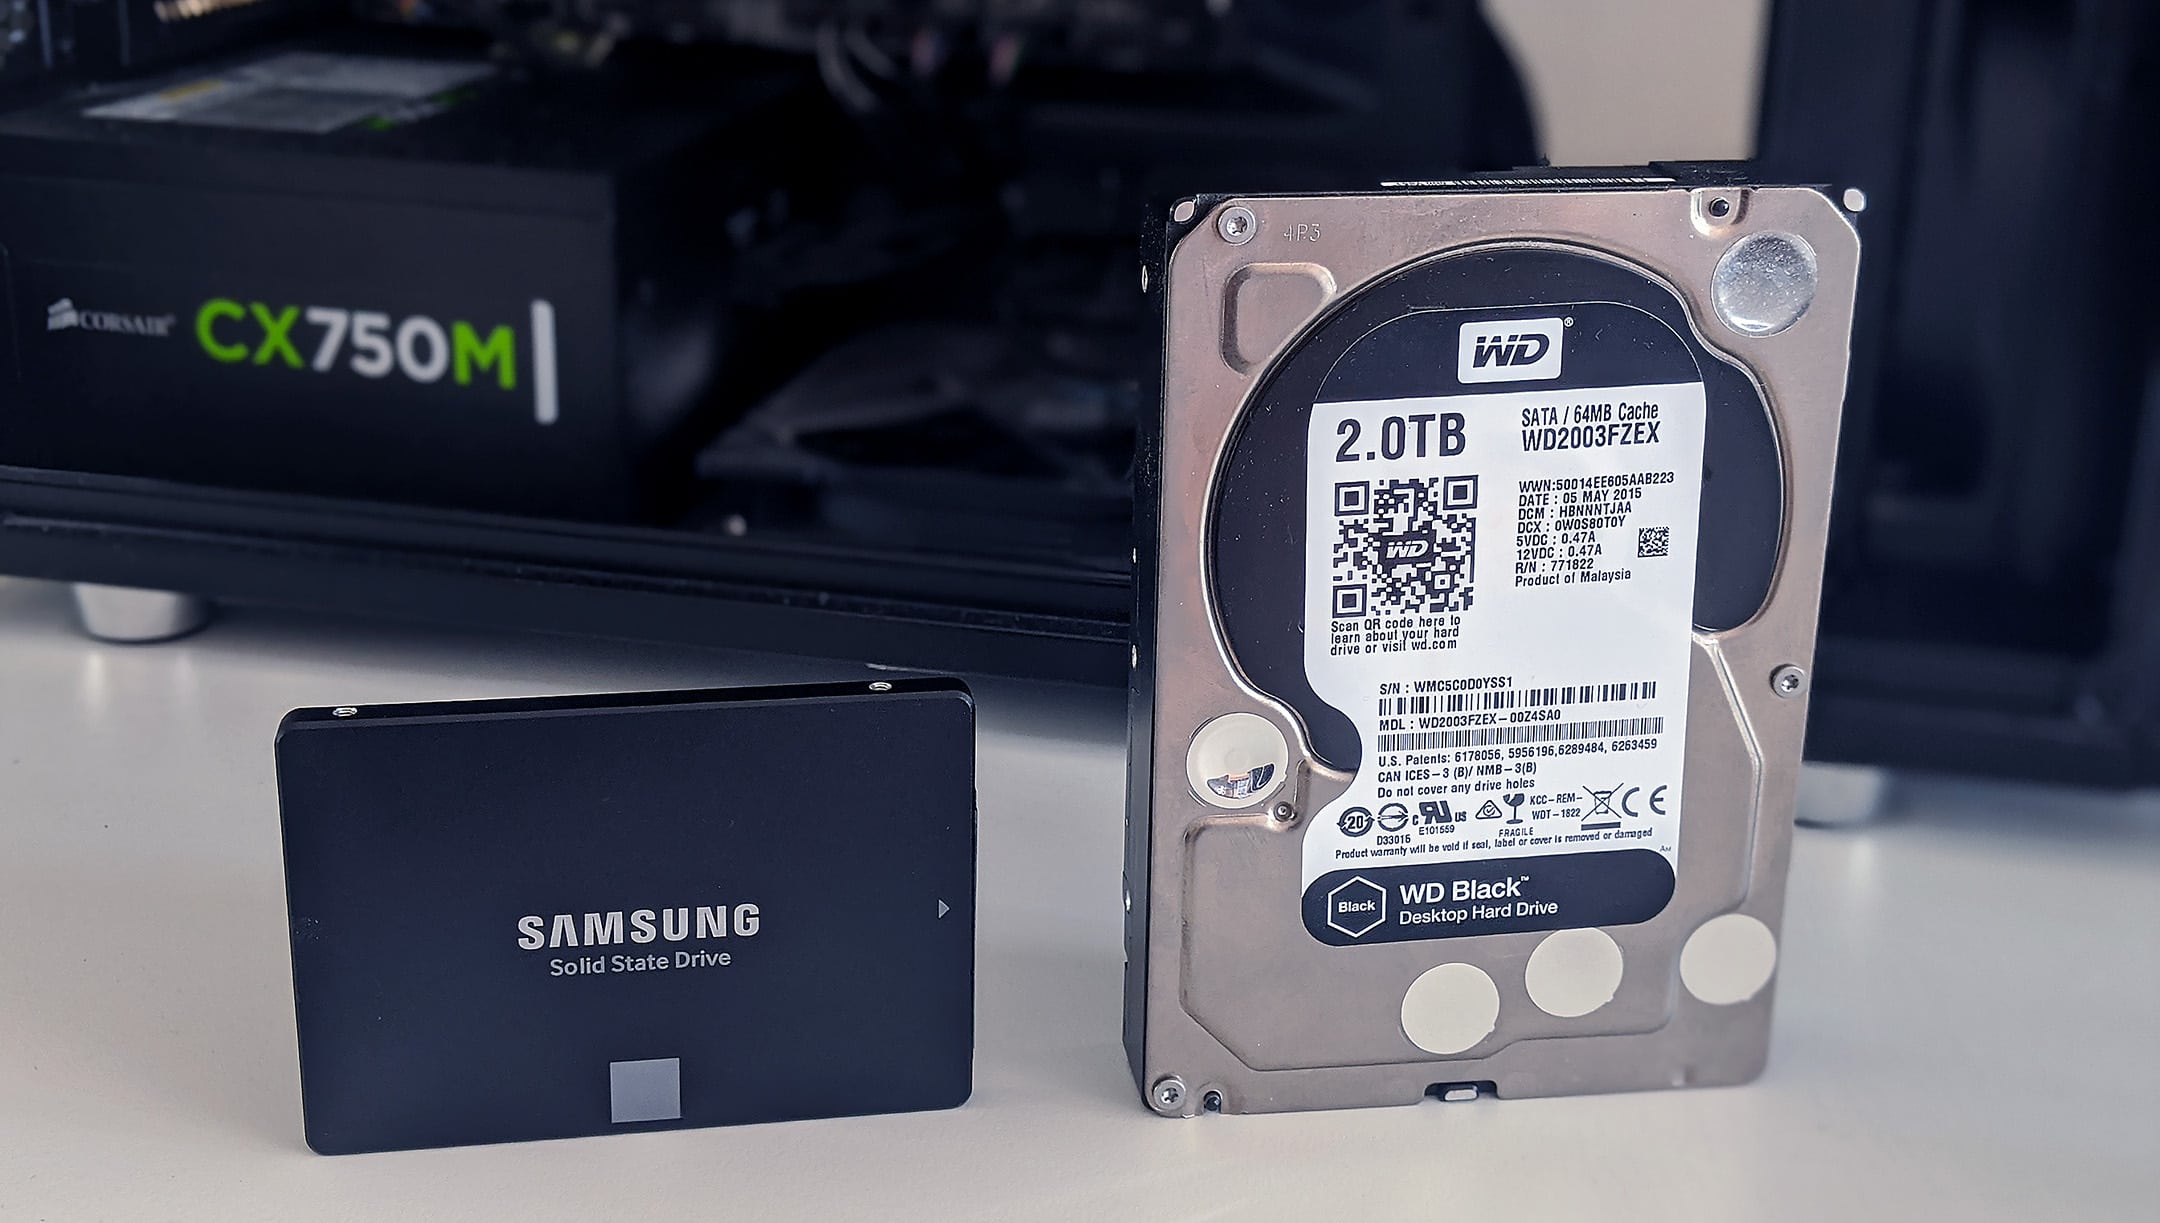
Take a moment to assess your computer’s physical space and determine where the SSD and HDD will be installed. SSDs usually come in a 2.5-inch form factor, similar to laptop hard drives, while HDDs can vary in size, with 3.5-inch being standard for desktop computers. Make sure you have a suitable mounting location inside your computer case to accommodate both drives without any compatibility issues.
3. Disconnect Existing Cables and Power Supply:
Before opening your computer case, shut down your computer and disconnect the power supply. This ensures your safety and prevents any accidental damage to your hardware. Once the power is disconnected, remove all cables connected to the existing HDD, including the data cable and power cable.
4. Mounting the SSD:
Locate an available drive bay inside your computer case to mount the SSD. Most modern cases come with designated mounting brackets or trays for 2.5-inch drives. Securely fasten the SSD in place using screws or any other provided mounting mechanism. Ensure a snug fit to prevent any movement during operation.
5. Connecting the Cables and Power Supply:
Connect the SATA data cable to the SSD and the motherboard’s SATA port. Next, connect the power cable to the SSD and the power supply. Ensure the cables are securely connected to avoid any loose connections or data transfer issues.
6. BIOS Configuration:
Once the physical installation is complete, boot up your computer and enter the BIOS settings by pressing a specific key (commonly F2, Del, or Esc) during startup. In the BIOS, locate the section related to storage devices or boot options. Set the SSD as the primary boot device or adjust the boot order to prioritize the SSD over the HDD. Save the changes and exit the BIOS.
7. Formatting the SSD:
After exiting the BIOS, your computer will start up from the SSD. Open the Disk Management tool in your operating system and format the SSD. This prepares the drive for use and allows your operating system to recognize it as an available storage option.
Once you’ve completed these preparations, you are ready to move on to the next steps in the installation process. By taking the time to back up your data and properly configure your hardware, you can ensure a smooth and successful integration of an SSD with your HDD setup.
Step 1: Backup Your Data
Before proceeding with the installation of a solid-state drive (SSD) alongside your existing hard disk drive (HDD), it is crucial to perform a comprehensive backup of all your important data. This step is vital to ensure the safety and preservation of your files in case of any unforeseen issues during the installation process. Here’s what you need to do:
1. Identify Important Data:
Start by identifying the data that you want to back up. This includes documents, photos, videos, music, and any other files that hold significant value to you. Take the time to locate and organize these files on your existing HDD so that you can easily transfer them to the new SSD once the installation is complete.
2. Choose a Backup Method:
There are several backup methods you can utilize, depending on your preference and the amount of data you need to back up. Here are a few commonly used methods:
– External Hard Drive: Connect an external hard drive to your computer and transfer your data onto it. This method provides a physical backup solution that you can safely store for future reference.
– Cloud Storage: Utilize cloud storage services such as Dropbox, Google Drive, or OneDrive to upload your files. Cloud storage offers the advantage of accessibility from any device with an internet connection and provides an additional layer of security for your data.
– Backup Software: Consider using specialized backup software that can automate and streamline the backup process. These programs often provide features like scheduled backups and incremental backups, saving you time and effort.
3. Perform the Backup:
Once you’ve selected your preferred backup method, initiate the backup process. Follow the instructions provided by the chosen method or software to transfer your data from your existing HDD to the designated backup destination. Depending on the amount of data you have, this process may take some time, so ensure that you have enough time available or schedule the backup for a convenient time.
4. Verify the Backup:
After completing the backup process, it is crucial to verify that all your important data has been successfully transferred and stored in the designated location. Check that your files are accessible and that there are no errors or corruptions in the backup. This step adds an extra layer of assurance that your data is safely backed up and can be restored if needed.
By diligently backing up your data before proceeding with the installation of the SSD and HDD, you protect yourself against the risk of losing valuable files. This precautionary step ensures that your important documents, cherished memories, and other essential data remain intact throughout the installation process. Once you have successfully completed the backup process, you can move forward with confidence to the next steps of the installation process.
Step 2: Determine the Physical Installation Space
In order to successfully install a solid-state drive (SSD) alongside your existing hard disk drive (HDD), it is important to assess your computer’s physical space and determine where the SSD and HDD will be installed. This step ensures that you have adequate room for both drives and allows for a seamless integration. Here’s what you need to do:
1. Assess Available Drive Bays:
Begin by identifying the available drive bays in your computer case. Most modern cases come with multiple 2.5-inch and 3.5-inch drive bays, but it’s important to confirm this beforehand. Open up your computer case and visually inspect the inside to locate the existing HDD and any vacant bays. Make note of the sizes of the drive bays to ensure compatibility with your SSD and HDD.
2. Consider Mounting Options:
Take into account the different mounting options available for your SSD and HDD. SSDs usually come in a 2.5-inch form factor similar to laptop hard drives, while HDDs are commonly found in the 3.5-inch form factor for desktop computers. Some cases include brackets or trays specifically designed for these drive sizes, making installation easier. Determine whether you need any additional mounting hardware or if your case already provides proper mounting provisions.
3. Check Connection Cables:
Ensure that you have the necessary cables to connect both the SSD and HDD to your motherboard and power supply. Most SSDs and HDDs use SATA (Serial ATA) cables for data transfer and a SATA power cable for power supply. Confirm that your motherboard has available SATA ports and that your power supply has enough SATA power connectors. If not, you may need to purchase additional SATA cables or a SATA power adapter.
4. Consider Airflow and Cooling:
Think about the airflow and cooling inside your computer case when planning the physical installation space for the SSD and HDD. SSDs generate very little heat and do not require direct airflow, making them versatile in terms of placement. On the other hand, HDDs can generate heat during intensive use, so it’s important to place them in a well-ventilated area with airflow from case fans or dedicated cooling solutions.
5. Plan for Easy Accessibility:
Lastly, consider the accessibility of the SSD and HDD for future maintenance or upgrades. You want to ensure that you can easily remove or replace drives if needed without having to disassemble the entire system. Keep in mind the arrangement of cables, connectors, and other components to optimize the accessibility of the drives within your computer case.
By assessing your computer’s physical space and evaluating the available drive bays, mounting options, connection cables, airflow, and accessibility, you can determine the best placement for the SSD and HDD. This thoughtful planning ensures a hassle-free installation process and sets the foundation for a well-optimized storage system. Once you have determined the physical installation space, you can move forward with disconnecting the existing cables and preparing for the installation process.
Step 3: Disconnect Existing Cables and Power Supply
Before proceeding with the installation of a solid-state drive (SSD) alongside your existing hard disk drive (HDD), it is essential to disconnect all the necessary cables and power supply to ensure a safe installation process. By taking the time to disconnect these components correctly, you minimize the risk of electrical damage and ensure a smooth integration of the new drives. Here’s what you need to do:
1. Shut Down Your Computer:
Begin by shutting down your computer properly. Save any open files or applications, and close all running programs. Once the operating system has fully shut down, turn off the power supply using the designated power button or switch.
2. Unplug the Power Cable:
Locate the power cable connected to your computer’s power supply unit (PSU). Hold the plug firmly and gently pull it out from the power supply socket. Ensure that you exert consistent pressure and avoid pulling on the cable itself, as this can cause damage. Double-check that the power is completely disconnected by verifying that all lights and fans have turned off.
3. Disconnect Data Cables:
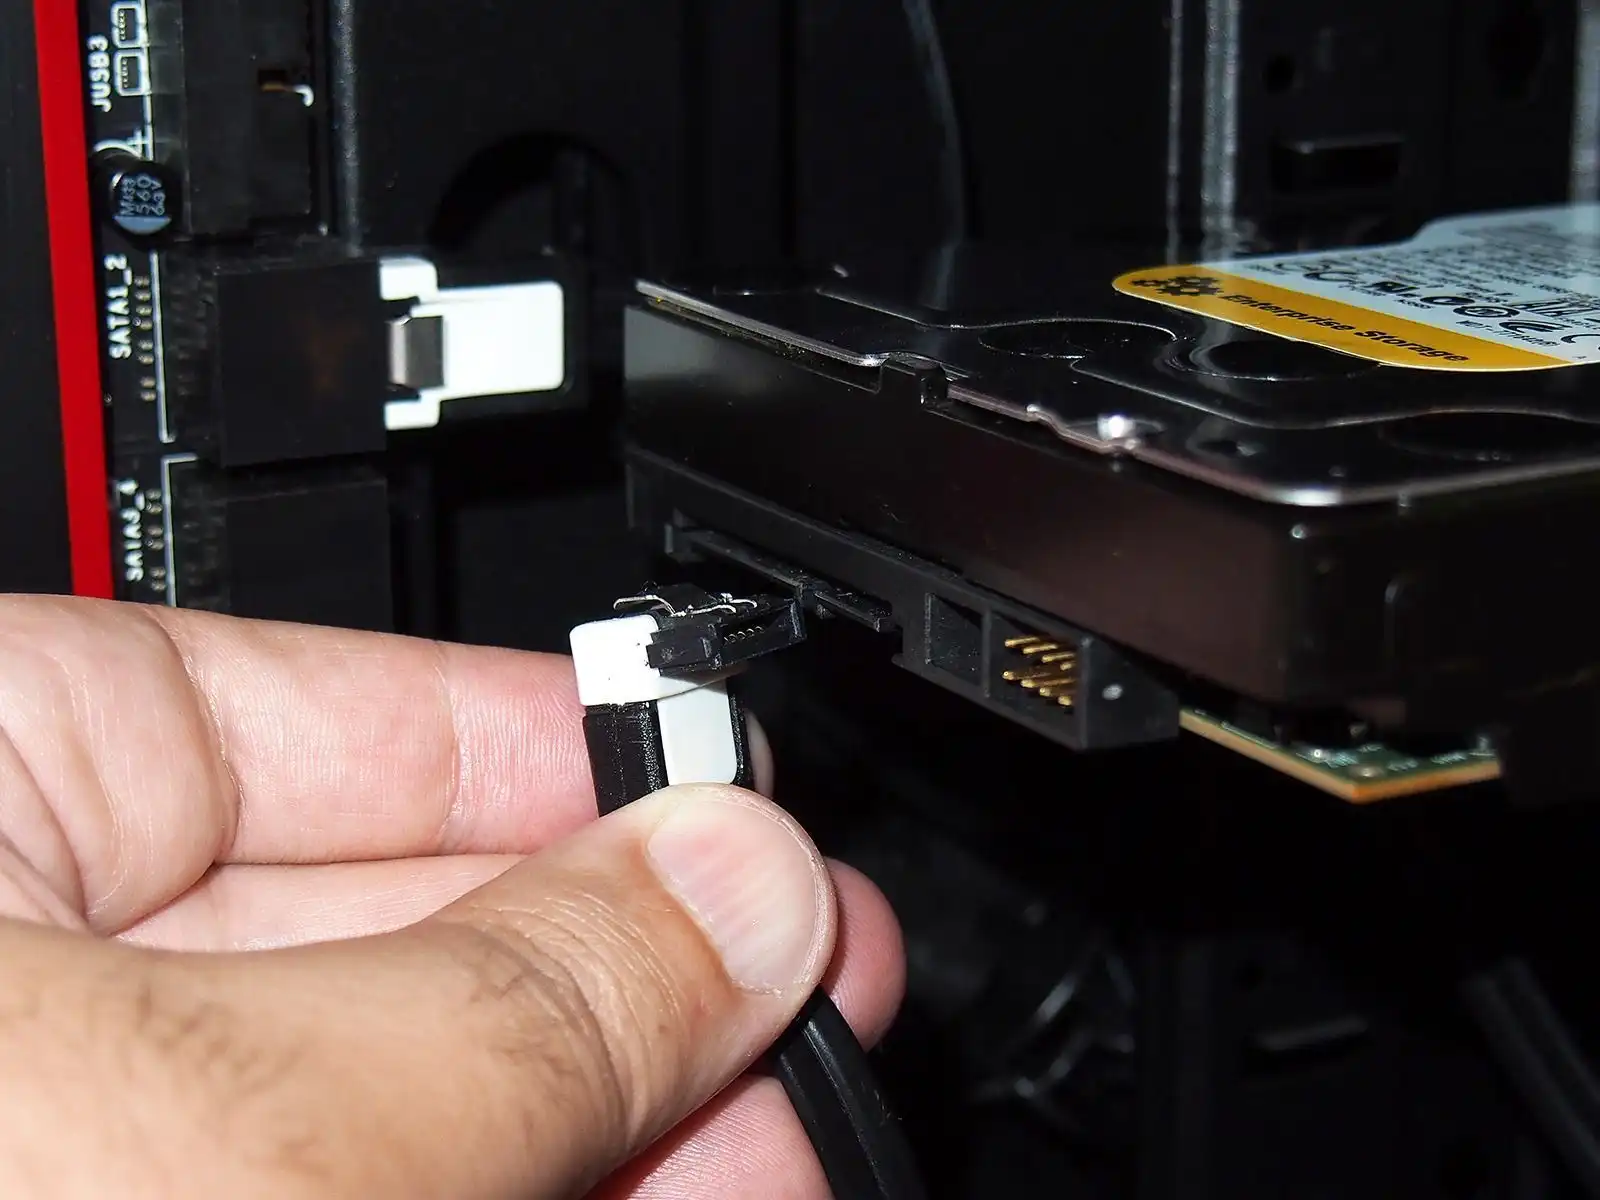
Identify the data cables that are connected to your existing HDD. The most common data cable type is the SATA (Serial ATA) cable, which is usually a flat, narrow cable with a small L-shaped connector on each end. Disconnect one end of the SATA cable from the HDD by firmly holding the connector and gently pulling it out. Repeat the same process for any other data cables connected to the HDD.
4. Remove Power Cable:
Locate the power cable connected to your HDD. It is typically a thicker cable with a larger, rectangular connector. To remove the power cable, hold the connector firmly and gently pull it out from the HDD. Make sure to remove any additional power cables connected to the HDD, if applicable, depending on your configuration.
5. Store Cables Safely:
Once all the necessary cables are disconnected, store them safely in a designated place. This will prevent any accidental damage or loss and ensure that you have them readily available when needed for future use or troubleshooting.
Remember to exercise caution while handling cables and connectors to avoid bending or breaking any pins and to prevent electrostatic discharge (ESD) by grounding yourself before handling any components. Refer to the manufacturer’s guidelines or your computer’s manual if you require additional assistance or are unsure about the proper disconnection procedures.
By carefully following the steps to disconnect existing cables and power supply, you lay the foundation for a successful installation of the SSD and HDD. This process ensures a safe and smooth transition without causing any harm to your computer’s components. Once you have disconnected the necessary cables and power supply, you can proceed to the next step of the installation process: mounting the SSD.
Step 4: Mounting the SSD
After disconnecting the necessary cables and power supply, it’s time to proceed with mounting the solid-state drive (SSD) in your computer. Properly securing the SSD in a suitable location ensures stability and optimal performance. Here’s how to mount the SSD:
1. Locate an Available Drive Bay:
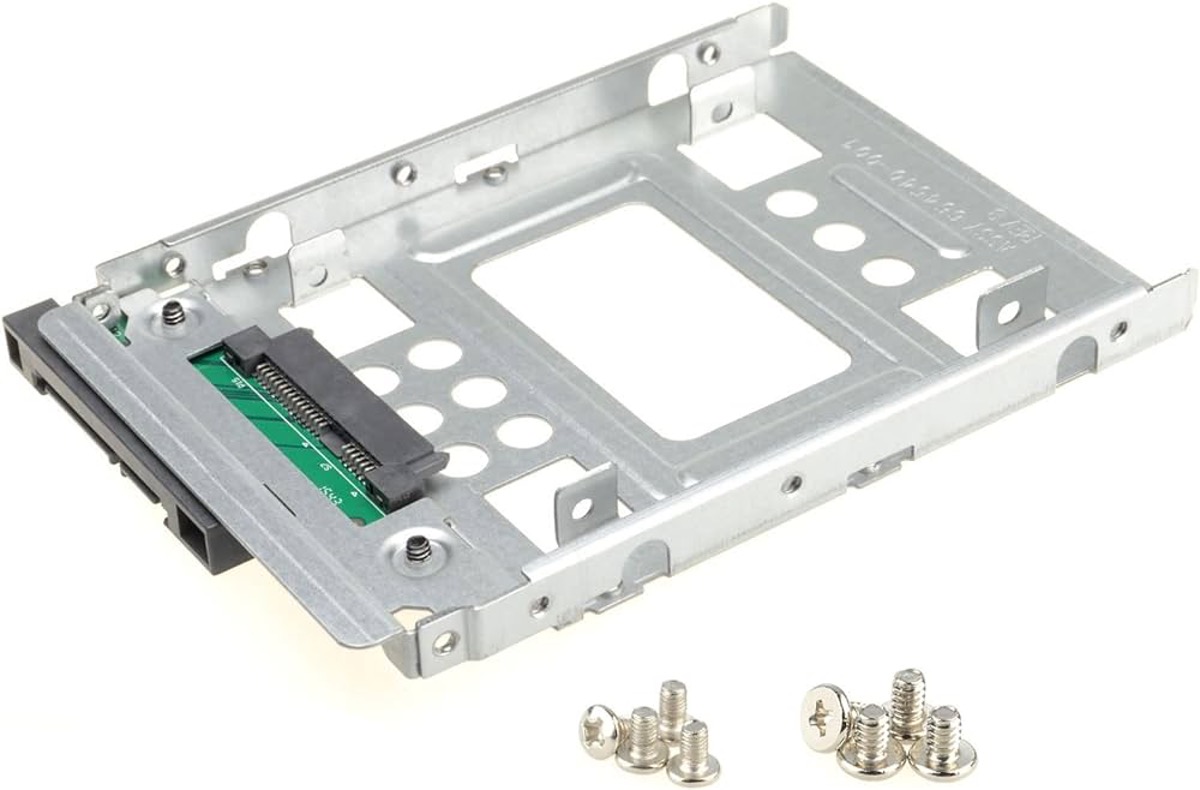
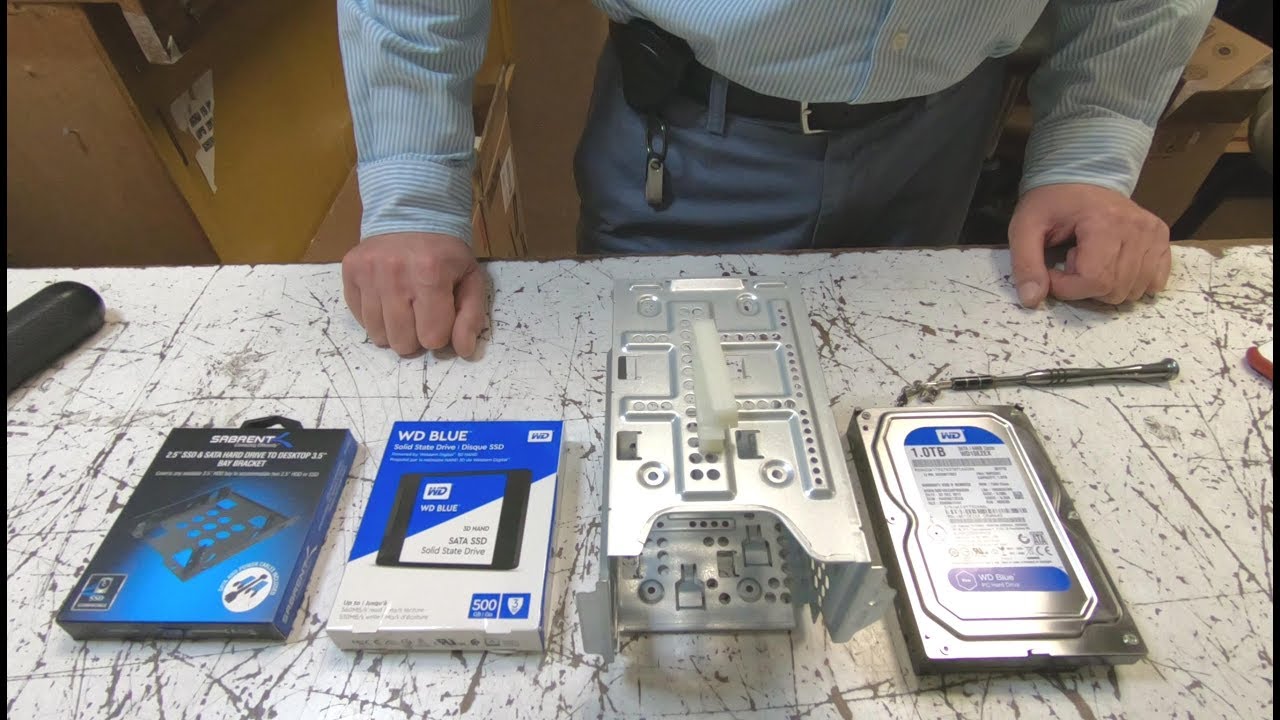
Examine your computer case to identify an available drive bay where you can mount the SSD. Most cases have dedicated mounting brackets or trays for 2.5-inch drives like SSDs. If your case doesn’t have specific brackets for SSDs, don’t worry. You can use an adapter or mounting bracket designed to fit the 2.5-inch drive in a standard 3.5-inch drive bay.
2. Prepare the Mounting Hardware:
Ensure that you have the necessary mounting hardware for your SSD. Some cases include screws or other fastening mechanisms specifically designed for 2.5-inch drives. If not, you can typically find mounting brackets or adapters sold separately at computer hardware stores or online retailers. Verify that the mounting hardware you have is compatible with the size and form factor of your SSD.
3. Secure the SSD in Place:
Attach the mounting hardware to the SSD. If your SSD has screw holes, insert the screws through the bracket or adapter and tighten them into the screw holes on the side or bottom of the SSD. If you are using a tool-less mounting mechanism, align the SSD with the bracket or adapter and secure it in place according to the mechanism’s instructions. Ensure a secure fit that prevents any movement or looseness.
4. Choose an Ideal Location:
Decide on the best location to install the SSD inside your computer case. Consider factors such as cable management, airflow, and ease of access. Mount the SSD in a way that allows easy connection of cables without interfering with other components or blocking airflow. Remember that SSDs generate less heat than other drives, so they are relatively flexible in terms of placement.
5. Insert and Secure the SSD:
Carefully place the SSD in the chosen drive bay and align it with the mounting holes or slots. Gently slide the SSD into the bay until it fits snugly. If necessary, secure the SSD in place using screws or other fastening mechanisms provided by the case or mounting hardware. Ensure that the SSD is firmly attached and doesn’t wobble or move when touched.
By properly mounting the SSD in a suitable location inside your computer, you guarantee stability and optimal performance. A secure and stable mounting ensures that the SSD remains in position during operation, minimizing the risk of damage or data loss. Once you have successfully mounted the SSD, you can proceed to the next step: connecting the cables and power supply.
Step 5: Connecting the Cables and Power Supply
With the SSD securely mounted in your computer, it’s time to connect the necessary cables and power supply to ensure proper operation and data transfer. The correct connection of cables is crucial for the SSD to function optimally alongside your existing hard disk drive (HDD). Here’s how to connect the cables and power supply:
1. SATA Data Cable:
Locate a free SATA port on your motherboard – these are usually labeled SATA1, SATA2, etc. Connect one end of the SATA data cable to the SATA port on the motherboard. Ensure a secure connection by aligning the L-shaped connector with the corresponding port and gently pushing it in until it clicks.
2. SSD SATA Connector:
Connect the other end of the SATA data cable to the SATA connector on the SSD. Align the connector with the corresponding port on the SSD and gently push it in until it clicks, ensuring a snug fit.
3. SATA Power Cable:
Locate a SATA power connector from your computer’s power supply unit (PSU). The SATA power cable has a broad, rectangular connector with an L-shaped notch. Connect one end of the SATA power cable to the SATA power connector on the SSD. Align the notch on the connector with the corresponding notch on the SSD and gently push it in until it locks into place.
4. HDD Connections (If Applicable):
If you have an existing hard disk drive (HDD) installed, reconnect the SATA data cable and SATA power cable to the appropriate ports on the HDD. Follow the same steps mentioned above and ensure a secure and proper connection.
5. Cable Management:
After connecting the necessary cables, take a moment to tidy up the cables inside your computer case. Use cable ties or Velcro straps to secure and organize the cables, making sure they don’t obstruct airflow or interfere with other components.
6. Double-Check Connections:
Before closing the computer case, double-check all the cable connections. Ensure that the SATA data cable and SATA power cable are fully inserted and securely attached to both the SSD and the motherboard or HDD.
By correctly connecting the SATA data cable and SATA power cable to your SSD, you establish a reliable data transfer pathway and provide the necessary power for the SSD to function. Double-checking the connections ensures a seamless integration of the SSD and HDD into your computer system. Once the cables and power supply are connected, you can move on to the next step: configuring the BIOS settings.
Step 6: BIOS Configuration
After connecting the necessary cables, it’s time to configure the Basic Input/Output System (BIOS) settings to recognize and optimize the newly installed solid-state drive (SSD). Proper BIOS configuration ensures that your computer boots from the SSD and takes full advantage of its performance capabilities. Here’s how to configure the BIOS settings:
1. Boot up your computer and access the BIOS:
Restart your computer and enter the BIOS settings. The specific key to access the BIOS may vary depending on your motherboard, but it is often the Delete or F2 key. Look for an on-screen prompt during the boot process that indicates the key or combination of keys to press.
2. Locate the Boot options:
Once inside the BIOS, navigate to the “Boot” or “Boot Options” section. This section may be named differently depending on your motherboard’s BIOS interface.
3. Set the SSD as the primary boot device:
In the Boot options, locate the list of boot devices. Look for the entry corresponding to your SSD. Select the SSD and move it to the top of the boot device list using the designated function keys (often F5 or F6) or by adjusting the boot order using the arrow keys.
4. Configure other boot settings (if necessary):
If you have additional hard drives or bootable devices connected, ensure that the SSD is set as the primary boot device and that any secondary or non-bootable drives are properly listed in the boot device order. This allows your computer to prioritize the SSD for booting.
5. Save and exit:
Once you have configured the boot options and ensured that the SSD is set as the primary boot device, save the changes and exit the BIOS. Follow the prompts to save the changes and restart your computer.
6. Check boot order and SSD detection:
After restarting, confirm that the computer boots from the SSD. You can check this by observing the boot screen or checking the BIOS settings again. Additionally, check the storage configuration in your operating system to ensure that the SSD is properly detected.
By setting the SSD as the primary boot device in the BIOS, you allow your computer to boot from the SSD, taking advantage of its faster boot times and improved performance. Configuring the BIOS properly ensures that your computer recognizes the SSD and optimizes its use. Once you have successfully configured the BIOS settings, you can proceed to the next step: formatting the SSD.
Step 7: Formatting the SSD
After configuring the BIOS settings, the next step in the installation process is to format the solid-state drive (SSD). Formatting the SSD prepares it for use and allows your operating system to recognize it as an available storage device. Here’s how to format the SSD:
1. Open Disk Management:
In your operating system, open the Disk Management tool. On Windows, you can access it by right-clicking the Start menu and selecting “Disk Management” from the context menu. On macOS, open “Disk Utility” from the Applications/Utilities folder.
2. Locate the SSD:
In the Disk Management tool, locate the SSD from the list of available disks. It may appear as an unallocated or unformatted disk. Take note of the disk number or name to avoid formatting the wrong disk.
3. Format the SSD:
Right-click on the SSD in the Disk Management tool and select “Format” from the context menu. Choose a suitable file system, such as NTFS for Windows or APFS for macOS. Optionally, you can assign a drive letter or volume name to the SSD for easy identification.
4. Customize Format Options (if applicable):
When formatting the SSD, you may have the option to customize the format settings. For Windows, you can choose allocation unit size and perform a quick format or a full format. On macOS, you can select the format type and scheme. Unless you have specific requirements, the default settings are typically sufficient.
5. Confirm the Format:
Review the format settings and click “OK” or “Format” to begin the formatting process. Depending on the size of the SSD, the formatting process may take a few seconds to several minutes. Be patient and let the process complete.
6. Verify the Formatted SSD:
Once the formatting is complete, verify that the SSD is properly formatted and appears as a healthy, accessible volume in the Disk Management tool. Check that the file system and storage capacity match your formatting settings.
Formatting the SSD prepares it for use and allows your operating system to treat it as a storage device. It establishes the necessary file system structure for data storage and retrieval. Once the SSD is successfully formatted, you can move on to the next step: transferring files from the HDD to the SSD.
Step 8: Transferring Files from HDD to SSD
With the solid-state drive (SSD) formatted and ready for use, it’s time to transfer your files from the existing hard disk drive (HDD) to the SSD. This step ensures that you can access your important data and programs on the faster and more efficient storage solution. Here’s how to transfer files from the HDD to the SSD:
1. Identify the Files to Transfer:
Determine which files and folders you want to transfer from the HDD to the SSD. You may prioritize important documents, personal files, frequently used applications, and any other data you commonly access.
2. Manually Copy and Paste:
The simplest method to transfer files is by manually copying and pasting them from the HDD to the SSD. Open two windows in your file explorer, one showing the contents of the HDD and the other showing the contents of the SSD. Select the files and folders you wish to transfer in the HDD window, right-click, and choose “Copy.” Switch to the SSD window, right-click in the desired location, and choose “Paste.”
3. Drag and Drop:
A quick alternative to copying and pasting is to use drag and drop. Open two windows, as mentioned above, and resize them so they’re visible side by side. Select the files and folders in the HDD window and drag them over to the corresponding location in the SSD window.
4. Use Backup and Restore Software:
If you have a large amount of data to transfer or prefer an automated approach, consider using backup and restore software. These programs allow you to create a backup of your HDD and restore it onto your SSD. They often provide additional features like incremental backups, file synchronization, and scheduled transfers.
5. Reinstall Applications (Optional):
Some applications may require a fresh installation on the SSD for optimal performance. If this is the case, make note of the necessary applications and reinstall them directly onto the SSD. Remember to retrieve any license keys or activation codes needed during the reinstallation process.
6. Verify the Transferred Files:
Once the transfer is complete, double-check that all the files and folders have successfully transferred to the SSD. Ensure that the organization and structure of the data remain intact and that you can access the transferred files on the SSD.
By systematically transferring your files from the HDD to the SSD, you ensure that you can continue working seamlessly with your data and applications while taking advantage of the SSD’s speed and efficiency. Once the files are successfully transferred, you can proceed to the next step: optimizing your system for the SSD-HDD setup.
Step 9: Optimizing Your System for SSD-HDD Setup
Once you have transferred your files from the hard disk drive (HDD) to the solid-state drive (SSD), it’s important to optimize your system to fully harness the benefits of the SSD-HDD setup. By implementing the following optimizations, you can optimize performance, maximize storage capacity, and ensure a seamless and fluid computing experience. Here’s how to optimize your system for the SSD-HDD setup:
1. Set SSD as the System Drive:
Confirm that your operating system is installed and running from the SSD. Check the properties of your operating system drive to ensure it is located on the SSD rather than the HDD. If necessary, update the boot order in the BIOS to prioritize the SSD as the primary boot device.
2. Adjust Paging File Settings:
The paging file, also known as the virtual memory file, plays a crucial role in computer performance. To optimize your system, move the paging file from the HDD to the SSD. Access the system settings, go to the Advanced tab, and click on the Settings button under the Performance section. In the Performance Options window, navigate to the Advanced tab, click on the Change button under Virtual Memory, and set the SSD as the location for the paging file.
3. Redirect User Folders:
To maximize storage capacity on the SSD, you can relocate user folders such as Documents, Pictures, Music, and Videos to the HDD. Right-click on each user folder, go to Properties, and navigate to the Location tab. Click on the Move button, select the corresponding folder on the HDD, and confirm the relocation.
4. Enable TRIM Support:
TRIM is a feature that helps optimize SSD performance and prolong its lifespan. Verify that TRIM is enabled in your operating system settings. Open the Command Prompt as an administrator and type the command “fsutil behavior set DisableDeleteNotify 0” to enable TRIM support.
5. Disable HDD Indexing:
Indexing is a feature that can improve search performance but may impact SSD performance. Disable indexing for the SSD to prevent unnecessary read/write operations. Open File Explorer, right-click on the SSD drive, go to Properties, and uncheck the “Allow files on this drive to have contents indexed” option.
6. Update SSD Firmware and Drivers:
Keep your SSD firmware and drivers up to date to ensure compatibility, stability, and optimal performance. Visit the manufacturer’s website and download the latest firmware updates and drivers specific to your SSD model. Follow the instructions provided by the manufacturer for firmware and driver installation.
7. Regularly Maintain and Optimize the System:
Periodically perform system maintenance tasks such as disk cleanup, defragmentation, and error checking to keep your SSD and HDD running smoothly. Use built-in tools like Disk Cleanup, Disk Defragmenter (if applicable), and Error Checking to perform these tasks.
By implementing these optimizations, you can fully leverage the speed and responsiveness of the SSD while maximizing storage capacity on the HDD. These adjustments ensure that your computer operates efficiently, providing an optimal and seamless user experience. Regularly maintaining and optimizing your system will help sustain performance over time.
With these optimizations in place, you can experience the best of both worlds – the speed and responsiveness of the SSD combined with the ample storage capacity of the HDD. Enjoy the enhanced performance and storage capabilities of your SSD-HDD setup!
Conclusion
Congratulations! You have successfully completed the installation of a solid-state drive (SSD) alongside your existing hard disk drive (HDD). By combining the advantages of both storage devices, you have optimized your computer’s performance, improved storage capacity, and enhanced the overall user experience.
Throughout the installation process, you learned how to backup your data, determine the physical installation space, disconnect existing cables and power supply, mount the SSD, connect the cables and power supply, configure the BIOS settings, format the SSD, transfer files from the HDD to the SSD, and optimize your system for the SSD-HDD setup. These steps ensure a seamless integration and allow you to fully leverage the benefits of the SSD and HDD combination.
The benefits of using an SSD with an HDD are numerous. The SSD provides lightning-fast data access speeds, improved system performance, enhanced reliability and durability, energy efficiency, and quiet operation. Meanwhile, the HDD offers ample storage capacity at a lower cost. By strategically storing your operating system, frequently used applications, and important files on the SSD, and utilizing the HDD for less frequently accessed files and media libraries, you strike the perfect balance between speed and storage capacity.
Remember to implement ongoing maintenance tasks, such as updating firmware and drivers, optimizing system settings, and regularly maintaining your SSD and HDD. By doing so, you can ensure that your system continues to perform optimally and remains in excellent condition for years to come.
With your SSD-HDD setup, you can enjoy faster boot times, quicker application launches, seamless multitasking, and efficient data storage. Whether you are a gamer, creative professional, or power user, this combination provides the best of both worlds, enhancing your productivity and overall computing experience.
Thank you for following this installation guide. Embrace the power and storage capacity of your SSD-HDD setup and enjoy the enhanced performance and capabilities it offers. Happy computing!