Introduction
Welcome to our guide on how to install a Cooler Master Hyper 212 Evo CPU cooler. If you’re looking to improve the cooling performance of your CPU, the Hyper 212 Evo is a popular and effective aftermarket cooling solution. Whether you’re a seasoned PC builder or a beginner, this step-by-step guide will help you through the installation process.
One of the most critical components of any computer system is the CPU (Central Processing Unit). It generates a significant amount of heat during operation, and if not adequately cooled, it can lead to performance issues and even damage the processor. Stock coolers that come bundled with CPUs are often sufficient for basic tasks, but they can struggle to maintain low temperatures under heavy loads or overclocking scenarios. That’s where aftermarket CPU coolers, like the Cooler Master Hyper 212 Evo, come in.
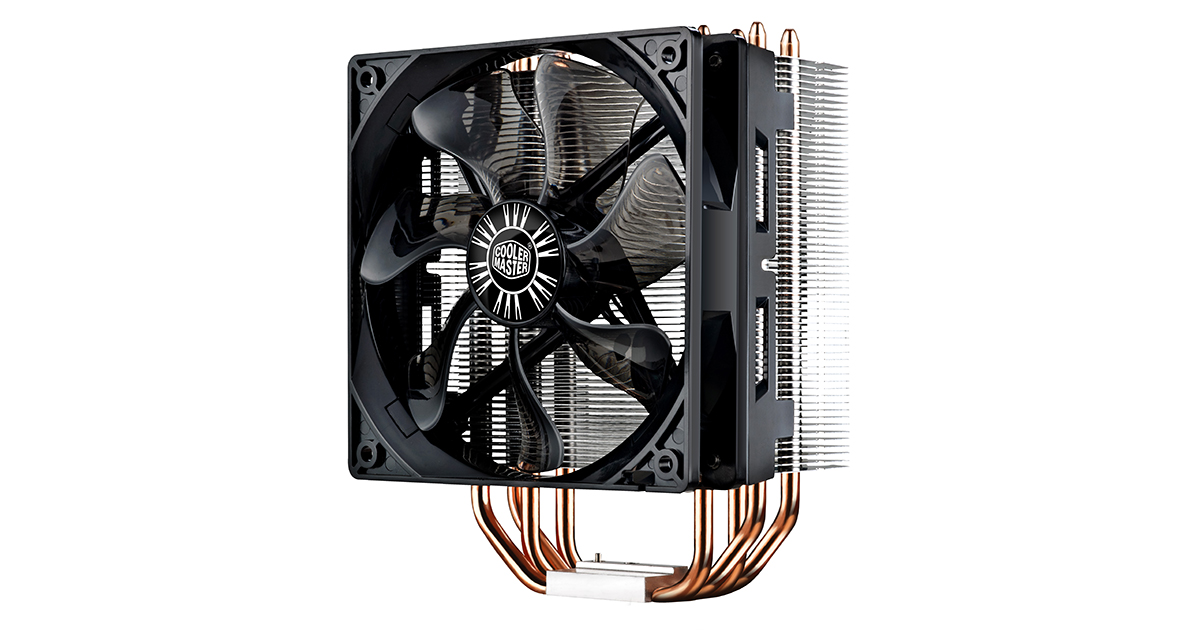
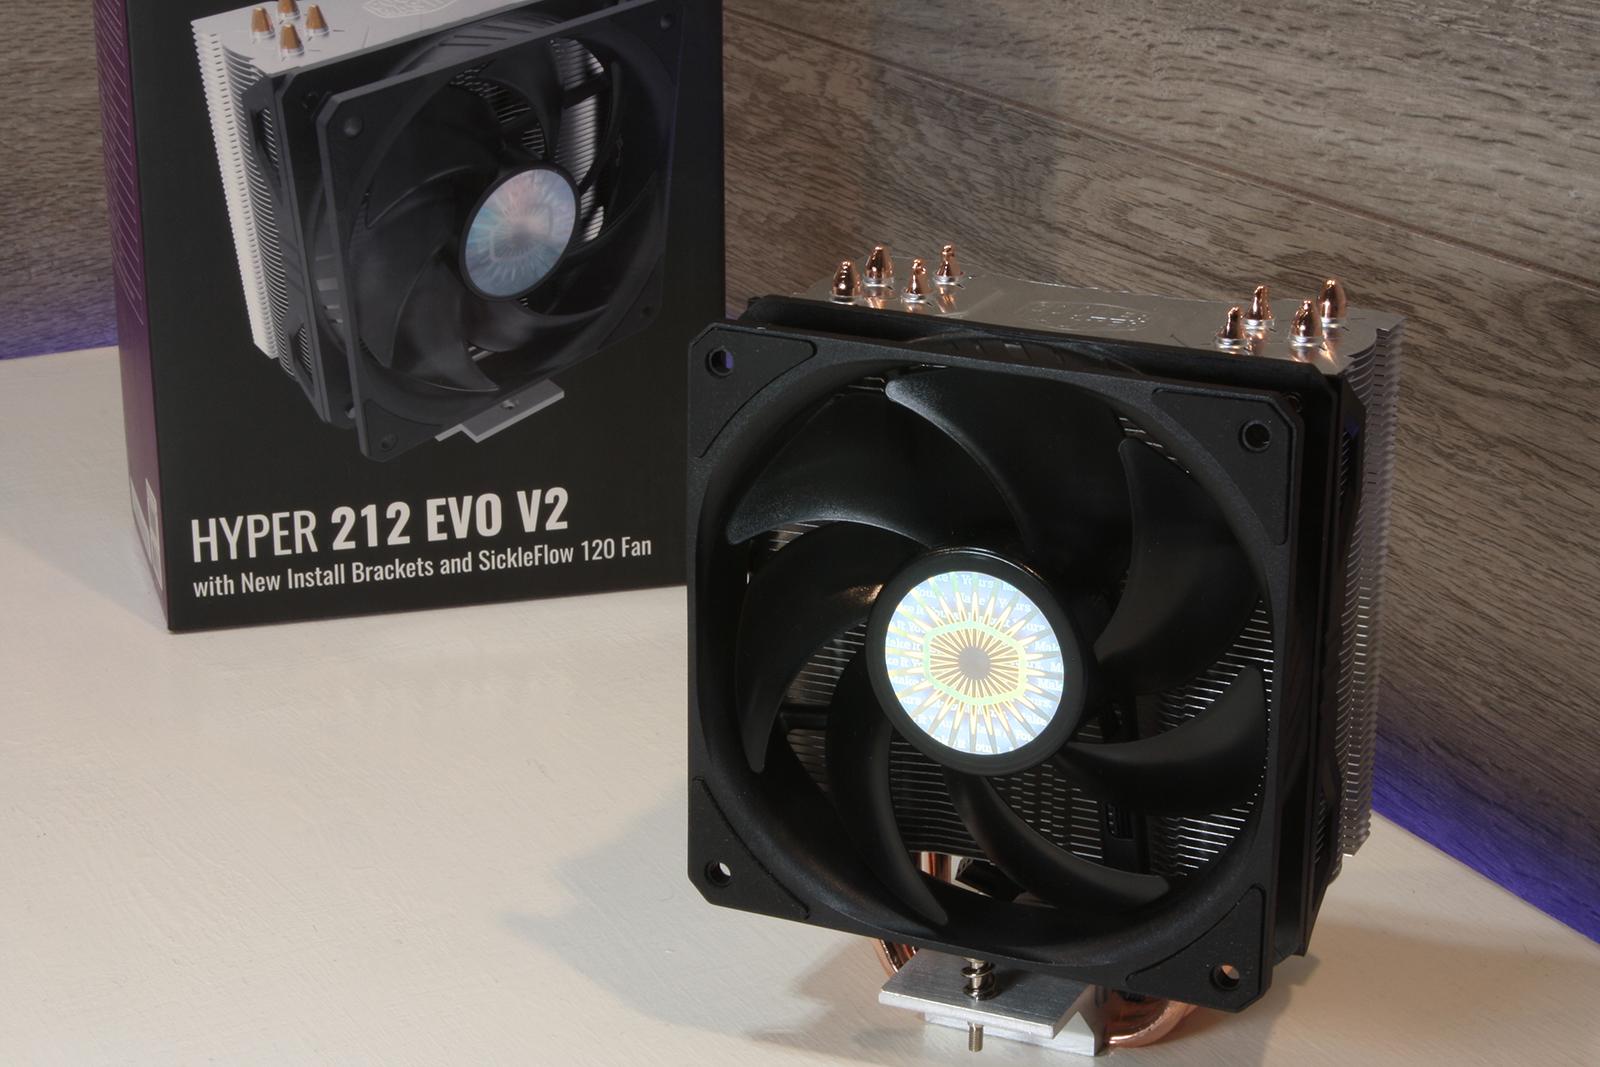
The Cooler Master Hyper 212 Evo is a budget-friendly air cooler that offers excellent cooling performance and silent operation. It features a tower design with four direct contact heat pipes that efficiently transfer heat away from the CPU. The included 120mm fan provides a good balance between airflow and noise levels.
In this guide, we will take you through every step of the installation process, from gathering the necessary tools to testing the cooler’s performance. We will provide detailed instructions and helpful tips to ensure a successful installation, even if you have limited experience with computer hardware.
Before we dive into the installation process, it’s essential to note that every CPU cooler installation may have slight variations depending on the specific motherboard and CPU socket you’re using. Therefore, it’s crucial to consult your cooler’s manual and your motherboard’s documentation for any specific instructions or precautions that may differ from the general guidelines we’ll be providing.
Now that we have a brief overview let’s move on to the first step: gathering the necessary tools and equipment.
Step 1: Gather the Necessary Tools and Equipment
Before you begin the installation process, it’s essential to gather all the necessary tools and equipment. Having everything ready beforehand will make the installation smoother and more efficient. Here’s a list of what you’ll need:
- Screwdriver: A Phillips head screwdriver is typically required to remove the old CPU cooler and secure the Hyper 212 Evo.
- Thermal Paste: Most CPU coolers, including the Hyper 212 Evo, require thermal paste to ensure proper heat transfer between the CPU and cooler. Some coolers come with pre-applied thermal paste, but it’s always a good idea to have some extra just in case.
- Isopropyl Alcohol: You’ll need isopropyl alcohol and a clean cloth or lint-free wipes to clean the old thermal paste from the CPU surface.
- Clean Cloth or Lint-Free Wipes: These are necessary to wipe away any excess thermal paste or to clean the CPU surface.
- Anti-static Wrist Strap: To protect your computer hardware from electrostatic discharge, it’s advisable to wear an anti-static wrist strap throughout the installation process.
- Cotton Swabs or Q-tips: These are useful for applying thermal paste or cleaning hard-to-reach areas.
- Tweezers (optional): Tweezers can be handy for handling small screws or other delicate components.
Ensure that you have all of these tools and equipment readily available before proceeding to the next step. It’s also a good idea to read through the Cooler Master Hyper 212 Evo’s manual or manufacturer’s website to check if any additional tools or accessories are required for your specific installation.
Taking the time to gather these tools and equipment will save you from unnecessary interruptions and help ensure a successful installation process. Once you have everything prepared, you can move on to the next step: preparing the computer for installation.
Step 2: Prepare the Computer for Installation
Before you start installing the Cooler Master Hyper 212 Evo CPU cooler, it’s crucial to prepare your computer for the installation process. Proper preparation will ensure a smooth and efficient installation. Follow these steps to get your computer ready:
- Power Off and Unplug: Shut down your computer and unplug it from the power source. This is a crucial safety measure to avoid any electrical mishaps during the installation process.
- Open the Computer Case: Remove the side panel of your computer case to gain access to the internal components. Different cases have different mechanisms for opening, ranging from thumb screws to sliding panels. Consult your case manual if you’re unsure how to open it.
- Ground Yourself: To prevent static electricity discharge, touch a grounded metal object, such as your computer case or a metal table. Alternatively, wear an anti-static wrist strap and connect it to a grounded point.
- Identify the CPU Socket: Locate the CPU socket on your motherboard. It’s usually a square or rectangular socket with a lever or latch to secure the CPU cooler in place.
- Remove Any Existing Fan: If you have a stock CPU cooler or any other cooling solution already installed, disconnect and remove it from the socket. Follow the instructions in your motherboard’s manual for proper removal.
- Clean the CPU Area: Use a clean cloth or lint-free wipes and isopropyl alcohol to gently clean the surface of the CPU. Remove any leftover thermal paste or debris to ensure a clean and smooth contact surface.
- Check for Compatibility: Verify that the Cooler Master Hyper 212 Evo is compatible with your motherboard and CPU socket. Refer to the cooler’s manual or the manufacturer’s website for information on compatibility. It’s essential to ensure a proper fit before proceeding with the installation.
By following these steps, you have set the stage for a successful installation. Your computer is now prepared, and you’re ready to move on to the next step: removing the old CPU cooler. It’s important to approach this step with caution and patience to avoid any damage to your hardware.
Step 3: Remove the Old CPU Cooler
Now that your computer is prepared, it’s time to remove the old CPU cooler. Follow these steps carefully to ensure a smooth removal process:
- Detach the Fan Cable: Gently disconnect the fan cable from the motherboard header. This cable is responsible for supplying power to the fan, and it may be connected via a small 3-pin or 4-pin connector.
- Remove the Cooler Mounting Brackets: Depending on your current CPU cooler, you’ll need to remove any mounting brackets that hold it in place. These brackets can be secured using screws or clips. Consult your motherboard’s manual or the cooler’s manual for the specific procedure.
- Loosen the Cooler Retention Mechanism: Most CPU coolers use a retention mechanism to secure them to the motherboard. This mechanism may involve screws, latches, or a lever. Loosen or release the mechanism to detach the old cooler from the CPU socket.
- Carefully Remove the Cooler: Once the retention mechanism is loosened, gently lift the old CPU cooler off the CPU socket. Be cautious not to put excessive force on the CPU or any surrounding components.
- Clean the CPU Surface: Use a clean cloth or lint-free wipes and isopropyl alcohol to wipe away any thermal paste residue from the surface of the CPU. Ensure that the surface is clean and free of debris before proceeding to the next step.
Removing the old CPU cooler can be a delicate process. Take your time and be careful not to damage the CPU or any surrounding components. If you encounter any difficulties during the removal, consult your motherboard’s manual or seek assistance from a professional.
With the old CPU cooler removed and the CPU surface clean, you’re now ready to move on to the next step: cleaning the CPU and applying thermal paste for the new Hyper 212 Evo cooler installation.
Step 4: Clean the CPU and Apply Thermal Paste
After removing the old CPU cooler, it’s crucial to clean the CPU surface and apply fresh thermal paste before installing the Cooler Master Hyper 212 Evo. Follow these steps to ensure proper heat transfer and optimal cooling performance:
- Prepare the Isopropyl Alcohol: Dampen a clean cloth or lint-free wipes with a small amount of isopropyl alcohol. Ensure that the cloth is not dripping wet but moist enough to clean the CPU surface effectively.
- Clean the CPU Surface: Gently wipe the surface of the CPU with the moistened cloth or wipes. Be careful not to apply excessive pressure or scrub vigorously. The goal is to remove any residual thermal paste or debris without damaging the CPU surface.
- Dry the CPU Surface: Using a dry cloth or a new lint-free wipe, carefully dry the CPU surface. Ensure that no moisture is left behind before applying thermal paste.
- Apply Thermal Paste: Using a small pea-sized dot of thermal paste, apply it to the center of the CPU surface. It’s essential not to use too much thermal paste, as it can lead to poor heat transfer. The pressure applied during cooler installation will spread the paste evenly.
- Spread the Thermal Paste (optional): If you prefer a more controlled spread, you can use a plastic card, thermal paste spreader, or even a clean fingertip (covered with a rubber glove or plastic wrap) to spread the thermal paste evenly across the CPU surface. Be cautious not to use excessive force or create a thick layer.
Remember, the goal of applying thermal paste is to fill in microscopic gaps between the CPU and the cooler’s heat spreader, improving the heat transfer efficiency. Too much or too little thermal paste can negatively affect cooling performance, so be mindful of the amount used.
Once you have applied the thermal paste, you’re ready to move on to the next step: installing the Cooler Master Hyper 212 Evo CPU cooler and securing it to the motherboard.
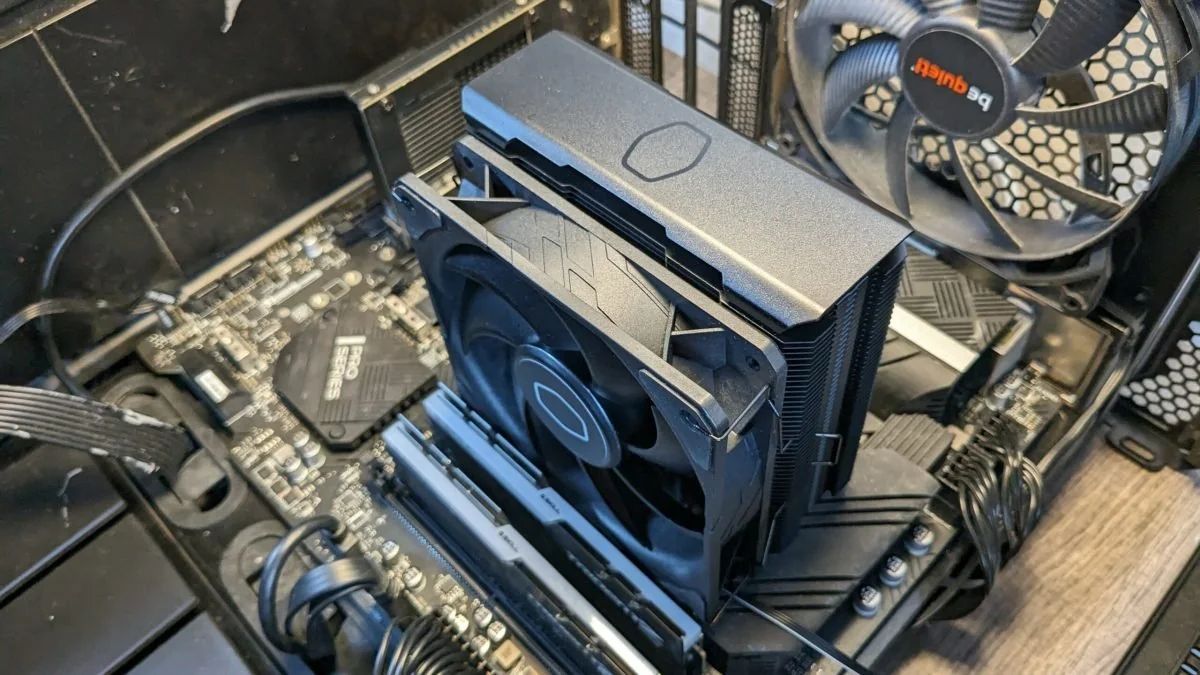
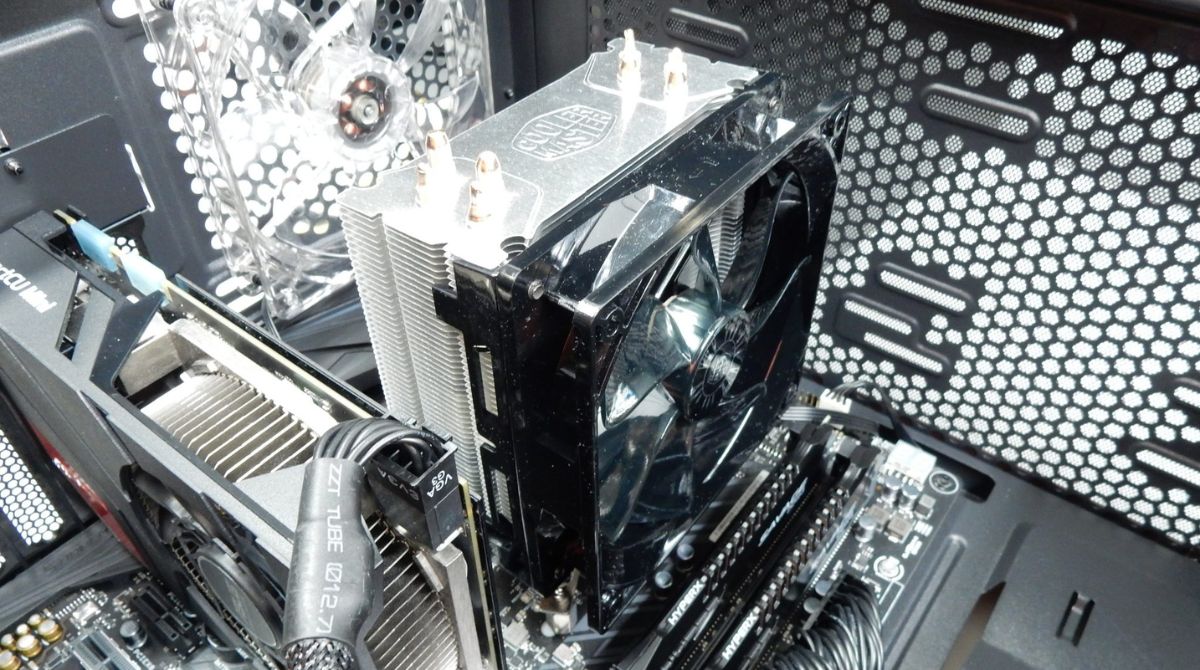
Step 5: Install the Cooler Master Hyper 212 Evo
With the CPU cleaned and thermal paste applied, it’s time to install the Cooler Master Hyper 212 Evo. Follow these steps carefully to ensure a secure and proper installation:
- Position the Cooler: Carefully place the Cooler Master Hyper 212 Evo onto the CPU surface, aligning the mounting screw holes with the corresponding holes on the motherboard.
- Secure Mounting Bracket: Depending on your motherboard’s socket type, you’ll need to attach a mounting bracket to the cooler. Follow the instructions provided with the cooler to ensure the bracket is properly installed.
- Attach Mounting Screws: Using the provided mounting screws, secure the cooler to the motherboard through the mounting holes. Tighten the screws in a diagonal pattern, gradually ensuring even pressure is applied to all sides.
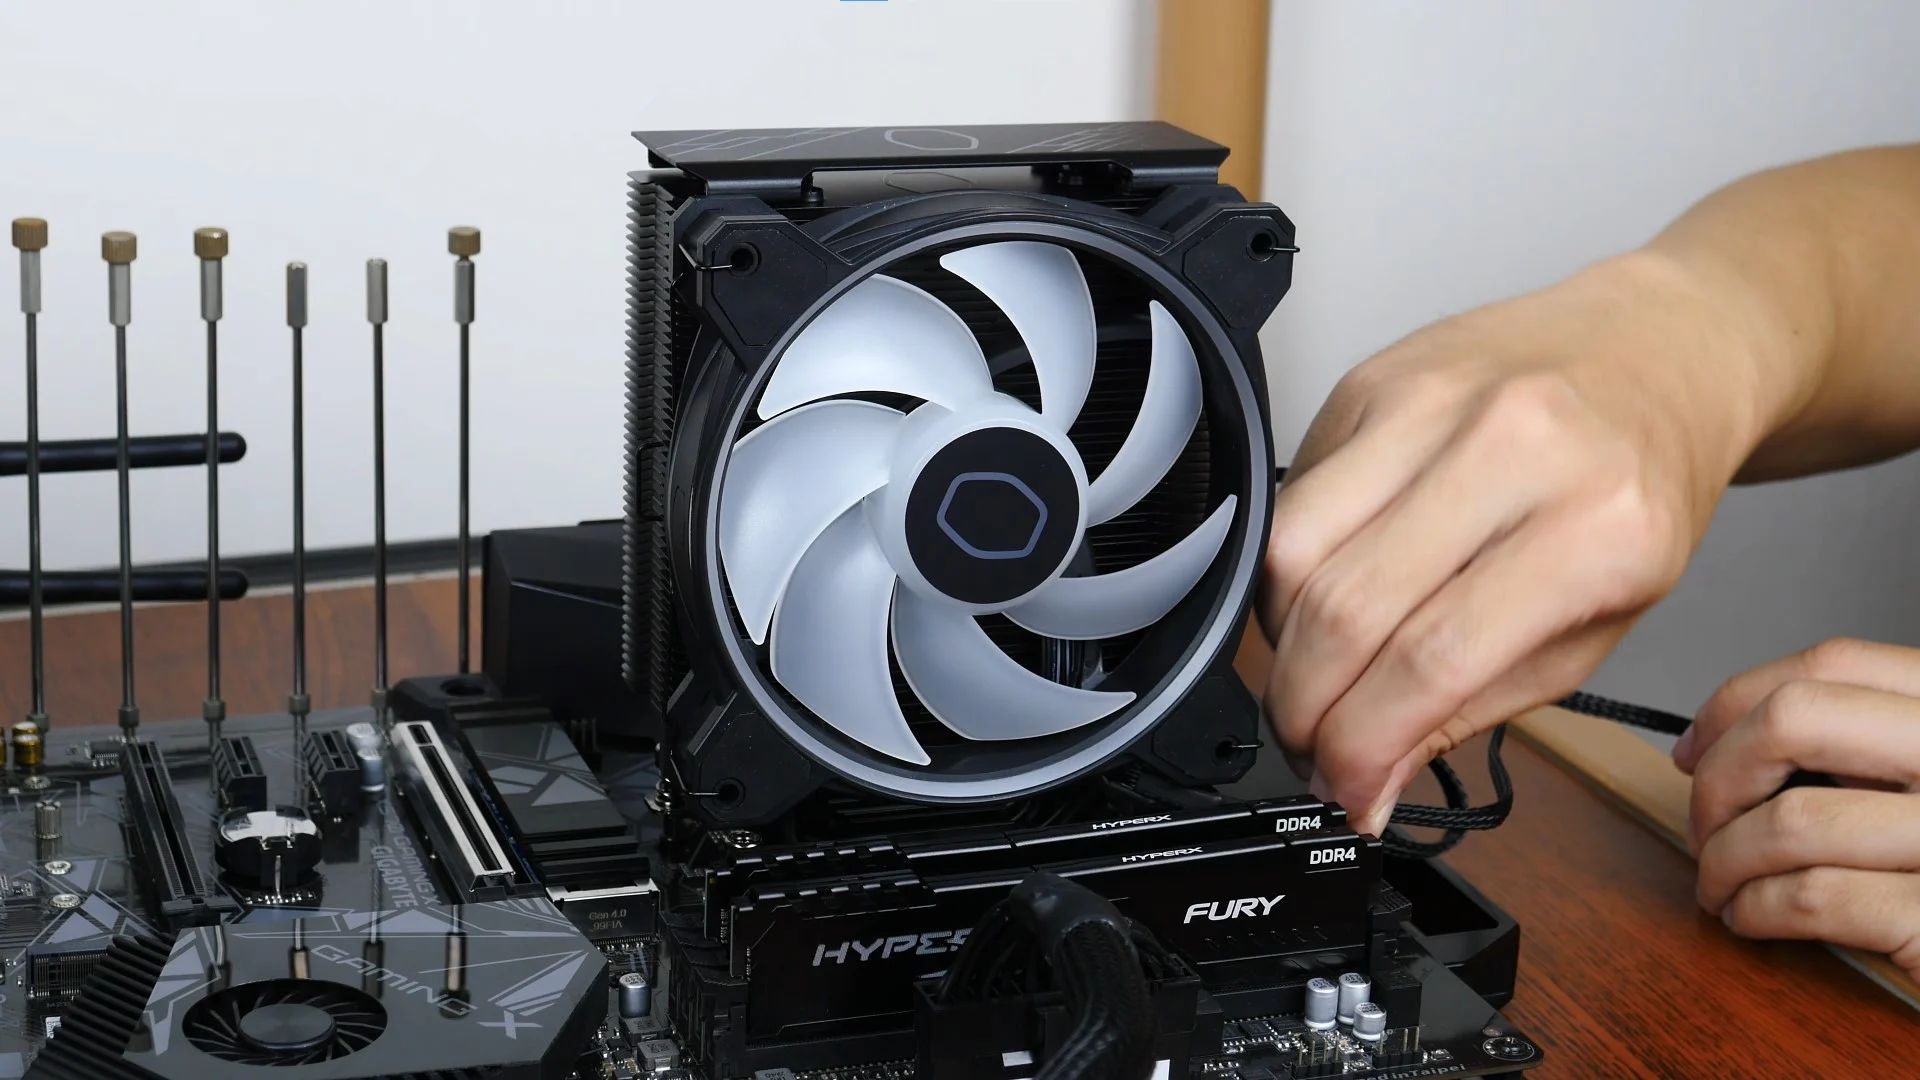
- Connect the Fan: Attach the Cooler Master Hyper 212 Evo’s fan to the heatsink. Align the fan’s mounting clips with the holes in the heatsink and secure them in place. Ensure that the fan cable is connected to the appropriate fan header on the motherboard.
- Reattach the Side Panel: Once the cooler is securely installed, reattach the side panel of your computer case.
Throughout the installation process, be mindful of tightening the screws evenly and not overtightening them, as this can damage the motherboard or CPU. It’s also important to ensure that the fan is properly aligned with the heatsink for optimal cooling performance.
Keep in mind that the specific installation steps may differ slightly depending on your motherboard’s layout and socket type. Always consult the Cooler Master Hyper 212 Evo’s manual for any specific instructions or recommendations for your particular installation.
Once you have completed the installation of the Cooler Master Hyper 212 Evo, it’s time to move on to the next step: securing the cooler to the motherboard.
Step 6: Secure the Cooler to the Motherboard
Once you have installed the Cooler Master Hyper 212 Evo onto the CPU, the next step is to secure it to the motherboard. Properly securing the cooler ensures stability and optimal thermal contact. Follow these steps to secure the cooler to the motherboard:
- Verify Mounting Pressure: Do a visual check to ensure that the cooler is making solid contact with the CPU surface. Check if the thermal paste is spreading evenly across the CPU.
- Tighten the Screws: Starting with one screw, tighten it in a clockwise direction until it is snug. Then move to the opposite diagonal screw and tighten it. Continue this pattern with the remaining screws until you have tightened all of them securely.
- Check for Even Pressure: After tightening the screws, check for even pressure on all sides of the cooler. Gently press down on the cooler to ensure it is firmly seated and making full contact with the CPU.
- Double-Check Screw Tightness: Once all the screws are tightened, double-check their tightness. Ensure that they are secure but be cautious not to overtighten and risk damaging the motherboard.
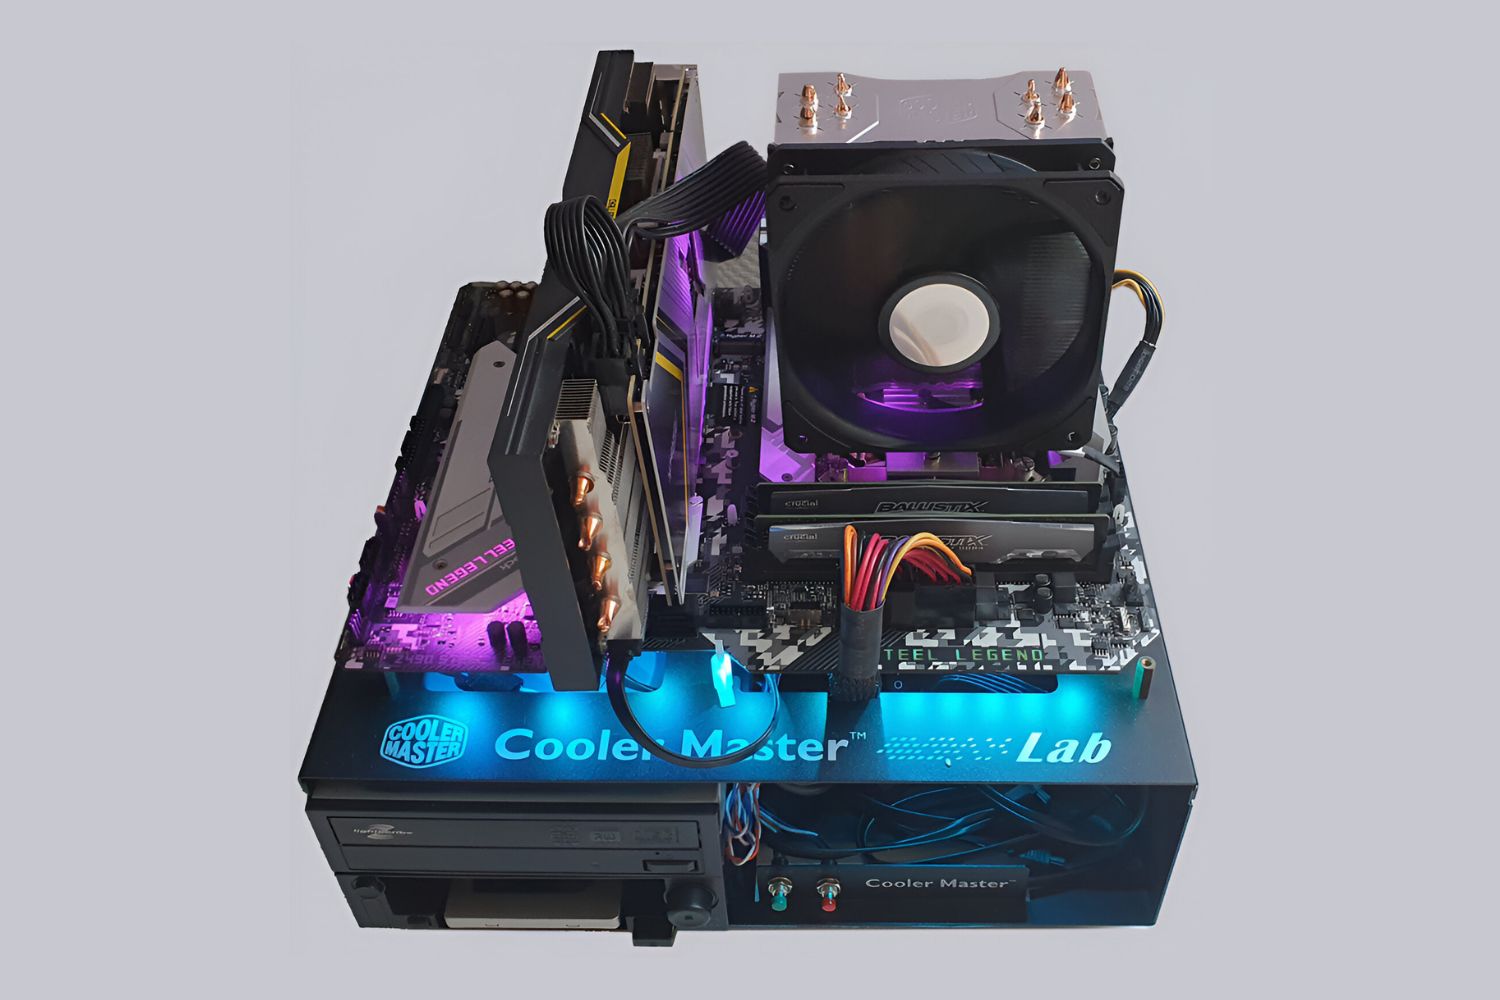
It’s important to ensure that the cooler is evenly and firmly secured to the motherboard. This ensures proper heat transfer and prevents any potential wobbling or movement that could affect cooling performance. The Cooler Master Hyper 212 Evo comes with a robust mounting system that provides stability and ease of installation.
Once you have securely fastened the cooler to the motherboard, you can proceed to the next step: connecting the Cooler Master Hyper 212 Evo to the power supply.
Step 7: Connect the Cooler to the Power Supply
After securing the Cooler Master Hyper 212 Evo to the motherboard, the next step is to connect it to the power supply. This allows the cooler’s fan to receive power and provide the necessary airflow for effective cooling. Follow these steps to connect the cooler to the power supply:
- Locate the CPU Fan Header: On your motherboard, find the CPU fan header. It’s typically labeled as “CPU_FAN” or something similar. Refer to your motherboard’s manual if you’re unsure of the exact location.
- Connect the Fan Cable: Take the fan cable from the Cooler Master Hyper 212 Evo and connect it to the CPU fan header on the motherboard. Make sure it is securely plugged in, aligned with the pins or connector on the header.
- Adjust Fan Speed (Optional): Some motherboards offer fan speed control options in the BIOS or through software utilities. If desired, you can adjust the fan speed settings to fit your preference for cooling performance and noise levels.
After connecting the Cooler Master Hyper 212 Evo’s fan to the CPU fan header, it will start receiving power when you turn on your computer. The fan’s rotation will help dissipate heat from the CPU, maintaining optimal operating temperatures.
It’s important to note that the Cooler Master Hyper 212 Evo features a PWM fan, which means it can automatically adjust its speed based on CPU temperature. This feature allows for more efficient cooling by adjusting fan speed as needed.
Once you have successfully connected the cooler to the power supply, you’re ready for the final step: testing the installation to ensure everything is functioning correctly.
Step 8: Test the Installation
After completing the installation of the Cooler Master Hyper 212 Evo CPU cooler, it’s crucial to test the installation to ensure everything is working correctly. Proper testing will give you peace of mind and allow you to identify any potential issues early on. Follow these steps to test the installation:
- Power On Your Computer: Plug in your computer and power it on. Allow it to boot into the operating system.
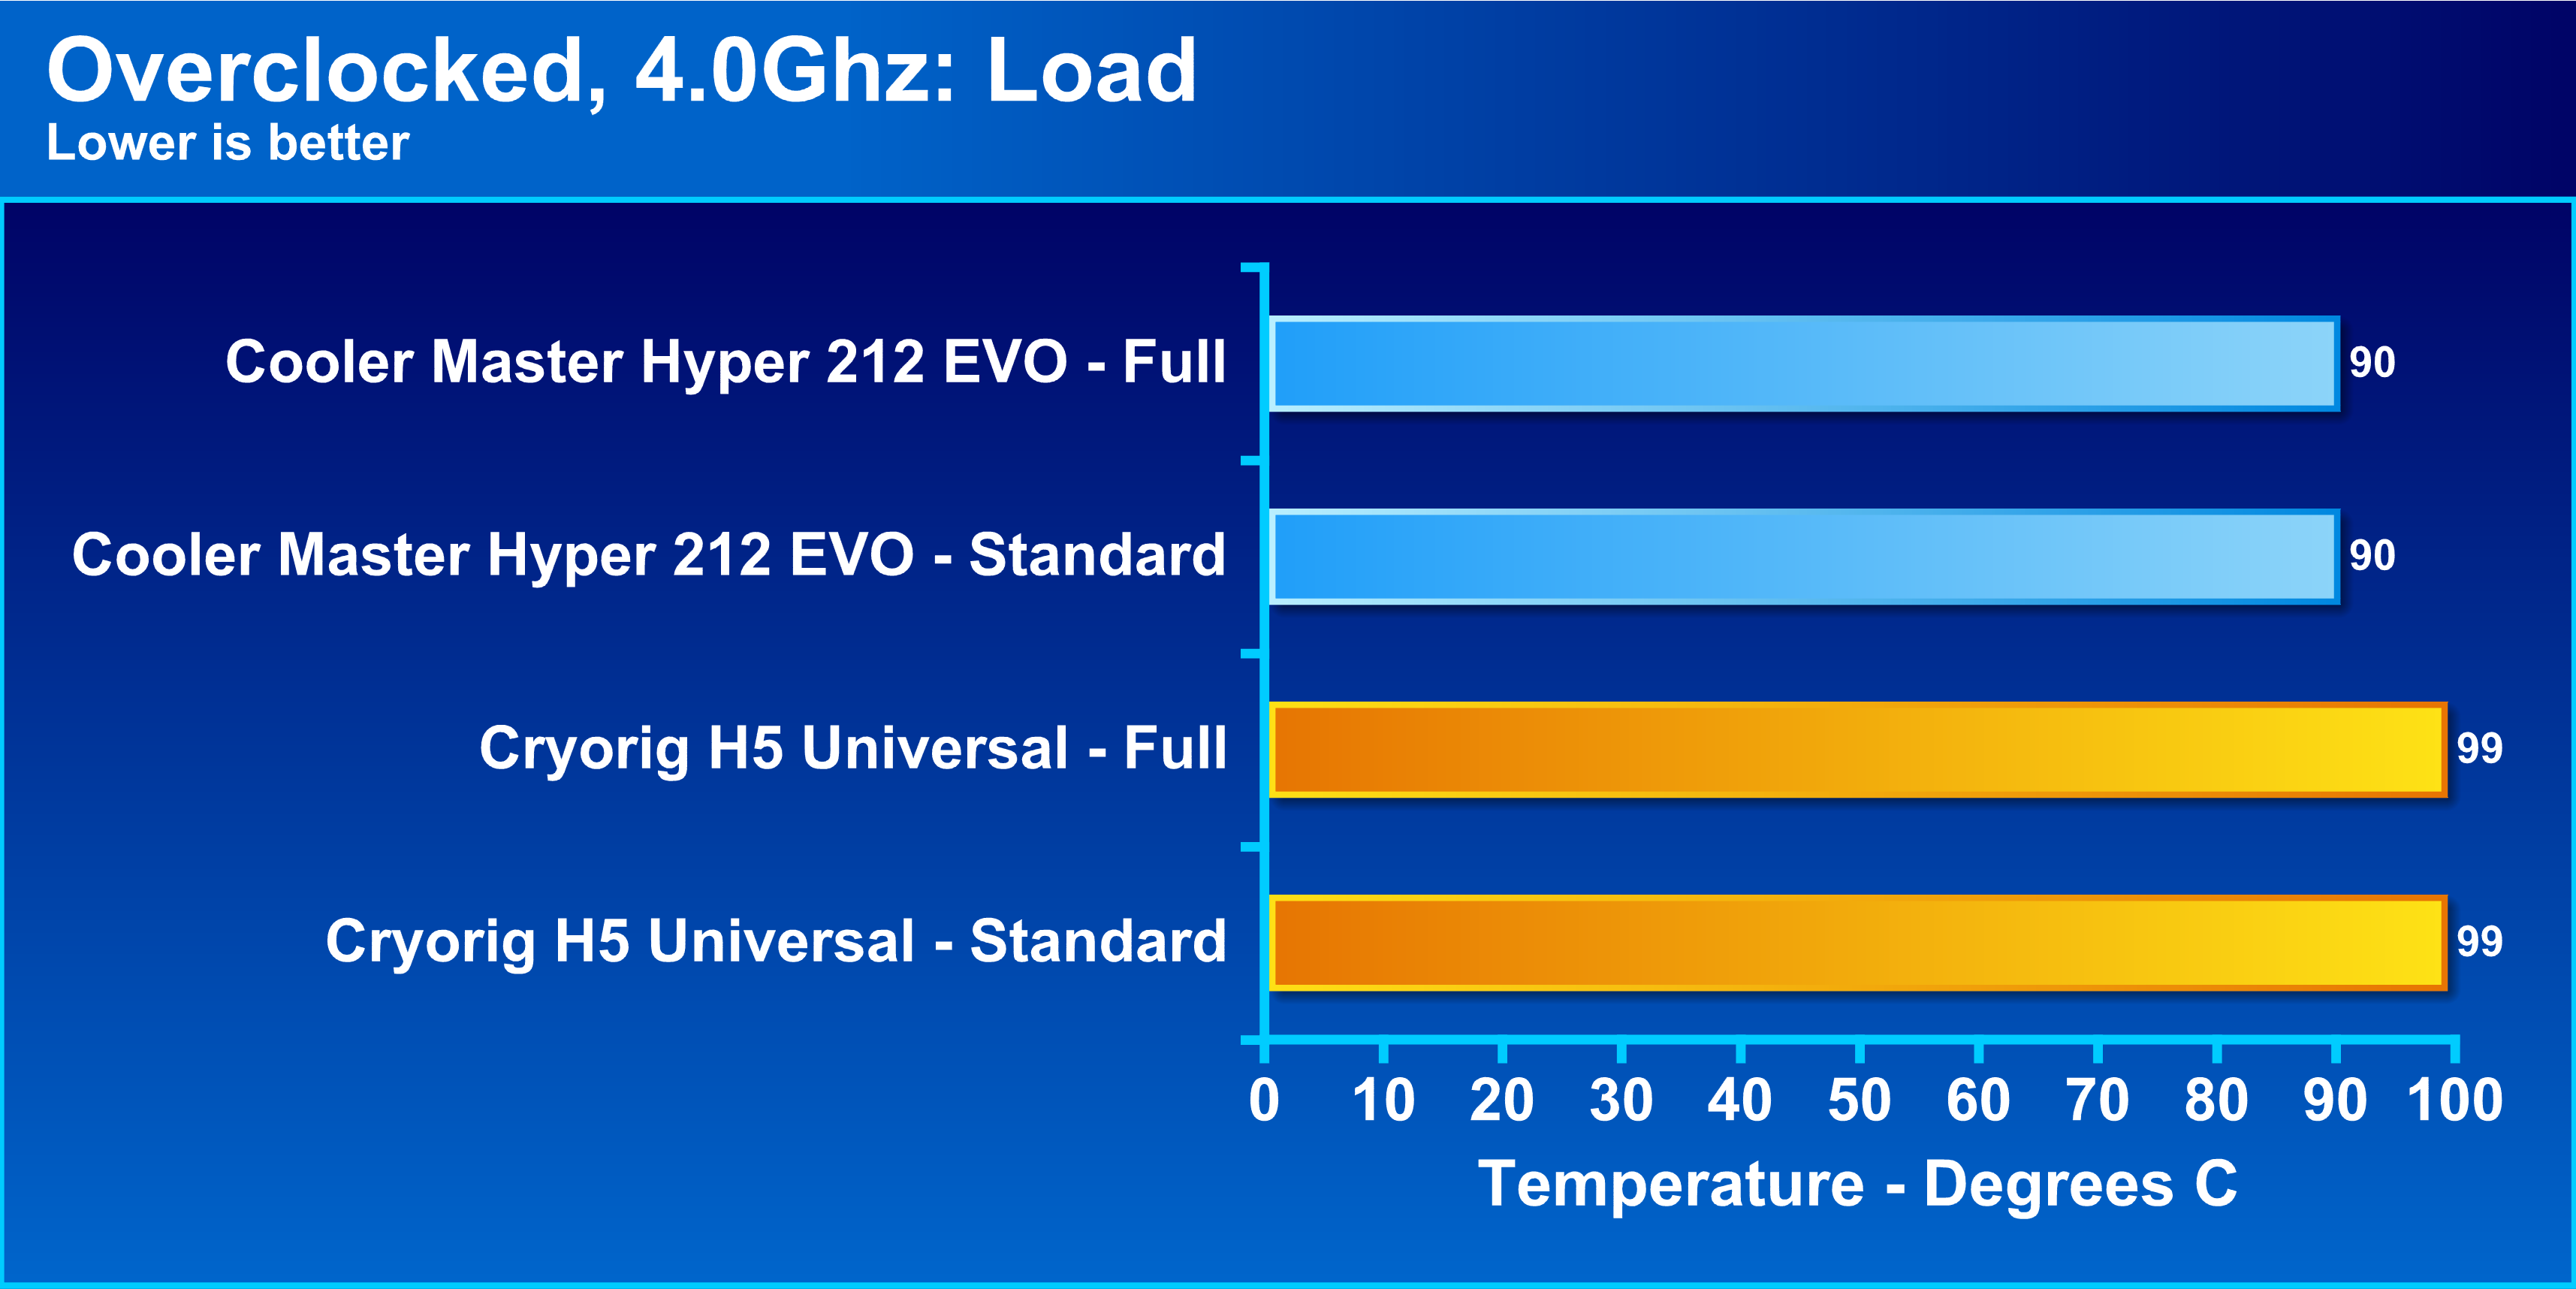
- Monitor CPU Temperatures: Use a monitoring software or the BIOS to check the CPU temperatures. Ideally, the temperatures should be lower compared to the previous cooling solution or within a safe operating range.
- Listen for Fan Operation: Pay attention to the operation of the Cooler Master Hyper 212 Evo’s fan. Ensure that it is spinning smoothly and without any unusual noises. If you notice any strange noises or the fan not spinning, check the connections and ensure it is receiving power properly.
- Run Stress Tests: To further test the installation, you can run CPU-intensive tasks or stress tests. These tests will put a heavy load on the CPU and allow you to monitor the temperatures and check for any signs of overheating or instability. There are various benchmarking and stress testing software available for this purpose.
- Monitor System Stability: While running the stress tests, keep an eye on the system’s stability. Monitor for any crashes, freezes, or unexpected shutdowns, which could be an indication of an installation issue.
It’s important to note that each computer system is unique, and the temperature and stability thresholds may vary for different CPUs and operating conditions. Consult your CPU manufacturer’s specifications or seek guidance from forums or community support if you have concerns about acceptable temperature ranges or system stability.
If everything is functioning correctly, and the temperatures and system stability are within acceptable ranges, you can consider the installation of the Cooler Master Hyper 212 Evo CPU cooler a success.
In the event that you encounter any problems or have concerns during the testing phase, it’s recommended to consult the Cooler Master Hyper 212 Evo’s manual, seek assistance from technical support, or connect with experienced users in online forums for guidance and troubleshooting.
With the installation now complete and successfully tested, you can enjoy the benefits of improved cooling performance and quieter operation provided by the Cooler Master Hyper 212 Evo.
Conclusion
Congratulations! You have successfully installed the Cooler Master Hyper 212 Evo CPU cooler. By following the step-by-step instructions in this guide, you have improved the cooling performance of your computer’s CPU, ensuring optimal operating temperatures and potentially boosting overall system performance.
The Cooler Master Hyper 212 Evo is a budget-friendly and reliable aftermarket cooler that offers excellent cooling capabilities. Its tower design, direct contact heat pipes, and 120mm fan contribute to efficient heat dissipation and quiet operation. With your newly installed Hyper 212 Evo, you can expect improved thermal management, especially during demanding tasks or overclocking scenarios.
Throughout the installation process, you have learned valuable skills in computer hardware and have gained the confidence to tackle similar projects. Remember, proper preparation, careful handling of components, and thorough testing are key to a successful installation.
As you enjoy the benefits of the Cooler Master Hyper 212 Evo, remember to periodically check and clean the cooler to maintain its performance. Over time, dust and debris can accumulate, hindering airflow and potentially reducing cooling efficiency. Regular maintenance will help prolong the lifespan of your cooler and keep your CPU operating at optimal temperatures.
We hope this guide has been helpful in your journey to install the Cooler Master Hyper 212 Evo. If you have any further questions or need additional support, consult the cooler’s manual, reach out to technical support, or connect with the vibrant community of PC enthusiasts in online forums.
Thank you for choosing the Cooler Master Hyper 212 Evo, and happy computing!