Introduction
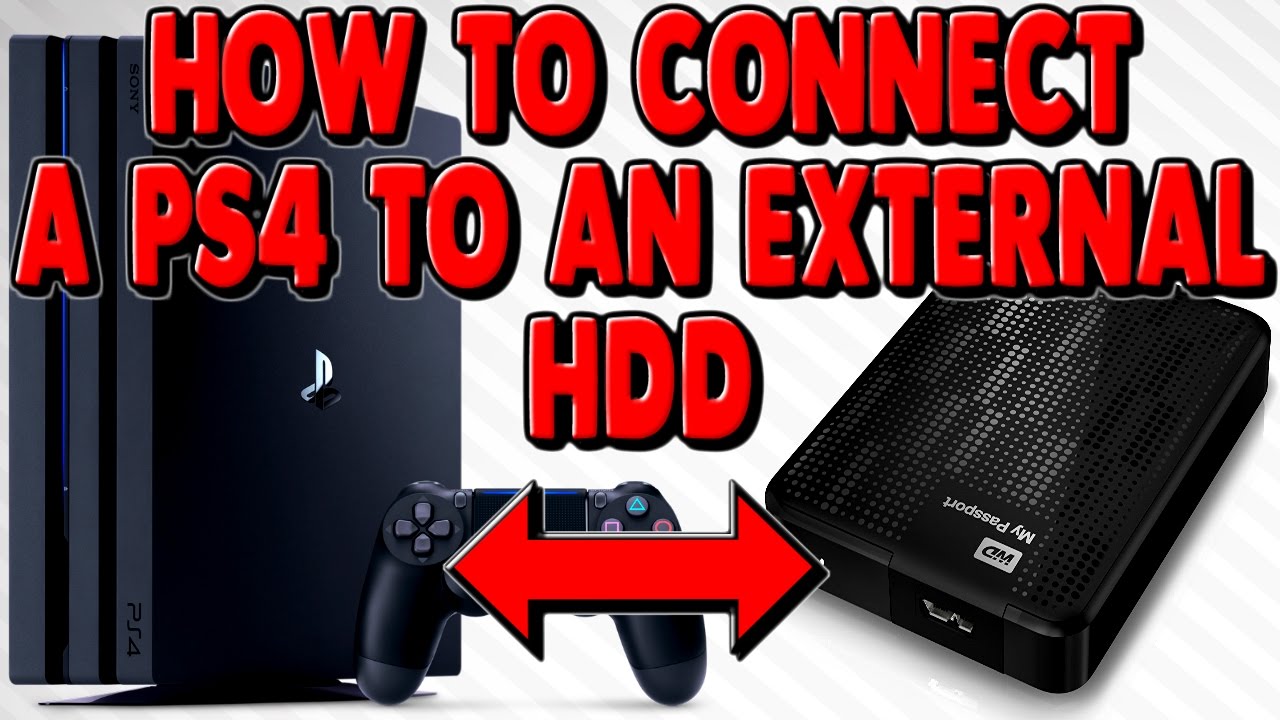
Are you running out of storage space on your PS4? Do you want to expand your gaming library without having to delete your favorite games? If so, connecting an external hard drive to your PS4 is the perfect solution.
The PS4 allows you to connect an external hard drive to easily expand your storage capacity. This means you can store more games, applications, and media files without worrying about filling up your console’s internal storage. Not only does this offer convenience, but it also helps improve the overall performance of your PS4.
In this guide, we’ll walk you through the step-by-step process of hooking up an external hard drive to your PS4. Whether you’re a seasoned gamer or new to the world of PlayStation, you’ll find this guide helpful and easy to follow.
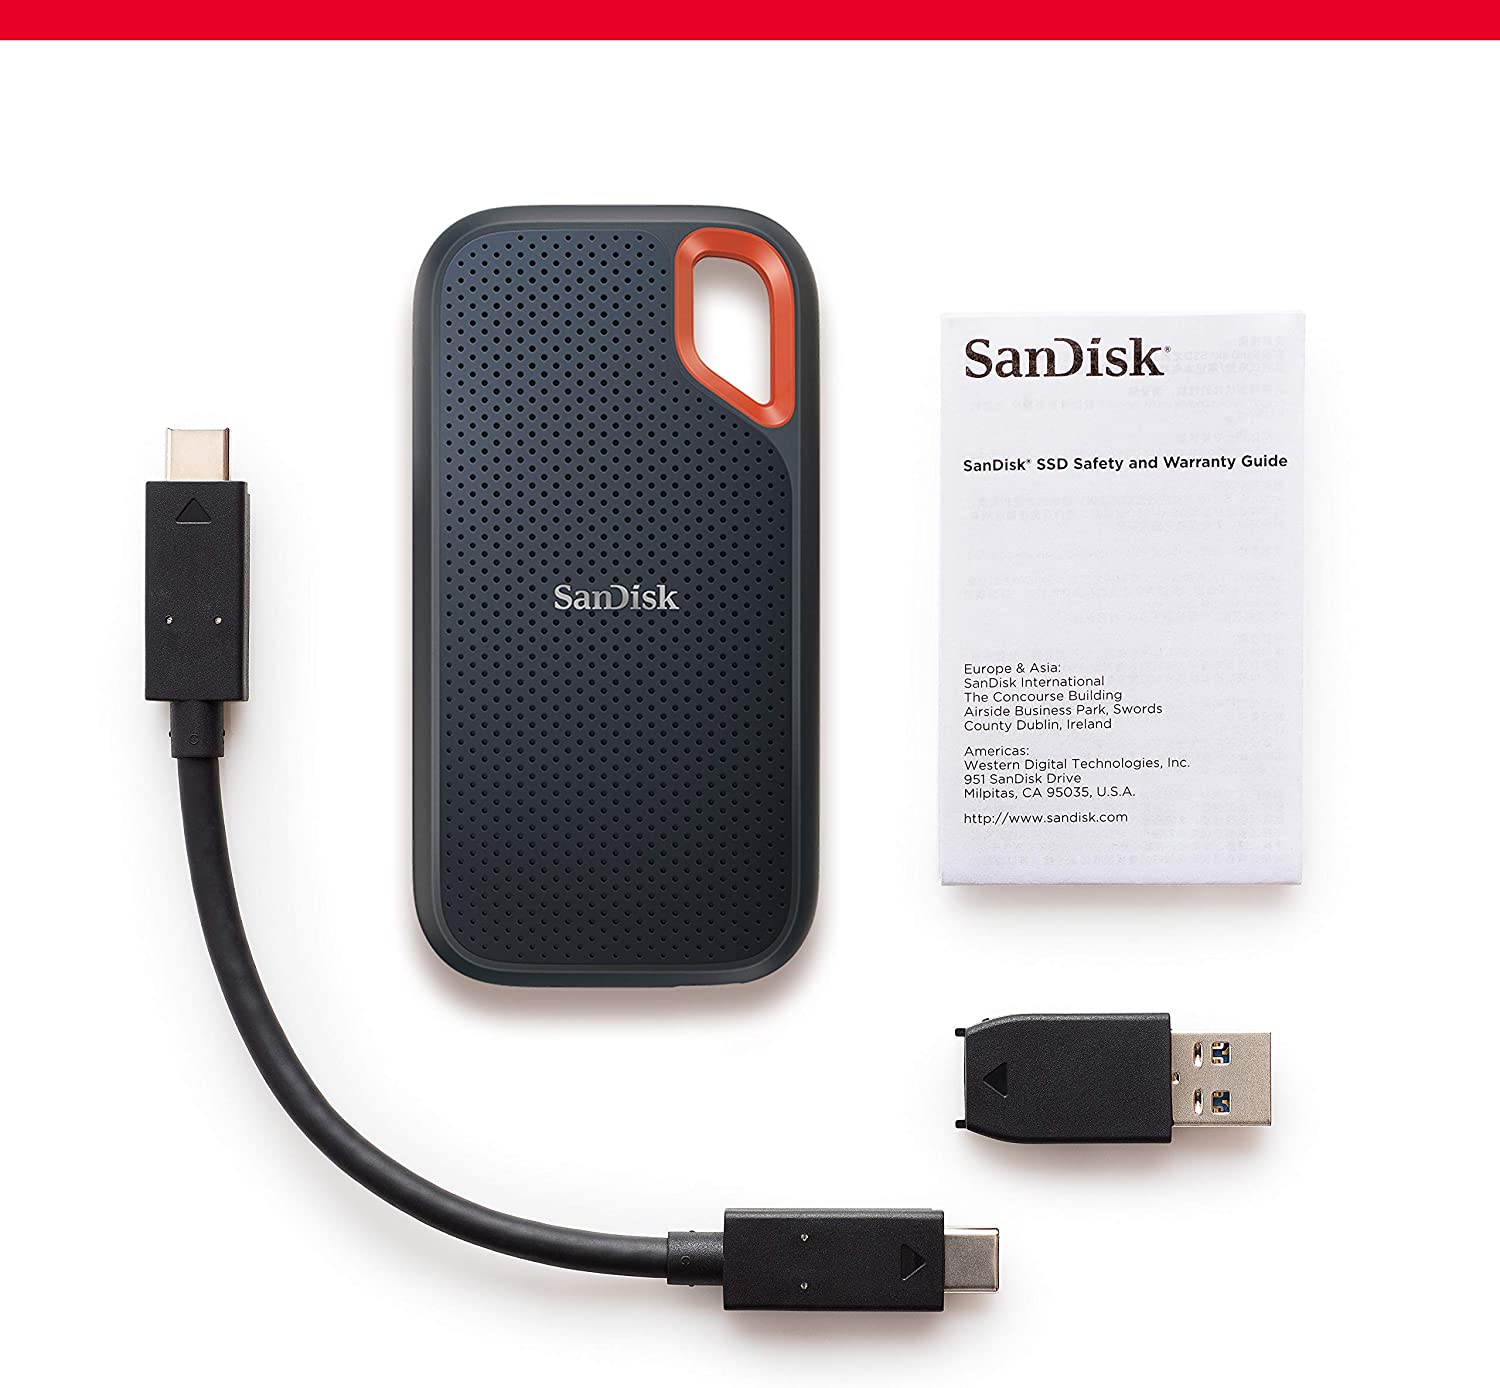
Before we dive into the steps, it’s important to note that not all external hard drives are compatible with the PS4. You’ll need to check the compatibility of your external hard drive to ensure a seamless connection and usage.
Once you’ve verified compatibility, the next step is to format the external hard drive. This is a crucial step as it prepares the hard drive for use with the PS4 and ensures optimal performance. Don’t worry; we’ll guide you through the formatting process.
Once the hard drive is formatted, it’s time to connect it to your PS4. You’ll learn how to properly connect the external hard drive to the console, ensuring a secure and stable connection.
After the connection is established, the next step is to set up the external hard drive on your PS4. This involves navigating through the settings and configuring the storage settings to recognize the newly connected external hard drive.
Once everything is set up, it’s time to transfer your games and applications to the external hard drive. This step helps free up space on your console’s internal storage and ensures that all your games and apps are safely stored on the external hard drive.
Lastly, we’ll cover some tips and tricks for managing and using the external hard drive on your PS4. This will help you make the most out of your expanded storage and ensure smooth gaming experiences.
So, without further ado, let’s jump right into the first step: checking the compatibility of your external hard drive.
Step 1: Check Compatibility
Before connecting an external hard drive to your PS4, it’s important to check its compatibility. Not all external hard drives work seamlessly with the PS4, so it’s crucial to ensure you have a compatible one for a hassle-free experience.
First, check the specifications of your external hard drive. The PS4 supports external hard drives that have a USB 3.0 connection. Make sure your drive meets this requirement, as using a USB 2.0 drive will result in slower data transfer speeds.
Additionally, consider the storage capacity of the external hard drive. The PS4 supports drives with a capacity of up to 8TB, which provides ample space for storing your games and applications.
Another important factor to consider is the file system format of the external hard drive. The PS4 requires the drive to be formatted in either FAT32 or exFAT. Keep in mind that formatting the drive will erase all existing data, so be sure to back up any important files before proceeding.
If you’re unsure about the compatibility of your external hard drive, you can check the manufacturer’s website or consult the product manual. They usually provide information about compatibility with gaming consoles, including the PS4.
It’s worth noting that some external hard drives may require an external power source to function properly with the PS4. If your drive doesn’t have its own power supply, you’ll need to plug it into a USB port on the console itself. However, if your drive has its own power source, connect it to a power outlet before connecting it to the PS4.
By taking the time to ensure compatibility, you can avoid any frustrations or issues when connecting the external hard drive to your PS4. Once you’ve confirmed compatibility, you’re ready to move on to the next step: formatting the external hard drive.
Step 2: Format the External Hard Drive
Before you can use your external hard drive with the PS4, you need to format it to ensure compatibility and optimal performance. The formatting process will erase all existing data on the drive, so make sure to back up any important files before proceeding.
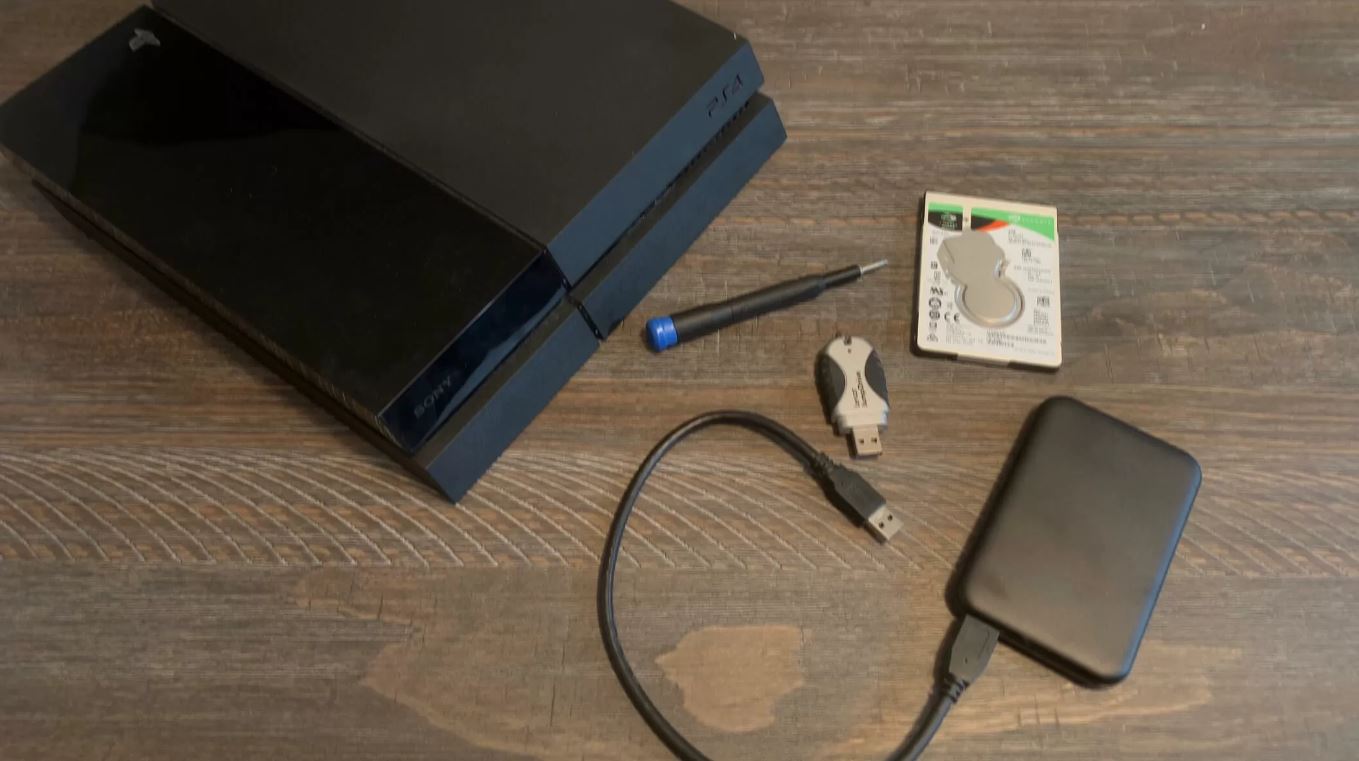
To begin, connect your external hard drive to your computer using a USB cable. Ensure that the drive is properly detected by your computer before proceeding with the formatting process.
Next, open the file explorer on your computer and locate the external hard drive. Right-click on the drive and select the “Format” option from the context menu.
In the formatting options, choose either FAT32 or exFAT as the file system format. FAT32 is recommended if your external hard drive is below 2TB in capacity, as it provides better compatibility with external devices. If your drive is larger than 2TB, select exFAT.
After selecting the appropriate file system format, give your external hard drive a new name or leave it as is. Then, click on the “Format” button to start the formatting process.
Depending on the size of your external hard drive, the formatting process may take a few minutes. Once complete, you will receive a notification indicating that the drive has been successfully formatted.
Now that your external hard drive is properly formatted, it’s time to disconnect it from your computer and prepare to connect it to your PS4. Safely eject the drive from your computer to avoid any data corruption or loss.
Formatting the external hard drive ensures compatibility with the PS4, allowing it to recognize and utilize the drive for storage purposes. With the formatting process complete, you can now move on to the next step: connecting the external hard drive to your PS4.
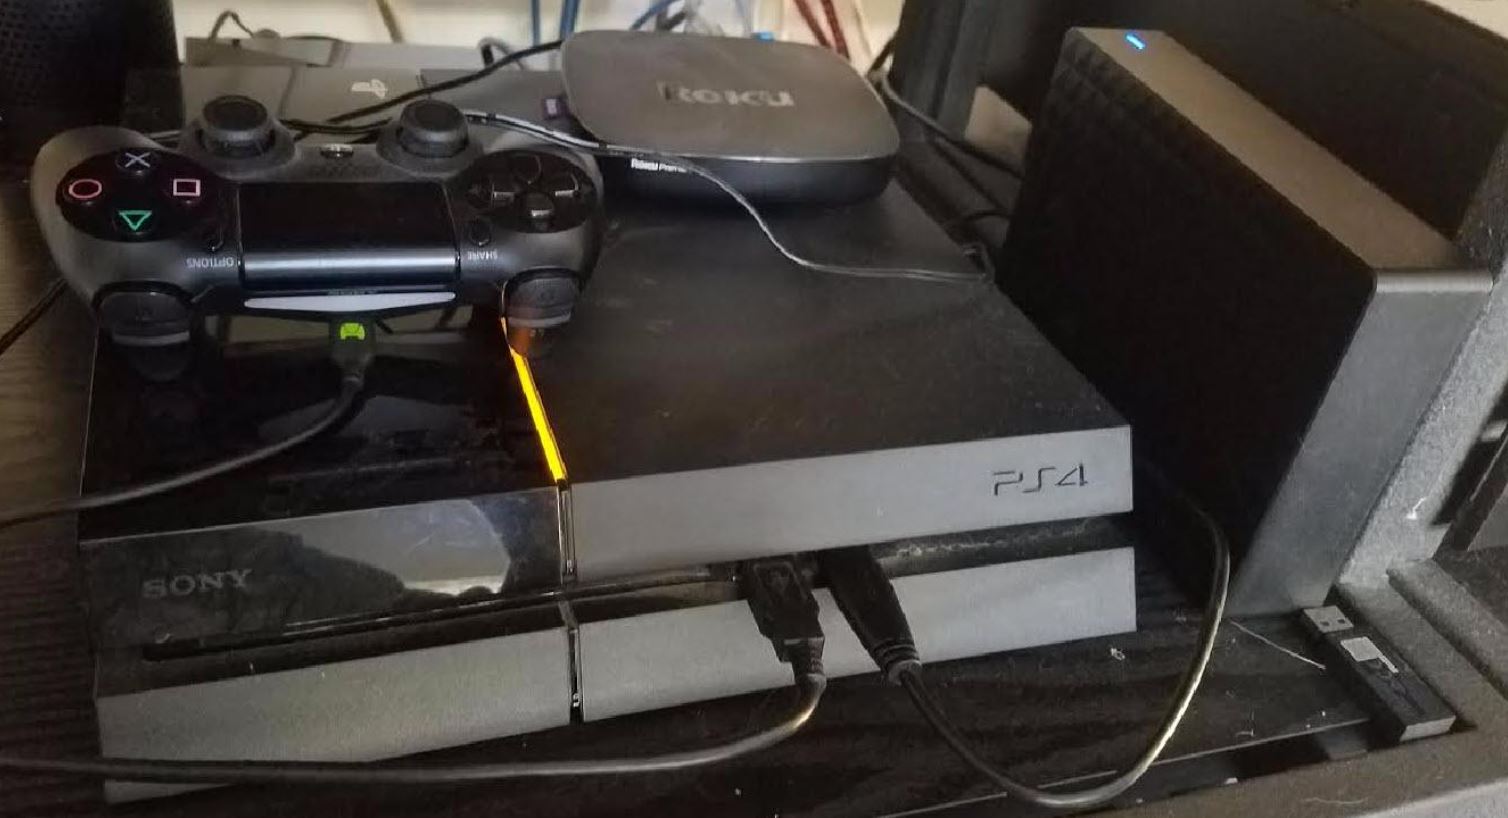
Step 3: Connect the External Hard Drive to the PS4
Now that you have successfully formatted your external hard drive, it’s time to connect it to your PS4. Follow these steps to ensure a secure and stable connection:
1. Turn off your PS4: Make sure your PS4 is completely turned off before connecting the external hard drive. This can be done by selecting the “Power” option from the PS4’s main menu and choosing “Turn Off PS4”.
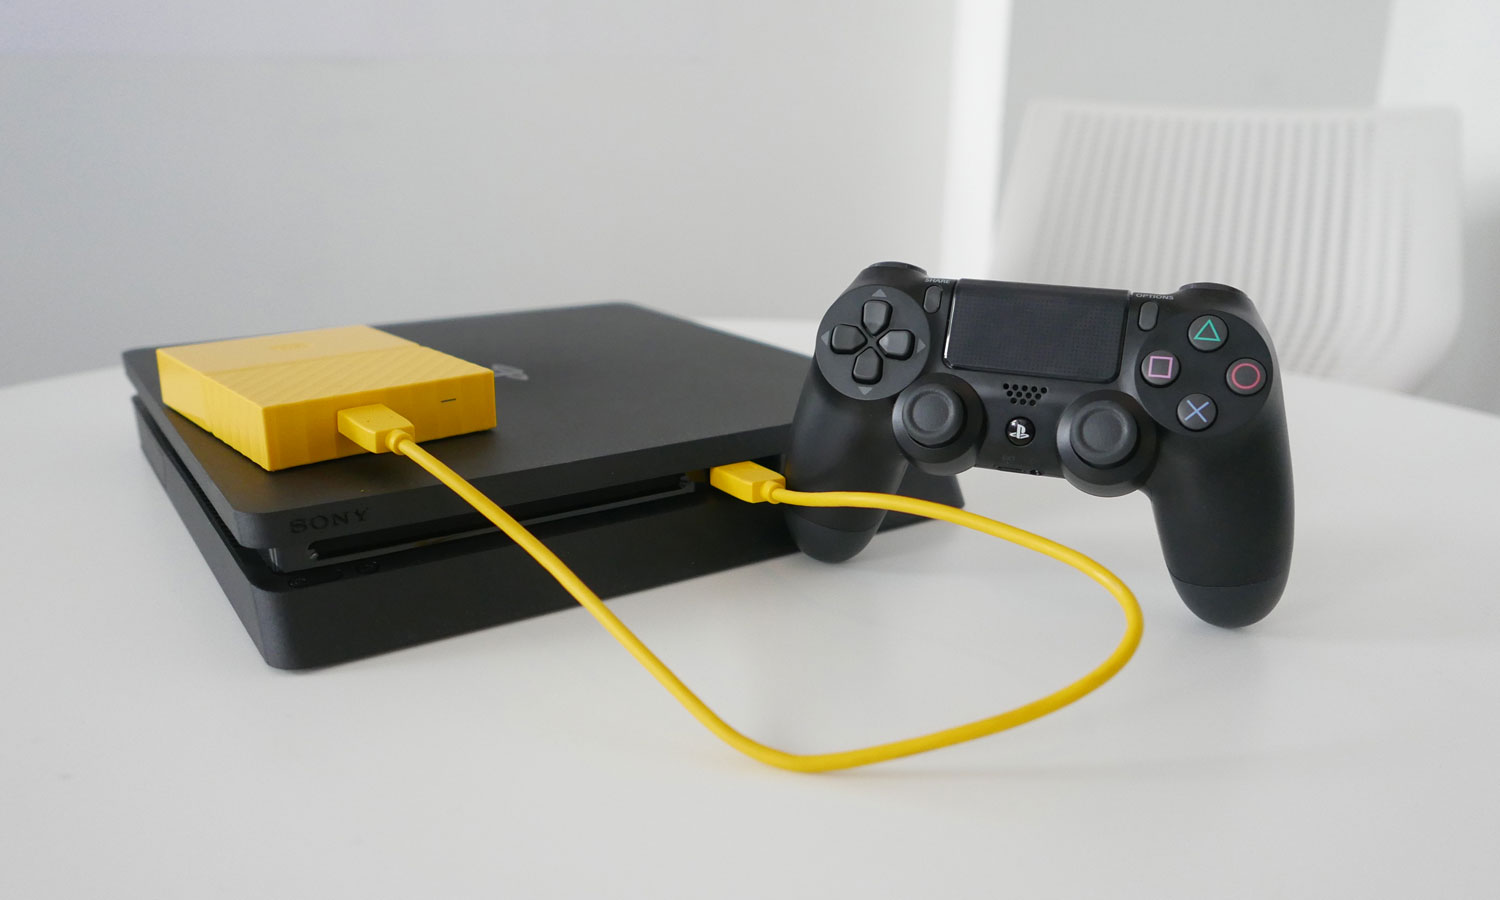
2. Locate the USB ports: The PS4 has two USB ports on the front of the console. These ports are used to connect the external hard drive. Locate the ports and ensure they are free from any obstructions.
3. Connect the USB cable: Take the USB cable that came with your external hard drive and plug one end into the USB port on the external hard drive. Then, plug the other end into one of the USB ports on the front of your PS4.
4. Power on the PS4: Press the power button on your PS4 to turn it on. It will take a few moments for the console to detect the connected external hard drive.
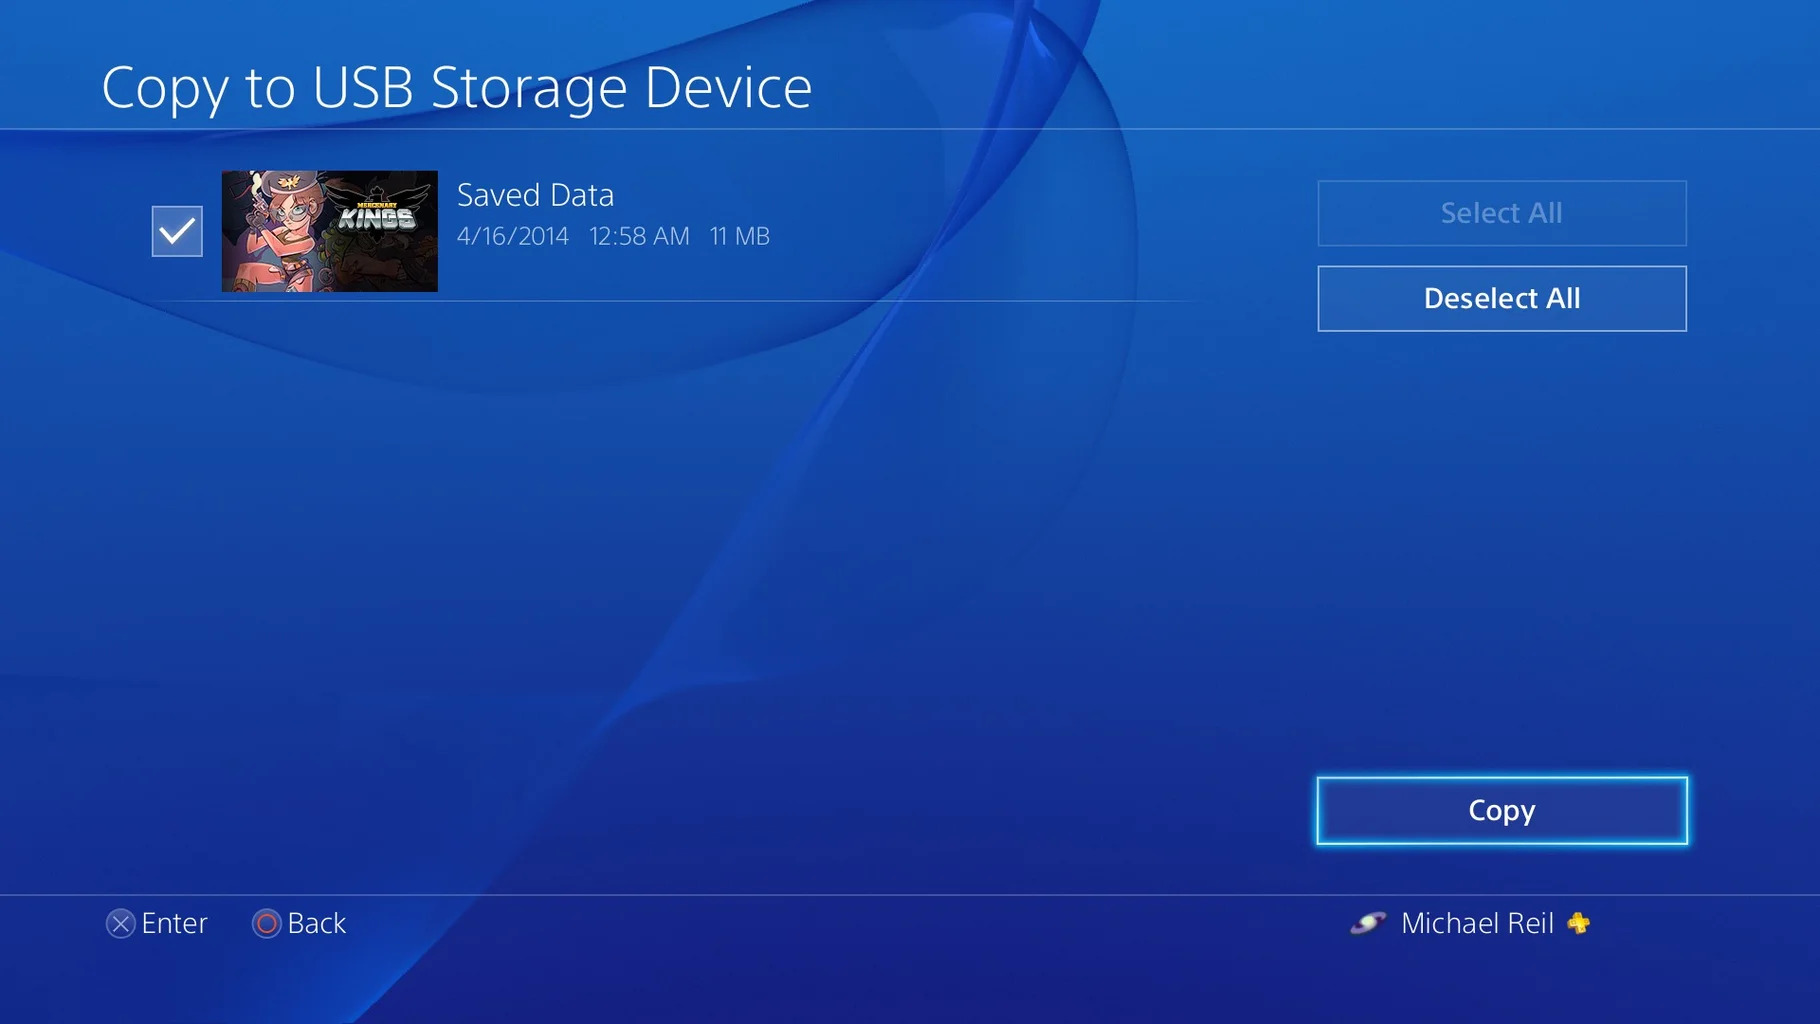
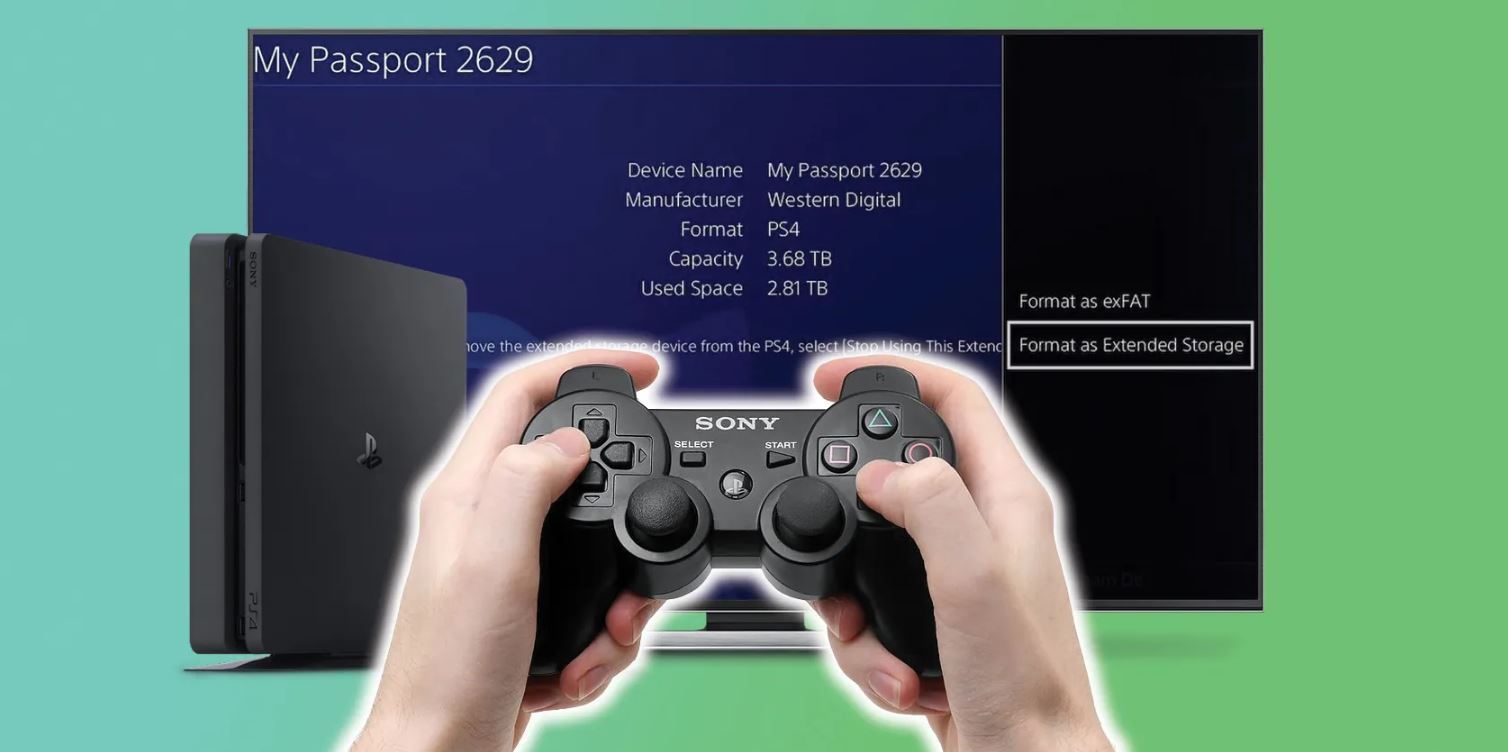
5. Check the PS4 interface: Once your PS4 is powered on, navigate to the main menu and go to the “Settings” option. From there, select “Devices” and then “USB Storage Devices”. You should see your external hard drive listed as a connected device.
6. Confirm the connection: Choose your external hard drive from the list and select “Format as Extended Storage”. This step is necessary to configure your external hard drive as the additional storage for your PS4. Follow the on-screen instructions to complete the formatting process.
Once the formatting is complete, your external hard drive is now ready to be used as an extended storage device for your PS4. It will serve as an extra storage space, allowing you to install and store more games, applications, and media files.
By following these steps, you can connect your external hard drive to your PS4 without any issues. Now, let’s move on to the next step: setting up the external hard drive on your PS4.
Step 4: Set up the External Hard Drive on the PS4
With your external hard drive connected to your PS4, it’s time to set it up and configure it as the primary storage for your console. Follow these steps to properly set up the external hard drive:
1. Access the settings: From the main menu of your PS4, navigate to “Settings” and select it. This will take you to the settings menu where you can customize various options.
2. Go to “Storage”: Within the settings menu, find and select the “Storage” option. This will display the available storage devices connected to your PS4.
3. Select the external hard drive: Choose the connected external hard drive from the list of storage devices. You should see it listed as “Extended Storage” or with the name you assigned during the setup process.
4. Format as extended storage: Select the external hard drive and choose the “Format as Extended Storage” option. This will configure the external hard drive to be used as the additional storage for your PS4.
5. Confirm formatting: A warning message will appear, informing you that formatting the drive will erase all data. Confirm your selection and proceed with the formatting process. It may take a few minutes for the formatting to complete.
6. Set the default installation location: Once the formatting is complete, you’ll be prompted to set the default installation location for games and applications. Choose the external hard drive as the default location to ensure that all future downloads are installed directly to the external storage.
7. Transfer existing data (optional): If you have existing games and applications on your PS4’s internal storage that you want to move to the external hard drive, you can do so by going to the “Storage” menu, selecting the internal storage, and choosing “Move to Extended Storage”. This will transfer the selected data to the external hard drive, freeing up space on your console’s internal storage.
With the external hard drive set up and configured as extended storage, you can now enjoy the benefits of having extra space on your PS4 for installing and storing games, applications, and media files. The external hard drive will be recognized as part of the system storage, providing seamless integration with your console.
Now that you’ve successfully set up the external hard drive on your PS4, you’re ready to move on to the next step: transferring games and applications to the external hard drive.
Step 5: Transfer Games and Applications to the External Hard Drive
Now that your external hard drive is set up as extended storage for your PS4, it’s time to transfer your games and applications to free up space on your console’s internal storage. Follow these steps to transfer your games and applications:
1. Access the settings: From the main menu of your PS4, navigate to “Settings” and select it. This will take you to the settings menu where you can customize various options.
2. Go to “Storage”: Within the settings menu, find and select the “Storage” option. This will display the available storage devices connected to your PS4.
3. Choose internal storage: Select the internal storage from the list of available storage devices. This will show you a list of games and applications stored on your console’s internal storage.
4. Select the games and applications to transfer: Choose the games and applications you want to transfer to the external hard drive. You can select multiple items by holding down the “Ctrl” (or “Command” on Mac) button while clicking on each item.
5. Initiate the transfer: Once you’ve selected the games and applications you want to transfer, choose the “Options” button on your controller and select “Move to Extended Storage”. This will start the transfer process, moving the selected items from the internal storage to the external hard drive.
6. Monitor the transfer progress: The transfer process may take some time, depending on the size of the games and applications being transferred. You can monitor the progress by going back to the storage menu and selecting the external hard drive. There, you will see the progress of the transfer for each item.
7. Enjoy your games and applications from the external hard drive: Once the transfer is complete, you can access and play your games and applications directly from the external hard drive. Simply go to the main menu of your PS4 and select the game or application you want to play.
By transferring games and applications to the external hard drive, you’ll free up valuable space on your console’s internal storage, allowing for smoother operation and faster loading times. This also gives you the flexibility to expand your gaming library without worrying about storage limitations.
Now that you’ve successfully transferred your games and applications to the external hard drive, you can proceed to the final step: managing and using the external hard drive effectively.
Step 6: Managing and Using the External Hard Drive
Now that you have set up and transferred your games and applications to the external hard drive, it’s important to effectively manage and utilize its storage capacity. Here are some tips for managing and using the external hard drive on your PS4:
1. Organize your games and applications: To keep your games and applications easily accessible, consider organizing them into folders on the external hard drive. You can create folders based on genre, game type, or any other way that makes sense to you. This will make it easier to find and launch your favorite games.
2. Install new games directly to the external hard drive: By default, your PS4 will install new games and applications to the internal storage. However, you can change this setting to install new games directly to the external hard drive. From the settings menu, go to “Storage” and select the external hard drive as the default installation location.
3. Reorganize your storage: If you find that your external hard drive is filling up quickly, consider moving less frequently played games or applications back to the internal storage of your PS4. This will free up space on the external hard drive for new games and applications while still allowing you to keep them accessible on your console.
4. Uninstall games and applications: If you no longer play certain games or use specific applications, consider uninstalling them from your external hard drive to free up even more space. You can do this by selecting the game or application in the storage menu and choosing the “Options” button on your controller, then selecting “Delete” or “Uninstall”.
5. Regularly back up your data: As with any storage device, it’s important to regularly back up your data from the external hard drive. This can be done by connecting it to your computer and copying the files to another storage location. By keeping backups of your games and applications, you can easily restore them if anything happens to your external hard drive.
By effectively managing and using the external hard drive for your PS4, you can maximize its storage capacity and ensure a seamless gaming experience. Take advantage of the additional space to expand your gaming library and keep your favorite games organized and easily accessible.
Following these tips will help you make the most out of your external hard drive and enhance your overall gaming experience on the PS4.
Congratulations! You have successfully completed all the steps to hook up an external hard drive to your PS4. Now you can enjoy a larger storage capacity and expand your gaming library without worrying about running out of space on your console’s internal storage.
Conclusion
By following the steps outlined in this guide, you can easily hook up an external hard drive to your PS4 and expand your storage capacity. Whether you’re running out of space for new games or want to keep your favorite games and applications easily accessible, using an external hard drive is a convenient and effective solution.
Throughout the process, it’s important to consider compatibility, formatting, and proper connection of the external hard drive. By checking the specifications, formatting the drive correctly, and connecting it securely to your PS4, you can ensure a smooth and trouble-free experience.
Once the external hard drive is connected and set up, you can transfer your games and applications to free up space on your console’s internal storage. This provides more room for new games, larger downloads, and additional media files.
Remember to effectively manage your storage by organizing games and applications into folders, installing new games directly to the external hard drive, and regularly backing up your data to avoid any loss or corruption.
With the external hard drive properly set up, you can enjoy a seamless gaming experience with an expanded library of games and applications. Say goodbye to the frustration of having to delete games to make space and embrace the freedom that comes with additional storage.
Now that you have completed this guide, you are ready to take full advantage of the benefits offered by an external hard drive for your PS4. So go ahead, connect that external hard drive, and dive into an endless world of gaming adventures!